Table of Contents
Advertisement
Quick Links
Advertisement
Table of Contents

Related Manuals for Master View CS-1004


Summary of Contents for Master View CS-1004
- Page 2 Please read this manual thoroughly and follow the installation and operation procedures carefully to prevent any damage to the Master View Pro unit, and/or any of the devices it connects with. ©Copyright 1999 ATEN ® International Co., Ltd.
-
Page 3: Table Of Contents
TABLE OF CONTENTS Overview Features Hardware Requirements Console Cables Unpacking Front View Rear View Installation First Station Installation Daisy Chaining Operation Hot Plugging Powering Off and Restarting Port Selection Port ID Numbering Numbering Rules Port Numbering Table Hot Key Operation Hot Key Navigation Hot Key Broadcasting Previous/Next Switching... -
Page 4: Overview
Pro, you can easily access multiple computers in a cost effective manner. Depending on the model, a Master View Pro unit can control up to 4, 8, or 16 PCs. Up to 31 additional Master View Pros can be daisy chained (for a total of up to 32 units), which means that up to 128, 256, or 512 PCs can all be controlled from a single keyboard- monitor-mouse console. -
Page 5: Features
Features • Daisy Chain Up To 31 Additional Units - Control Up to 512 PCs From a Single Console • No Software Required - PC Selection via Front Panel Switches, Hot Keys, or OSD (On Screen Display) • Quick View Scan Mode for Monitoring Selected PCs •... -
Page 6: Hardware Requirements
Hardware Requirements Console • A VGA, SVGA, or Multisync monitor capable of the highest resolution that you will be using on any PC in the installation • A PS/2 Style Mouse • A PS/2 Style Keyboard The following equipment must be installed on each PC that is to be connected to the system: •... -
Page 7: Unpacking
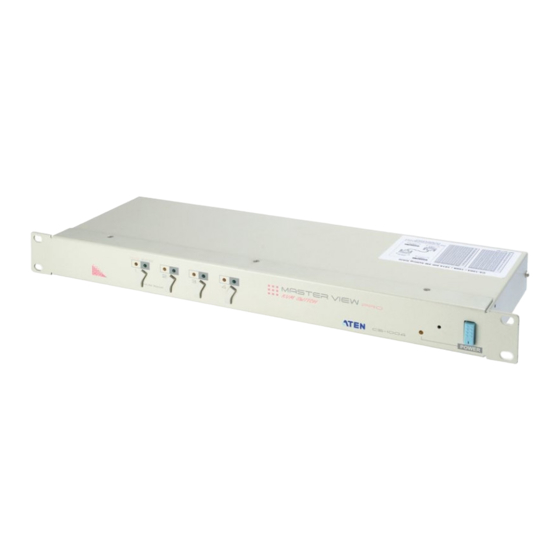
3. Port Selection Switches Press a switch to access the PC attached to the corresponding port. 4. Power LED Lights to indicate that the Master View Pro has been turned On and is receiving power. 5. Power Switch User's Manual 4... -
Page 8: Rear View
CS-1016 Rear View: * The figure shows a CS-1016 model. The only difference between it and the other models is in the number of CPU Ports. 1. Daisy Chain Section If you daisy chain units, the cables plug in here. 2. -
Page 9: Installation
First Station, do the following: 1. Set Switches 1 - 5 of the Master View Pro’s DIP Switch to the ON position to set this unit up as the First Station (see the table on page 20 for Dip Switch Station Setting details). -
Page 10: Daisy Chaining
If any of these problems occur, turn the Switch Off, then turn it On again. 7. Turn on the power to the PCs. Note: You must turn on the power to the Master View Pro b e f o re turning on the power to the PCs. - Page 11 3, and power up. When powering up, you must follow these two basic rules: a) Turn on the power to a child Master View Station before turning on the power to its parent (i.e., start with the last unit in the chain and work back to the First Station).
-
Page 12: Operation
Step 6 of the Daisy Chaining section, above. Powering Off and Restarting If, for some reason, it is necessary to Power Off one of the Master View Pro units, before you start it back up you must do the following: 1. -
Page 13: Port Selection
Port Selection Controlling all the PCs connected up in your Master View Pro installation from a single console could not be easier. Three methods are available that provide instant access to any PC on the chain: Manual; Hot Key; and OSD. -
Page 14: Port Id Numbering
Port ID Numbering Since each CPU Port on a Master View installation is assigned a unique Port ID, you can directly access any computer on any level of the installation by specifying the Port ID that the computer is connected to using the Hot Key port selection method, or from the OSD Main Menu. -
Page 15: Port Numbering Table
Port Numbering Table Port Numbering is summarized in the following table: User's Manual 12... -
Page 16: Hot Key Operation
Hot Key navigation allows you to conveniently access connected PCs directly from the keyboard, instead of having to manually select them by pressing Port Selection switches. Note: Make sure that DIP Switch 6 (located on the Master View’s rear panel), is set to ON to enable the Hot Key feature under OSD. -
Page 17: Previous/Next Switching
Previous/Next Switching Previous/Next switching enables you to quickly switch from the currently active computer to the previous or next available computer in the installation. To invoke Previous/Next switching, key in the following Hot Key combination: 1. Press and release [Ctrl]+[Alt]+9+Right Shift To Switch to the Next available computer. -
Page 18: Osd Operation
Although Hot Key switching still works, using OSD is a great deal more convenient - especially in large, daisy chained installations where a great number of PCs are connected to a several Master View Pro units, and it is difficult to keep track of which port a particular PC is attached to. -
Page 19: Osd Main Menu Headings
OSD Main Menu Headings: The Function Keys: Pressing a Function Key brings up a related submenu that is used to configure and control the OSD to make it convenient for you to work with. For example, you can: rapidly switch to any port; scan selected ports only; limit the list you wish to view; designate a port to be included in the Quick View Scan Mode group;... - Page 20 • F2 Scan: Pressing [F2] initiates the Quick View Scan Mode, in which the OSD cycles through all the ports that have been selected for Quick View Scanning (see F4, below), and displays each one for the amount of time set with the Set Scan Duration function (see F6, below).
- Page 21 • F4 QVSW: You can broaden or narrow the number of ports that get automatically scanned by selecting only the ones you want with the QVSW (Quick View Scan Switch) function. [F4] is a toggle that selects or deselects the currently highlighted port for the Q u i c k View Scan Mode function (see F2, above).
- Page 22 The settings are explained in the table below: When you have finished making your selections, press [Esc] to return to the OSD Main Menu. Factory Default Settings: The factory default settings are as follows: User's Manual 19...
-
Page 23: Appendix
Master View Pro daisy chained to the Second Station is considered the Third Station, etc. Switches 1 - 5 of the DIP Switch located on the Master View Pro’s rear panel are used to set the Station Number of each daisy chained unit, as indicated in the table below (0 = On;... -
Page 24: Troubleshooting
Troubleshooting Specifications User's Manual 21... -
Page 25: Radio & Tv Interference Statement
PREVENTING RADIO & TV INTERFERENCE WARNING!! This equipment generates, uses and can radiate radio frequency energy and, if not installed and used in accordance with the instruction manual, may cause interference to radio communications. This equipment has been tested and found to comply with the limits for a Class A computing device pursuant to Subpart J of Part 15 of FCC Rules, which are designed to provide reasonable protection against such interference when operated in a commercial environment.
Need help?
Do you have a question about the CS-1004 and is the answer not in the manual?
Questions and answers