Advertisement
OVERVIEW

- Tail cap/Switch assembly*
- Lip seal, tail cap
- Battery holder assembly*
- Barrel/LED assembly*
- Lip seal, Head
- Head assembly*
*Do not disassemble.
Please register your flashlight online at www.maglite.com/register.asp. (Registration is not required for warranty service.)
BATTERY HOLDER
Insert Batteries with the "-" end facing the large spring end of each battery slot in the battery holder as shown (Fig. 1). Incorrect battery insertion could damage your flashlight's electronics. Insert Battery Holder into Flashlight with the arrow (Fig. 1) pointing toward the head of the flashlight.
OPERATION
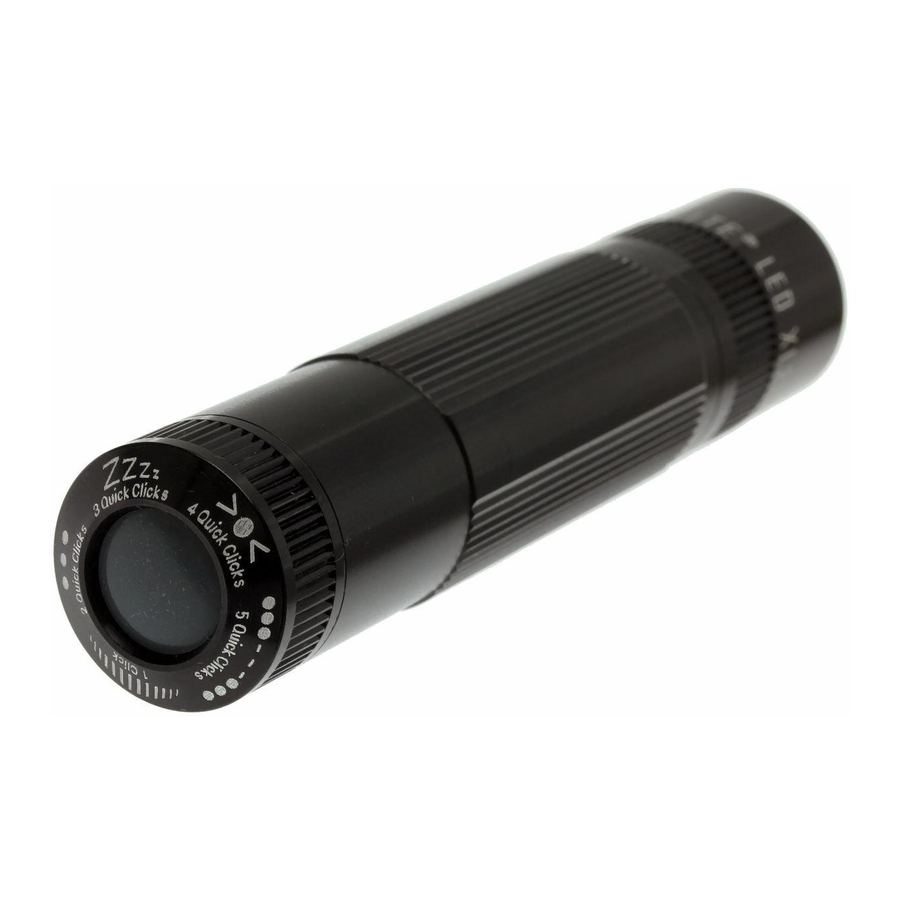
Using the XL200™ flashlight's pushbutton switch (in the tailcap), you can select one of 5 basic functions. These are summarized by icons on the tailcap as follows (see Fig. 2): (See our Demo video at www.maglite.com)

 means you can turn the flashlight on and adjust brightness using 1 Click. Starting with the flashlight off, press and hold down the switch button while rotating the flashlight left and right (see Fig. 3) to vary the brightness. When you see the desired brightness level, release the button to keep that setting. Turn the flashlight off with 1 Click. The XL200™remembers your selected brightness setting, so when you turn the light on with 1 Click, your selected brightness level will reappear. Your selection will stay in effect until you either (1) change it by repeating the above steps or (2) remove the tailcap, wait a moment, and replace it.

 means that you can make the flashlight produce a strobe (blinking) effect using 2 Quick Clicks. Starting with the flashlight off, press the button twice (about as quickly as you would say "Click Click") but hold it down on the second press. Rotate the flashlight left and right (see Fig. 3) while holding down the switch button to vary the blink rate. When you see the desired blink rate, release the button to keep that setting. As above, use 1 Click to turn the flashlight off. When you turn it on again with 2 Quick Clicks, it will strobe at your selected blink rate, which will stay in effect until you change it as above.
 means that you can put the flashlight in Nite Lite™ mode using 3 Quick Clicks. Starting with the flashlight off, quickly press the switch button three times (about as quickly as you would say "Three Quick Clicks") and it will come on at maximum brightness (or whatever other brightness level you have stored). Within 5 seconds or so, it will dim down to a very low level and stay there until the flashlight is moved; then it will go to bright again. 1 Click turns the flashlight off.
 means that you can put the flashlight in Signal mode using 4 Quick Clicks. Starting with the flashlight off, click the switch button four times. You can then use your flashlight as a silent signaling device: Turn it on and off noiselessly simply by rotating the flashlight (as in Fig. 3). 1 Click turns the flashlight off.
 means that by using 5 Quick Clicks you can make your flashlight repeatedly and silently signal "SOS" – the International Morse Code Distress Signal. Quickly press the button five times and it will begin signaling "SOS." To make it stop, turn the flashlight off with 1 Click.
Lockout: To avoid accidental operation, follow these steps to lock the switch: (1) Aim the flashlight straight up at the ceiling; (2) press and hold down the switch button as you rotate the flashlight until it is pointing straight down at the floor; then (3) release the button. The switch is now locked. To unlock, repeat these steps.
INSPECTION AND MAINTENANCE
If flashlight is used less than once a month, remove the batteries between uses. Lubricate all threads and rubber O-rings with petroleum jelly twice yearly. Inspect flashlight monthly and carefully remove any damaged batteries and clean any corrosion.
TROUBLESHOOTING
If flashlight does not turn on or stay on -
- Replace the batteries. If the problem persists, then
- Check the tail cap and battery holder. All contacting metal surfaces should be clean, shiny and free of corrosion or other obstruction. Clean as needed.
- If the flashlight still does not operate properly, see the tips at www.maglite.com>customer service> [click on image of your flashlight]>frequently asked questions. If this does not resolve the problem, see the "How and When to Make a Warranty Claim" section below.

- To AVOID RISK OF EYE INJURY, LOOK AWAY IMMEDIATELY IF BEAM IS SHONE DIRECTLY INTO YOUR EYES.
- AVOID EXPOSING BATTERIES TO FIRE OR EXCESSIVE HEAT, as this may cause leakage or explosion.
- To AVOID RISK OF INJURY TO EYES OR SKIN, AVOID CONTACT WITH ANY MATERIAL LEAKED FROM A BATTERY
- THIS FLASHLIGHT IS NOT A TOY; not recommended for use by children.
TEN YEAR LIMITED WARRANTY
Mag Instrument, Inc. warrants to the original owner that this flashlight is free from defects in parts and workmanship for ten years from the date of first retail purchase. Mag or an authorized Mag Warranty Service Center will, free of charge, repair or, at its option, replace a defective flashlight or component. (Mag does not warrant the future availability of particular colors or decorations, and may replace a custom flashlight with a standard flashlight.) This warranty is in lieu of all other warranties, express or implied.
HOW AND WHEN TO MAKE A WARRANTY CLAIM
- In case of dead batteries, replace batteries; do not send batteries or flashlight to Mag.
- If flashlight is damaged by battery leakage, determine what brand of battery caused the damage and follow the battery manufacturer's instructions regarding damage claims; do not send batteries or flashlight to Mag.
- For warranty returns: Send the flashlight (postage or shipping prepaid) to the nearest authorized Mag Warranty Service Center (find at www.maglite.com/repaircenters.asp or ask your local Mag retailer).

Documents / Resources
References
![www.maglite.com]() Maglite Flashlights and Lifestyle Products
Maglite Flashlights and Lifestyle Products![www.maglite.com]() Maglite Flashlights and Lifestyle Products
Maglite Flashlights and Lifestyle Products![www.maglite.com]() Maglite Flashlights and Lifestyle Products
Maglite Flashlights and Lifestyle Products
Download manual
Here you can download full pdf version of manual, it may contain additional safety instructions, warranty information, FCC rules, etc.
Advertisement


Need help?
Do you have a question about the XL200 and is the answer not in the manual?
Questions and answers