Table of Contents
Advertisement
Quick Links
Advertisement
Table of Contents

Subscribe to Our Youtube Channel
Related Manuals for RFN ARES RALLY PRO 2023

Summary of Contents for RFN ARES RALLY PRO 2023
- Page 1 ELECTRIC DIRT BIKE RFN ARES RALLY PRO OWNER'S MANUAL Original Instructions...
- Page 2 1. Introduction To all RFN owners: Thank you for your trust to the RFN brand, we will accompany you to make exploration of the life as much as possible, look for unknown answers and wonderful off-road life. This manual explains the correct and safe use of the vehicle and a simple inspection before using. Please read the operation instructions carefully. If you have...
- Page 3 2. Important Manual Information Warning It refers to a warning instruction to be abided by and failure of abiding by the warning may result in serious injury or death of the vehicle operator. Caution Warning refers to a special precaution to avoid damage to the vehicle and it indicated the important information in this manual. Caution Please always leave this manual to the next owner for maintenance/service records, even if the vehicle is sold out.
-
Page 4: Table Of Contents
Table Of Contents 3. Safe Driving..................................................4 4. Description of Vehicle Parts...............................................6 5. Manufacturer Information..............................................8 6. Display and control devices..............................................9 7. Inspection before riding..............................................15 8. Riding operation................................................16 8.1 Starting..................................................16 8.2 Riding..................................................16 8.3 Throttle..................................................17 8.4 Braking..................................................17 8.5 Selecting a riding mode............................................18 8.6 Parking..................................................18 9. -
Page 5: Safe Driving
3. Safe Driving Check the condition of the vehicle and its surroundings before starting so as to Clothing avoid accidents. Professional long sleeves and pants shall be wore to protect your arms and Do not lend the vehicle to a driver who is not fit to drive the vehicle. legs. - Page 6 3. Safe Driving Accessories Safety Stickers The manufacturer will only use the original accessories supplied by the 1.Warning stickers of driving behavior manufacturer for your vehicle. Please contact an authorized dealer for this 2.Warning stickers of major switch purpose. The manufacturer refuses to bear any and all responsibilities and 3.Warning stickers of battery duties for the accessories provided by third party and all of such 4.Warning stickers of air pressure...
-
Page 7: Description Of Vehicle Parts
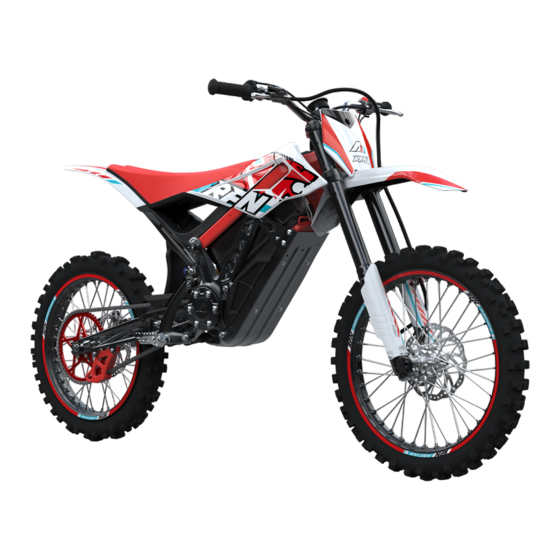
4. Description of Vehicle Parts Left side view 1. Charging port 2.Battery fixing lock 3.Frame 4.Rear fender 5.Rear shock absorber 6.Front wheel 7.Front brake assy 8.Front suspension fork 9.Motor controller 10.Lithium battery pack 11.Side stand 12.Rear swing arm 13.Rear brake assy 14.Rear wheel... - Page 8 4. Description of Vehicle Parts Top view 16. Handlebar 17.Rear brake lever 18.Instrument panel 19. Front brake lever 20.Acceleration twist throttle 21.Master key switch 22.Seat...
-
Page 9: Manufacturer Information
5. Manufacturer Information Manufacturer L08Y10T06N1000009 ★ Vehicle Serial Number ★ Name:Zhejiang Apollo Sports Technology Co., Ltd. Add:No.12-14 of Jinheng Second Road,Jinyanshan Industrial Zone,Quanxi Vehicle Serial Number Town,Wuyi County,Jinhua City,Zhejiang Province,China Please note that the vehicle serial number SN will be used when ordering spare parts from an authorized dealer or in the event of theft of the vehicle. -
Page 10: Display And Control Devices
6. Display and control devices 6.1 Main Switch Controls Power: 6.5 The brake lever for the front brakes is located on the right handlebar. 6.2 Power on Turn the key to “ ” position The meter will light up, after retracting the side stand, “Ready” on meter lights up, it can be ridden normally. - Page 11 6. Display and control devices 6.7 The button mechanism on the handlebars 6.8 Side stand Rocket mode (1 Side stand(1) is located on the left side of the vehicle. Tortoise/Rabbit mode switch (2 Open the side stand to make the vehicle upright. R reverse (3 1.Rocket mode The vehicle will run at peak power, and this mode will be maintained for...
- Page 12 6. Display and control devices 6.9 Battery Charger 6.10 Charging Port The vehicle is equipped with the battery charger. If there is only one red The charging port (1) is located on the battery. indicator light left on the meter, please charge the vehicle immediately. The battery can be charged when it is mounted on or removed from the Only the factory-supplied charger could be used to charge the battery.
- Page 13 6. Display and control devices 6.11 Battery 6.12 The arc power indicator has 10 cells, each cell corresponds to 10% The battery is located under the battery cover. power, decreasing from right to left. 1 cell: remaining 10% power, the charging indicator flashe,please Note: Please observe the warning on the battery, including: battery charge it immediately.
- Page 14 6. Display and control devices 6.13 Operation on Charging the Battery 6.14 Remove the battery 1. Turn off the vehicle. Remove the cushion (1 2. Insert the charger plug into the battery. Open the locking mechanism (2 3. Insert the power plug into a 220 V socket. Take off the battery cover (3 4.
- Page 15 6. Display and control devices 6.16 Front Shock Adjustment 6.17 Adjusting the rear shock The knob above the front shock absorber is responsible for rebound Adjusting the rear shock preload damping adjustment To adjust the spring preload of the damper, please turn the adjusting knob on the top of the damper (1) On the lower side of the damper is the rebound adjustment knob (2).
-
Page 16: Inspection Before Riding
7. Inspection before riding Warning! Caution If a part of the vehicle is found to be defective, do not ride the vehicle. For your safety, please check the condition of your vehicle before each use so as to avoid safety incidents caused by vehicle failure. The manufacturer does not provide any warranty for problems caused by negligence of authorized dealers or lack of care and maintenance of the vehicle user.The manufacturer does not provide any warranty... -
Page 17: Riding Operation
8. Riding operation 8.2 Riding Warning! 1. Retract the side stand Before departure, please familiarize yourself with all of the control 2. Sit on the seat. components of the vehicle and how to operate them Contact your 3. Squeeze and hold the brake lever for more than 2 seconds and the dealer if you have any questions. -
Page 18: Throttle
8. Riding operation 8.3 Throttle To accelerate, turn the throttle to the direction (a); To decelerate, turn the throttle to the direction (b), and use the brake. Rear Wheel Brakes Front Wheel Brakes 8.4 Braking Warning! Turn the throttle fully (b) with no tendency to continue accelerating. Avoid sudden or violent braking, which can cause the vehicle’s tires to Use the front and rear brakes simultaneously and increase the braking skid. -
Page 19: Selecting A Riding Mode
8. Riding operation 8.5 Selecting a riding mode 8.6 Parking Use the Riding Mode button to select from three modes: Turn off the main switch of the vehicle Tortoise mode: In this mode, power delivery is limited under which the Put down the side stand. -
Page 20: Regular Maintenance And Minor Repairs
9. Regular maintenance and minor repairs The safety and condition of your vehicle are influenced by the proper 9.1 Tires maintenance, regular inspections, adjustments and lubrication. In the following For optimal performance, durability and safe operation of your tires, pages, you will refer to the corresponding instructions. Maintenance please refer to the following tire instructions. - Page 21 9. Regular maintenance and minor repairs Tire Inspection Minimum tire tread depth Front and rear: >3 mm 1.Tread depth inspection 2.Tire sidewall inspection Warning! 3.Tire wear warning line inspection Tire wear may affect the stability of the vehicle. Do not continue riding if the tires are worn to the limit or if they are damaged.
-
Page 22: Braking System
9. Regular maintenance and minor repairs 9.2 Braking System 2. Brake Pads 1. Brake Tie Rods The front and rear brake pads must be checked before each journey and according to the maintenance table Brake Pad Inspection If the brake pads are worn to a thickness of 1mm, contact an authorized Caution dealer for a new pair of brake pads. -
Page 23: Lubricating The Brake Levers
9. Regular maintenance and minor repairs 9.3 Lubricating the brake levers 9.5 Suspension components The turning points of the brake levers of the front and rear brakes must be The suspension components (front shock absorber and rear shock lubricated on a regular basis. absorber) must be checked briefly before each trip and repaired the same Turning points of the brake lever if necessary. -
Page 24: Steering Bearing Inspection
9. Regular maintenance and minor repairs 9.6 Steering Bearing Inspection 9.8 Chain Tension 1. Place the vehicle on the lift and remove the front wheels Incorrect chain tension can damage the chain discs, bearings, sprockets 2. Lift the front shock and try to wiggle it back and forth. or the chain itself. -
Page 25: Battery
9. Regular maintenance and minor repairs 9.9 Battery 9.10 Fuses The vehicle is equipped with a maintenance-free battery If the vehicle’s instrument panel does not work after the circuit breaker Never open the battery, which would be dangerous and would and main switch are turned on, it may be caused by a blown fuse. -
Page 26: Trouble Shooting
10. Trouble shooting Although your vehicle has been thoroughly checked before delivery, problems may also occur during operation. If your vehicle needs to be repaired, please contact an authorized dealer who has the necessary tools, expertise and experience to properly repair your vehicle. Please use genuine factory parts for repairs. -
Page 27: Cleaning And Storage
11. Cleaning and storage 11.1 Cleaning the vehicle Clean the dirt with warm water, a mild detergent and a soft, clean Regular and proper cleaning of your vehicle will extend its life of service sponge. Then rinse thoroughly with clean water. Use a small brush to clean Preparation hard-to-reach areas. - Page 28 11. Cleaning and storage 11.3 Store the vehicle for a long time (two weeks and more) 11.4 Battery Storage Clean the vehicle. If the vehicle has not been used for more than one month, remove the 1. Remove the battery from the vehicle. Follow the instructions in the battery from the vehicle, charge it, and store it in a dry place at 0-40°...
-
Page 29: Technical Specifications
12. Technical Specifications Battery Frame 35Ah / 2.5kWh Capacity: Build: 6082 aluminium - extruded, forged and CNC machined LG Premium 21700 lithium cells Cells: Front suspension Features: Removable, can be charged when installed in bike or separately. 200mm Travel: Voltage (nominal): Upside-down air forks featuring 43mm stanchion tubes for extra rigidity and strength, Brake modes specially developed for... -
Page 30: Guarantee And Warranty
13. Guarantee and warranty Before using the vehicle, read the operating instructions carefully to familiarize yourself with the operation of the vehicle. The operating, care and maintenance instructions provided in the operating manual must be followed to maintain warranty and claim conditions. Compliance with the operating, care and maintenance instructions will be conductive to significantly increasing the service life of the vehicle. -
Page 31: After-Sales Service And Warranty Coverage Table
14. After-sales service and warranty coverage table Rear w heel assy Plant CODE EN DESCRIPTION Qty/Unit 319003014001 Rear axle M12x187mm Bolt M6x12 309007010001 Brake disc 12Cr13_2.0mm 307039001001 Rear wheel assy 307007275001 Tyre (include inner tube) 311027003001 Sprocket 403030001001 Bolt M8x25 404005009001 nut M12X1.25... - Page 32 14. After-sales service and warranty coverage table Front w heel assy Plant CODE EN DESCRIPTION Qty/Unit Bolt M6x12 309007010001 Brake disc 12Cr13_2.0mm 307038001001 Front wheel assy 307007274001 Tyre (include inner tube)
- Page 33 14. After-sales service and warranty coverage table Sw ing arm and Cradle assy Plant CODE EN DESCRIPTION Qty/Unit 305056001001 Nylon sleeve F16xF26x24.5 603027001001 spacer 8X 16X150mm 305052002002 Left swing arm assy 305057001002 Right swing arm assy 305055001001 Nylon sleeve F16xF26x51 401012001001 Bolt M8X1.25X50mm 401010004001...
- Page 34 14. After-sales service and warranty coverage table Seat assy Plant CODE EN DESCRIPTION Qty/Unit 313020001001 Seat assy 304114001001 left side cover 602003052003 Seat fixed pin 304115001001 right side cover bolt M6x12...
- Page 35 14. After-sales service and warranty coverage table Brake Assembly Plant CODE EN DESCRIPTION Qty/Unit Bolt M6X20 308057001001 Bracket 318001002001 clip Screw M6x10mm 308059001001 Rear brake assy 308058001001 Front brake assy...
- Page 36 14. After-sales service and warranty coverage table Front Fork assy Plant CODE EN DESCRIPTION Qty/Unit 304120001001 Right fender of front fork 304119001001 Left fender of front fork 404030003001 nut M6 603001115001 holder for brake tube 403004037001 screw M6X20 305053001001 front fork 318100001001 bracket for brake tube lower pinch...
- Page 37 14. After-sales service and warranty coverage table Motor Compactor Plant CODE EN DESCRIPTION Qty/Unit 319073001001 lock spring 319072001001 fixed spring F5X391mm 609092001001 axle 403028001001 screw M8x5 609091001001 bushing...
- Page 38 14. After-sales service and warranty coverage table Rear Fork Assy Plant CODE EN DESCRIPTION Qty/Unit 311100001001 left chain tensioner 401003017001 bolt M8X60X1.25 404002008001 nut M8x1.25 306037001001 right part of the rear swing arm 404005009001 nut M12X1.25 319077002001 spacer M12x32x2 409010001001 bearing 401011001001 bolt M12x1.25x170mm...
- Page 39 14. After-sales service and warranty coverage table Frame Assy Plant CODE EN DESCRIPTION Qty/Unit 606023001001 Subframe assembly 404028001001 Triple Clamp Top Nut 319077001001 Washers 403029002001 screw M8x1.25x16mm 403029001001 screw M8X1.25X30mm 401006004001 bolt M8x1.25x40mm 603001113001 battery mount seat left 601001479001 Left side beam of motor 609094001002 Rubber fixing sheet 319076001001 Cushioned rubber sleeve 404029001001 Hexagon lock nuts with metal inserts M8x1.25...
- Page 40 14. After-sales service and warranty coverage table Plastic Assy Plant CODE EN DESCRIPTION Qty/Unit 404031001001 Nut M6 304009020001 rear fender 403004038001 screw M6X16 405006063001 Flat Washers M6 403004038001 screw M6X16 304112001001 Controller plastic cover left 404009003001 clip nut M6X23X16 403005122001 screw M5*12 404028002001 Nut M6...
- Page 41 14. After-sales service and warranty coverage table Electrical Assembly Plant CODE EN DESCRIPTION Qty/Unit 315135001001 emergency power off switch 310140001001 throttle cable 315090001001 Three- mode button switch 315136001001 Pull Wire Hall Governor 401008001001 bolt M6X14 315134001001 wiring harness assembly 311011278001 chain 315031039001 motor...
-
Page 42: Maintenance Guideline
15. Maintenance guideline Important information Maintenance shall be subject to time or kilometers, whichever earlier. Warning! Please carry out suitable maintenance work on the vehicle. The warranty can only be granted if the vehicle has been maintained according to this plan Caution The vehicle must be continuously checked for rust. -
Page 43: Service Manual
16. Service Manual When the vehicle is handed over, the customer and the vehicle data must be completed. Maintenance No.1 Maintenance No.2 Maintenance No.3 Current mileage: Current mileage: Current mileage: Date: Date: Date: Dealer stamp/signature Dealer stamp/signature Dealer stamp/signature Maintenance No.4 Maintenance No.5 Maintenance No.6 Current mileage:... - Page 44 WWW.RFNBIKE.COM ZHEJIANG APOLLO SPORTS TECHNOLOGY CO., LTD.
Need help?
Do you have a question about the ARES RALLY PRO 2023 and is the answer not in the manual?
Questions and answers