Table of Contents
Advertisement
Quick Links
Advertisement
Table of Contents

Related Manuals for Retractable Awnings Trieste

Summary of Contents for Retractable Awnings Trieste
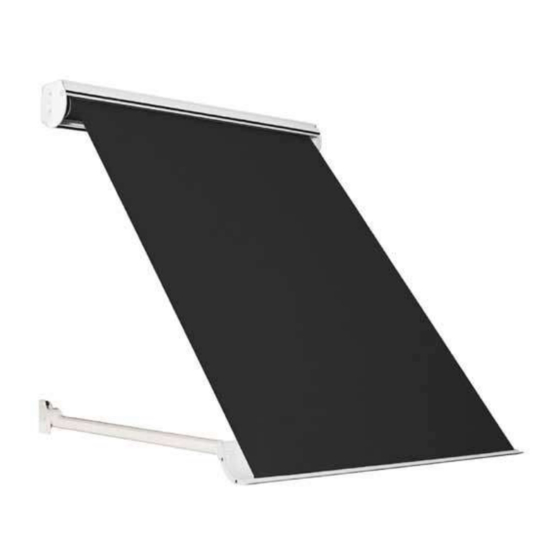
- Page 1 New Italia Trieste I n stallat i on ma nual...
- Page 2 All information contained in this document was provided by the manufacturer of the components for this particular model. As a fabricator/distributor, Retractableawnings.com Inc. claims no liability with respect to these documents as we are not engineers and did not complete any of the information, engineering or calculations in this document.
-
Page 3: Table Of Contents
Summary 1 Introduction ..................4 1.1 ▪ Symbols Used in the Manual ....................4 1.2 ▪ Personnel Requirements ......................4 1.3 ▪ Required Equipment .........................4 2 Safety ....................4 2.1 ▪ General Safety Information ......................4 2.2 ▪ Requirements for Working in Safety ..................5 2.3 ▪ Working Environment .......................5 3 Technical Tables for Installation ............5 3.1 ▪ Diagram for Distances of Guide Support Brackets and Plugs ..........5 3.2 ▪ Table of Loads on Awning Fastening Plugs, Based on Type of Attachment . -
Page 4: Introduction
Trieste New Italia Installation manual 1 IntroductIon T his manual for the awning was prepared by the manufacturer to provide necessary information to those autho- rized to install and perform special maintenance of the product. It is prohibited to remove, rewrite, or in any way modify the pages of the manual and their content. Operations must be carried out by personnel with the technical and professional skills required by current ap- plicable national laws or standards. This manual must be kept complete in all its parts in an easily accessible place. The manufacturer reserves the right to update products and corresponding manuals without the obligation to update previous products and manuals. The manufacturer reserves all rights on this manual. It may not be reproduced in any way, wholly or in part, without the manufacturer’s written authorization. 1.1 Symbols used in the manual ▪ The WARNING symbols used in the manual are shown below. InFormatIon and PrEcautIonS useful advice and instructions to be observed to ensure proper installation and/or maintenance of the awning. Failure to observe these messages may compromise the integrity and/or the resistance of the product. cautIon dangEr to oPErator! Instructions to be evaluated and followed carefully. Failure to comply with these messages may compromise individual safety. -
Page 5: Requirements For Working In Safety
New Italia Installation manual cautIon It is necessary to ensure a distance of at least 500 mm between the end of the fully- opened awning (outermost part) and any fixed obstacle (wall, terrace, etc.). cautIon It IS prohibited to install or place ladders or any fixed object near the awning that may reduce the space required by the awning. 2.2 requirements for Working in Safety ▪ ▪ Installation must be performed in full compliance with standards set forth by Presidential Decree 164/56 and Legislative Decree 494/96 for all that which concerns individual safety. ▪ Before use, check that all temporary structures (scaffolding, ladders, etc.) and all individual safety gear (har- nesses, belts, etc.) are compliant with standards and in good condition. ▪ Always use suitable individual protection gear. ▪ If there is more than one installation technician, their work must be coordinated. ▪ Operators must work in compliance with the safety instructions given to them. ▪ If the awning is to be installed above ground level, the area underneath the awning must be marked off and guarded so that no one can get underneath the hanging load. ▪ Firmly tie the ropes or straps around the pre-assembled parts, so that the components do not slip and risk falling. 2.3 Working Environment ▪ ▪ Installation and special maintenance must be carried out in a place that is sufficiently illuminated (based on specific standards) by either natural or artificial lighting. The operator must have a clear view of the work to be performed, and he must also prevent third persons from approaching the work area around the awning. 3 tEchnIcaL tabLES For InStaLLatIon 3.1 diagram for distances of guide Support brackets and Plugs ▪... -
Page 6: Table Of Loads On Awning Fastening Plugs, Based On Type Of Attachment
New Italia Installation manual WALL MOUNTING OF CEILING MOUNTING OF 3.2 table of Loads on awning Fastening Plugs, based on type of ▪ attachment WarnIng thE bELoVE LIStEd tabLES arE PurELy IndIcatIVE. thE InFormatIon IS uP to datE accordIng to thE aVaILabLE KnoWLEdgE. bat S.p.a. doES not ProVIdE any guarantEE rEgardIng accuracy, rELIabILIty, and comPLEtEnESS oF thE InFormatIon contaInEd hErEIn. It IS thE uSEr’S rESPonSIbILIty to EnSurE thE SuItabILIty and comPLEtEnESS oF thIS InFormatIon. InFormatIon and PrEcautIonS the calculations of the plugs were made taking into account the class of wind resistance of the awning as per standard En 13561. cEILIng/WaLL InStaLLatIon WIdth (m) Extraction load on anchoring devices (kN) 0,61 0,68 0.74 0.80 0.86 0.93 0.67 0.75 0.82... -
Page 7: Table Of Suggested Anchoring Devices
New Italia Installation manual cautIon the selection of the most suitable type of fastening device depends on the base material and its physical condition. It is therefore the responsibility of the installer to check the condition of the base material before attaching the awning. the installer is not obliged to use hilti plugs. 3.3 tabLE oF SuggEStEd anchorIng dEVIcES ▪ 3.3.1 t ypes of anchoring devices based on base material ▪ Extraction load on anchoring devices (kN) CONCRETE hilti hSt CRACKED CONCRETE HARD NATURAL STONE 2 CONCRETE hilti hSa HARD NATURAL STONE hilti hIt-hy 150 with haS CONCRETE CONCRETE hilti hIt-rE 500 HARD NATURAL STONE... -
Page 8: Sequence For Fastening Of Anchoring Devices
New Italia Installation manual 3.3.2 ▪ Sequence for Fastening of anchoring devices mEchanIcaL anchorIng dEVIcE chEmIcaL anchorIng dEVIcE 1 ▫ Make a hole with a 1 ▫ Make a hole with a drill bit that is suit- drill bit that is suitable able for the anchor- for the anchoring ing device device 2 ▫ Pay attention to how 2 ▫ Pay attention to how deep you make the deep you make the hole... -
Page 9: Minimum Dimensions
New Italia Installation manual minimum dimensions ▪ WIth boX WIthout boX min800-max1600 min800-max1600 FIG. 1 3.5 box Support brackets ▪ WaLL/cEILIng bracKEt FIG. 1 rev.02 22-06-13... - Page 10 New Italia Installation manual “L” bracKEt R4,25 FIG. 2 WaLL/cEILIng bracKEt WIth InSErtS 53.5 47.5 FIG. 3 rev.02 22-06-13...
- Page 11 New Italia Installation manual arm bracKEt 47,9 7,25 18,75 52,5 FIG. 4 rev.02 22-06-13...
-
Page 12: Installation Of Manual Awning
New Italia Installation manual 4 InStaLLatIon oF manuaL aWnIng The awning can be either wall-mounted or ceiling-mounted. The instructions provided below are for wall mounting. If the procedure is different for ceiling installation explanations will be provided as needed. If any optionals are provided, first read Chapter 6 “Optionals” This procedure must be performed by at least two workers. cautIon all movement and lifting must be done with extreme care. Ensure that individuals not involved in the work are kept at a safe distance, so that no one is standing under hanging loads, whether they are moving or standing still. - Page 13 New Italia Installation manual “L” bracKEt ScaLE 1:1 WaLL/cEILIng bracKEt ScaLE 1:1 rev.02 22-06-13...
- Page 14 New Italia Installation manual WaLL/cEILIng bracKEt WIth InSErtS (ScaLE 01:01) rev.02 22-06-13...
- Page 15 New Italia Installation manual arm bracKEt ( ScaLa 1:1) rev.02 22-06-13...
-
Page 16: Installation Of Box
New Italia Installation manual InFormatIon and PrEcautIonS If the wall is off-square, it may difficult to install the box on the support brackets. It is therefore advisable to check the alignment of the brackets (especially if there are more than two of them) and to provide inserts to ensure proper alignment for good installation. use a string to check alignment. 4.2 Installation of box ▪ FIG. 2 4▫ Drill a hole in the wall based on the type of screws available and the type of masonry. FIG. 1 1▫ P lace the box on the brackets as shown in the fig- ure, checking that it fits perfectly. FIG. 4 5 ▫ Fasten the brackets to the wall: insert the plugs in the holes and secure the brackets with the screws and washers (B). FIG. 2 2 ▫ F asten the box to the brackets (A) using the grub screw (B). -
Page 17: Installation Without Box
New Italia Installation manual Installation Without box 4.4 Installation of arms ▪ ▪ FIG. 1 Insert the locking screw (A). FIG. 1 1 ▫ Fasten the bracket (D) using the slots as described cautIon in point 5 dangEr to oPErator! thE armS 2 ▫ Position the roller tube insert (B) in both sides of arE SPrIng LoadEd thanKS to a the roller tube. SPEcIaL KEy. rEmoVE It onLy WhEn thIS manuaL SayS to do So!! handLE 3▫ Position the tube with the inserts (B) in the wall/ thE armS WIth carE. - Page 18 New Italia Installation manual FIG. 3 2 ▫ Fasten the arm bracket to the support surface. 90° FIG. 4 3 ▫ After firmly fastening the two ends of each arm, carefully remove the key (A - Fig. 1) FIG. 5 4▫ Fasten the manoeuvre rod (C) to the winch. 5▫ Open and close the awning. Make sure the box closes properly. InFormatIon and PrEcautIonS For proper awning operation, the arms must be at right angles to the box (Fig. 4).
-
Page 19: Installation Of Motorized Awning
New Italia Installation manual 5 InStaLLatIon oF motorIzEd aWnIng cautIon It IS ProhIbItEd to install the motorized product in an explosive atmosphere. cautIon use a locking switch (with key) if the awning is installed in sensitive locations such as schools, boarding schools, hospitals, retirement homes, etc. If the awning is equipped with a radio remote control, keep it out of the reach of children. cautIon If there is an opening/closing switch, it must be located in a protected position at a height of at least 1500 mm above ground level and in a safe place. cautIon the awning must be installed at a minimum height of 2500 mm. If this is not possible, for awnings equipped with automations it is obligatory to install an acoustic warning device. 5.1 Limit Switch calibration ▪ InFormatIon and PrEcautIonS before installation, check that the limit switch is properly calibrated. If it requires adjustment, follow the instructions in the attached “motor manual”. 5.2 Electrical connections and Installation ▪ cautIon the electrical connections must be performed by qualified personnel and with the electrical energy disconnected. -
Page 20: Special Maintenance
New Italia Installation manual 7 SPEcIaL maIntEnancE 7.1 troubleshooting table ▪ manuaL aWnIng ProbLEmS cauSES SoLutIonS Conical rolling of canvas Uneven fabric thickness Roll the canvass all the way back up motorIzEd aWnIng Without electronic control unit ProbLEmS cauSES SoLutIonS Conical rolling of canvas Uneven fabric thickness Roll the canvass all the way back up The awning does not roll up all the way. Incorrect adjustment of limit switch See manual for motor (attached) The awning does not open up all Movement of motor crown during op- See manual for Assembly, Chap. the way. eration The motor is very noisy Incorrect wiring See manual for motor (attached) Motor defective... - Page 21 BAT S.p.A. Via H.Ford, Z.I. Est 30020 Noventa di Piave (VE) Italy tel +39 042165672 fax +3900421659007 info@batgroup.com www.batgroup.com...
Need help?
Do you have a question about the Trieste and is the answer not in the manual?
Questions and answers