Table of Contents
Advertisement
Quick Links
Advertisement
Table of Contents

Subscribe to Our Youtube Channel
Related Manuals for AUDAC MTX48


Summary of Contents for AUDAC MTX48
- Page 1 User Manual MTX48/88 audac.eu...
- Page 2 This manual is put together with much care, and is as complete as could be on the publication date. However, updates on the specifications, functionality or software may have occurred since publication. To obtain the latest version of both manual and software, please visit the Audac website @ www.audac.eu. MTX48/88 - User manual...
- Page 3 AUDAC TOUCH™2 � � � � � � � � � � � � � � � � � � � � � � � � � � � � � � � � � � � � � � �...
- Page 4 Updating the MTX � � � � � � � � � � � � � � � � � � � � � � � � � � � � � � � � � � � � � � � � � � � � � � � � � � � � � � � � � � � � � � � 047 Technical specifications MTX48/88 - User manual...
- Page 5 Introduction Multi-zone matrix The MTX is AUDAC’s series of very cost efficient audio matrix systems for a wide range of Multi-Zone audio applications, offering two different models with the same features and possibilities, but with different zone capacities. The MTX88 is the eight-zone version, and the MTX48 is the four-zone version.
- Page 6 MTX Block Diagram Block diagram shown for MTX88 - 8 Zone Matrix MTX48/88 - User manual...
- Page 7 ONLY USE ATTACHMENTS & ACCESSORIES SPECIFIED BY THE MANUFACTURER UNPLUG THIS APPARATUS DURING LIGHTNING STORMS OR WHEN UNUSED FOR LONG PERIODS OF TIME ONLY CONNECT THIS UNIT TO A MAINS SOCKET OUTLET WITH PROTECTIVE EARTHING CONNECTION MTX48/88 - User manual...
- Page 8 Do not get the unit wet. If liquid is spilled on the unit, shut it off immediately and take it to a dealer for service. Disconnect the unit during storms to prevent damage. MTX48/88 - User manual...
-
Page 9: Safety Notices
The fuse (T500mAL/250V) provides a safeguard function to the device. When replacing the fuse, make sure that the value of the replacement matches the value of the original fuse. Identification of a suitable replacement component or substitute shall be done by qualified technicians. MTX48/88 - User manual... -
Page 10: Pin Connections And Connectors
Chapter 1 Pin connections and connectors CONNECTION STANDARDS The in- and output connections for AUDAC audio equipment are performed corresponding to international wiring standards for professional audio equipment. RCA (COAXIAL): For unbalanced line input connections. Tip: Signal Sleeve: Ground For balanced microphone input connections. - Page 11 The MTX has RS232, RS485 and TCP/IP ports which all accept the same commands. The complete command set to control the MTX is available in the MTX commands user manual which is freely downloadable on www.audac.eu MTX48/88 - User manual...
-
Page 12: Wire Up The System
Minimum 2 x 1.5 mm² If distance > 15 m: 2 x 2.5 mm²) Music sources and zone outputs: Must be connected with high-quality audio cable and high-quality connectors Ethernet connection: UTP/FTP Cat5e cable or better MTX48/88 - User manual... -
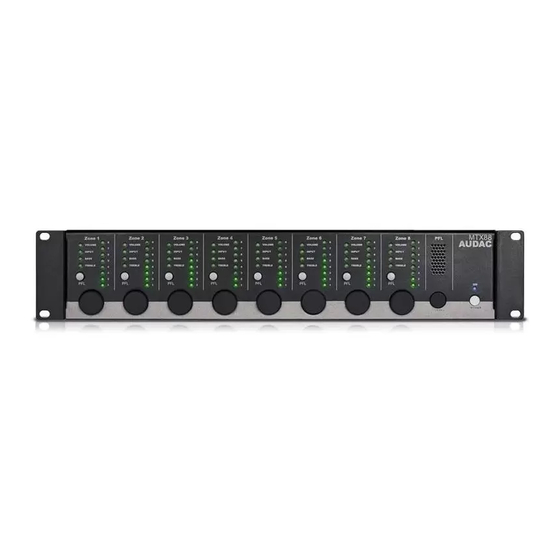
Page 13: Front Panel Overview
PFL selection switches which are provided with each zone control section. The level of the PFL loudspeaker can be controlled by using the PFL potentiometer. On the right side there is a power button provided. Simply push this button to power-up the system. MTX48/88 - User manual... -
Page 14: Front Panel Functions
LED for the selected input channel will illuminate when selected. Switching between the different input channels can be done by rotating the function dial. The table shown below gives an overview of which number corresponds with which input channel. MTX48/88 - User manual... -
Page 15: Power Switch
PFL loudspeaker can be controlled by using the PFL potentiometer. Power switch: By means of the power switch, the device can be turned ON and OFF. When the device is switched on, the blue LED above the power button will illuminate. MTX48/88 - User manual... -
Page 16: Functions Overview
(Volume LED starts blinking) - Priority can be enabled and volume can be set by rotating the button (Priority is disabled when volume is set to zero) - Press rotary button once again to return back to main menu MTX48/88 - User manual... - Page 17 (All connected wall panels will start blinking) - Press upper button from the wall panel to assign this wall panel to the corresponding zone - Repeat this action to assign multiple wall panels to this zone MTX48/88 - User manual...
-
Page 18: Rear Panel Overview
MTX running on emergency power when the mains power is shut down. When the MTX is running on 24 Volt emergency power, the function of the power switch on the front panel is bypassed and can’t switch the MTX off. MTX48/88 - User manual... -
Page 19: Ethernet Rj45 Connector
This connector should be connected to a LAN network. This makes it possible to control the MTX via the internet. The control is possible by sending commands via TCP/IP using a specially developed app, AUDAC Touch™2, which is designed to be used with smartphones or tablets. See ‘Chapter 4: User interface & configuration’ and ‘Chapter 6: IP basics’... -
Page 20: Input Connectors
In addition, both channels have a three-band tone control, whereby specific frequency ranges can be adjusted within a range of ± 15 dB and a phantom power switch, whereby the 15 Volts phantom power can be enabled for powering condenser microphones. MTX48/88 - User manual... -
Page 21: Connecting Audio Sources
Terminal Block). The amplifier configuration (100V or Low impedance) and power needs to be chosen according to the requirements for each specific application. In its standard configuration, the MTX has Balanced Stereo outputs, which can be switched to Balanced Mono outputs. (See configuration functions) MTX48/88 - User manual... - Page 22 / switch / hub), a straight network cable should be used. Please ask your network administrator for assistance. Download the AUDAC Touch™2 application from the website: https://audac.eu/touch/. The MTX can be controlled via the application. The default administrator password (access to all functions) is “MTX”...
- Page 23 Once all settings have been made, click the “Save to wallpanel” button and all your settings will be saved to the selected MWX65 wall panel. Repeat this action for all connected MWX65 wall panels. Ready Your system is now completely configured and ready to be used. MTX48/88 - User manual...
-
Page 24: User Interface & Configuration
Chapter 4 User interface & configuration The Audac Touch 2 is the main platform we are offering for application specific or total system configuration and control. The app is available on the Apple App-store, Google Play or audac.eu/touch for IOS, Android and PC. - Page 25 AUDAC TOUCH™2 First, Dashboards screen welcomes you when the Audac Touch 2 application is opened. Here new dashboards can be created for full system control and this user interface can be personalized using widgets. On the top left side, icon with three parallel lines allows access to the app menu where you can navigate between Dashboards, Devices, WaveDynamics,User and Settings.
- Page 26 On the “Saved” item list, features like model name, IP,device name and number of linked items can be seen. Control panel of the device you wish to control can be reached when you click on the item. The item should be in online status to access control panel. MTX48/88 - User manual...
-
Page 27: Login Screen
1 dB steps. At the bottom there is a ‘Mute’ button to mute the volume of the corresponding output channel with one click. When the volume is muted, the button turns red. To unmute, press the button again. MTX48/88 - User manual... - Page 28 ZONE SETTINGS’ button at the top of the screen to save these new settings. If the settings have been saved, they will be recalled after a restart. If not saved, these settings will be lost after a restart. MTX48/88 - User manual...
-
Page 29: Device Settings
Control Panel of MTX Return to main screen Click the “CONTROL” button to return to the main screen. Automatic saving Unlike zone settings, the changes in the configuration settings are automatically saved and set as default on the device. MTX48/88 - User manual... - Page 30 Then, first enter the old/existing password and then the new password twice for consistency reasons. After these has been entered, press the “OK” button. If the old password is correct, and the new password matches in both lines, the old password will be changed to the new password. MTX48/88 - User manual...
- Page 31 It will not recall the previously saved settings but it will recall the factory default setting and the previously made settings will be lost. Click the “OK” button to reset the settings to the factory defaults. MTX48/88 - User manual...
-
Page 32: Input Settings
Input settings “Inputs” section gives an overview of all available inputs. Input channel names for each channel can be changed by pressing the setting icon next to channel name. Input settings for MTX MTX48/88 - User manual... -
Page 33: Output Settings
Certain inputs can be selected for each output. These can be added by pressing the plus button. The desired input can be chosen from the pop-up menu. The input can be changed by pressing the ‘edit’ icon and deleted by pressing the ‘delete’ icon. MTX48/88 - User manual... -
Page 34: Paging Volume
The paging volume can be set in -1 dB increments, starting at 0 dB, decreasing to -70. If the volume is set to 0 dB, the announcements for the respective outputs will be output at maximum volume. MTX48/88 - User manual... - Page 35 If the sensitivity is set to low, you need a relatively high input signal (e.g. speak relatively loudly) to activate the priority mode. The hold menu sets the time that the audio sources are still suppressed when the priority procedure is over. This value can be set from 1 second to 5 seconds. MTX48/88 - User manual...
-
Page 36: Network Settings
The IP address can be changed simply by typing one of the available IP addresses on the LAN to the corresponding line. Click “SAVE” to confirm the network settings. STANDARD NETWORK SETTINGS 192.168.0.192 IP Adres: Subnet Mask: 255.255.255.0 Gateway: 192.168.0.253 DNS Server: 192.168.0.21 DHCP State: Off MTX48/88 - User manual... - Page 37 The MPX paging consoles can be used for broadcasting messages to the selected zones of MTX. Depending on the used MTX model, MPX48 can be used in combination with MTX48 or MPX88 can be used in combination with MTX88. Connection to the matrix system is done through a fixed connection cable with a length of 2 meters to the Paging port.
-
Page 38: Wall Panel
8 signals / presets. The inputs that can be selected with the wall panel can be configured in the AUDAC Touch™2 application under ‘Settings >> Inputs’. How this works is described in detail in a previous chapter of this user manual. Please read the WP connection principles in the beginning of this chapter before making any connections. -
Page 39: Change Volume
600 meters can be reached. The table below gives an overview of the maximum cable length, depending on the connected wall panels. No. of MWX45 wall panels Maximum cable length 600 meter 500 meter 400 meter 300 meter 200 meter 150 meter 120 meter 100 meter MTX48/88 - User manual... - Page 40 This setting can also be changed in the MWX65 settings menu. (If “Block settings menu” is not checked) 7) When the settings are made, press the “Save to Wall panel” button and the settings will be sent to the selected MWX65 wall panel. MTX48/88 - User manual...
- Page 41 Pin 3 White-Green +24V DC Pin 4 Blue Not connected Pin 5 White-Blue Not connected Pin 6 Green Pin 7 White-Brown Right + Pin 8 Brown Right - Maximum Cable length for WP2xx is 300 meters. MTX48/88 - User manual...
- Page 42 Zone 4 Zone 3 Zone 2 Zone 1 PHANTOM PHANTOM RS-232 Line 6 Line 5 Line 4 Line 3 ETHERNET GAIN GAIN GAIN GAIN AC Input CLIP CLIP CLIP CLIP CLIP CLIP 100-240V 50/60Hz Fuse: T1AL/250V MTX48/88 - User manual...
- Page 43 NOTE: In setups with specific wiring requirements, such when using WP2xx wall panels, it is recommended to use ARJ03P or CTA845 accessories as node, to make convenient and reliable connections as shown in the above diagrams. MTX48/88 - User manual...
- Page 44 If the paging consoles are connected to the MTX, they can be found under ‘Discover Peripherals’ on the MTX page in the AUDAC System Manager. Under ‘Priority’ you can enter a value. The lowest value gets the highest priority.
- Page 45 75 mA APM101/ 104 / 108 / 116 Digital Paging 300mA Microphone WP2xx Universal Wall panel 60mA maximum ATTENTION Make sure the current consumption of all connected peripheral devices added together never exceeds the 1.5 Ampere limit MTX48/88 - User manual...
- Page 46 AUDAC products have the following IP address by default: “192.168.0.xxx”, this means that the default IP range of AUDAC products is “192.168.000.xxx”. If your network uses a different IP range, the AUDAC products cannot be accessed from your network. You can change the IP address of the AUDAC products so that they work properly in your network.
- Page 47 The easiest way to keep your MTX device up-to-date is via the Audac System Manager. The Audac System Manager (ASM) is a windows compatible software application that detects all ‘smart’ devices with their peripherals in your system and enables extensive configuration, update and backup functions for the devices.
-
Page 48: Technical Specifications
MTX88 Supply 100 ~ 240 V AC / 50 ~ 60 HZ 24 VDC (emergency power) Dimensions 482 x 88 x 335 mm (W x H x D) Weight 4.750 kg Mounting 19” Rack Unit height MTX48/88 - User manual... - Page 49 Note MTX48/88 - User manual...
- Page 50 Note MTX48/88 - User manual...
- Page 51 Note MTX48/88 - User manual...
- Page 52 Discover more on audac.eu...
Need help?
Do you have a question about the MTX48 and is the answer not in the manual?
Questions and answers