Table of Contents
Advertisement
Advertisement
Table of Contents

Summary of Contents for Azkoyen CASHLOGY CONNECTOR
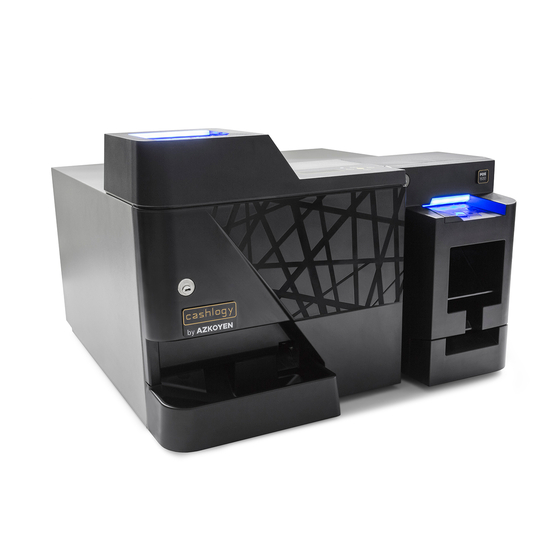
- Page 1 CASHLOGY CONNECTOR USER MANUAL.
- Page 2 info@cashlogy.com www.cashlogy.com HISTORY OF REVISIONS Date Version May 2014 Creation of document January 2015 Revised by JV April 2019 General revision October 2019 Added self-protection mode The contents of this manual may undergo modifications without previous warning, due to modifications, improvements and/or updates. The information herein is valid except for possible printing errors.
-
Page 3: Table Of Contents
Contents INTRODUCTION..................4 WHAT IS CASHLOGYCONNECTOR............. 4 FUNCTIONALITIES ................... 5 PAYMENT ....................5 In all different cases, it can be configured a reminder to the user to collect the change. See configuration section of this manual..............8 BACKOFFICE .................. -
Page 4: Introduction
1 INTRODUCTION. This manual is destined for the use of software personnel of the Point of Sale (POS) Terminal applications that CashlogyConnector uses for the operations with the Cashlogy till. Here forward, this manual will use the term POS to refer the Point of Sale terminal. -
Page 5: Functionalities
3 FUNCTIONALITIES PAYMENT Once Cashlogy has been selected as payment type in the POS software, Cashlogy will be activated to allow the coins and notes introduction. Depending on the integration an informative screen will be shown. The following will explain all the possible Payment screens using CashlogyConnector screens. - Page 6 This way, on the main screen, we can distinguish between the quantity of cash that will be stored automatically by the Cashlogy and that which will be stored manually. If we return to the payment screen and we press the button “Cancel” Cashlogy will return the value inserted.
- Page 7 • WITH MANUAL COLLECTION AND AUTOMATIC PAYMENT. Being an automated payment, the [ACCEPT] button will not be shown and it won’t be needed to confirm the payment. When the amount to collect is reached the payment process will finish automatically. User has to take into account that if some coins are introduced to receive as change a note or bigger coins, small coins have to be introduced first and later the notes or bigger...
-
Page 8: See Configuration Section Of This Manual
• WITHOUT MANUAL COLLECTION AND WITH AUTOMATIC PAYMENT. In all different cases, it can be configured a reminder to the user to collect the change. See configuration section of this manual. In case of any error or not having change, machine will show different error messages (See error information screens section in this manual) -
Page 9: Backoffice
3.2 BACKOFFICE From this screen it is possible to access to all different functionalities of CashlogyConnector software. Clicking on any of the buttons user will access to any of them (add change, collect stacker….) Depending integration user permissions, CashlogyConnector can show less functionalities than those are listed in this manual. -
Page 10: Cashlogy Status
3.2.1 CASHLOGY STATUS This screen shows the notes and coins with which Cashlogy can operate and provides information about the amount of each denomination stored in the device, for both the recycling units and stacker (note stacking unit). Those items in red show that they are “near empty” and in blue that they are “near full”. -
Page 12: Give Change
The screen shown in this case will be the following: 3.2.3 GIVE CHANGE You can change the amount entered in notes or coins in this screen with the same amount in notes and coins of a different denomination. - Page 13 First, the system will request you to insert notes and/or coins and show the value as it is inserted. Next, press [ACCEPT] and the application will show a screen with the notes and coins you can use to give change. This can be configured by the staff installing or distributing the application, using the CashlogyConfig application.
-
Page 14: Withdraw Cash
quantity of €50 in notes of €5, €10 or €20, depending on the availability of change for recycling. Remember that the notes sent “To Stacker” cannot be returned to the note payout exit. 3.2.4 WITHDRAW CASH The screen will display the notes and coins stored in Cashlogy, with the denominations that are “almost empty”... -
Page 15: Collect Stacker
3.2.5 COLLECT STACKER To collect the notes deposited in Cashlogy’s stacker, this function must be selected before the physical removal of notes from the stacker. CashlogyConnector will show this screen, providing information about the total amount of notes deposited in the stacker. To collect it, press the [CONFIRM COLLECTION OF NOTES FROM THE STACKER] button and collect the notes. -
Page 16: Closure / Cash Float
Press “Cancel” to return to the previous screen without modifying the value of the notes stored in the stacker. To set the amount stored in the stacker to zero, perform this operation in the POS terminal and physically remove the stacker. - Page 17 Enter the amounts of each coin/note to be left as a fund at the bottom of the “Cash Float” column; the remaining amount will be returned by Cashlogy (coins to the tray, notes to the stacker). If the “cash float” column is left empty, Cashlogy will return all notes and coins, since this column is where the amounts to be used as the fund will be indicated.
-
Page 18: Absolute And Relative Statistics
3.2.7 ABSOLUTE AND RELATIVE STATISTICS This option allows us to see the number of coins or notes of each type that have been inserted into (deposited) or removed (dispensed) from the Cashlogy. This allows us to detect high usage of a type of coin or note value (for example, 1€ coin) and carry out the necessary configuration and maintenance. - Page 19 Both the total and partial statistical data show the dates from which the accounting record began. In the case of the partial statistics, this date is reset each time you press [DELETE STATISTICS]. This option is not available in the total statistics as this shows the counter values from the first usage of the machine.
-
Page 20: Resolve Self-Protection Mode
The file .csv can be opened using any text editor or software such as (Microsoft Excel, OpenOffice…). 3.2.8 RESOLVE SELF-PROTECTION MODE. From this option, users will access to a help guide to solve the recycler self-protection mode. Recycler self-protection mode is a functionality where the bill recycler can avoid dispensing a certain note that could damage the recycler. - Page 21 Clicking on the recycler that is in self-protection mode, CashlogyConnector starts the process to solve it. In a first step, CashlogyConnector will try to dispense the maximum possible amount of notes, and it will ask the user to chose between dispensing them to the stacker or the return tray.
- Page 22 Next, CashlogyConnector will ask the user to switch off the machine, and manually empty three notes from the recycler. It is important to strength that it is necessary to extract just three notes to ensure the process will work successfully. Once these three notes have been removed, the user has to put the recycler again and turn on the machine, then CashlogyConnector will extract all the remain notes to the selected destination.
- Page 23 Once the process has finalized, the user will be informed that the notes have to be re- introduced again using the “add change” option. If an error would happen douring the process, the user will be informed to start again the process or contact their technical service.
-
Page 24: Complete Emptying
This functionality is available from Cashlogy Connector version v2.1.0.56, and it only works if dll is at least version v1.11.3.46 and RBH500 firmware is equal or higher to v13.41. 3.2.9 COMPLETE EMPTYING Full emptying of the device will empty it from all notes and coins, even if they have not been counted due to an error or change in the POS terminal. -
Page 25: Maintenance
By clicking the button [CONFIRM SET COINS TO ZERO], a message to confirm if you want to reset the coin values to 0 or not appears. If [YES] is selected, it will reset the values to zero. It is very important that this process is only executed when it there are no coins in the machine, otherwise the accounting of the machine will not balance. - Page 26 Select this option to see how many notes are pending before the next maintenance and to reset the counter after carrying out the maintenance operations. It is very important to ensure that the device is maintained and fine tuned correctly to lengthen its service life and prevent errors.
- Page 27 If these numbers are lower than 85%, no warning is shown If notes and/or days are between 85% and 100%, a warning will be shown to remind that maintenance has to be done soon. If one of these numbers is over the limit, CashlogyConnector will show a warning to remind that maintenance has to be done.
-
Page 28: See Logs
Maintenance of bank notes belt warning does not depend on a number of cycles, it depends on an internal algorithm that detects if notes are having some misalignment or they are sliding when they are introduced. However, once it is realized the maintenance of these belts by the technical service, this counter has to be reinitialized. -
Page 29: Information Button
It has three column views: 1.- The transaction LOG. Indicates the amount of notes and coins inserted and withdrawn each transaction sent from software CashlogyConnector. 2.- The communication LOG. Shows all calls made from the POS software to the CashlogyConnector. 3.- The error LOG. -
Page 30: Error Screen Information
3.3 ERROR SCREEN INFORMATION In case of Cashlogy showing any errors or alerts on executing any of the commands, Cashlogy will show these at the top of the screen, it will show one of the following icons: If it detects an alert, it will show this icon: If it is an error, it will show this icon: If there is too much or too little change: Clicking on the icon will show another new screen that shows a detailed list of alerts... - Page 31 • ERROR IN CHANGE REFUNDED: If it detects an error in giving change, it will show one of the following screens:...
- Page 32 This last window it is shown when Cashlogy has not change enough to payback and it gives three different options. These options are configurable to appear all three, two of them or just one: (See configuration section) 1. Add change. We can click on Add change button to access the add change window that will put Cashlogy on admission mode and allow us to add coins and notes.
- Page 33 In the case where it restarts the refund after reloading more change, it will show the following screen: If while it is executing any process, the machine detects another error, it will show a screen with a description of the error and explain what to do using a text, image or video to explain the problem.
-
Page 34: Advanced
ADVANCED Attention, this section is only for experimented users with specific advanced technical knowledge of the Cashlogy. An incorrect modification of the parameters of Cashlogy can lead to errors and even the termination of any type of guarantee or contract. Please, in case of doubt, consult your Cashlogy installer or distributor. - Page 35 Therefore, it will be always possible to access the buttons of “save”, “exit”, “change config” to change the language and product and “reset factory settings” to go back to default configuration. GENERAL In the field “Name”, name of the machine is shown, this name will be given by ▪...
- Page 36 parameter could be changed by the POS software (see section 6.3.1.3. CHARGING). “Nº Minutes auto shutdown”. ▪ o = n, CashlogyConnector will shut down automatically if after starting, after this number of minutes without connection with the POS software. (Only in case CashlogyMonitor is not installed) = 0, will not shut down automatically although there is no communication.
- Page 37 Hopper number where the coin will be stored. In the case that various types of coins are stored in a Hopper, each coin will be saved as a parameter in the same Hopper number. “Can make Change” ▪ o = 1 indicates that this coin or note can be used to give change. o = 0 indicates this coin or note cannot be used in this process.
- Page 38 “Media Format”. Format and resolution the error videos will be shown (just ▪ for complete integration). See section 6.3.2.5.3. Error details. “Screen mode”. This parameter will be modified for configurations that do not ▪ use screens provided by CashlogyConnector, especially for integrations with a MiniPC without screen.
- Page 39 “Show error window”. Parameter to configure if we want to show an error ▪ window in case there is not enough cash to pay. “Show error of”. Select different error types that can be showed to user: ▪ o Type 0. Warnings. i.e. “coin near empty” o Type 1.
Need help?
Do you have a question about the CASHLOGY CONNECTOR and is the answer not in the manual?
Questions and answers
Recycler -3 self protection mode