Advertisement
Introduction
Congratulations, by purchasing the POWERbreathe Medic Plus you have taken a big step towards – Better Breathing.
POWERbreathe Respiratory Muscle Training (RMT) will make your breathing muscles stronger, reducing breathlessness during exercise and daily activity.
POWERbreathe (RMT) uses a technique known as resistance training. This strengthens the breathing muscles by making them work harder, in much the same way as you might use weights to increase the strength of your arm muscles.
When training with your POWERbreathe Medic Plus, you will notice that you have to work harder to breathe in. This is the effect of resistance training acting on the muscles used to inhale – primarily the diaphragm and rib cage muscles. When breathing out, there is no resistance and you can breathe out normally, allowing the chest and breathing muscles to relax, naturally pushing the air from your lungs.
Used properly, you should begin to enjoy the benefits of using your POWERbreathe Medic Plus in just a few weeks.
To make sure you get the most from your POWERbreathe Medic Plus, please read this instruction booklet carefully, visit powerbreathe.com and take time to get used to your POWERbreathe Respiratory Muscle Training.To Activate Your Warranty
Please ensure that you register your
POWERbreathe Medic Plus by visiting www.powerbreathe.com/warranty-index
Alternatively please retain the sales receipt as proof of purchase date.
Thank You.
Developed, designed and manufactured with pride in the United Kingdom

Precautions
POWERbreathe - Respiratory muscle training (RMT) / Inspiratory muscle training (IMT) is drug free; suitable for almost anyone and should cause no harmful side effects when used properly. If you have any doubts about the POWERbreathe Medic Plus device's suitability or you have a medical condition, please consult your doctor.
Please read the following - Precautions and CONTRAINDICATIONS information, to ensure that you use the POWERbreathe Medic Plus device safely and appropriately:
PRECAUTIONS:
- Do not make changes to any prescribed medication or prescribed treatment programme without consulting your doctor.
- To prevent the potential transmission of infections, we recommend that you do not share your Medic Plus with other users, including family members.
- This product is not intended to diagnose, treat, cure or prevent any disease.
- POWERbreathe Medic Plus is designed for exercising your inspiratory muscles only. No other use is intended or implied.
- Anyone who is under the age of 16 should only use POWERbreathe RMT / IMT with supervision from an adult. The Medic Plus contains small parts and is not suitable for children under 7 years.
- Whilst training with the Medic Plus you should feel resistance when inhaling but it should not be painful. If you should feel pain whilst using the Medic Plus, stop immediately and consult your doctor.
- Some users may experience slight ear discomfort when training with Medic Plus, especially if they are recovering from a cold. This is caused by inadequate equalisation of pressure between the mouth and ears. If symptoms persist, please consult your doctor.
- If you are suffering from a cold, sinusitis or respiratory tract infection, we advise that you do not use your Medic Plus until symptoms have disappeared. If in doubt, consult your doctor.
Additionally, the following conditions have been highlighted to require guidance from your medical professional, before use of the Medic Plus device:
- A history of spontaneous pneumothorax (a collapsed lung that was not due to traumatic injury e.g. broken rib), as it may lead to a recurrence of the condition. Following a traumatic pneumothorax and/or broken rib, the Medic Plus should not be used prior to full recovery.
- Pulmonary hypertension
- Large bullae on chest x-ray
- Marked osteoporosis with history of rib fractures
- Desaturation during or following IMT (<94%)
CONTRAINDICATIONS: Respiratory muscle training (RMT) / Inspiratory muscle training (IMT), such as training with POWERbreathe Medic Plus, is not recommended for patients with certain conditions such as:
- POWERbreathe Medic Plus is not suitable for asthma patients who have low symptom perception and suffer from frequent, severe exacerbations or with an abnormally low perception of dyspnoea.
- Do not use the Medic Plus if you are suffering from a ruptured eardrum or any other condition of the ear
- POWERbreathe Medic Plus is not suitable for patients with marked elevated left ventricular end-diastolic volume and pressure
- POWERbreathe Medic Plus is not suitable for patients with worsening heart failure signs and symptoms after RMT / IMT
Please remember: If in doubt, consult your specialist respiratory health doctor.
POWERbreathe RMT/IMT is clinically proven to improve symptoms, exercise tolerance and quality of life in major debilitating conditions such as COPD, Asthma and Heart Failure. If you or your doctor, would like more information on the clinical effectiveness of POWERbreathe devices, please visit our website (www.powerbreathe.com). If you have any more questions about POWERbreathe, please contact the POWERbreathe distributor in your country.
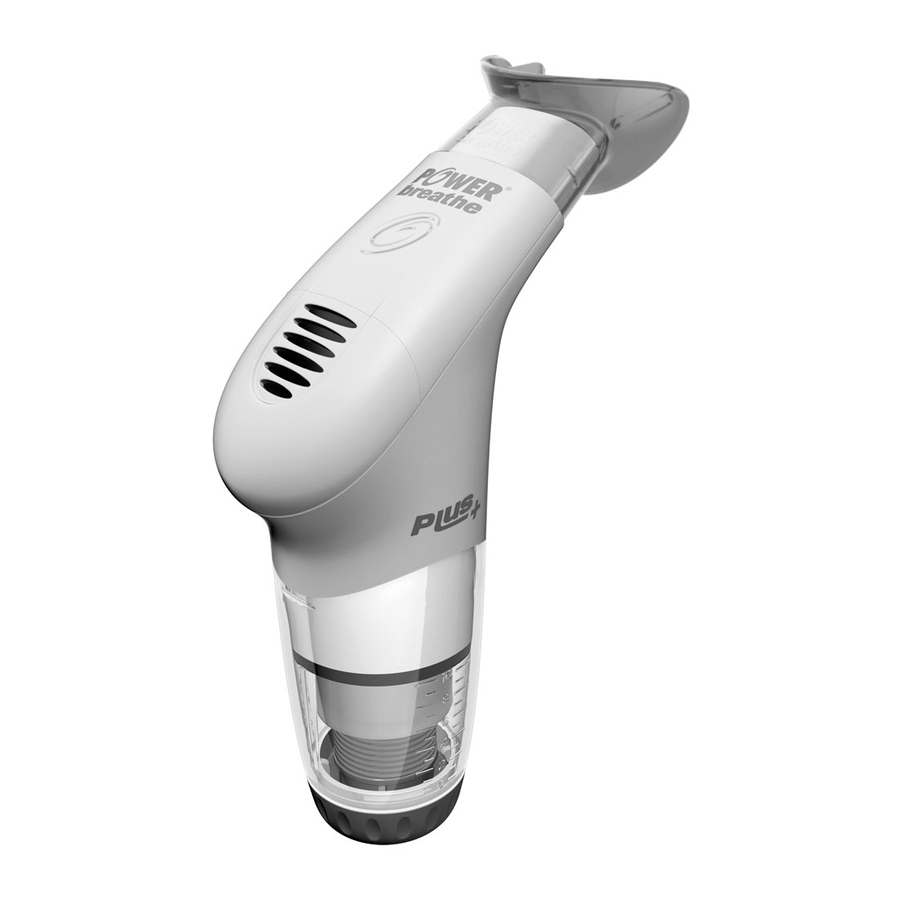
Product description

Getting used to your Medic Plus
Diagram 1: Adjusting the Medic Plus

Remove the Medic Plus and nose-clip from the packaging. Holding the Medic Plus upright, practise adjusting the training load: Rotate the load adjustment knob clockwise to increase the training load; rotate the load adjustment knob anticlockwise to reduce the training load.
Notice that a numbered scale is visible on the side of the Medic Plus. As the load adjustment knob is rotated, the internal load-indicator sleeve will move up or down, indicating your current training load on this scale.
Diagram 2: Load 0

Now set the Medic Plus to load 0. At this load the base of the internal white sleeve should be aligned with the lowest load on the scale, as shown in the diagram. Note: Do not attempt to reduce the load below 0 as this may damage the adjustment thread.
Diagram 3:Placing the Medic Plus in your mouth.

Make sure you are sitting or standing upright and feel relaxed. Holding the Medic Plus by the handle, place the mouthpiece in your mouth so that your lips cover the outer shield to make a seal, and the mouthpiece bite blocks are gripped between your upper and lower teeth.
Diagram 4: Inhaling through the Medic Plus.

Breathe out as far as you can then take a fast, forceful breath in through the mouth. Take in as much air as you can, as quickly as you can, straightening your back and expanding your chest.
Diagram 5: Exhaling through the Medic Plus.

Now breathe out slowly and passively through your mouth until your lungs are empty, letting the muscles in your chest and shoulders relax. Pause until you feel the urge to breathe again. Repeat this exercise until you feel confident about breathing through the Medic Plus. Note: do not pant – if you start to feel light-headed, slow down and pause at the end of your breath out.
Diagram 6: Using the nose-clip.

Now put the nose-clip on so that it pushes your nostrils together, as shown in the diagram. Continue to practise taking a forceful breath in then breathing out slowly and fully. Note: the nose-clip will help you to breathe through your mouth rather than your nose. However, it is not essential and some people find it more comfortable to train without the nose-clip.
Training with Medic Plus
Guidance for patients
Please follow the instructions below unless instructed to do otherwise by your doctor. Before commencing the exercises, please ensure that you have read the precautions section of this manual.
Finding your correct training load:
The recommended POWERbreathe RMT routine is 30 breaths twice a day.* In order to get the most from the training, these exercises should be completed at a load that is as hard as possible, without causing discomfort.
For the first day of training, set your Medic Plus to load 0 (see Diagram 1 - "Getting used to your Medic Plus").
Some individuals may find the exercises very challenging at this load. If you find you are unable to complete 30 breaths at this load, take a short rest then start again until you have accumulated a total of 30 breaths.
If you found it difficult to complete 30 breaths at load 0, continue to train at this load twice a day for the first week.
If you found you could easily complete 30 breaths at load 0, the next day you should set your Medic Plus to load 1. Complete the exercises again. By this method, continue to increase the training load by 1 setting each day, until you are only just able to complete 30 breaths of training. Once you have reached this point, continue to train at this load twice a day for one week.
After one week of training with the Medic Plus at the same load, increase the training load by half a turn. Continue to train at this load for a further week. From this point onwards you should aim to increase the load by half a turn each week.
For an example of a typical training diary and to download/print blank diary pages, to keep a record of your progress visit: powerbreathe.com
* The 30 breath twice daily training regimen is a high intensity training regimen that has been found to be very effective in people who train to improve their general fitness (Romer & McConnell, 2003). Though more intense, this regimen has the great advantage of being much shorter than the more traditional "Low intensity training" regimens that have been used in clinical studies. Recent evidence suggests that the benefits of low and high intensity training are similar (Gosselink et al, 2010), so we recommend the regimen that is least time consuming. However, if you are experiencing difficulties with the high intensity training, please refer to the section on "Low intensity training" on the following page.
Achieving good training technique:
When you inhale through your Medic Plus, you should breathe in as deeply and as quickly as possible. When you exhale, breathe out slowly and gently until your lungs are completely empty. Try to squeeze out as much air as possible towards the end of the breath to ensure your lungs are completely empty. Pause until you feel the urge to breathe in again before inhaling again (Approx 3-4 secs).
You will notice that it becomes harder to completely fill your lungs as you continue to breathe during a training session. This is because your breathing muscles are becoming tired. If you can no longer take a satisfying breath, take a short break before continuing your training. If you find you are unable to complete a breath early in your training session, the load may be set too high. In this case, simply decrease the training load by half a turn, then continue your training session. Note: Training should feel challenging. At the end of the 30 breaths training, you should aim to feel as if you cannot continue further.
If you feel out of breath, light-headed or you need to cough, take a short break. As soon as you have recovered, continue the training session until you have completed a total of 30 breaths. If you miss a training session, simply complete the session as soon as possible. If you miss it by more than 12 hours, ignore the missed session and carry on with your next training session as normal.
Maintaining your breathing:
After 4-6 weeks your breathing muscles should have improved substantially and you should feel less breathless during activity. At this stage you will not need to use your Medic Plus every day to maintain your improved breathing. Training with your Medic Plus just 3 times a week should be sufficient to continue to enjoy a better lifestyle.
"Low intensity training"– If you are experiencing difficulties with the training, you may wish to progress to a less intense, longer training regimen that has proven very effective for people who suffer from respiratory conditions. If so, you could consider trying the 15 minutes continuous breathing on a low load setting (consult your medical practitioner if in doubt).
If the lowest load setting "0" is too heavy for you to start with, then POWERbreathe Medic Plus allows you to train without using the calibrated load spring or the complete valve assembly to train at the absolute lowest load.
See diagrams 1 - 6.
Medic Plus assembly
General Assembly

Note: Whilst the POWERbreathe Medic Plus can be disassembled further into its component parts (with the exception of the main body) – This is not recommended as small parts can easily be misplaced.
However, if your condition means that you need to start at the absolute lowest load then you will need to follow instructions as shown within diagrams 1 to 6.
If you need to train below load setting "0" remove valve assembly and/or spring as shown below:
Diagram 1: Gently pull to remove handle cover. (When re-assembling handle cover a gentle twist may be required to locate the valve assembly into the load adjustment knob.)

Diagram 2: Gently pull to remove valve assembly Do Not Twist main body or valve assembly as it is possible to damage the locator pin indicated below. To re-assemble, line up the locator pin with the slot and relocate.

Diagram 3: To remove the calibrated spring from the valve assembly gently peel back and remove the rubber seal.

Diagram 4: Carefully remove the sleeve and then remove the spring. Then replace the sleeve before re-fitting the rubber seal.

Diagram 5: Shows Medic Plus re-assembled with the valve assembly in place but without the calibrated spring.

Note: The load adjustment knob does not function when spring is not in use
Diagram 6: Shows the Medic Plus re-assembled but without the complete valve assembly and with the POWERbreathe breathing indicator ball.

Note: POWERbreathe breathing indicator ball helps to see breathing actitvity (Ball Not included - visit powerbreathe.com for details.)

Please keep all the POWERbreathe Medic Plus components not being used in a safe place, for use later on and for warranty purposes.
Guidance for healthcare professionals
Contraindications:Please read the precautions section of this manual in order to assess a patient's suitability for respiratory muscle training (RMT).
Patients should be instructed in the proper use of the POWERbreathe Medic Plus RMT before commencing training. Please familiarise yourself with the operation of the device prior to assisting a patient in its correct use referring to the sections "Getting used to your Medic Plus" and "Training with Medic Plus - Guidance for Patients". Guidance on training with Medic Plus is based on information published in the European Respiratory Society's 'Breathe' journal (McConnell et al, Inspiratory muscle training in obstructive lung disease; how to implement and what to expect. September. vol 2(1),pp39-49, 2005). Visit our website to download the full article.
Note: Some patients may be unable or unwilling to use the mouthpiece. In this case, the Medic Plus mouthpiece may be replaced with a facemask attached to a Medic Plus spacer, to allow training.
Setting the training load:
Clinical research indicates that inspiratory muscle training (IMT) loads must exceed 30% of the patient's maximal inspiratory muscle strength in order to be effective. There is also evidence that heavier loads yield greater improvements in inspiratory muscle strength.
If you have access to a means of measuring inspiratory muscle strength such as a POWERbreathe KH1 or KH2 device, you may set the initial training load to 30-40% of Maximal Inspiratory Pressure (MIP) using the conversion table on pg16. The training load should then be increased by half a turn each day for the next 7-10 days up to 60% of baseline MIP.
The patient should train at this load for 1 week. Thereafter, the training load should be increased weekly to maintain the training load at approximately 60% of the patient's new inspiratory muscle strength.
Note: at 60% MIP training will be strenuous and it may take some time before the patient is able to complete 30 breaths without taking a break.
Teaching good training technique:
The first few days are the most challenging for the patient who will require careful and sensitive coaching, including the allowance of short breaks. They should be encouraged to tolerate the breathless sensation induced by training, and to increase the training load progressively. Typically, increases in load of 5-10% per week can be achieved.
It is advisable to encourage patients to train across the full extent of their vital capacity in order to train the full range of motion of the inspiratory muscles. As the patient's inspiratory muscles fatigue, they may find it hard to achieve higher lung volumes towards the end of inspiration. At these higher lung volumes the inspiratory muscles are weakest and will be most prone to the effects of fatigue. Patients should be warned to expect this and should be discouraged from training beyond the point where they are able to achieve a 'satisfying breath'.
Patients should also be encouraged to inhale against the load as rapidly as possible in order to maximally recruit their inspiratory muscles. Patients should breathe with a combination of diaphragmatic and chest wall movement in order to utilise all of their inspiratory muscles during training. Patients may require breaks during a training session in order to cough, or because they feel too breathless. It is important that the duration of these is minimised in order to maintain the training stimulus, but this too must be handled sensitively, and supported by an explanation of why it is important to minimise the duration of these enforced 'rest' periods.
Maintenance training:
After 4-6 weeks of training, the patient's inspiratory muscles should have improved substantially and they should feel less breathless during exercise. At this stage it is not necessary to train with Medic Plus every day in order to maintain improved breathing. Training with Medic Plus three times a week will be sufficient to maintain the training effects.
POWERbreathe Medic Plus - Accessories
A range of accessories to help patients/users with special needs are available, for example:
- Spacer
- Oxygen Mask Adapter
- Masks
- POWERbreathe Filters
For more information please visit:
powerbreathe.com
Care and maintenance
Precautions
POWERbreathe products are designed to be robust and durable. With a little care, your Medic Plus should last many years. Please read the following instructions to ensure that your Medic Plus remains in good condition:
- Do not attempt to reduce the load adjustment below load 0 – this is the minimum setting and attempting to unscrew the mechanism further may damage the adjustment thread.
- Do not attempt to separate the upper and lower portions of the main body of the device – these should remain permanently joined.
- Please store your Medic Plus in the storage pouch provided or a suitable clean container. Always make sure that your Medic Plus is dry before storage.
Cleaning
Your Medic Plus will be exposed to saliva during use and we recommend that you clean it frequently to keep it in good working order.
A few times a week, soak your Medic Plus in warm water for about ten minutes and then wipe it with a soft cloth, under warm running water, paying particular attention to the mouthpiece. Shake off excess water and leave on a clean towel to dry.
Once a week perform the same procedure but soak your Medic Plus in a mild cleansing or approved cleaning solution instead of water. The cleansing solution used must be intended for use on equipment that comes into contact with the mouth, such as that used for babies' bottles. POWERbreathe cleansing tablets are available from retailers nationwide or visit www.powerbreathe.com for further details.
To keep your Medic Plus in good condition, after cleansing with an approved cleansing product hold it upside down under a running tap so that water can run through the device. Shake off excess water and leave on a clean towel to dry.
If further cleaning is necessary the Medic Plus can be disassembled into its component parts as demonstrated in the diagrams. If disassembling the Medic Plus be careful not to lose any components parts.
Note: the POWERbreathe Medic Plus is not suitable for dishwashers.
Technical specifications
Mouthpiece Latex-free PVC, contains a silver biocide additive
Clear handle cover Polycarbonate
Soft touch adjuster grip ABS with Santoprene overmoulding
Flap valve Silicone 60
O-ring Nitrile rubber
Nose-clip rubber Silicone 40
Nose-clip bridge Nylon
All other components ABS (Acrylonitrile Butadiene Styrene) Note: Materials are FDA compliant with regards to composition, additives and properties, where applicable in accordance with Medical Device Directive 93/42/EEC Essential Requirements (Annex 1)
Load Selection Range Table
| No Spring & No Valve Assembly | No Spring | Load (cm H20) @ 1l/sec | |||||||||||
| Load Setting | - | - | 0 | 1 | 2 | 3 | 4 | 5 | 6 | 7 | 8 | 9 | 10 |
| cm H20 | 1 (including ball) | 3 | 9 | 16 | 23 | 29 | 36 | 43 | 50 | 57 | 64 | 71 | 78 |
| Note: A load of 3cmH2O can be achieved by removing the spring and replacing the valve assembly for training. In addition, a load of 1 cm H20 can be achieved when the complete valve assembly is removed and the POWERbreathe breathing indicator ball is installed. All values are at a flow rate of 1 litre a Second, consistent with other POWERbreathe models. | |||||||||||||
Precise load settings may vary marginally due to: (1) the analogue nature of the calibrated spring tensioner and the precision with which the load is selected; (2) a small effect of inspiratory flow rate upon spring compression such that high inspiratory flow rates lead to greater spring compression, and a small increase in load (Caine & McConnell, 2000). This effect is common to all spring loaded devices, and its size is magnified by increasing spring range (it is larger in a spring with a maximum range of 90cmH2O compared with one with half this range), it is also greater at lower absolute load settings (Caine & McConnell, 2000).
Caine MP & McConnell AK. (2000). Development and evaluation of a pressure threshold inspiratory muscle trainer for use in the context of sports performance. Journal of Sports Engineering 3, 149-159.

Documents / Resources
References
![www.powerbreathe.com]() Register Your Warranty | POWERbreathe
Register Your Warranty | POWERbreathe![www.powerbreathe.com]() POWERbreathe | The World's No.1 Breathing Trainer
POWERbreathe | The World's No.1 Breathing Trainer![powerbreathe.com]() POWERbreathe | The World's No.1 Breathing Trainer
POWERbreathe | The World's No.1 Breathing Trainer
Download manual
Here you can download full pdf version of manual, it may contain additional safety instructions, warranty information, FCC rules, etc.
Download POWERbreathe Medic Plus - Makes Breathing Easier Manual
Advertisement


Need help?
Do you have a question about the Medic Plus and is the answer not in the manual?
Questions and answers