
Related Manuals for MUDIX MX-1

Summary of Contents for MUDIX MX-1
- Page 1 MUDIX 1080P Video Projector Model: MX-1 Shenzhen Hifun Technology Co.,Ltd Address: No.12, Longshan Road, Luotian Community, Yanluo Street, Baoan District, Shenzhen China...
-
Page 2: Table Of Contents
CONTENTS IMPORTANT SAFETY INSTRUCTIONS ..................02 SAFETY NOTICE ........................04 PACKAGE CONTENTS ......................04 PROJECTOR COMPONENTS & FUNCTIONS ................05 REMOTE CONTROL BUTTONS ....................06 EQUIPMENT CONNECTION ......................07 INSTALLATION & ADJUSTING ....................08 1. Placement...........................08 2. Adjust The Focus........................08 3. Projection Distance Reference....................09 4. - Page 3 Scan the QR code for more details. ● Please scan the QR code via phone or visit https://mudix.afterservice.vip to REGISTER and EXTEND warranty. ● Defective item received or issues with product, please scan the QR code via phone or visit https://mudix.afterservice.vip to contact our 7/24 after service team.
-
Page 4: Important Safety Instructions
IMPORTANT SAFETY INSTRUCTIONS ● Please read and understand all instructions before using this device. ● Don't change any settings that are not described in this manual. ● Warranty does not apply if personal injury, data loss, or damage occurs as a result of failure to follow instructions. - Page 5 ● Do not put any hazards into the accessories. ● Do not use the projector in the following cases or it may pollute optical elements, reduce product life, and the projection image will be dark: - Wet, dusty, smoky places. - Places where the temperature is above 104°F.
-
Page 6: Safety Notice
SAFETY NOTICE Do not install in Do not install in high unventilated places. temperature or humid places. Do not block the ventilation Do not install in dusty or holes (intake or exhaust) smoky places. PACKAGE CONTENTS ● Projector ● Power Cord ●... -
Page 7: Projector Components & Functions
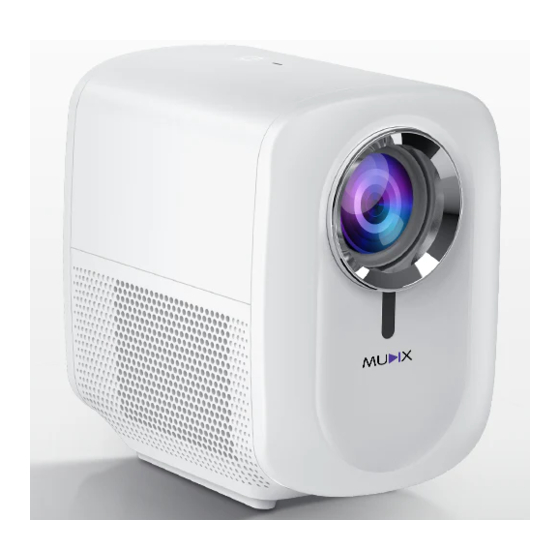
PROJECTOR COMPONENTS & FUNCTIONS Buttons and indicators Lens HD Input Power connector Audio Output - 05 -... -
Page 8: Remote Control Buttons
PROJECTOR COMPONENTS & FUNCTIONS Power on/off REMOTE CONTROL BUTTONS Power Volume - Mute Volume + Home Down Return Left Focus- Right Focus+ Menu - 06 -... -
Page 9: Equipment Connection
EQUIPMENT CONNECTION Signal flow direction Notebook/set-top box HD cable USB Disk Audio Earphone - 07 -... -
Page 10: Installation & Adjusting
INSTALLATION & ADJUSTING Placement Place projector on a flat, stable foundation squarely in front of the projection surface. For best results, the projection surface shall be white and flat. The distance between this projector and the projection surface must be a minimum of 1.2 meters (47 inches). -
Page 11: Projection Distance Reference
INSTALLATION & ADJUSTING Projection Distance Reference The distance between this projector and the projection surface determines the approximate size of the image. Projection distance Projection size Projection size Projection distance (inch) (H*W) (inch) (inch) (H)18.5 (W)31.49 43.4 (H)29.5 (W)52.36 66.9 (H)34.25 (W)61.02 78.74... -
Page 12: Power On/Off
INSTALLATION & ADJUSTING Power On/Off Power on 1. Connect this projector to an electrical outlet by using the provided power cord and adapter. 2. Remove the lens sticker. 3. Press the Power button on the projector to power on. Then turn this projector towards a flat, white projection surface. -
Page 13: Home Page
HOME PAGE To play from HD playback devices, select "HD" and press "Enter". This projector can be connected to various HD playback devices such as a TV box, TV stick, DVD player, set-top box (STB), gaming console, or other devices.To play from HD playback devices, connect this projector to an HD playback device with an HD cable. - Page 14 To play from a USB drive: 1. Insert a USB drive into the USB socket; Select "Video" ,"Music" ,"Photo" ,"Office"and press "Enter"on the Homepage . 3. Select a file, then press "Enter", this projector will play the video or music, or display the photo you selected.
Need help?
Do you have a question about the MX-1 and is the answer not in the manual?
Questions and answers