
Related Manuals for b&o BEOSOUND THEATRE


Summary of Contents for b&o BEOSOUND THEATRE
- Page 1 B E O S O U N D T H E A T R E Assembly Guide 組裝指南 组装指南 組み立てガイド 조립 방법 Руководство по сборке Guia de montagem...
- Page 2 Short part name 1234567891 UK: Welcome to your new Beosound Theatre. Assembly is divided into seven steps. Each box is marked with the step number and a letter for each available variant, for example . Inside the boxes, you will find the parts clearly marked with a circled number or 2 or 3 , and the relevant box number.
- Page 3 Mounting the Beosound Theatre UK: Mounting the Beosound Theatre / CHT: 固定 Beosound Theatre / CHS: 安装 Beosound Theatre / JA: Beosound Theatreの取り付け / KO: 단계 Beosound Theater 장착 / RU: Монтаж кинотеатра Beosound / PT: Montar o Teatro Beosound Screen installation UK: Screen installation / CHT: 安裝螢幕...
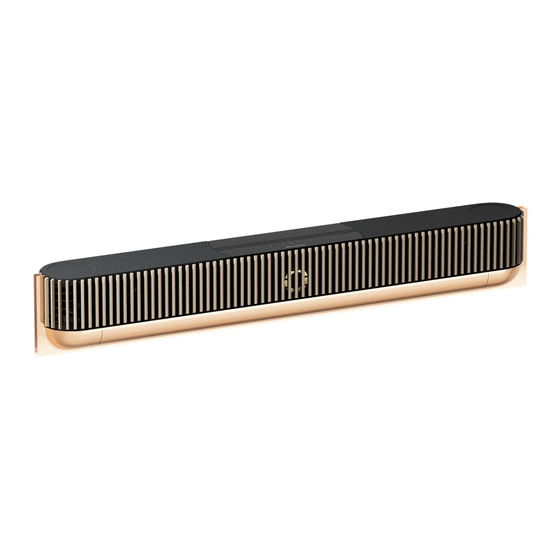
- Page 4 STEP 1 Soundbar preparation and wing application CHT: Soundbar 準備和安裝側翼 / CHS: Soundbar 的准备和机翼的应用 / JA: サウンドバーの準備とウイングの取り付け KO: 사운드바 준비 및 날개 적용 / RU: Подготовка звуковой панели и крепление крыльев PT: Preparação da barra de som e aplicação da asa UK: Lift Soundbar from the box, turn it upside down and place on the foam packaging.
- Page 5 B E O S O U N D T H E A T R E...
- Page 6 UK: If you bought your Beosound Theatre online, the aluminium wings are pre-mounted and you can skip this page. NOTE: Unpack the aluminium side wings depending on the length you have chosen) and place them so they rest on the foam inserts at either end of your Soundbar.
- Page 7 B E O S O U N D T H E A T R E...
- Page 8 UK: Hook on the two lower corner covers 2 and 3 from box at the bottom and rotate into place. Fasten each side with three screws 4 . NOTE: If you mount your Soundbar on a motorized wall bracket, leave the lower corner unmounted on the side the wall bracket will be attached to.
- Page 9 B E O S O U N D T H E A T R E...
- Page 10 UK: Click side covers 5 onto both sides. CHT: 扣上兩側的側蓋 5 時會聽到哢噠一聲, 說明側蓋已經安裝成功。 CHS: 扣上两侧的侧盖 5 时会听到咔哒一声, 说明侧盖已经安装成功。 JA: 両側のサイドカバー 5 を取り付けます。 KO: 측면 커버 5 를 양쪽에 끼웁니다. RU: Защелкните боковые крышки 5 с обеих сторон. PT: Encaixe as tampas laterais 5 em ambos os lados.
- Page 11 B E O S O U N D T H E A T R E UK: Remove the connector cover from the central section by pulling gently. CHT: 輕輕拉動, 從中央部位拆下連接器蓋。 CHS: 轻轻拉动, 从中央部位拆下连接器盖。 JA: コネクターカバーを軽く引っ張って、 中央部から取り外します。 KO: 커넥터 커버를 부드럽게 잡아당겨 중앙 섹션에서 제거합니다. RU: Снимите...
- Page 12 Mounting the Beosound Theatre UK: Mounting the Beosound Theatre / CHT: 安裝 Beosound Theatre 配件 / CHS: 安装 Beosound Theatre 配件 / JA: Beosound Theatreの取り付け / KO: Beosound Theatre 장착 / RU: Монтаж кинотеатра Beosound / PT: Montar o Beosound Theatre UK: Included in the box .
-
Page 13: S C R E E N I N T E R F A C E
S C R E E N I N T E R F A C E B E O S O U N D T H E A T R E G O T O E X T E R N A L G U I D E S EN - Find the assembly instructions for this part on our website. -
Page 14: Wall Mount
Wall mount CHT: 壁掛式支架安裝 CHS: 壁挂式支架安装 JA: 壁掛け KO: 벽걸이 RU: Крепление на стене PT: Montagem em parede UK: NOTE: You need four screws to mount the Soundbar on the wall. Choose suitable screws for the wall in question as these are not included. - Page 15 B E O S O U N D T H E A T R E UK: On the Soundbar: Locate the grooved cylinders in the four corners next to the Soundbar’s connection panel. Mount the four on each, using the supplied screws 2 installation spacers CHT: 在...
- Page 16 Wall mount CHT: 牆壁安裝 CHS: 墙壁安装 JA: 壁掛け KO: 벽걸이 RU: Крепление на стене PT: Montagem em parede UK: On the wall: Place the drilling template from Box against the wall and make sure it is level. For an installation with concealed cabling, the shaded areas on the template suggest the best placement of in-wall sockets.
- Page 17 Bottom of soundbar Centre line Scale 1:5 77” 65” 55” 55” 65” 77” 189.4 [7.5] Beosound Theatre Wall Mount All dimensions are in mm [Inch] 1225 [48.2] Scale 612.5 [24.1] 1446 [56.9] 723 [28.5] 1721 [67.8] 3506029 Version x.x 860.5 [33.9 ] Beosound Theatre Wall Mount 1225 [48.2]...
- Page 18 Wall mount CHT: 牆壁安裝 CHS: 墙壁安装 JA: 壁掛け KO: 벽걸이 RU: Крепление на стене PT: Montagem em parede UK: Connect the relevant cables (see Appendix) and fasten them with the hook & loop fasteners. Cables can easily be routed in any direction on the wall bracket.
- Page 19 B E O S O U N D T H E A T R E UK: Once it is cabled, hang the Soundbar on the wall mount. It can be placed in different positions. Make sure it is securely in the grooves, at your chosen depth.
- Page 20 Soundbar stand CHT: Soundbar 腳架 CHS: Soundbar 支架 JA: サウンドバースタンド KO: 사운드바 스탠드 RU: Подставка для звуковой панели PT: Suporte de barra de som UK: Slide the Soundbar stand over the two lower cylinders next to the connection panel. CHT: 將 Soundbar 支架 滑動到連接面板旁邊的兩個下部氣缸上。...
- Page 21 B E O S O U N D T H E A T R E UK: Fasten with the four screws 2 CHT: 再用四個螺釘 2 鎖緊。 CHS: 再用四个螺钉 2 紧固。 で固定します。 JA: 4本のネジ 2 KO: 4개의 나사 2 로 고정합니다. RU: Закрепите...
- Page 22 Soundbar stand CHT: Soundbar 腳架 CHS: 条形音箱支架 JA: サウンドバースタンド KO: 사운드바 스탠드 RU: Подставка для звуковой панели PT: Suporte de barra de som UK: Connect relevant cables in the connection panel (see Appendix). If you are installing the Soundbar under a TV screen, remove the detachable section in the middle of the cover so the cables can be routed upwards.
- Page 23 B E O S O U N D T H E A T R E UK: Click the connector cover back on. Place the Soundbar at the desired location. CHT: 扣上連接器蓋會聽到喀噠一聲, 然後將 Soundbar 放置在所需位置。 CHS: 扣上连接器盖会听到咔哒一声, 然后将 Soundbar 放置在所需位置。 JA: コネクターカバーを元通りにはめます。 サウンドバーを目的の位置に配置します。 KO: 커넥터...
-
Page 24: Screen Installation
STEP 3 Screen installation 螢幕安裝 / CHS: 屏幕安装 / JA: スクリーンの取り付け / KO: 스크린 설치 / RU: Установка экрана / CHT: PT: Instalação do ecrã UK: If you are installing your Soundbar under a TV, please leave a distance of at least 20 mm. NOTE: If you plan to dock a screen in the Soundbar for an integrated TV solution, follow the link or scan the QR code to our external guide for detailed instructions. - Page 25 S C R E E N I N T E R F A C E B E O S O U N D T H E A T R E G O T O E X T E R N A L G U I D E S EN - Find the assembly instructions for this part on our website.
- Page 26 STEP 4 Finalize cabling and connecting external devices CHT: 完成佈線和連接外部裝置 / CHS: 完成布线和连接外部设备 / JA: 外部デバイスのケーブル配線と接続 / KO: 케이블링 및 외부 장치 연결 완료 / RU: Прокладка кабелей и подключение внешних устройств / PT: Finalize a cablagem e ligue dispositivos externos UK: In the connection socket, you find a wide range of options, allowing you to connect your Soundbar to your TV, speakers and more.
- Page 27 B E O S O U N D T H E A T R E UK: Once all cables are connected, click on all relevant connection covers. CHT: 連接所有纜線之後, 扣上所有相關連接蓋板。 CHS: 连接完所有电缆后, 咔哒一声扣上所有的连接盖。 JA: すべてのケーブルを接続したら、 すべての接続カバーを取り付けます。 KO: 케이블이 모두 연결되면 모든 관련 연결 덮개를 덮고 고정합니다. RU: После...
- Page 28 UK: Download the Bang & Olufsen app from any app store on your smartphone. Create a user account or log in. Follow the instructions in the app to add Beosound Theatre and enable your desired features. By setting up Beosound Theatre in the app, you can be sure you always have access to the latest features.
- Page 29 B E O S O U N D T H E A T R E...
- Page 30 STEP 6 Listening positions CHT: 聆聽位置 / CHS: 聆听位置 / JA: リスニングポジション / KO: 청취 위치 / RU: Положения прослушивания / PT: Posições de audição UK: You can optimize your sound for one or more listening positions in the Bang & Olufsen app. First, remove the protective plastic cover from the speaker drivers.
- Page 31 B E O S O U N D T H E A T R E UK: Unpack the microphone and unfold the legs. CHT: 然後打開麥克風 的包裝並展開支腳。 CHS: 然后打开麦克风 的包装并展开支脚。 JA: マイク を開梱し、 脚を広げます。 KO: 마이크 의 포장을 풀고 다리를 펼칩니다. RU: Распакуйте...
- Page 32 UK: Plug the microphone cable into the Soundbar then switch on by sliding the microphone switch to the far left. CHT: 將麥克風纜線插入 Soundbar, 然後將麥克風開關滑到最左側打開麥克風。 CHS: 将麦克风电缆插入 Soundbar, 然后将麦克风开关滑到最左侧, 打开麦克风。 JA: マイクケーブルをサウンドバーに接続し、 スイッチを左にスライドさせて電源を入れます。 KO: 마이크 케이블을 사운드바에 꽂은 다음 마이크 스위치를 맨 왼쪽으로 밀어서 켭니다. RU: Подключите...
- Page 33 B E O S O U N D T H E A T R E...
- Page 34 UK: Place the microphone in your preferred listening spot. Go to your Bang & Olufsen app and launch the ‘listening position’ feature. Follow the instructions in the app. Once all listening positions have been set, remove the cable. You can add new or different listening positions whenever you wish.
- Page 35 B E O S O U N D T H E A T R E...
- Page 36 STEP 7 Front cover CHT: 前端面板 / CHS: 前盖 / JA: フロン トカバー / KO: 전면 커버 / RU: Передняя панель / PT: Cobertura frontal UK: ON: Locate the arrow on the front cover that shows you which way is up. Align the front cover pins with the sockets and push till the cover sits securely in position.
- Page 37 B E O S O U N D T H E A T R E UK: NOTE: Use the tool in microphone box to remove the front cover. Start at the sides and work your way around, then pull at the top and bottom to remove the cover completely.
- Page 38 APPENDIX Cabling CHT: 佈線 / CHS: 布线 / JA: ケーブル配線 / KO: 케이블링 / RU: Прокладка кабелей / PT: Cablagem UK: Connect the Soundbar to a power point. If you want to add a TV screen, connect the HDMI cable to the TV ARC socket on the Soundbar and the HDMI connector marked with ARC/ eARC on your TV.
- Page 39 B E O S O U N D T H E A T R E...
- Page 40 on.beo.com/beosound-theatre-support...
Need help?
Do you have a question about the BEOSOUND THEATRE and is the answer not in the manual?
Questions and answers