Table of Contents
Advertisement
Quick Links
Advertisement
Table of Contents

Related Manuals for Apogee Jam X


Summary of Contents for Apogee Jam X
- Page 1 Jam X User’s Guide Version 1.0...
-
Page 2: Table Of Contents
Connecting to an iOS Device (Lightning connector) Jam X Lights and Getting Sound Installing Jam X Software Windows 10 Installer Configure the Computer’s OS to use Jam X for Audio I/O macOS Windows 11 Apple iOS Working with Jam X... -
Page 3: In The Box
○ Neural Archetype: Tim Henson Plugin Extended Trial ● Access Apogee’s expert Technical Support for free ● Receive important product update information by email ● Take the Customer Satisfaction Survey for a chance to win Apogee gear! Register Now: https://apogeedigital.com/my-account... -
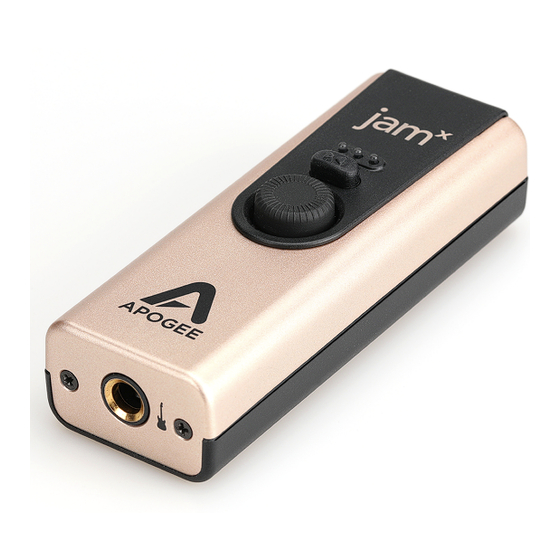
Page 4: Jam X Product Tour
Apogee Jam X User’s Guide Jam X Product Tour... -
Page 5: Connecting Your Studio
Jam X. Connect your instrument Connect Hi-Z instruments such as guitar, bass, keyboards, and synthesizers to the Jam X using a ¼” instrument cable. ● Dynamic mics with XLR plug can be connected using a Hi-Z to Low-Z transformer converter. -
Page 6: Connecting To A Mac Or Windows Computer
Apogee Jam X User’s Guide Connecting to a Mac or Windows computer Using one of the supplied cables, connect Jam X’s Micro-USB B port to any USB-A or USB-C port on your Mac or Windows computer. Connecting to an iPad Pro (USB-C connector) Using the supplied Micro-USB B to USB-C cable, connect Jam X’s to your iPad Pro’s USB-C... -
Page 7: Connecting To An Ios Device (Lightning Connector)
Connecting to an iOS Device (Lightning connector) Using the micro-USB B to Lightning Cable (sold separately), connect to the Lighting port on your iPhone or iPad: Connecting Jam X to an iPhone with Lightning connector Connecting Jam X to an iPad with Lightning connector... -
Page 8: Installing Jam X Software
For macOS and iOS users, no software is required to connect Jam to your Mac, iPhone or iPad. After registering your Jam X at the link below, you’ll receive links to download accessory software: ● Ableton Live Lite, a digital audio workstation;... -
Page 9: Configure The Computer's Os To Use Jam X For Audio I/O
Configure the Computer’s OS to use Jam X for Audio I/O macOS To choose Jam X as the audio interface for Mac applications that don’t have specific audio hardware preferences, such as Safari, Spotify, Voice Memos and others: 1. Open System Settings by choosing Apple menu > System Settings. -
Page 10: Windows 11
Apple iOS Apple iOS (iPhone and iPad) automatically chooses the most recently connected audio interface as the audio I/O device for all applications. Simply connect Jam X to your iOS device’s Lightning or USB-C port as described on page 6-7. -
Page 11: Working With Jam X
Working with Jam X Jam X LED Functionality Use the Jam X’s multi-color LED lights, buttons, and knob to adjust your audio signal level, monitor settings, and compressor presets. Jam X will display a blue LED when first connected via USB. -
Page 12: Blend Mode
Apogee Jam X User’s Guide Blend Mode The Blend mode button toggles Jam X’s signal path between two workflows, Software monitoring and Direct monitoring. These workflows affect how you hear your instrument while recording. Blend Off - Software Monitoring When Blend is off, you hear your instrument AFTER it’s been routed through your Amp Sim app or DAW, as shown below. -
Page 13: Minimize Latency With Software Monitoring
Apogee Jam X User’s Guide Minimize Latency with Software Monitoring Here are a few ways to minimize the latency through your system: 1. Set your Amp sim or DAW software to a sample rate of 96kHz - this divides latency in half. -
Page 14: Configuring Neural Archetype:tim Hensen - Standalone
Apogee Jam X User’s Guide Configuring Neural Archetype:Tim Hensen - Standalone The best way to get started quickly with Jam X is with the supplied Archetype: Tim Hensen guitar amp plugin running in Standalone mode on your Mac or Windows computer. -
Page 15: Configuring Your Daw
Apogee Jam X User’s Guide Configuring Your DAW Find below detailed information to configure Jam X with popular DAWs: ● Configure the DAW to use Jam X ● Configure the DAW for Direct or Software monitoring ● Access Jam X inputs & outputs in the DAW ●... -
Page 16: Avid Pro Tools
● Uncheck Low Latency Monitoring for Software monitoring. ● Check Low Latency Monitoring for Direct monitoring. 2. On the Jam X, press the Blend button: ● Turn Blend off for Software monitoring.. ● Turn Blend on for Direct monitoring through the Jam X. -
Page 17: Ableton Live
In/Out is checked. 3. In each channel, set Monitor to Auto for Software monitoring or Off for Direct monitoring. 4. On the Jam X, press the Blend button: ● Turn Blend off for Software monitoring.. ● Turn Blend on for Direct monitoring... -
Page 18: Troubleshooting
Troubleshooting Q: The LED light stays blue and I can’t turn it green A1: Check if Jam X is recognized by the computer or iOS device. If it isn’t, Your USB cable may be faulty and should be swapped out. -
Page 19: Warranty Information And Legal Notices
12 months. The term of this warranty begins on the date of sale to the purchaser from an authorized Apogee dealer (proof of purchase in the form of a receipt may be required). Units returned for warranty repair to Apogee or an authorized Apogee warranty repair facility will be repaired or replaced with a functional equivalent product that is new or refurbished at the manufacturer’s option, free of charge. - Page 20 (73/23/EEC – Low Voltage Directive) and (89/336/EEC – EMC Directive) Declaration of Conformity – Japan Apogee Electronics Corporation hereby declares that Jam X, to which this declaration relates, is in material conformity with the VCCI Class A standard.
Need help?
Do you have a question about the Jam X and is the answer not in the manual?
Questions and answers