Table of Contents
Advertisement
Quick Links
Advertisement
Table of Contents

Summary of Contents for Dnake DK230
- Page 1 Wireless Doorbell DK230 USER MANUAL...
- Page 2 REMARK Please follow the user manual for correct installation and testing. If there is any doubt please call our tech-supporting and customer center. Our company applies ourselves to reformation and innovation of our products. No extra notice for any change. The illustration shown here is only for reference.
-
Page 3: Table Of Contents
CATALOG Product Features............1 Package Contents ............1 Pictures..............2 Installing Batteries ...........4 Installation Instruction ..........5 Diagram ..............6 Settings..............8 Engineering Mode..........17 Operations..............19 Technical Parameters..........21 Installation & Usage..........23 Safety Instructions ..........25... -
Page 4: Product Features
PRODUCT FEATURES 2.4" TFT LCD display Video resolution: 320x240, with 15 frames per second Wide angle lens and LED for night vision Long standby door camera (battery or DC 12V) Waterproof door camera IP65 Microphone and speakerphone Basic video intercom, monitoring, remote unlocking and tamper alarm feature Adjustable brightness and talking volume Support up to 2 door cameras and 2 indoor monitors... -
Page 5: Pictures
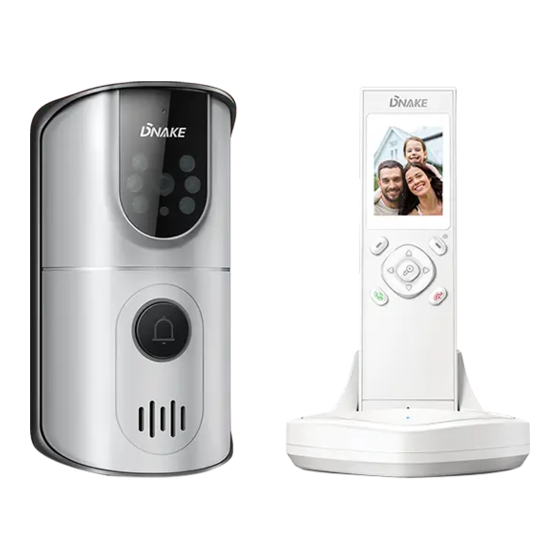
Contents of indoor monitor Power Adapter Indoor Monitor Lithium Battery Charger Base (12V, 500mA) PICTURES Door Camera Microphone LED Lights Camera Sensor Light Call Button Speaker... - Page 6 Indoor Monitor LCD Display Speaker Navigation Key Left Soft Key Right Soft Key Monitor/ Snapshot Accept Key Power/ End Key Battery Unlock Key/ Compartment Charger LED Cover Microphone Charging Pins Charger Charger Base...
-
Page 7: Installing Batteries
INSTALLING BATTERIES Indoor Monitor The rechargeable lithium battery (3.7V, 1100mA) comes with indoor monitor. Install the battery before use. Lithium battery Protective cover Battery case Battery compartment cover 2. Insert new battery as indicated, matching correct polarity(+,-). 3. To replace the battery, slide the cover up until it snaps in place. Notes: 1. -
Page 8: Installation Instruction
Door Camera 1. Install two 1.5V size C batteries (not supplied) into the battery compartment or connect with DC 12V power adapter to turn on the door camera. 2. Drill four screws to fix the battery cover up. Screw Battery Cover Battery INSTALLATION INSTRUCTION Indoor Monitor... -
Page 9: Diagram
DIAGRAM Connection Mode 1 EX-BUT For normally-open lock DC9-12V Lock DC power for Lock DC Power Supply The maximum output current of relay can be 1A. BAT+ Door Camera Backup Power Connection Mode 2 EX-BUT For normally-closed lock DC9-12V Lock DC power for Lock DC Power Supply... - Page 10 Door Camera 1. After wiring from the connection terminal, tighten the cable. Drill the screws on the cable cover of the connection terminal. Cable cover Waterproof EVA Pad Cable 2. Choose a proper location for the door camera. Be sure to consider the average height of visitors.
-
Page 11: Settings
SETTINGS Turning On To turn on the indoor monitor, press and hold Powering on the indoor monitor, the system will enter into the following interface: Note: When the battery power of indoor monitor is insufficient, it will display an indication icon and emit warning tone. - Page 12 Chapter 1: Volume This function allows you to adjust the volume (9 levels are adjustable) during a call. 1. Press Up or Down to choose “Volume” menu, then press beneath Select. 2. Press Up or Down to choose talking volume(9 levels are adjustable), and press Left or Right to adjust.
- Page 13 This function allows you to adjust the brightness (9 levels are adjustable). 1. Press Up or Down to choose “Brightness” menu, then press beneath Select . 2. Press Left or Right to select the brightness level. Each time you press Left or Right , the indoor monitor displays with the selected brightness...
- Page 14 Chapter 4: Ring Tone This function allows you to change the ring tone of indoor monitor (There are three ring tones for your selection). 1. Press Up or Down to choose “Ring Tone” menu, then press beneath Select. 2. Press Up or Down to select the ring tone.
- Page 15 With this Auto Snap On, the camera will take a photo of visitor automatically when visitors press the Call button on the door camera. You can check this photo easily in the indoor monitor. Notes: 1. During the conversation, if you press the Snapshot key, the camera can take a photo of visitor and save it into the indoor monitor.
- Page 16 Chapter 7: Date&Time 1. Press Up or Down to choose “Date&Time” menu, then press beneath Select. 2. To set the time, you can press Left or Right to choose the Hour or the Minute and press the Up or Down to adjust.
- Page 17 1. Press Up or Down to choose “Door Set.” menu, then press beneath Select. 2. To adjust the volume of door camera, you can press Up or Down choose (9 levels are adjustable), and press Left or Right to adjust. 3.
- Page 18 Chapter 10: Wallpaper You can choose different wallpaper. Chapter 11: Version Indoor Monitor Version No. 1 means the first door camera registered in the indoor monitor Door Camera Version No. Press Up or Down to choose “Version” menu, then press beneath Select.
- Page 19 1. Press Up or Down to choose “Monitor Set.” menu, then press beneath Select. 2. Press Up or Down to the select item; Panorama stands for full screen monitor, which is system default; Full screen L stands for left area of monitoring view;...
-
Page 20: Engineering Mode
ENGINEERING MODE Register 1. Firstly, insert the small screw driver on “ ”position inside the battery compartment of door camera for 3 seconds. It will give an indication tone and the backlight of call button will lighten. Secondly, press beneath Menu on the indoor monitor, select the Register menu, press Up or Down to choose one door camera (1-2 are selectable) - Page 21 3. If you want to delete the registration, you can press beneath . The display will show " ?", press beneath to confirm. Press beneath return to the main interface. Notes: 1. The registration of door camera can be up to 60 seconds. 2.
-
Page 22: Operations
OPERATIONS Monitor As for monitoring function, the LCD will automatically display the corresponding menu in accordance with the registered door camera. 1. In the standby mode, press beneath Mon. 2. With one door camera registered, the indoor monitor will enter into monitoring mode directly. - Page 23 3. When the door camera calls indoor monitor, if the indoor monitor has no operation (press ), the indoor monitor will return to the main interface. The flashing icon of missed call will show in the upper left corner to remind the user of view the images. Pressing the End key in the main interface or viewing picture in the “Snap Show”...
-
Page 24: Technical Parameters
TECHNICAL PARAMETERS Detail Item Door Camera Transmit Frequency Range 2.4GHz - 2.4835GHz 2.0Mbps Data Rate Transmitting Power 19dBm(TYP) GFSK Modulation Type about 400m Transmitting Distance(in open area) Color CMOS Image sensor Image Sensor Type Image Processing H.264 640 480 Camera Pixels Auto White Balance Viewing Angle (Diagonal) - Page 25 Item Detail Indoor Monitor 2.4GHz - 2.4835GHz Receiving Frequency Range Monitor 2.4” Color LCD Data Rate 2Mbps Receiving Sensitivity -85dBm Demodulation Type GFSK LCD Resolution 320X240(RGB) Transmitting Power 19dBm(TYP) Power Requirement BL-5C, 3.7V ,1100mA(lithium battery) Power Consumption 400mA Max Operating Temperature -10℃~+55℃...
-
Page 26: Installation & Usage
INSTALLATION & USAGE Since working frequency of this product is 2.4G, wavelength is short and wireless signal has poor penetration, the device will get disturbed from other products of the same frequency. In order to ensure smooth communication, please note the following. 1. - Page 27 Away from electrical appliances, In a HIGH and CENTRAL location such as a TV, personal computer with no obstructions such as walls, or another cordless phone. microwave oven and WIFI. Location Diagram 1 of Indoor Monitor Door Camera ..............Location Diagram 2 of Indoor Monitor...
-
Page 28: Safety Instructions
SAFETY INSTRUCTIONS In order to protect you and others from harm or protect your device from damage, please read the following information before using the device. Do not install the device in the following places: Do not install the device in high-temperature and moist environment or the area close to magnetic field, such as around electric generator, transformer or magnet. - Page 29 V1.2 600110134302...
Need help?
Do you have a question about the DK230 and is the answer not in the manual?
Questions and answers