
Related Manuals for RGNT Motorcycles No. 1 Classic SE


Summary of Contents for RGNT Motorcycles No. 1 Classic SE
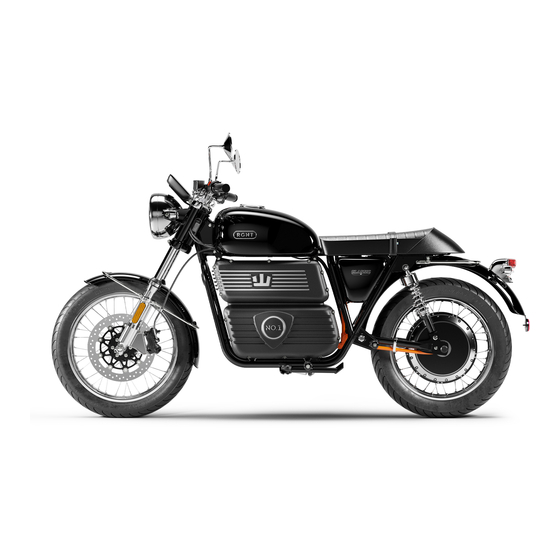
- Page 1 Built in Sweden User Manual No. 1 Classic SE / SEL No. 1 Scrambler SE / SEL User Manual | rgnt-motorcycles.com...
-
Page 2: Table Of Contents
Table of Contents 1. Introduction 2. General safety Information 3. Vehicle Identification Number ( VIN ) 4. Keys 5. Specifications 7. High Voltage Information 8. Motorcycle Controls 9. Brake system 10. HMI / Display 11. Safety check 12. How to Operate the Motorcycle 13. -
Page 3: Introduction
Please read these instructions on how to operate your RGNT motorcycle and safely take care of it. All RGNT motorcycles are internet connected vehicles. RGNT sends and receives motorcycle data via wireless communications over-the-air (OTA).This data is used to monitor the internal electric system of the motorcycle. -
Page 4: General Safety Information
2. General safety Information 2.1. Follow the User Manual RGNT motorcycles are designed and homologated/certified to the highest standards for street and road traffic. The motor- cycle is NOT designed for Off-Road use or Racing. The RGNT is an electric motorcycle. Please pay attention to the warning... - Page 5 • Always maintain a safe speed appropriate to the conditions when driving 2.3. Changes to RGNT No.1 design Only use RGNT Motorcycles approved parts and accessories for your RGNT Motorcycle. Parts and accessories for your RGNT Mo- torcycle have been checked and tested for safety and suitabi- lity.
- Page 6 2.5. Operating The Motorcycle Before you operate the RGNT motorcycle read the “User Manual” carefully. This to make sure to avoid any damages on the mo- torcycle or any accidents that will cause personal injuries. The “User Manual” will tell you how to operate the RGNT No.1 correctly and introduce you to its special features.
-
Page 7: Vehicle Identification Number ( Vin )
3. Vehicle Identification Number ( VIN ) The Vehicle Identification Number (VIN) is located on the right side of the steering stem neck. The VIN is the unique international identification code which provides information about a vehicle, e.g. country, model, year, description, number, owner. - Page 8 3.1. Statutory plate The Manufacturer’s Statutory Plate is located on the left side of the steering stem. 1. Name of manufacturer 2. Vehicle category - license category 3. EU Type approval ID 4. VIN ( Vehicle Identification Number ) 5. Homologated max sound level 6.
-
Page 9: Keys
4. Keys The motorcycle comes equipped with two sets of keys: (1) main key (active) and (2) spare key (passive). Main Key (Active): The main key should be used as your every- day primary key. It is equipped with electronic recognition capabilities, allowing it to recognize the motorcycle when in close range. -
Page 10: Specifications
5. Specifications 5.1. The No.1 Classic SE / SEL GENERAL Front: Total Weight: 161,3 kg J.Juan CBS Brake System Weight Battery: 60 kg Disc Brake:300 mm floating (unmounted) disc 4,5 mm thickness Frame: Swedish quality Steel stainless steel Frame, welded and powder Brake pads: Sintered coated License requirements: EU: A1... - Page 11 4.2. The No.1 Scrambler SE / SEL GENERAL Front: Total Weight: 161,3 kg J.Juan CBS Brake System Weight Battery: 60 kg Disc: 300 mm diameter disc 4,5 (unmounted) mm thickness stainless steel Frame: Swedish quality Steel Brake pads: Sintered Frame, welded and powder coated Rear: License requirements: EU: A1...
- Page 12 6. Motorcycle description 6.1. Pictured from right side Rear reflector License Plate light Tail light Saddle Saddle strap Rear shock absorber Glove compartment / USB C Charge port (2A 5V) Side stand ( left side of motorcycle ) Main battery 10.
- Page 13 6.2. Motorcycle pictured from above Rear turn indicator License Plate reflector Tail light Saddle passenger strap Charging port (Type 2 ) Headlight Front turn indicator Driver footrest Passenger footrest User Manual | rgnt-motorcycles.com...
- Page 14 6.3. Motorcycle pictured from Rear & Front Pictured from Rear Pictured from Front REAR FRONT 1. Tail light 1. Rear view mirror 2. License Plate holder 2. HMI Display 3. Rear turn indicator 3. Headlight 4. Rear reflector 4. Turn indicator 5.
-
Page 15: High Voltage Information
7. High Voltage Information 7.1. Electric systems information RGNT No.1 has two electrical sub-systems: high-voltage (88V) and low-voltage (12V). High-Voltage System The high-voltage system includes the traction battery, in- verter and the vehicle’s motor. NEVER attempt repairs or any other work on the high-voltage system. Any service on the high-voltage system must be performed by a RGNT authorized Service Center with high-voltage experience. -
Page 16: Motorcycle Controls
8. Motorcycle Controls 8.1. Controls & Components HMI Display Left rear view mirror Left brake lever ( Front & Rear brakes ) Light switch control ( headlight, indicators, hazard/war ning light & horn ) Charging port ( Type 2 ) Right control &... -
Page 17: Brake System
9. Brake system 9.1. CBS brakes ( Combined Brake System ) 1. Left brake lever When using the left brake lever - BOTH the Front and Rear brakes are activated. 2. Right brake lever When using the right brake lever - ONLY the Front brakes are activated. -
Page 18: Hmi / Display
10. HMI / Display 10.1. HMI / Display ( Human Machine Interface ) This is the standard view of the HMI / Display when the motorcycle is turned on. Turn-signal Direction indicators ( R / L ) Drive mode Battery level ( % ) Battery temperature Regenerative Braking Date &... - Page 19 10.2. HMI / Display icons Turn-Signal Direction indicators Left & right icons will flash on the display panel when using the “turn-signal control buttons” located on the left side of the handle bar. When pushing the “turn-signal control button” to the left or right, the turn-signal lights will flash both in the front and back to indicate that the motorcycle is turning left or right.
- Page 20 Speedometer: The digital speedometer shows the current speed of the vehicle. It can show the vehicle speed in kilometers per hour ( KM/H ) or miles per hour ( MPH ). 10. Present Power Usage: The Power Usage indicator shows how much Power ( kW ) is being used at any given time during your ride.
- Page 21 10.3. Warning icons Warning icons 1. Turtle Mode icon 2. Warning Motor Temperature 3. Warning Malfunction icon 4. Drive Mode icon 5. Battery Temperature icon Warning icon explanations 1. Turtle Mode icon The Turtle Mode icon tells you that both Power and Speed must be temporarily restricted.
- Page 22 2. Warning Motor Temperature The Motor Temperature icon warns the driver that the power train is HOT and becoming too hot to continue operating at normal capacity. The first step will be automatic deactiva- tion of higher Power Modes. If the power train continues to heat up, the Turtle Mode icon (1) will be displayed to indi- cate that the motorcycle is operating with restricted Power and Speed (55 km/h).
- Page 23 10.4. Notices and Notifications The HMI / Display has Pop-Up Notices which inform the dri- ver of the current state of the bike. The Pop-Up Notices consist of icons and concise information which can be under- stood quickly and easily. Read the information and follow the instructions.
- Page 24 Warning Notices 10.5. Settings Menu Use the HMI Display to access the Settings Menu and configure information via the display panel. Press Settings (1) on the starting display panel, then press Switch View. The settings menu has 4 sub-menus: Vehicle, Privacy, App, System. You will find information about the software and license, as well as privacy options in Settings.
- Page 25 Settings has 4 different categories of settings: (1) Exit (2) Vehicle, (3) Privacy, (4) App, (5) System. NOTE: The Settings Menu is only accessible when the vehicle is in Park mode ( P ) or Neutral mode ( N ). When the vehicle is set to Drive ( D ), Settings will no longer be accessible as a safety precaution.
- Page 26 10.6. Vehicle settings 1. Arrow icon: Exit Menu 2. Trip Meter Clear: Reset Trip meter to zero 3. Trip: Shows trip distance traveled ( KM ) 4. Default Meter: Choose Odometer or Trip, your preference to show in “normal display view” 5.
- Page 27 1. Arrow icon: Exit Menu 2. Display Brightness: Set the Brightness of the display: LOW / MEDIUM / HIGH 3. Units: Choose Metric system units or Imperial system units for your Odometer / Trip Meter 10.7. Privacy Settings Your RGNT Electric motorcycle is an internet connected devi- ce.
- Page 28 1. Arrow icon: Exit menu 2. Privacy Settings Button icons: The Yellow button icon in- dicates that you have agreed to share the information with RGNT. The Grey button icon indicates that you don’t wish to share the information with RGNT. 3.
- Page 29 10.8. App ( Mobile Phone application ) 1. ( Arrow icon ) Exit Menu. QR Code Scan the QR Code with the RGNT mobile phone app when promp- ted in Step 3. This will pair your RGNT motorcycle with your smartphone.
- Page 30 10.9. System Information The System Information menu is where you can find information about the current software and the licenses installed on the motorcycle. The System Information pages are purely informa- tive. There is nothing for you to select or change. System Information page 1 1.
- Page 31 System Information page 2 1. UI: User Interface 2. HMI / DISPLAY: ( Human Machine Interface ) 3. VCU: ( Vehicle Control Unit ) 4. OS: Operating System 5. Licenses: License Information User Manual | rgnt-motorcycles.com...
-
Page 32: Safety Check
11. Safety check 11.1. Safety checklist before each use Before driving any motorcycle, including the RGNT Electric Motorcycle, we recommend that you perform a quick safe- ty check of the motorcycle. By completing this checklist you will ensure that the motorcycle is in good condition before you drive it. -
Page 33: How To Operate The Motorcycle
11.4. Lights safety check • Signal Light indicators: switch the signal-light button Left and Right. Do a visual check. • Brake Light: squeeze the Left or Right brake lever toward the handlebar. Do a visual check. • Headlight: switch through all 3 light modes and do a visual check of each. - Page 34 12.2. Drive Away Fold up the side stand. The motorcycle will switch from Park (P) to Neutral (N) automatically. Press the red Drive ( 2 ) / Kill switch button. The motorcycle will switch from Neutral (N) to Drive ( D ). Drive mode will be shown on the HMI display.
- Page 35 NOTE! Driving in “Dynamic Power mode”, or specifically “Boost Power mode” will generate more heat than in Normal mode. Beware of the temperature limits. If the vehicle tem- peratures are either too cold or too hot, both Dynamic and Boost will be temporarily unavailable. The battery power percentage is also a factor in what “power mode”...
- Page 36 12.4. Regenerative Braking To use Regenerative Braking, twist the throttle (1) forward while driving. Using Regenerative Braking will charge your battery ( maximum 4kW ) and therefore extend your driving range. This function could be deactivated due to extreme cold or heat; a Warning will be shown on the display.
- Page 37 ! WARNING ! Regenerative Braking is insufficient when an urgent stop is necessary. Use BOTH the Right and Left brake levers to make the motorcycle stop as quickly as possible. The brakes are NOT anti-lock (ABS). Always brake with caution when driving. Be extra careful when braking on slippery surfaces like wet tarmac or gravel.
- Page 38 12.6. Neutral mode Stop the motorcycle. Press the red Drive/Kill ( D ) switch button. The Neutral ( N ) icon will be shown on the display. Fold down the side stand to put the motorcycle in Park ( P ) mode. 12.7 Shut down &...
- Page 39 Put the motorcycle on either Neutral ( N ) or Park ( P ) mode. Quick-press (0.5s) the Off ( 1 ) button. NOTE: Have your main key close to the motorcycle seat area. For example in your jacket or pants pocket. The bike needs to be in Neutral or in Park to be able to shut down.
-
Page 40: How To Charge
Press and hold ( 1 ) the off button for 3-seconds until you hear the lock mechanism engage. The steering lock is now locked. NOTE: If the steering lock won’t engage, wiggle the handle- bars Left and Right. Make sure that the handlebar is all the way Left at the steering stop. - Page 41 NOTE: The charging outlet will show a green pulsating light while charging. If the light is yellow, the cable has been connected but for some reason the motorcycle has not star- ted charging (this is normal for the first few seconds after plugging it in).
- Page 42 Unplug the charger connector ( 2 ) by pulling it upward. Close the charge port lid. NOTE: Have the main key close to the motorcycle seat area. For example in your jacket or pants pocket. User Manual | rgnt-motorcycles.com...
-
Page 43: Troubleshooting
14. Troubleshooting 14.1. Troubleshooting Possible situation 1 Feedback from motorcycle: 1+2 Flashes from indicators and icons Cause: The motorcycle cannot find the key Solution: A. Put the key on the seat. B. If this does not work, open the locked compartment on the right side under the seat and follow the instruction sticker inside the lid. -
Page 44: Cleaning And Storing
15. Cleaning and Storing 15.1. Washing CAUTION! Do not use any harsh chemical products on plastic parts. Be sure to avoid using cloths or sponges which have been in contact with strong abrasive cleaning products, sol- vent or thinner, fuel (gasoline), rust removers or inhibito- rs, brake fluid, antifreeze or electrolytes. -
Page 45: Wheels And Tires
If the motorcycle battery is below 0°C degrees, the motorcycle will have reduced power while driving until the battery warms up to above 0°C degrees. To indicate that the motorcycle has reduced power the Turtle Drive icons will be shown on the display. CAUTION ! If the electric motorcycle is stored for a longer period of time at a higher or lower temperature than recommended, it is... - Page 46 16.3. Visual Inspection Each time before riding your motorcycle, check both the front and rear tires to be sure they are not cut or show any other mechanical damage. If damage occurs, replace the tyre imme- diately. Check that tyre tread depth is sufficient according to the laws and regulations of the country where the vehicle is being used.
-
Page 47: Removing The Back Wheel / Engine
16.5. Maximum Load RGNT No.1 Classic & Scrambler Gen 2.0 330 kg (727 Lb) Total weight of rider, passenger, cargo & accessories 17. Removing the Back Wheel / Engine NOTICE: Removing the back wheel/engine, for example to change a tire or fix a flat is ONLY to be performed by an authorized RGNT service technician. -
Page 48: Adjusting The Suspension
18. Adjusting the Suspension 18.1. Adjusting the rear suspension The Classic Shock absorber The Scrambler Shock absorber RGNT No.1 has shock absorbers with adjustable spring pre-ten- sioning. The settings can be adjusted at your RGNT Service Center or by yourself with a special tool. If you don’t have this shock adjuster tool contact an authorized RGNT dealer or contact us directly on our homepage. -
Page 49: Safety Check Brake System
19. Safety Check Brake System 19.1. Brake-fluid control The brake fluid reservoir window allows you to check the le- vel of the brake fluid visually without having to open the container. First, put the bike on a level surface. The bike must be as upright as possible, both horizontally and verti- cally. - Page 50 19.2. Brake-disc maintenance check Picture shows Front disc brake 19.3. Front brake disc Classic & Scrambler 2.0. The front brake disc has a thickness of 4.5mm. Maximum wear before replacing the disc is 1.0 mm. If the measured brake disk is below 3.5 mm, change the brake disk and brake pads.
- Page 51 19.5. Brake pad check The RGNT No.1 Scrambler & Classic are equipped with a CBS brake system. Brake pad thickness when new is 6.8 mm. Maximum wear before replacing the brake pads is 3 mm. If the thick- ness of either brake pad is less than 4 mm, replace both bra- ke pads at the same time.
-
Page 52: Service Recommendations
20. Service Recommendations The RGNT No.1 Classic & Scrambler Electric Motorcycle requi- res less service than a traditional combustion motorcycle, because they are electric. However, it is still very impor- tant that a RGNT Motorcycle be inspected by an authorized RGNT Dealer at regular intervals. -
Page 53: Customer Support Information
21. Customer Support Information When contact RGNT Support Please have the following available when contacting RGNT Motorcycles AB. As they are essential to efectively and efficiently answer your questions or resolve your concerns. • Contact name and address • Contact telephone number: •... -
Page 54: Report A Warranty Claim
22. Report a Warranty Claim If you want to report a warranty claim of the RGNT motorcycle. First make sure that the motorcycle warranty period is still active. The standard warranty covers 2 years on the Chassi and 3 years on the main battery. The Standard warranty begins from the date you purchase &... -
Page 55: Warranty Terms And Conditions
23. Warranty Terms and Conditions RGNT Electric AB ( RGNT ) warrants that, dependent upon the exclusions and limitations set out below, the RGNT No1 ve- hicle purchased by you will be without defects in materials and workmanship, when used normally, in accordance with our published guidelines. - Page 56 The location is subject to change at any time and without prior notice. §6 The tires installed on the RGNT Motorcycles. The original equipment tires are warranted separately by the tire manu- facturer. ( Avon tires ) What is excluded §1...
- Page 57 §3 This Warranty supersedes all other RGNT Electric AB warran- ties and liabilities, whether oral, written, (non-mandatory) statutory, contractual, in tort or other, including, without restriction, and where allowed by applicable law, any implied conditions, warranties or other terms as to adequate quality or fitness for purpose.
- Page 58 §7 Warranty is only covers “Normal operating conditions” If we the bike has been used off road or used for competition on closed circuit warranty will not cover this. If RGNT deter- mine that the vehicle has been negligent and not been taken care of with in “Normal operating conditions”...
- Page 59 §13 Damage, malfunctions, or performance problems caused by con- tinued operation of the motorcycle after a warning light, gauge reading, or other warning indicates a mechanical or operational problem. §14 RGNT reserves the right to change or improve the design of any RGNT Motorcycle at any time, without assuming any obliga- tion to modify any RGNT products previously manufactured or sold.
- Page 60 The End Did not find what you were looking for? E-mail us: support@rgnt-motorcycles.com User Manual | rgnt-motorcycles.com...
Need help?
Do you have a question about the No. 1 Classic SE and is the answer not in the manual?
Questions and answers