
Subscribe to Our Youtube Channel
Related Manuals for Pello Ripple

Summary of Contents for Pello Ripple
- Page 1 Owner’s Manual All content © 2023 Pello Bikes Printed on climate pledge friendly paper...
-
Page 2: Table Of Contents
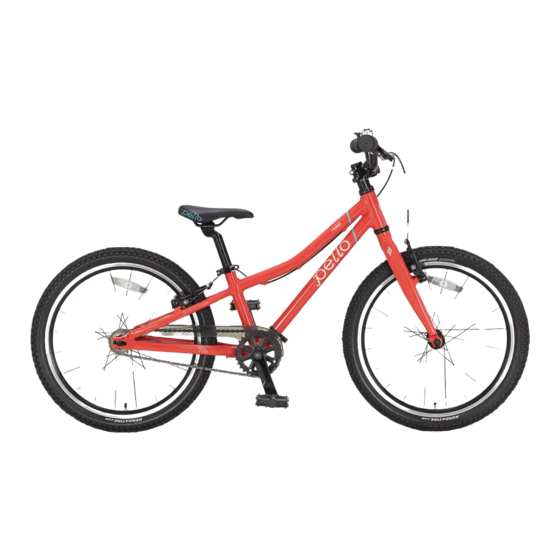
Beyond that, you will even find some tips for maintaining your bike and keeping it in its best working order in the fu- ture. If you have any questions or issues with your Pello bike now or in the future, please drop us a note at info@pellobikes.com... - Page 3 Get to know your Pello balance bike (Ripple) Frame Brake Lever Tire 12 Rim 16 Reflector Fork V-Brake 10 Spokes 13 Saddle Bell Stem Valve Stem 14 Seatpost Handlebar Headset (Schrader) 15 Seatpost Clamp...
- Page 4 Get to know your single speed Pello (Romper, Revo & Reddi) Frame Brake Lever Tire 16 Pedal 20 Chain guard Fork Brake 10 Spokes 13 Crank Arm 17 Saddle 21 Chain Bell Stem Valve Stem 14 Chain ring 18 Seatpost 22 Reflector...
-
Page 5: Get To Know Your Pello
Get to know your geared Pello (Rover, Reyes & Roovi) Frame Shifter Spokes 13 Chain ring 18 Seatpost Clamp 22 Water Bottle Cage Fork Stem 10 Valve Stem (Presta) 14 Bottom Bracket 19 Chain guard Mounting Bolts Handlebar Headset 15 Pedal 20 Dérailleur... -
Page 6: What Do I Need To Put It Together
Install reflectors and bell Please read all instructions first before assembly. There was a lot of care given in packing your Pello to ensure it made it to Reddi you without damage. Please use care when unpacking your new Pello and please recycle responsibly. -
Page 7: Assembling Your Bike
*(If your tires are directional please look on side of tire for the directional arrow.) Reddi, Rover & Reyes Step 3/3 Ripple, Romper & Revo = Align stem and fork so they are both Quick faceing forward. The fork is properly oriented when the fender Release eyelet is facing the rear of the bike. - Page 8 fit your child (refer to bike fit section for tips) then tighten images below). the bolts 1/4 turn at a time in an X-pattern (Ripple, Romper, Revo & Axle is securely Roovi) and Top-Bottom (Reddi, Rover & Reyes). The faceplate should...
- Page 9 Assembling your bike cont... Step 1/2 Continued Step 2/2 Tighten in X-Pattern (Ripple, Romper, Revo & Roovi) Please reference the images below for proper Cable Routing after handlebar instalation. Ripple Rear brake cable Romper, Revo, Reddi Rear brake Tighten Top-Bottom (Reddi, Rover, Reyes)
- Page 10 Connect the Front Brake (Romper, Assembling your bike cont... Revo & Reddi) Step 2/3 *Please note that the Romper comes equipped with a rear coaster and rear hand brake. The rear hand brake is already connected and Squeeze the brake arms together until the pads adjusted.
- Page 11 Assembling your bike cont... Step 3/3 Install the Pedals While continuing to hold the brake arms together, slide the end of the brake noodle into the slot on the You will find the pedals in the small parts box. They are marked L for noodle holder.
- Page 12 You can sitting on the bike. adjust the bell hammer by rotating it as needed. *Note: Ripple, Romper & Revo bell have a small shim inside the clamp.
-
Page 13: Bike Fit
Bike Fit Saddle Height Saddle Height & Position 6mm bolt for saddle A good starting point is to have your child stand next to the bike saddle, adjustment angle and forward adjust the saddle height to the height of their hips by loosening the Quick or back position. -
Page 14: Checklist, Review And First Ride
Also, ensure they are able to engage the coaster brake on Pello bikes that are OK, now that the Pello is fitted properly and you’ve gone through the equipped with one (Romper). -
Page 15: Maintaining Your Bike
Please refer to the included RST owners manual or visit (www.rstsus- Note: The Ripple has a schrader type valve that does not require the pension.com/en/) for maintenence requirements. valve adapter or to unscrew the valve. -
Page 16: Safety & Riding Tips
Safety Tips Reflectors All Pello bikes come with a white reflector on each wheel, and one front Always wear a helmet (white) and one rear (red) reflector. Reflectors are an important safety When riding your Pello make sure to always wear a helmet that is properly feature and are legally required. -
Page 17: Growpello
Satisfaction Guaranteed (Return Policy) GrowPello We want you and your little one to be totally content with your new Pello purchase. To make sure you and your child love your new Pello, we offer a 60-day full refund guarantee. Sort of like buying a new pair of shoes, generally wear them around a bit but don’t wear them out, and if... - Page 18 Monthly Maintenance Tracker Yearly Maintenance Tracker Service(s) Performed Date Service(s) Performed Date...
-
Page 19: Journal
Journal How was the ride today? -
Page 20: Color The Bike
Color the bike with your unique style:) - Page 21 All content © 2023 Pello Bikes...
Need help?
Do you have a question about the Ripple and is the answer not in the manual?
Questions and answers