Table of Contents
Advertisement
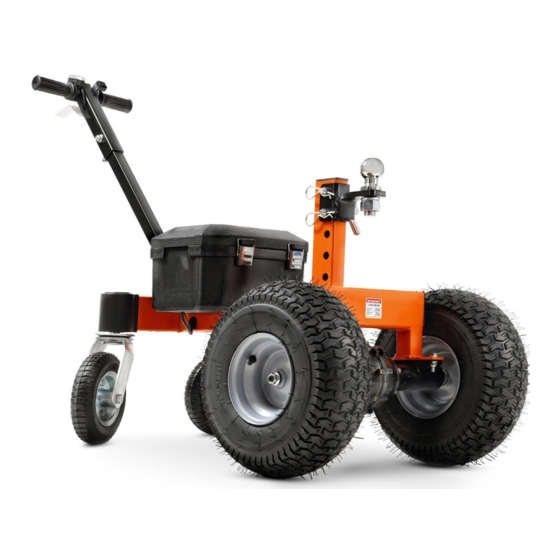
Electric Power Dolly
Operator's Manual
WARNING:
Carefully review and understand all INSTRUCTIONS prior to operating this device. Failure to
follow the safety rules and other basic safety precautions may result in serious personal injury.
Keep these instructions in a safe place and accessible so that they can be reviewed as required.
Keep these instructions to assist in future servicing needs.
REV 1.0
Advertisement
Table of Contents

Summary of Contents for Super Handy GUO092
- Page 1 Electric Power Dolly Operator’s Manual WARNING: Carefully review and understand all INSTRUCTIONS prior to operating this device. Failure to follow the safety rules and other basic safety precautions may result in serious personal injury. Keep these instructions in a safe place and accessible so that they can be reviewed as required. Keep these instructions to assist in future servicing needs.
- Page 2 WARNING • Thoroughly review the "Installation and Operation Guidelines" and familiarize yourself with your electric dolly and its operation. • Never store the battery pack together with nails, screws, keys and other metallic or sharp objects. These items may cause short circuit of the battery terminal resulting in damage to the battery and may cause a fire, endangering personal safety.
-
Page 3: Technical Specifications
SuperHandy electric power dolly is compact in structure and convenient in operation. It is used for towing trailers, RVs, etc. equipped with ball head couplings. It has the functions of forward, backward and steering, and can achieve movement over short distances or in compact spaces. GUO092 Description Electric Power Dolly... - Page 4 1. Steering switch: Control the dolly to move "forward" or "backward" 2. Speed regulating switch: Adjust the running speed of the dolly 3. Connecting rod: Connect the handle and the bracket 4. Power switch: "Turn on" or "Turn off" the power supply of the dolly. Please turn off the power supply when not in operation 5.
- Page 5 Figure 3 Figure 4 3. Assemble swivel wheel 4. Assemble rear wheel Align the Swivel wheel fixing shaft with the First, remove the plastic sheath on the rear hole under the bracket (Step 1); Insert axle transmission shaft, and remove the flat M8x55 bolt (Step 2);...
- Page 6 7. Terminal connections Insert the terminals for the speed regulating switch, steering switch and controller tightly. 8. After checking that the wiring harness is connected accurately, replace the case cover and secure the buckle (Step 1); Cover the pipe plug for sealing (Step 2). Figure 8 9.
-
Page 7: Operation
Power Switch Connection Caution: Incorrect power switch cable connection may cause a short-circuit, it may lead battery destroy, fir or physical danger. Controller “-”(Black) Battery “-”(Black) Controller “+”(Red) Battery “+”(Red) Contol Switch Controller Motor Connection Electrical schematic diagram Power switch Phase line Battery pack... - Page 8 5. Be sure the towed trailer weighs less than1620kgs/3600Lb, and tongue weight is less than 270kgs/600Lb. 6. The towing road is required to be flat, with an uphill angle of less than 4°. This equipment is not equipped with a brake device, so it cannot be parked on a ramp. Selection of ball head position 1.
- Page 9 Power Switch D/R Switching Battery Button Speed Regulating knob 2. Switch on the power switch, and press the battery button on the speed regulating switch (the battery indicator lights up). Pull the steering switch to position "D" for dragging, and position "R"...
- Page 10 Swivel wheel replacement a. Loosen the screws on the wheel cover b. Align the fixing shaft of the Swivel wheel (No.14) and remove the wheel cover. with the shaft sleeve in the bracket, insert Then remove M8 bolt (No.13) and nut, M8 bolt in alignment with the mounting and take out the Swivel wheel hole and tighten the nut, and then fix the...
- Page 11 Battery “-”(Black) Controller “-”(Black) Controller “+”(Red) Battery “+”(Red) b. Align the power switch with the square hole of the cover and directly press it to the bottom to ensure that the chuck is hooked firmly. Plug in the terminal according to the Electrical Schematic Diagram in Section 5.2, and then turn on the power supply after confirmation with no errors.
- Page 12 a. Open the upper cover of the battery case, locate the connecting terminals of the steering switch, the speed regulating switch and the controller according to the Electrical Schematic Diagram, and remove them. Loosen the bolts Loosen the bolts b. Loosen the bolts between the handle bar c.
-
Page 13: Maintenance And Storage
Wire Terminal connection f. Thread the wire into the connecting rod, and then through the front end of the bracket into the battery case. Assemble the handle bar assembly with the connecting rod, and the connect- ing rod with the bracket, and insert the wire terminal with the terminal of the controller tightly. g. -
Page 14: Troubleshooting
TROUBLE SHOOTING Problem(s) Possible Cause Corrective Action Power dolly do not works. Power shut down. 1. Check the battery status make sure it in full . 2. Check the power switch in power on status. 3. Check the connect cable without loose Power dolly stop during 1. - Page 15 Part No. Description Q’ty Part No. Description Q’ty Hexagon flange lock nut M10 Battery case cover Rear axle 24V~800W Charger 24V 2A 13-inch power wheel DC socket Ordinary flat key 5x5x28 Case body Handle sleeve Battery 12V 7Ah Speed regulating switch Connecting rod Square pipe plug 40*40 Hexagonal-head bolt M10x16...
- Page 16 Great Circle USA Support Line: 1-866-493-0524 help@greatcircleus.com www.greatcircleus.com Size: 145x210mm 157克双铜 REV 07/14/22 6.02.00006...
Need help?
Do you have a question about the GUO092 and is the answer not in the manual?
Questions and answers