
Summary of Contents for NSi INDUSTRIES TORK DLC400BP
- Page 1 INSTRUCTION MANUAL DLC400BP DIGITIAL LIGHTING CONTROLLER 888.500.4598 FOR TECHNICAL SUPPORT: 888.500.4598 www.nsiindustries.com 03.14 MLI-188 (B)
-
Page 2: Table Of Contents
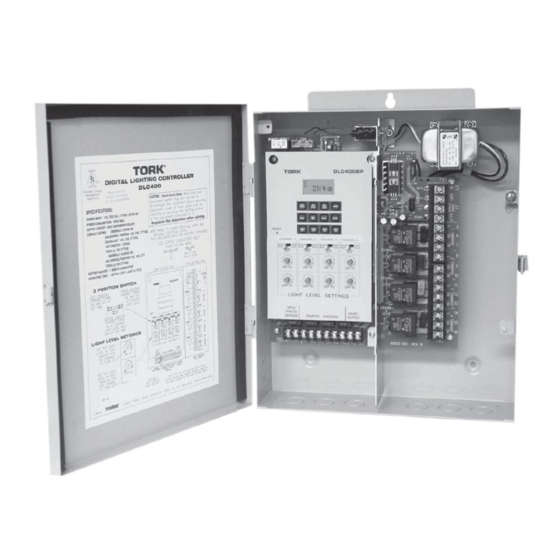
TORK MODEL DLC400BP DIGITAL LIGHTING CONTROLLER TABLE OF CONTENTS CAUTION: RISK OF ELECTRIC SHOCK – More than one disconnect switch may be required to de-energize the equipment before servicing. Disconnect power at main Section Page panel prior to installing or servicing this lighting control or Installation Instructions and Grounding . -
Page 3: Selection Of Function Modes And Light Level Settings
SELECTION OF FUNCTION MODES AND LIGHT In this illustration, the light level for ON fc is about 30 Foot- LEVEL SETTINGS: Candles, and the light level for OFF fc is about 10 Foot- Each channel can be assigned via the slide switches to one Candles. -
Page 4: Instructions For Setting The Unit
Maintained Input, Remote Override: INSTRUCTIONS FOR SETTING THE UNIT Connect unit to main power source prior to entering the Each channel has an isolated contact closure remote over- settings. When powering up the unit for the first time, allow ride input. This input can be used for “after hour” needs. 1-2 minutes before the display will show 12 HOUR. -
Page 5: To Set The Clock
1.0 TO SET THE CLOCK Press HOUR and MIN to advance to the present hour and minutes. Check AM/PM, and press ENTER. 1.1 TO MODIFY THE CLOCK Press ENTER then go to step 4.0. Press MODE until the display shows: CLK. Press HOUR and MIN to modify the clock and press ENTER. -
Page 6: Set Individual Holiday Dates
4.0 SEASON DURATION SET 5.0 SET INDIVIDUAL HOLIDAY DATES Up to 4 different season durations can be set by entering Press MODE until display shows: the START and END dates. MO TU WE TH FR SA SU NOTE: If season durations are not set, they will not appear on the schedule and astronomic mode. -
Page 7: Setting Days, Holidays And Seasons
6.2 SETTING DAYS, HOLIDAY AND SEASONS Press ENTER. The display will show: Press SELCT to select the flashing desired days, holiday 2 3 4 SE ASON 1 2 3 4 and/or seasons, otherwise press DAY to skip and then ASTRO MO TU WE TH FR SA SU press ENTER. -
Page 8: Astronomic On And Time Off
7.2 ASTRONOMIC ON AND TIME OFF 7. ASTRO MODE: Press SELCT to select desired channel. Set astronomic ON per sections 7.0 and 7.1. Press LAT to change latitude. Press ENTER. Press DAY TIME OFF: and SELCT to add or delete days in the sunset mode. Press MODE until “sch01”... - Page 9 Press EVENT, the display will show: Season Start Date End Date Description Holiday (H) Press ENTER briefly and everything in the timer memory is Date Description wiped off including real time and date. 12HOUR will flash. Light Level Channel 1 Channel 2 Channel 3 Channel 4...
Need help?
Do you have a question about the TORK DLC400BP and is the answer not in the manual?
Questions and answers