Advertisement
Strainoptics Laser GASP
CAUTION: DO NOT LOOK DIRECTLY AT THE LASER LIGHT.
Note: You have been provided a full instruction manual in addition to this Quick-Start Guide.
Please refer to the complete manual for further details on the initial setup, general operation, &
maintenance requirements of the GASP.
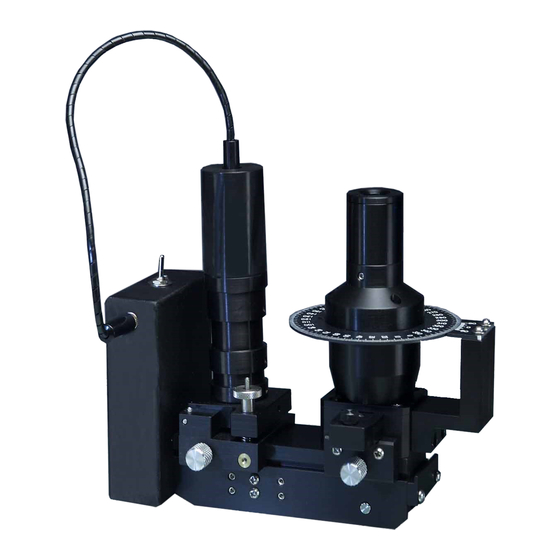
LCD-GASP
F. Input Head Tilt-Adjust Knob
A. Battery Pack
E. Input Head Locking Knob
1. SET UP GASP ON CAL-PLATE:
a. Remove the cal-plate from behind the foam in the lid of the carrying case & place it lengthwise on
table perpendicular to your body so the painted surface (the "tin side") is facing up.
b. Remove the matching index fluid ("MIF") and place a small amount (~10mm diameter) of MIF on the
clear, rectangular measurement location on the cal-plate.
c. THEN remove the GASP from the case and place it on the MIF so that the Six Screwheads ("C" in
the diagram above) are on top of the MIF in the window on the cal-plate with the camera head ("D"
above) facing you. This will ensure adequate optical contact of the prisms with the cal-plate.
2. TURN ON GASP: Turn on the power to both the laser and the LCD monitor separately.
a. Laser: with the battery pack ("A" above) power switch in the OFF position, plug the small jack for
the Input Head ("B" above) into the side of the battery pack. Turn ON the power switch.
b. Monitor (for LCD-GASP): push the power button on the back of the LCD screen to turn the monitor
on. Make sure "CH1" is displayed.
3. OBTAIN IMAGE ON CAL-PLATE: If you removed your GASP from the case carefully, you should not
need to adjust it to measure the surface stress of the cal-plate. If you do not see an image in the eyepiece
or on the LCD Monitor, follow the instructions below to obtain an optical image.
a. To maximize light intensity – With your eyes level to the cal-plate, you should be able to see the
laser light exiting the glass edge. Loosen the input head locking knob ("E") and, while observing the
Quick-Start Guide
C. Six Screwheads
or LCD GASP
®
B. Input Head
D. Eyepiece Tube
or
Camera Head
(LCD & Auto-GASP)
®
I. Protractor Dial
J. Degree Indicator
H. Compensator Assembly
G. Mirror Pivot Lever
(not shown)
Advertisement
Table of Contents

Related Manuals for Strainoptics Laser GASP

Summary of Contents for Strainoptics Laser GASP
- Page 1 Strainoptics Laser GASP or LCD GASP ® ® Quick-Start Guide CAUTION: DO NOT LOOK DIRECTLY AT THE LASER LIGHT. Note: You have been provided a full instruction manual in addition to this Quick-Start Guide. Please refer to the complete manual for further details on the initial setup, general operation, &...
- Page 2 THE UV LAMP THAT CAME WITH YOUR GASP (Strainoptics Part #UV-1301). To minimize the possibility of damage to the Laser GASP’s prisms, be sure that the glass is free of abrasives. If you are having difficulty using your GASP, please contact Strainoptics at 215-661-0100 or stress@strainoptics.com...
Need help?
Do you have a question about the Laser GASP and is the answer not in the manual?
Questions and answers