Advertisement
Specifications
| AD7-MD | AD7-RS | |
| Scout STX, SPX, SKX, SJX |  | |
| PJX | | |
| EX, AX, PX, PR, PA, PAJ | | |
| R41, RC41, R71, TD52, T24PE | |
Unpacking
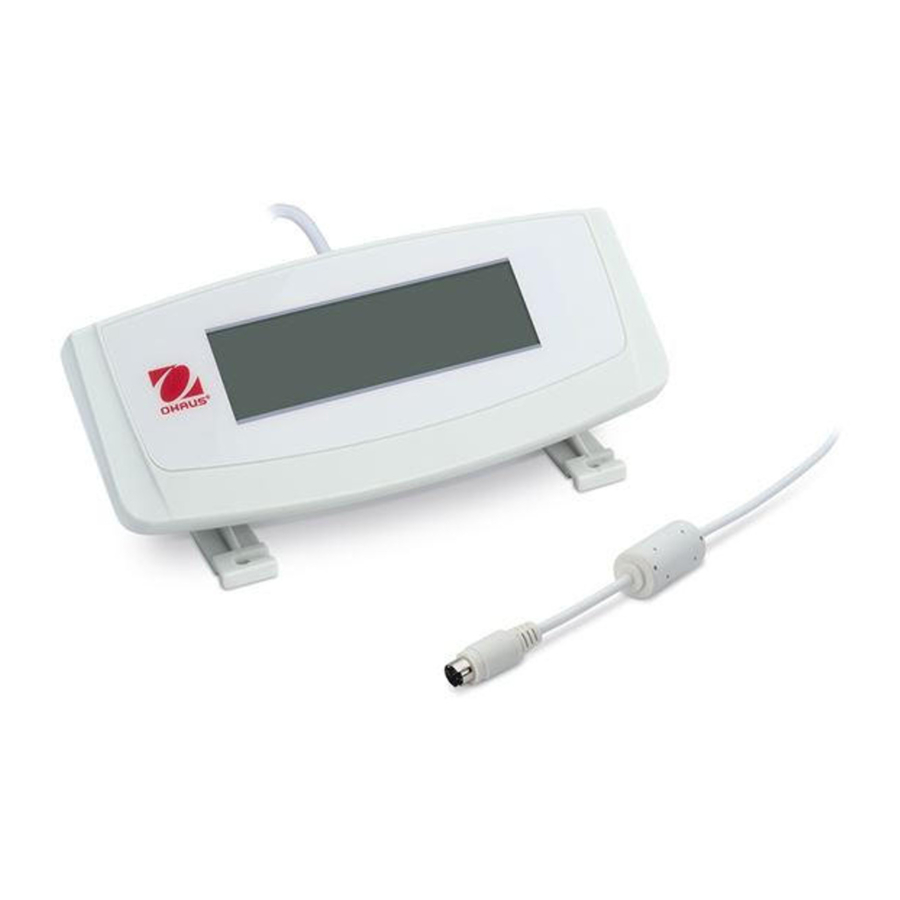
Carefully unpack the Auxiliary Display kit. The package should contain:
- Auxiliary Display with attached cable
- Mounting brackets (2)
- This instruction sheet
Installation
- For AD7-MD Model
- Unplug the Balance from AC adapter.
- Connect the cable from the Auxiliary Display to the option port on the Balance.

- Connect the AC adapter to the Balance and turn on. Then the Auxiliary Display will operate automatically.
- For AD7-RS Model
- Unplug the Balance or Scale.
- Connect the RS232 from the Auxiliary Display to the RS232 port of the Balance or Scale.

- Connect AC adapter (not included; contact OHAUS if you need) to the cable of the Auxiliary display.
- Connect the power to the Balance or Scale and turn on. Then the Auxiliary Display will operate automatically.


Note:
- Please make sure your Balance or Scale's RS232 configuration is either one of below:
- 9600-8-N-1, Handshake: None
- 2400-7-N-2, Handshake: None
- If communication is lost (Auxiliary Display will show "------"), turn the balance off and on to restore the connection with the Auxiliary Display.
- You can find the supported OHAUS Balances and Scales in the Specifications Table on the back page.
Display Mounting and Placement Options
Table top placement:
The Display may be placed on a flat surface without additional hardware.
Direct wall mounting:
The Display may be mounted to a wall using two screws (not included). Select appropriate sized screws that fit into the holes in the back of the Display.
Bracket wall mounting/table mounting:
Attach the two mounting brackets. Position the Display where desired on the wall or table.
Note: When installing the mounting brackets, insert round pins into holes in the back of the display and then slide each bracket to lock into place. Mounting brackets may be attached in two different orientations to provide optimum viewing angle.
Technical Data
| Model | AD7-MD | AD7-RS |
| Ambient Temperature | 5°C to 40°C | |
| Relative Humidity | 15% to 80% at 31°C non-condensing, decreasing linearly to 50% at 40°C | |
| Height above Sea level | Up to 2000m | |
| Storage temperature range | -10°C to +60°C | |
| Power requirements | 5V  40mA 40mA | 12V  50mA 50mA |
| Protection | Pollution degree 2, For indoor use only | |
This product complies with the applicable harmonized standards of EU Directives 2011/65/EU (RoHS) and 2014/30/EU (EMC). The EU Declaration of Conformity is available online at www.ohaus.com/ce
Register your accessory under Warranty Registration at www.ohaus.com
Ohaus Corporation
7 Campus Drive
Suite 310
Parsippany, NJ 07054, USA
Tel: +1 973 377 9000
Fax: +1 973 944 7177
www.ohaus.com
With offices worldwide

P/N 30474230 A  2018 Ohaus Corporation, all rights reserved

Documents / Resources
References
Download manual
Here you can download full pdf version of manual, it may contain additional safety instructions, warranty information, FCC rules, etc.
Download OHAUS AD7-MD, AD7-RS - Auxiliary Display Installation Instructions
Advertisement
Thank you! Your question has been received!
Need Assistance?
Do you have a question about the AD7-MD that isn't answered in the manual? Leave your question here.