Advertisement
Introduction
Thank you for purchasing Philips-branded products. For your safety, please read this user manual carefully before using the product. Any personal injury, property or other loss caused by not following the user manual or precautions, no liability will be assumed by Philips.
Please read this user manual carefully before using this product.
To register your product(s) and get support from below site:
www.philips.com/support
Kind reminder:
This user manual is used as a guide. The photos, pictures, or illustrations provided in the manual are for explanation purposes, which may differ from the specific product, please refer to the actual product. Due to product version upgrade or other needs, Philips may update this manual timely without advanced informing. If you need the latest version of the manual, please download it from the Philips website (www.philips.com/support). The copyright of any part from this manual, including text, pictures or illustrations, belongs to Philips. Without written permission, no corporation or individual may extract, copy, translate, or modify all or part of this manual in any way. Unless otherwise agreed, Philips does not make any express or implied representations and guarantees.
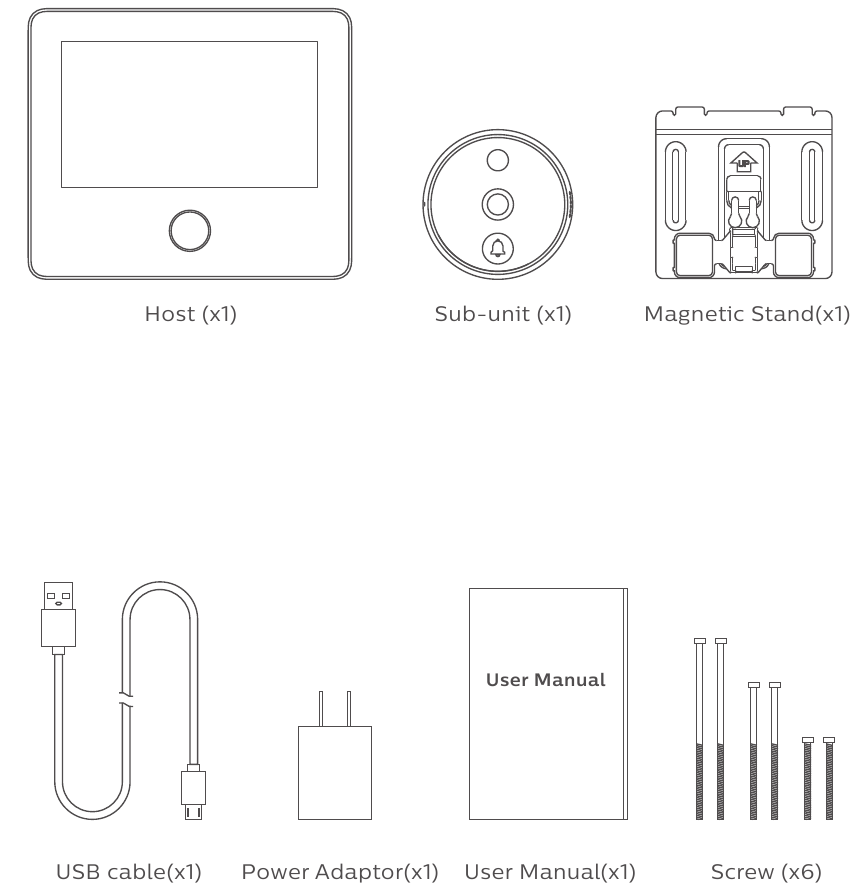
Packing List
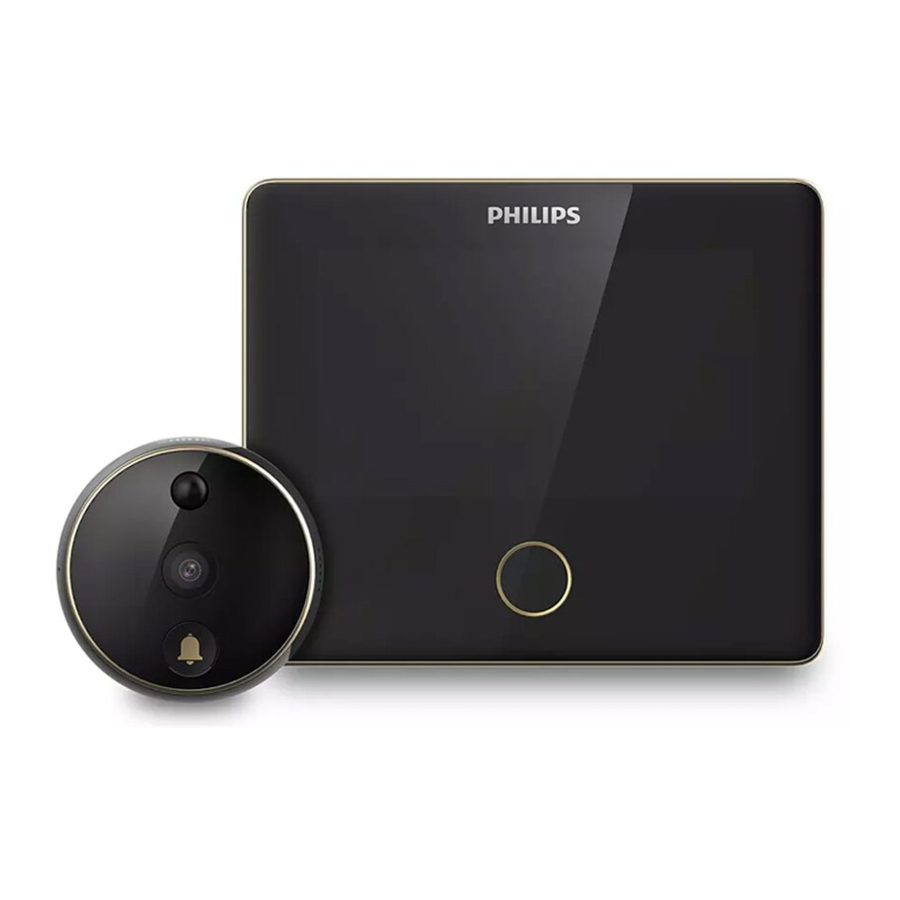
Appearance overview
Indoor host

Outdoor sub-unit

Installation
Confirm installation position
If there is no hole on the door, please drill one with a diameter of 15 ~ 30mm at the height of 145cm from the ground.
If there is a hole on the door and installed with a peephole, please remove the peephole and install the smart door viewer. The hole diameter range should be 15~50mm.

Please choose the proper screw as per the door thickness for sub-unit installation.
Short size screw is applicable for a door thickness of 35mm-60mm.
Medium size screw is applicable for a door thickness of 60mm-85mm.
Long size screw is applicable for a door thickness of 85mm-110mm.
Sub-unit pre-install instruction

Sort out the connecting cable, then tighten the screw into the sub-unit for 5mm, and tear the foam label protective sheet on the rear side of the sub-unit.
Fix sub-unit

Adjust the direction of the sub-unit from outside and make sure the doorbell button  is at the bottom. Then pass the screw and connecting cable through the hole. (If your door is too thick, use a paper tube to pass the cable through the door, then remove the paper tube ). Press hard on the sub-unit to make sure it perfectly adheres to the door, then remove the lens protective film.
Magnetic Stand Installation

Pass the connecting cable of the sub-unit through the square hole on the magnetic stand from the inside door ( Do not twist or squeeze the connecting cable.).

 -
-  Attention: Move down the magnetic stand so that the screws can be matched with the marked position, and then fasten the screws.
Hang the magnetic stand on the screws of the sub-unit and fasten the screws until the magnetic stand can be fixed firmly on the door.
Fix sub-unit interface

Gently pull out the connecting cable from the inside door, and then peel off the protection film on the back of the sub-unit interface.

- Attention: Insert the sub-unit interface into the groove on the magnetic stand as shown in the picture.
Align the sub-unit interface with the groove on the magnetic stand, and make sure they are stick to each other firmly.
Host Installation

 - Attention: Align the host device to the magnetic stand from the top to bottom.
Tilt the host by 10 degrees and hang it on the steel sheet from top to bottom. The bottom magnet will automatically suck with the host. After installation, gently pull the upper part of the host to check if it is correctly installed.
Remove the host

Please hold the bottom of the host with both hands and tilt it upwards by 10 degrees, and then move it against the steel sheet to remove the host.
General Operation
On/Off
- Long press the function button for 3 seconds to turn on the device.
- Long press the function button for 3 seconds could also turn off the device.
Sleep / Wake up mode
- This device has an automatic timeout feature to reduce battery consumption. If the user does not input anything within the defined time, the screen will turn off.
- Short press the function button could wake up the device.
Reset
If the device fails to turn on or stops responding, please use a needle or paper clip to shortly press the reset button to reboot the device. Long press the reset button for two seconds to turn off the device.
Resetting does not affect the data storage or time settings. Do not reset the device during normal operation, as this may lose the data stored in the device.
Touch Screen
You could use your fingers to click or slide to set up all the needed settings.
Outdoor checking
Wake up the device to enter into the interface, and then press the outdoor checking icon or short press the function button to view the instant scenes outside the door.
Charging
When this device is charging, a lightning icon will appear on the top of the touch screen to show the battery status. The indicator ring will glow in red when it is charging, and it will glow in green when fully charged.
Setup instruction
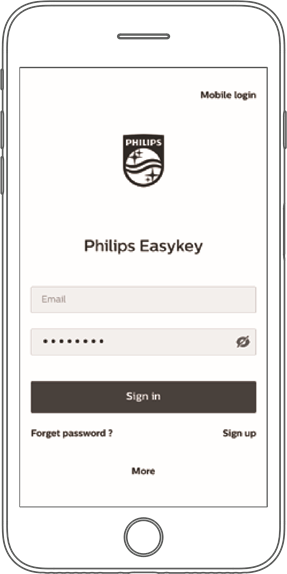
- APP download and installation
Andriod: Search and download the "Philips EasyKey" from Google Play.

IOS: Download the Philips EasyKey from the App Store.

- Sign up for registration and log in
![]()
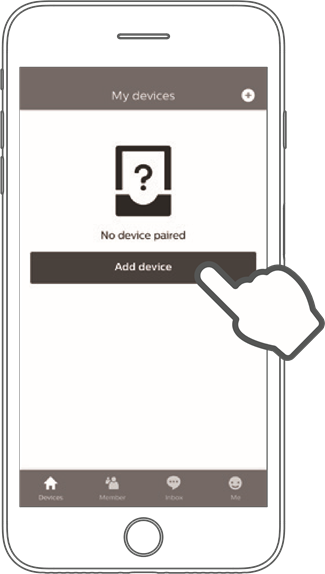
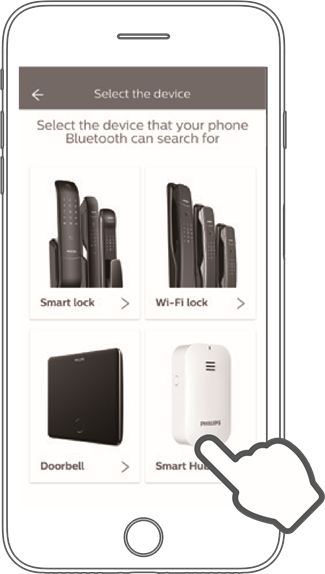
- Click on "Add a device"
![]()
- Select "Smart door viewer"
![]()
- Please connect the host to the sub-unit, and then long press the function button for 3 seconds until entering the interface.

- Press "Settings" to enter to the next interface.

![]() Power-saving mode switching
Power-saving mode switching
![]() Camera Preview
Camera Preview
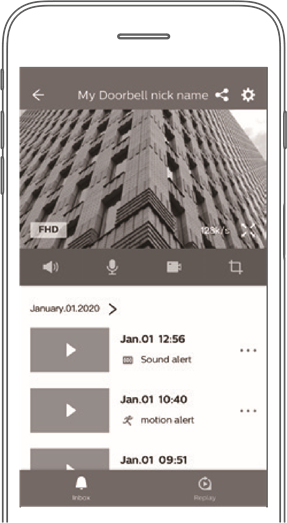
![]() Check the visitors/alarms record
Check the visitors/alarms record
![]() Time, doorbell, theme and network connection settings.
Time, doorbell, theme and network connection settings.
- Click on the Network icon to enter into next menu.

![]() Time, human detection sensitivity, alarm mode and alarm sound settings
Time, human detection sensitivity, alarm mode and alarm sound settings
![]() Door bell and volume settings
Door bell and volume settings
![]() Theme, time-out and brightness settings
Theme, time-out and brightness settings
![]() WIFI connection and device binding settings
WIFI connection and device binding settings
![]() Date & time, language and anti-prying alarm settings
Date & time, language and anti-prying alarm settings
![]() Check device version, firmware information, storage and restore to default settings.
Check device version, firmware information, storage and restore to default settings.
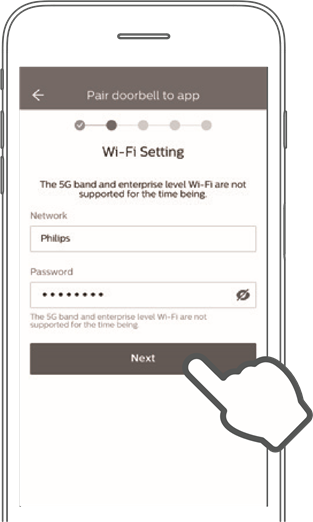
- In the interface of Network, click on "Scan QR Code" could enter into next menu.

- Enter into "Scan QR Code" Interface

- Open the door viewer and enter into the "Scan QR Code" menu via the mobile phone, then choose available WIFI, input password and click on "Next" to generate a QR code.
![]()
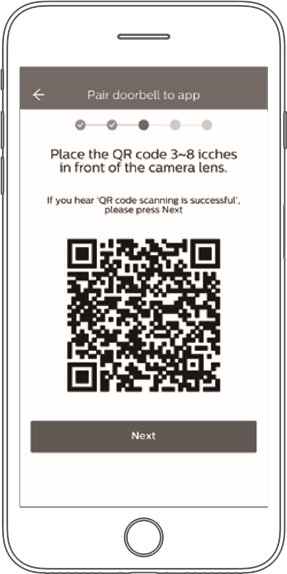
- Use the camera of sub-unit to scan the QR code generated in last step.
![]()
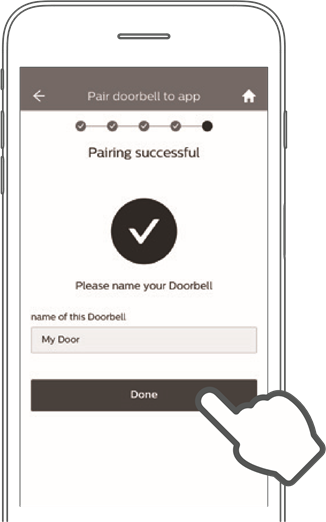
- Please wait for 1-2 minutes during the connection process. After successfully adding the device, click on "Done" to bind the device.
![]()
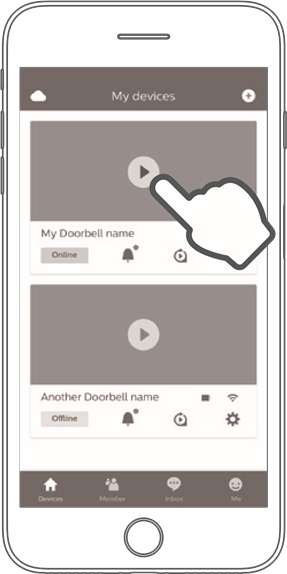
- Check your device list on the "Device" page.
![]()
- Click on any binding device could check the device access record.
![]()


 Time, human detection sensitivity, alarm mode and alarm sound settings
 Door bell and volume settings
 Theme, time-out and brightness settings
 WIFI connection and device binding settings
 Date & time, language and anti-prying alarm settings
 Check device version, firmware information, storage and restore to default settings.

Host Charging
When the battery is running low, you can remove the host from the magnetic stand after turning it off, then use a power adpter to charge it, install the host on the magnetic stand and turn on the device.

If you do not want to remove the host, you can take the power socket to the nearest position of the smart door viewer and connect the power adapter to charge.

Precaution
- Do not expose this product to the harsh environment with high temperature, high humidity, dust, salt spray, rain, and water splashing, it may damage the device.
- Do not press too hard on the lens of the sub-unit and the black round cover from the top, it may cause hardware damage.
- During the installation process, please not to pull out the connecting cable of the sub-unit, and prevent the cable from being scratched or cut off (Improper operation that causes cable damage is not covered by the warranty).
- Please use the authorized power adapter included in the packaging. The use of unauthorized adapter may result in failure to charge or system damage.
- Do not connect the sub-unit when the host stays on, otherwise, the camera may be connected abnormally. If there is an abnormality, please reconnect the sub-unit when the host is turned off.
- This product supports the 2.4GHz WLAN only, please make sure that this product is within the coverage of the WiFi, and position the WiFi router as close as possible to this product.
- This product is for home-use anti-theft monitoring. It is not applicable to other illegal premises.

Documents / Resources
References
Download manual
Here you can download full pdf version of manual, it may contain additional safety instructions, warranty information, FCC rules, etc.
Advertisement


Need help?
Do you have a question about the EasyKey DV001 and is the answer not in the manual?
Questions and answers