Table of Contents
Advertisement
Quick Links
Advertisement
Table of Contents

Subscribe to Our Youtube Channel
Summary of Contents for Snap-On LEVEL5ATC
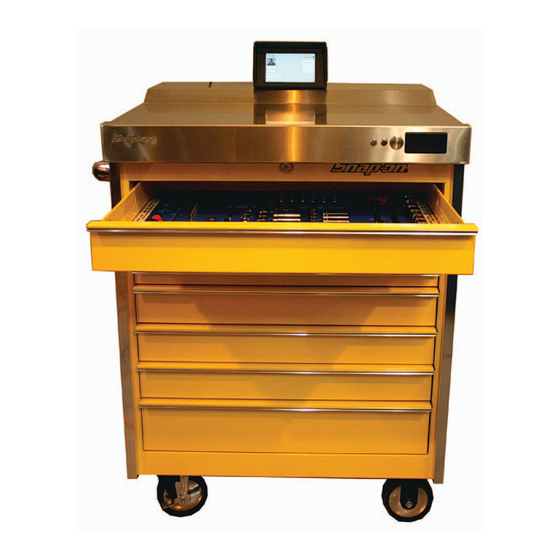
- Page 1 INSTALLATION AND OPERATION Form ZEAK0289J00A rev c...
- Page 3 SAFETY INFORMATION For your safety, read this manual thoroughly before installation of the equipment. Installation is intended to be performed by properly trained technicians. The safety messages presented here are remind- ers to the installer to exercise extreme caution during installation and training on the system. There are many variations in procedures, techniques, tools, and parts for installation due to varied shop configurations.
- Page 4 SAFETY INSTRUCTIONS IMPORTANT!! SAVE THESE INSTRUCTIONS Risk of electrical shock. • Do not operate equipment with a damaged power cord or if the equipment has been dropped or damaged, until it has been examined by a qualified service person. • If an extension cord is necessary, a cord with a current rating equal to or greater than that of the equipment should be used.
-
Page 5: Specifications
Specifications SPECIFICATIONS ATC LEVEL 5 TOOL BOX SPECIFICATIONS ELECTRICAL SPECIFICATIONS: • AC Input: 100-240~, 4-2A, 60-50 Hz.(+10%/-6%), 1-Phase. • Connect to a grounded (Earthed) electrical outlet using a detachable cordset. The electrical outlet must be readily accessible. • Maximum cord length shall be 3 meters. Power Supply Rating: •... -
Page 6: Table Of Contents
Table of Contents SAFETY INFORMATION SAFETY INSTRUCTIONS ............................ 2 SPECIFICATIONS ATC LEVEL 5 TOOL BOX SPECIFICATIONS ...................... 3 INTRODUCTION INSTALLATION OUTLINE OF THE LEVEL 5 TOOL CONTROL SYSTEM - ATC ..........6 NETWORKING ATC ADDING THE TOOLBOX TO A WIRELESS NETWORK: ..................7 ATC BOX SETUP DRAWER TRAINING ............................ -
Page 7: Introduction
Introduction INTRODUCTION Snap-on Automatic Tool Control boxes are designed as accountability systems for users of tools in environments where safety is of utmost importance. ATC systems encourages tool responsibility while maintaining an organized inventory of tools. Advantages of the ATC system include the ability to train the unit to accept various lighting environments. The unit can adapt to tool wear and contaminants over time. -
Page 8: Installation Outline Of The Level 5 Tool Control System - Atc
7. Load Administration Software and Setup 8. Add users and permissions and card programming. a. Connect to ATC Box b. Import user photos Store to: local drive “c:\Snap-on\ATC\EmployeePhotos” c. Program cards d. Edit cards and user permissions 9. Train on administration software features and reports. -
Page 9: Networking Atc
3. After several seconds the ATC’s Home Menu will appear. 4. If this is the initial ATC installation a Snap-on service representative will enter the ATC service code on the keyboard to gain access to the box. - Page 10 Networking 5. Using your mouse pointer click on <Setup> but- ton. If a mouse is not used a simple finger touch will select any button when touched. 6. Select the “Systems” tab at the top of the page. NOTE: THE SERIAL NUMBER AT THE BOTTOM OF THE SCREEN.
- Page 11 Networking 10. Using the mouse pointer right click on the “Wire- less Network Connection”. 11. Using the mouse click on the option “View Avail- able Wireless Networks”. 12. The system will pull up all network connections that are available within it’s wireless range. This range is dependent on the location of the Wire- less Access Point better known as a WAP.
- Page 12 Networking 14. The system will automatically connect to the net- work providing the correct Password is used. 15. After connecting the system will acquire all wire- less information needed. 16. After all requirements are met the ATC system will display that it has connected to the wireless network.
- Page 13 4. After several seconds the ATC’s Home Menu will appear. 5. If this is the initial ATC installation a Snap-on service representative will enter the ATC service code on the keyboard to gain access to the box.
- Page 14 Networking Networking Multiple ATC Units Wireless Network Wired Network...
-
Page 15: Atc Box Setup
ATC Toolbox Setup ATC BOX SETUP DRAWER TRAINING Although each tool box has drawer training performed during manufacturing, the procedure must be performed again upon installation on the job site. Drawer training ensures optimized camera efficiency when tools are removed and re- turned. -
Page 16: Complete Drawer Training
ATC Toolbox Setup COMPLETE DRAWER TRAINING From the Main screen select “Setup”. Select “Drawer Training”. Select the drawer requiring training. If all drawers require training select drawer one. Select “Train Drawer” to begin. Most boxes will display the message to the right stating that the cameras have already been trained and do you wish to proceed. - Page 17 ATC Toolbox Setup The next step requests for all tools to be removed from the selected drawer. However, it is NOT required to do so. You may leave all of the tools in the drawer unless the system requests that you remove a specific tool group. Slowly close the drawer.
- Page 18 ATC Toolbox Setup Please wait while the data is processed. This may take sev- eral moments. Open the drawer being trained and check that all tools are present. Close the drawer slowly. The toolbox will momen- tarily lock and then unlock in order to capture all necessary data.
-
Page 19: Abbreviated Drawer Training
ATC Toolbox Setup ABBREVIATED DRAWER TRAINING Once a Tool Box has had its drawers trained once, an Ab- breviated training is generally all that is required to maximize its efficiency. Follow these steps to complete the abbreviated proce- dures. From the Main screen select “Setup”. Select “Drawer Training”. - Page 20 ATC Toolbox Setup Select “No” when prompted. Selecting Yes will force you to perform a high reliability drawer training with tool removal. The next step asks if you would like to gather images with tools present. Select “Yes” to continue. Open the selected drawer making sure ALL tools are pres- ent.
- Page 21 ATC Toolbox Setup HIGH ACCURACY DRAWER TRAINING After completing either a Complete Drawer Training or an Abbreviated Drawer Training the following procedure may be used to achieve the highest level of accuracy. This pro- cedure will require the removal of all tools from the drawer being trained.
-
Page 22: Additional Setup Tabs
ATC Toolbox Setup ADDITIONAL SETUP TABS OPTIONS This screen allows adjusting the screen time out delays. Se- lect the Up or Down buttons to increase or decrease the time before Displaying the Splash Screen and the Automatic Locking feature. The system speaker volume can be adjusted on this screen. Move the slider bar to the desired volume level. -
Page 23: Touchscreen Calibration
ATC Toolbox Setup TOUCHSCREEN CALIBRATION Select to calibrate or re-calibrate the touch screen. When prompted, touch the Target and hold until told to release. The Target will move to four locations on the screen. Touch and release at each position. Once all four positions have been selected, the calibration values are stored and the screen is ready for operation. -
Page 24: Follow These Instructions For Software Installation
SQL Server Installation INTRODUCTION The data and configuration of all of the toolboxes in the Automatic Tool Control (ATC) system is stored and managed by the ATC Administration software. However, before the Administration software can be installed a database system must be in place to store the system information. The ATC system uses Microsoft®... - Page 25 SQL Server Installation STEP 1 Installing .NET Framework 3.5 SP1. Locate the file named dotnetfx25.exe on the CD ROM in the “Prerequisites” sub-directory. Double click the application to begin the instal- lation procedure. The “Extracting Files” dialog box will appear as shown here. Once the Files are extracted “Setup”...
- Page 26 SQL Server Installation The status box as shown to the right opens let- ting the installer know the progress of download. After the download is complete the application begins with the actual installation process of the program. The status bar indicates the progress.
- Page 27 SQL Server Installation After a few moments the box shown here opens to indicate that the program setup is complete. Select “Exit” to finish and close the installation application. STEP 2 Installing Windows® Installer 4.5: Locate the application listed as WindowsXP- KB942288-v3-x86.exe on the CD ROM also under the “Prerequisite”...
- Page 28 SQL Server Installation You will be required to read and understand the software license agreement. If you agree to the terms then select the “I agree” radio button followed by the “Install” button. If there are any applications open that need to be closed the dialog box will alert the installer and close them before proceeding.
- Page 29 SQL Server Installation After files are properly backed up the software is completed. Click on “Finish” to complete the installation and restart Windows®. STEP 3 Installing Windows® Powershell 1.0: L o c a t e t h e f i l e n a m e d W i n d o w s X P - KB926139-v2-x86.exe on the CD ROM also under the “Prerequisite”...
- Page 30 SQL Server Installation You will be required to read and understand the software license agreement. If you agree to the terms then select the “I agree” radio button followed by the “Install” button. It is recommended to agree and select Next. The status box as shown to the right opens let- ting the installer know the progress of update.
- Page 31 SQL Server Installation STEP 4 - Installing Windows® SQL Server 2008 Express Locate and run the Microsoft® SQL Server® 2008 Express executable. The application is named SQLServer2008ExpressInstallerFo- rATC.exe on the CD ROM under the “Prerequi- site” sub-directory. Double click the application, it is designed to “auto-install”.
- Page 32 SQL Server Installation Allow the installation to auto-install. Several more screens will appear as the program instal- lation wizard creates the environment required for proper operation on the selected computer. Installation of the SQL Server program will take some time to complete. Do not interrupt instal- lation.
-
Page 33: Using Administrator
Administrator / Toolbox Setup USING ADMINISTRATOR PC REQUIREMENTS Snap-on Level 5 ATC utilizes a stand alone PC with Snap-on provided software to administer the ATC tool boxes. PC Minimum Requirements: Operating Systems: - Windows®XP Service Pack 2 or 3 - Windows®Vista - Windows®7... - Page 34 Administrator / Toolbox Setup 5. Once the Installer is loaded the screen to the right appears, select “Next” to continue. 6. The default folder destination is C:\Snapon\ATC\. If a different hard drive location is necessary sim- ply click on the <Browse> button replace the C drive location with the desired drive letter.
- Page 35 12. Right click on the file named ATC Administration. exe and select Send To->Desktop (create short- cut) 13. Run any updates that are available from Snap-on at this time by double clicking on the supplied file. Follow the on-screen instructions to complete the...
- Page 36 Administrator / Toolbox Setup First Time Use When “Admin” starts the screen shown to the right is shown briefly. The first time the Administrator software is opened you will be prompted to select the database to be used. Select “OK” to continue. Select “Refresh”...
- Page 37 Administrator / Toolbox Setup Next you will be asked to define location to place “PDF” copies of your reports to a default folder. Se- lect “OK” to continue. You can create a uniquely named folder or select one that already exists. A Browser opens that allows you to select the desired directory.
-
Page 38: Toolbox Setup And Access
Administrator / Toolbox Setup TOOLBOX SETUP AND ACCESS Before adding any users it is recommended that each toolbox is setup using the administration software. Once each toolbox has been added to the system users and preferences can be added. The Administration PC is ca- pable of handling many users. - Page 39 Administrator / Toolbox Setup 5. Enter a unique name that describes the toolbox, keeping in mind that if several boxes are online a user can quickly identify a particular toolbox. For this exercise we used “Yellow 54””. 6. Enter the Serial Number noted in step 6 under the “Networking”...
-
Page 40: Setting Up Users
Administrator / Toolbox Setup 9. If all information is properly entered and depend- ing on the network speed the ATC system should come on line shortly. SETTING UP USERS 1. It is highly recommended that the 1st user that is setup in the system is the “Master”. - Page 41 Administrator / Toolbox Setup 4. Click on “Maintenance” and select “Set Employee Access Permissions” 5. Select the <Add new Employee> button. 6. Type in “Master” for the Master Card employee name. 7. With the administrator card reader plugged into a USB port of the administrator PC touch the Mas- ter ID card to it to automatically enter the encod- ed number.
- Page 42 Administrator / Toolbox Setup 8. We have chosen the Master Card to have full access rights to both the Administrator PC and Toolbox so we have checked off all selections. • The area marked with a 1 allows the user to access various functions of the Administrator PC. •...
- Page 43 Administrator / Toolbox Setup A B C D E F Allows the User to access the toolbox B. Allows the User to access “Setup” in the box. C. Allows the User to “Train” the drawers. D. Allows the User to access the toolbox “System” E.
- Page 44 Administrator / Toolbox Setup 9. Repeat steps 1 through 7 to setup additional users remembering in step 8 separate creden- tials are given to each user. We have added an additional user and given this user rights to only access the toolbox. NOTE: To make it easier and faster for the “Admin- istrator”...
-
Page 45: Adding User Photos
Administrator to browse to the location of stored photos. 4. A subdirectory is provided in the “Snap-on” directory on the C: drive. Select the desired photo and click on Open to save the photo. See screen shot to the right. -
Page 46: Additional Administration Features
Administrator / Toolbox Setup ADDITIONAL ADMINISTRATION FEATURES Below are described additional features and functions that may or may not be functional at the time of this publication. PREFERENCES There are two Preferences screens, both are accessed from the “Maintenance” pull down tab on the home screen. -
Page 47: Licensing
Administrator / Toolbox Setup LICENSING The second Preferences Tab shown here contains the licensing information for the Level Five ACT software. This information can be entered by Sales or Service organization or the Administrator and should never be altered. To do so may render the software unusable. Licensing information is obtained by contacting Snap- on Technical Support and providing the information they require. -
Page 48: Audit Image Search
Administrator / Toolbox Setup AUDIT IMAGE SEARCH This Selection allows the Administrator or another assigned with permissions to view the camera images of selected drawers. The Audit Image Search function is located at the bottom of the “Maintenance” drop down tab on the home screen. -
Page 49: Tools Out
Administrator / Toolbox Setup TOOLS OUT Select the “Tools Out” tab from the ATC Dashboard screen to view tools that have been removed from the box. Several filters are available that allow the Administrator to view tools removed by Employee or Location. By default the “Tools Out”... -
Page 50: Tool Search
Administrator / Toolbox Setup TOOL SEARCH The entire inventory of the tool box is reported in this screen. A number of filters are available to narrow the search for a tool. You can search by tool name, its location, and other filters. When entering a Tool Name for a search just simply type in any descriptor for that tool such as to find any- thing with 1/2”... -
Page 51: Reports
Administrator / Toolbox Setup REPORTS This Main Menu selection allows a wide variety of reports to be generated. Select “Reports” from the home screen. Information will be required based on the desired report. Some reports may require only the date and time and others require data or an employee name to be entered. -
Page 52: File Backup
From this screen select “Backup Toolbox Configura- tion”. Wait while the box files are written to the Admin computer. Select additional boxes to be backed up as required and repeat the above procedures. Backups are located at this address: c:\snap-on\atc\backups... -
Page 53: Atc Box Operation
ATC Toolbox Operation ATC BOX OPERATION Once all system setup requirements have been met the box is ready for normal operation and tool usage. Box operation is simple and straight forward for use of use. Turn the power to the on position via a power switch on the rear of the cabi- net adjacent to the power cord. -
Page 54: Checking Out Tools
ATC Toolbox Operation Only one user can be logged in at any one time. However multiple users can have tools checked out. Refer to the “Using Administrator” and “Box Setup” sections of this manual for information regarding permissions and employee setup and other maintenance functions. CHECKING OUT TOOLS A user must be allowed box access permission in order to remove or return tools. - Page 55 ATC Toolbox Operation When the user has removed desired tools from the box and closed the drawer, the box indicator shows the drawer in yellow to indicate there are tools removed from that drawer. Also the tools removed are then listed as shown to the right. Removed tools will remain listed even though the user has logged out of the system.
-
Page 56: Tool Status
ATC Toolbox Operation TOOL STATUS If for some reason a tool has been compromised such as lost, broken or cannot be returned to the box for other rea- sons the user can now mark those tools accordingly for its current status. To mark a tool double click the tool affected. -
Page 57: Atc Toolbox Software Update Installation
ATC TOOLBOX SOFTWARE UPDATE INSTALLATION NOTE: This procedure assumes that the ATC Administration software has been installed in the default installation direc- tory (c:\snap-on\atc). If a different installation directory was chosen you should contact Snap-on technical support for update instructions. - Page 58 ATC Toolbox Operation 1. Open and login to the Administration software. Click on “Box Setup & Access”, 2. From the Box Setup & Access screen select the first box that you are updating. A small, right-pointing arrow will appear to the left of the toolbox that is selected. 3.
-
Page 59: General Instructions
ATC Toolbox Operation 11. Click OK on the synchronization notification prompt. 12. On the Box Setup & Access screen make sure that the Synchronize checkbox is selected for all and only the toolboxes that are being updated. 13. On the ATC Dashboard screen press the Synchronize button. - Page 60 Notes...
- Page 61 Notes...
- Page 62 Phone: +44 (0) 118/929-6811 · Fax: +44 (0) 118/966-4369 www.snapon-equipment.co.uk Snap-on Tools (Australia) PTY LTD 80 Holbeche Road Arndell Park, NSW 2148 AUSTRALIA Tel: 1800 811 480 Fax: (02) 9837 9199 Email: SOTA.ind.customerservice@snapon.com Form TEAK0289J00A0 rev c..07.26.11 copyright 2011 Snap-on Inc. All Rights Reserved...
Need help?
Do you have a question about the LEVEL5ATC and is the answer not in the manual?
Questions and answers