
Summary of Contents for ALLPRO Imaging AIR TECHNIQUES ScanX B7100
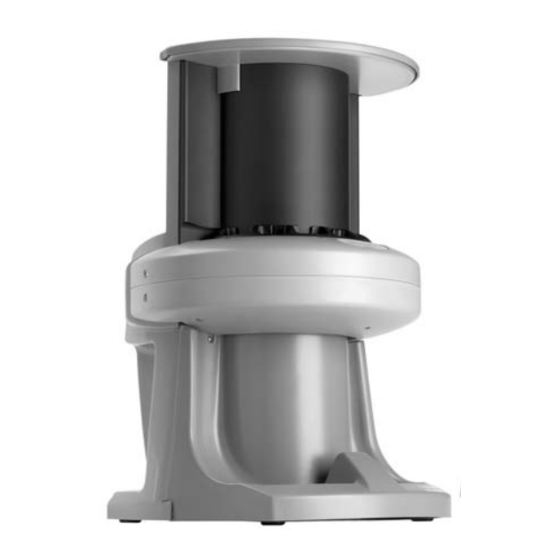
- Page 1 Part Numbers: B7100, B7200 and B7250 I n s t r u c t i o n M a n u a l ® ® ScanX and Ortho ScanX ® ScanX Intraoral P/N B7200 and B7250 P/N B7100...
-
Page 2: Table Of Contents
FOREWORD Air Techniques and its ALLPRO Imaging division have prepared this document as ® a guide to the proper use of three ScanX Digital Imaging Systems with In-Line ® ® ® Erase, ScanX Intraoral, ScanX and Ortho ScanX References in this manual to Air Techniques include its division ALLPRO Imaging. -
Page 3: Congratulations
Congratulations on your purchase of the ScanX Intraoral, ScanX or Ortho ScanX Digital Imaging System with In-Line Erase, the latest imaging product from Air Techniques, Inc./ALLPRO Imaging, a leading manufacturer of dental, medical and veterinary ® ® equipment since 1962. The ScanX... -
Page 4: Safety Notice
S A F E T Y N O T I C E This equipment has been designed to minimize exposure of personnel to hazards. While the ScanX is designed for safe operation, certain precautions must be observed. Use of the ScanX n n o o t t in conformance with the instructions specified in this manual may result in permanent failure of the unit. - Page 5 S A F E T Y N O T I C E Authorized Dealer Service Only. The interior of the ScanX is only accessible by removing hardware with tools. It should be opened and serviced only by an authorized dealer service technician. Failure to heed this warning may result in equipment damage or personal injury, and w w i i l l l l v v o o i i d d a a n n y y a a n n d d a a l l l l w w a a r r r r a a n n t t i i e e s s .
- Page 6 S A F E T Y N O T I C E Knowledge of Warnings and Cautions. Users must exercise every precaution to ensure personnel safety, and be familiar with the warnings and cautions presented throughout this manual and summarized below.
-
Page 7: Important Information
S A F E T Y N O T I C E CAUTIONS - Completely clean and erase PSPs before taking an X-ray exposure. See the PLATE PREPARATION section of this manual. Minimize exposing an X-ray exposed PSP to light. Transfer the PSP into the Inlet slot quickly to minimize exposure to light. -
Page 8: Purpose Of This Manual
IMPORTANT INFORMATION Correct Usage K Operation of the ScanX may only be carried out by suitably qualified personnel. K The ScanX is only to be used in the processing of exposed PSPs. K The ScanX should be used in a room equipped for it. K Room temperature should be in the range 50 to 105°F (10 to 40°C) with relative humidity between 5 and 95%. -
Page 9: Unpacking And Inspection
A deposit fee has been paid for this case, which may be returned to Air Techniques, Inc./ALLPRO Imaging for a full refund of the fee using a Return Authorization (RA) number, or retained, without refund of the fee, to protect the ScanX during transport or future shipping. -
Page 10: Computer System Requirements
COMPUTER SYSTEM REQUIREMENTS IMPORTANT: To operate the ScanX, it must be connected to a compliant Computer System, and the computer must be loaded with an authorized Imaging Software such as Visix. Neither the Computer System nor the Software is provided by Air Techniques. Contact your dealer for available Computer System and Software options. -
Page 11: Controls And Indicators
COMPUTER SYSTEM REQUIREMENTS System Properties. If unsure of the operating system version installed, check that it meets the necessary requirements by checking the S S y y s s t t e e m m P P r r o o p p e e r r t t i i e e s s window. This is done simply by right clicking the M M y y C C o o m m p p u u t t e e r r i i c c o o n n . -
Page 12: Technical Data
T E C H N I C A L D A T A Electrical Requirements: Supply Voltage: 100 to 240VAC +/- 10%, 50/60 Hz Supply Current: 1.2 A Maximum Line Cord: North American style 10 foot long Hospital Grade power cord, P/N 73096. Power Supply: 24 Volt Power Supply, P/N B7095 provided Physical Properties:... -
Page 13: Abbreviations
A B B R E V I A T I O N S Abbreviations used in this manual are summarized below. ampere(s) megabytes bytes) alternating current millimeter (10 - CD-ROM compact disk, read-only memory MONTH YYYY date (Month, 4 digit year) Code of Federal Regulations Phosphor... -
Page 14: System Setup
S Y S T E M S E T U P Note: Authorized Imaging Software, such as Visix, supplied by the dealer or other company, must be installed on the computer in order to operate the ScanX. ScanX Drivers and Utilities Installation Before connecting the ScanX to your computer or attempting to use it for the first time, run the Setup program on the ScanX Drivers and Utilities Disk included with the ScanX. - Page 15 S Y S T E M S E T U P Power Supply Mains Outlet Line Cord (The Line Cord is the Line Cord Mains disconnect device) Power Supply Computer Connector Cable Green LED Indicator Blue LED Indicator FLASHING FLASHING READY READY ERASER...
-
Page 16: Plate Care And Preparation
PLATE CARE & PREPARATION Prior to performing the Intraoral and Extraoral imaging procedures provided on the following pages, the user must be familiar with the care, handling and preparation of the PSP in order to ensure successful image scanning. Figure 2 shows the configuration of a Tube or Sensitive Printed side typical Intraoral Size #2 PSP and Figure... - Page 17 PLATE CARE & PREPARATION IMPORTANT: PSPs must always be erased prior to use. Note: Use PSPs within 24 hours of last erasure. Repeat erasing process if PSPs have been stored longer than 24 hours. Erase the PSP Each Intraoral and Extraoral PSP should be used (i.e. X-ray exposed and scanned) w w i i t t h h i i n n 2 2 4 4 h h o o u u r r s s of erasure since natural radiation will add noise to the PSP .
- Page 18 PLATE CARE & PREPARATION Barrier Envelope Handling Always guard against contamination by using standard infectious control proce- dures when handling individual barrier envelopes. It is best to discard suspected contaminated envelopes since no cleaning or disinfection procedure exist or are required for barrier envelopes.
-
Page 19: Intraoral Imaging Procedures
I N T R A O R A L I M A G I N G P R O C E D U R E S Note: 1. The orientation letter “a”, printed on the PSP, may be used for reference as you would use the dot on an intraoral X-ray film. - Page 20 I N T R A O R A L I M A G I N G P R O C E D U R E S Configure the Intraoral Plate Guides. If the desired Plate Guides are not in place, install these Guides at this time. Do not operate the scanner without a full complement of four Guides in place.
- Page 21 I N T R A O R A L I M A G I N G P R O C E D U R E S Scanning and Erasing Plates (continued) Note: Up to four PSPs can be processed simultaneously. One PSP can be inserted into each Plate Guide at a time as long as the corresponding track indicator light is illuminated green.
-
Page 22: Extraoral Imaging Procedures
EXTRAORAL IMAGING PROCEDURES Note: Cassettes must not contain intensifying screens when using PSPs. Take an X-ray Image Put an image on the extraoral PSP by performing the following procedure. 1. Place the erased PSP into the appropriate X-ray cassette, with the Tube side (sensitive side) of PSP towards Tube side of cassette. - Page 23 EXTRAORAL IMAGING PROCEDURES Scanning and Erasing Plates (continued) 5. Observe that a red glow eminates from the scanner exit slot. 6. Repeat steps 1 through 5 to process additional PSPs as necessary. Another PSP may be fed into the ScanX when all four track indicator lights illumi- nate green.
-
Page 24: Powering Down The System
P O W E R I N G D O W N T H E S Y S T E M IMPORTANT: Never power down the system during a scanning session. The ScanX is designed to be left on continuously during the active day. At the end of the day, or whenever desired, power down the system simply by pressing and holding the membrane READY switch ( ) on the Keypad Control Panel... -
Page 25: Troubleshooting
T R O U B L E S H O O T I N G Trouble Possible Cause Corrective Action 1. No power/ • Not plugged in. • Check the line cord No green light on connection is firmly membrane switch plugged in. - Page 26 T R O U B L E S H O O T I N G Trouble Possible Cause Corrective Action 7. Intraoral image • PSP was fed skewed either • Verify that Plate Guide is in appears skewed on behind or without a Plate place and PSP is fed into monitor.
-
Page 27: Accessories
ACCESSORIES The following lists the ordering number and description for accessory components available to maintain the ScanX to meet your professional needs. Contact your authorized dealer for information. Description Quantity Part Number Visix Imaging Software 5 Licenses 74500 ScanX Cleaning Sheets* Box of 12 B2010 Box of 25... - Page 28 Air Techniques and ALLPRO Imaging are leading manufacturers of fine dental, medical and veterinary equipment from air and vacuum systems and X-ray film processors, to an impressive line of new products incorporating the most recent technological advances. These new products, vital components of the innovative professional...
Need help?
Do you have a question about the AIR TECHNIQUES ScanX B7100 and is the answer not in the manual?
Questions and answers