Advertisement
Quick Links
®
DR
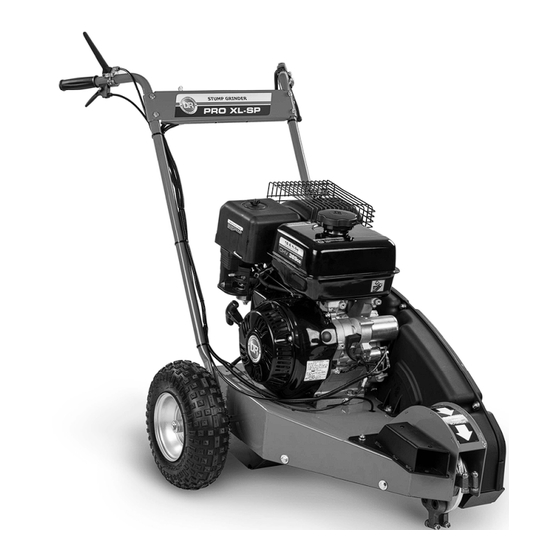
PRO XL-SP STUMP GRINDER
`
SAFETY & OPERATING INSTRUCTIONS
Serial No.
Order No.
Read and understand this manual and all instructions before operating the DR PRO XL-SP STUMP GRINDER.
DR Power Equipment
Toll-free phone: 1-800-DR-OWNER (376-9637)
Fax: 1-802-877-1213
Website: www.DRpower.com
CONTACT US AT www.DRpower.com
1
Advertisement

Subscribe to Our Youtube Channel
Related Manuals for DR PRO XL-SP


Summary of Contents for DR PRO XL-SP
- Page 1 PRO XL-SP STUMP GRINDER SAFETY & OPERATING INSTRUCTIONS DR Power Equipment Toll-free phone: 1-800-DR-OWNER (376-9637) Serial No. Fax: 1-802-877-1213 Order No. Website: www.DRpower.com CONTACT US AT www.DRpower.com Read and understand this manual and all instructions before operating the DR PRO XL-SP STUMP GRINDER.
-
Page 2: Table Of Contents
Table of Contents Chapter 1: General Safety Rules ................................3 Chapter 2: Setting Up The DR PRO XL-SP STUMP GRINDER ......................6 Chapter 3: Operating The DR PRO XL-SP STUMP GRINDER ......................13 Chapter 4: Maintaining The DR PRO XL-SP STUMP GRINDER ......................16 ... -
Page 3: Chapter 1: General Safety Rules
Safety and Information labels that appear on the equipment. Take a moment to study them and make a note of their location on your PRO XL-SP STUMP GRINDER as you set up and before you operate the unit. Replace damaged or missing safety and information labels immediately. - Page 4 General Safety Operating this PRO XL-SP STUMP GRINDER safely is necessary to prevent or minimize the risk of death or serious injury. Unsafe operation can create a number of hazards for you. Always take the following precautions when operating this PRO XL-SP STUMP GRINDER: ...
- Page 5 Never overload or attempt to grind material beyond the manufacturer’s recommendation. Personal injury or damage to the machine could result. While using the PRO XL-SP STUMP GRINDER, don't hurry or take things for granted. When in doubt about the equipment or your surroundings, stop the machine and take the time to look things over. ...
-
Page 6: Chapter 2: Setting Up The Dr Pro Xl-Sp Stump Grinder
Chapter 2: Setting Up The DR PRO XL-SP STUMP GRINDER It may be helpful to familiarize yourself with the controls and features of your DR PRO XL-SP STUMP GRINDER as shown in Figure 2 before beginning these procedures. If you have any questions at all, please feel free to contact us at www.DRpower.com. - Page 7 28" W x 55" L x 39" H* - *center Handlebar position Weight 207 lbs Compare the contents with the “Parts Supplied” list below. If you have any questions please contact us at www.DRpower.com or call 1-800-DR-OWNER (376-9637) for assistance. Parts Supplied in Parts Box (Figure 3): Item#...
- Page 8 10 after Cable is filly installed. Traction Drive Traction Drive Figure 6 Cable Barrel End Lever Slot Wire Harness and Traction Cable Ties Drive Cable Figure 7 Figure 8 ® PRO XL-SP STUMP GRINDER...
- Page 9 Pull the Traction Drive Cable Sheathing to the front to expose the Braided Cable and insert the Braided Cable into the Bracket slot (Figure 9). Push the Sheathing Sheathing into the hole at the front of the Traction Drive Handle Bracket. Slot Turn the Traction Drive Cable Adjuster clockwise (looking from top) to extend the adjuster to tighten the Cable (Figure 10).
- Page 10 Reinstall the Air Filter and Cover. Air Filter Cover Throttle Bowden “Z” Bend Cable Clamp Sheath Figure 17 Wing Nut Cable Tight Base Alignment Throttle Linkage Positioned at Idle Air Filter Figure 19 Base Air Filter Figure 18 ® PRO XL-SP STUMP GRINDER...
- Page 11 Note: To refill the gas tank, turn the engine OFF and let the engine cool at least five minutes before removing the gas fill cap. Remove any blocking used to level the Engine before operating the DR PRO XL-SP STUMP GRINDER.
- Page 12 Note: The Battery may have been shipped with a protective Cap over the negative Terminal and the Cap will need to be removed to connect the Negative Wire. Negative Terminal Connect the Green Negative Wire to the negative (black) Battery Lug (Figure 24). Battery Figure 24 ® PRO XL-SP STUMP GRINDER...
-
Page 13: Chapter 3: Operating The Dr Pro Xl-Sp Stump Grinder
Chapter 3: Operating The DR PRO XL-SP STUMP GRINDER It may be helpful to better familiarize yourself with the features of your PRO XL- Traction Drive Operator Presence SP STUMP GRINDER by reviewing Figure 2 in Chapter 2 before beginning the... - Page 14 Check that the ground is free of foreign objects, such as electrical cables, barbed wire, etc. Cut the stump as close to the ground as possible using a Chainsaw before using the PRO XL-SP STUMP GRINDER. Operating the Traction Drive ...
- Page 15 Side of Stump Allow engine to warm up at idle for a few minutes. Move the PRO XL-SP STUMP GRINDER into position with the Cutter Head Figure 30 at the right side of the stump on the edge closest to you (not touching) near the top edge (Figure 30).
-
Page 16: Chapter 4: Maintaining The Dr Pro Xl-Sp Stump Grinder
Chapter 4: Maintaining The DR PRO XL-SP STUMP GRINDER Regular maintenance is the way to ensure the best performance and long life of your machine. Please refer to this manual and the engine manufacturer's owner's manual for maintenance procedures. Service intervals listed in the checklist below supersede those listed in the engine manufacturer's owner's manual. - Page 17 Tools and Supplies needed: Two 1/2" Wrenches Belt 9/16" Wrench Cutting Head New DR Cutter Head Belt (#36563) Pulley Clutch Gloves Pulley Figure 35 Remove the three Bolts and Locknuts from the Belt Guards with two 1/2"...
- Page 18 Pay close attention how the Belt is routed. If you install it wrong, the machine will move in reverse when the Traction Drive Lever is activated and cause damage to the machine or cause personal injury. ® PRO XL-SP STUMP GRINDER...
- Page 19 With the PRO XL-SP STUMP GRINDER on the ground, remove the Bolt, Lock Washer and Large Flat Washer from the Axle with a 1/2" Wrench (Figure 38). Bolt, Lock Block the PRO XL-SP STUMP GRINDER up so the Wheels are off the ground Washer and and remove the Wheel. Large Flat...
- Page 20 Figure 42 Block the front end of the PRO XL-SP STUMP GRINDER so the Cutter Head is just off the ground. Only tip the machine back enough to lift the Cutter Head off the ground. Never tip the machine back on the Handlebars. Oil will get into the muffler if the machine is tipped completely back and could damage the engine.
- Page 21 Hit the Wrench sharply with a Dead Blow Hammer to start the Bolt turning on the Engine Shaft. Remove the Bolt, large Flat Washer, Spacer, Clutch and Key from the Engine Shaft. Apply a never seize type grease to the Engine Shaft and install the new Clutch and Key. Install the Spacer and secure with the Bolt and large Flat Washer using a 1/2"...
- Page 22 Using the 5.5mm Allen Wrench, loosen the Caliper Mounting Bolts one turn Mounting Caliper (Figure 48). Bolt While manually Squeezing the caliper closed onto the Brake Rotor, Retighten the Caliper mounting Bolts. Caliper Mounting Bolt Figure 48 ® PRO XL-SP STUMP GRINDER...
- Page 23 Operate the Engine for at least 45 minutes to maintain proper Battery charge. If the Battery loses its charge, you will need to use a trickle charger (like the DR Battery Charger) to recharge it. The Charger should have an output of 12 volts DC at no more than 2 amps.
- Page 24 One INMETCO Drive Ellwood City, PA 16117 (724) 758-2800; fax (724) 758-2845 To learn more about hazardous waste recycling, visit the Web site for Battery Council International [www.batterycouncil.org] or for the Environmental Protection Agency [www.epa.gov]. ® PRO XL-SP STUMP GRINDER...
-
Page 25: Chapter 5: Troubleshooting
Most problems are easy to fix. Consult the Troubleshooting Table below for common problems and their solutions. If you continue to experience problems, contact us at www.DRpower.com or call toll-free 1-800-DR-OWNER (376-9637) for support. Set the Wheel Brake, shut down the engine, remove the spark plug wire and wait five minutes before performing any maintenance procedure or inspection on the PRO XL-SP STUMP GRINDER. - Page 26 Confirm the throttle is moving on the engine. Confirm that Belt has not stretched to a point that it is slipping off the Pulleys. Clutch is not working. Change Clutch (refer to “Chapter 4: Maintaining the DR PRO XL-SP STUMP GRINDER”).
- Page 27 CONTACT US AT www.DRpower.com...
-
Page 28: Chapter 6: Parts Lists And Schematic Diagrams
Chapter 6: Parts Lists and Schematic Diagrams Parts List - HANDLEBAR ASSEMBLY Note: Part numbers listed are available through DR Power Equipment. Ref# Part# Description Ref# Part# Description 39209 Frame, PRO XL-SP STUMP GRINDER 26476 Guard, Debris 11163 Screw, #10 X 1-1/2", Type AB, ZP 15043 Bolt, HHCS, 3/8-16 X 1-1/4", GR5... - Page 29 Schematic – HANDLEBAR ASSEMBLY CONTACT US AT www.DRpower.com...
- Page 30 Parts List – HEAD DRIVE ASSEMBLY Note: Part numbers listed are available through DR Power Equipment. Ref# Part# Description Ref# Part# Description 35087 Bolt, HCS, 5/16-18 X .75", GR 5, ZP 39220 Pulley 33332 Nut, Nylon Lock, Flanged, 5/16-18 26535 Bolt, Shoulder, 1/2 X .75l...
- Page 31 Schematic – HEAD DRIVE ASSEMBLY CONTACT US AT www.DRpower.com...
- Page 32 Parts List – SELF PROPEL ASSEMBLY Note: Part numbers listed are available through DR Power Equipment. Ref# Part# Description Ref# Part# Description 39209 Frame, PRO XL-SP STUMP GRINDER, 19381 Sprocket, No.35, 10 Tooth 39225 Chain, #35, 65 Link & Master 35087 Bolt, HCS, 5/16-18 X .75", GR5, ZP...
- Page 33 Parts Schematic – SELF PROPEL ASSEMBLY CONTACT US AT www.DRpower.com...
- Page 34 Notes: ® PRO XL-SP STUMP GRINDER...
- Page 35 The DR PRO XL-SP STUMP GRINDER is warranted for two (2) years against defects in materials or workmanship when put to ordinary and normal consumer use; ninety (90) days for any other use. For the purposes of all the above warranties, “ordinary and normal consumer use” refers to non-commercial residential use and does not include misuse, accidents or damage due to inadequate maintenance.
- Page 36 If your DR PRO XL-SP STUMP GRINDER will be idle for more than 30 days, we recommend using a gas stabilizer. This will prevent sediment from gumming up the Carburetor. If there is dirt or moisture in the gas or tank, remove it by draining the tank.
Need help?
Do you have a question about the PRO XL-SP and is the answer not in the manual?
Questions and answers