Table of Contents
Advertisement
Part No. DOC 10 Rev. 10 October 2003
USER, INSTALLATION
and
SERVICING INSTRUCTIONS
COMBI 70 Mk
& COMBI 90 Mk
II
II
For use with Kerosene or Gas Oil
For Combi 90 Outdoor Module installation and wiring
please refer to the separate supplement
After installing the boiler leave these instructions with the User
This appliance is deemed a controlled service and specific regional statutory
requirements may be applicable
Advertisement
Table of Contents

Subscribe to Our Youtube Channel
Related Manuals for Grant COMBI 70 MkII


Summary of Contents for Grant COMBI 70 MkII
- Page 1 Part No. DOC 10 Rev. 10 October 2003 USER, INSTALLATION SERVICING INSTRUCTIONS COMBI 70 Mk & COMBI 90 Mk For use with Kerosene or Gas Oil For Combi 90 Outdoor Module installation and wiring please refer to the separate supplement After installing the boiler leave these instructions with the User This appliance is deemed a controlled service and specific regional statutory requirements may be applicable...
-
Page 2: Table Of Contents
LIST OF CONTENTS Section Subject Page User instructions ........3 Technical information ......6 General boiler information ....... 9 Boiler installation ........21 Fill and vent the system ......34 Commissioning ......... 35 Information for the user ......37 Boiler servicing ........37 Replacement of boiler components.. -
Page 3: User Instructions
1 - USER INSTRUCTIONS Control switches (see Fig. A) About your boiler Your Combi 70 or Combi 90 boiler is fully automatic 1 Heating switch - When set to TIMED the boiler when the Boiler On/Off switch is set to ON, and will will only provide central heating during the 'on' provide domestic hot water at mains pressure on demand periods set on the timer. - Page 4 1 - USER INSTRUCTIONS Lighting your boiler (see Fig. A) Domestic hot water system 1 Ensure that - There is sufficient fuel in the supply The boiler will supply domestic hot water whenever a tank and all fuel supply valves are open, the water hot tap is opened, providing the Boiler On/Off switch supply is on, the electricity supply to the boiler is is set to ON.
- Page 5 1 - USER INSTRUCTIONS 5 Ventilation - Always ensure that the boiler has Useful tips adequate ventilation. Any ventilation openings provided by the Installer must not be obstructed. To ensure that the hot water performance is not Periodically check that they are clear. reduced first thing in the morning, or in the evening Do not attempt to 'box in' the boiler or build a compartment if the heating is off through the day, set the heating...
-
Page 6: Technical Information
2 - BOILER TECHNICAL INFORMATION Boiler technical data Model Combi 70 Combi 90 Boiler water content litre 17.6 * Weight (dry) Max. heat input (Kerosene) 22.0 27.6 Btu/h 75 000 94 200 Connections: Heating flow and return Flow - 22 mm copper pipe, Return - 1" BSP Cold water mains inlet 15 mm copper pipe Domestic hot water outlet... - Page 7 2 - BOILER TECHNICAL INFORMATION Combi 70 & 90 oil boilers using class C2 Kerosene Note: All boilers are despatched for use with Kerosene. Net eff. ** Head Oil press. Smoke Fuel flow Net flue gas Flue gas mass Net Heat Input Heat Output (kW) (Btu/h)
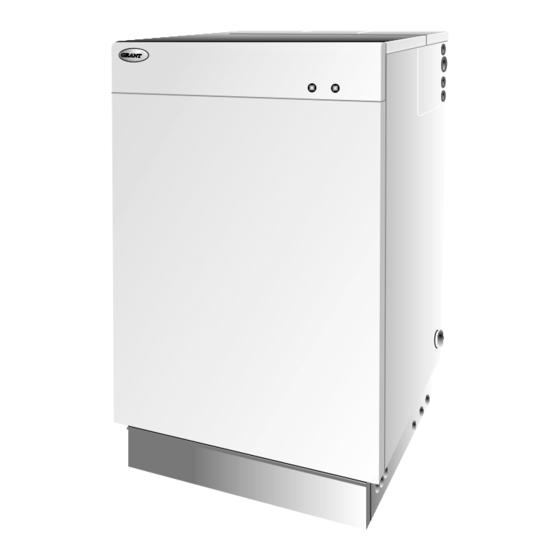
- Page 8 2 - BOILER TECHNICAL INFORMATION Boiler dimensions Fig. 1 Note: Water connections may be from the left or right hand side. If using side exit flue, it must be on the opposite side to the top water connections. Water schematic of boiler Fig.
-
Page 9: General Boiler Information
Failure to install and commission appliances the boiler in a convenient position for the user, may be correctly may invalidate the boiler warranty. connected to the boiler for this purpose - the Grant TCR kit is ideal. Refer to section 10 - wiring diagrams. IMPORTANT... - Page 10 (900 mm) and " to " BSP male Low level balanced flue - square. adaptor are available from Grant Engineering (UK) (Short, Standard, Long or Extra Long) Limited (Part No. RBS104). g Vertical balanced flue. 6 The flexible fuel lines supplied should be inspected h Vertical balanced flue extensions.
- Page 11 (a flexible fuel line (900 mm) and " to " BSP male adaptor are available from Grant Engineering (UK) Limited - Part No. RBS104). See section 3.4.6. Combi 70 & Combi 90 Oil Boilers...
- Page 12 (a flexible fuel line (900 mm) and " to " BSP screw using an hexagonal key. male adaptor are available from Grant Engineering 5 Connect the return oil flexible fuel line to the pump. (UK) Limited - Part No. RBS104). See section 3.4.6.
- Page 13 7 Flexible fuel lines and adaptors are available from Further details may be obtained from BS 5410:1:1997. Grant Engineering (UK) Ltd. Notes: 8 The burner cover may be left off until the boiler is For a boiler fitted in a compartment, which is commissioned.
- Page 14 3 - GENERAL BOILER INFORMATION Fig. 8 - Air supply for room sealed balanced flue boilers Fig. 9 - Combustion and ventilation air supply for conventional flue boilers Minimum size of air vents required - see Figs. 8 and 9 Combi 70 Combi 90 Vent A...
- Page 15 3 - GENERAL BOILER INFORMATION Conventional flue system See Fig. 10 Grant boilers have high operating efficiencies. Care must be taken to ensure the flue system is suitable for the low flue gas temperatures. 1 An insulated flue terminating in a down draught free area, i.e.
- Page 16 3 - GENERAL BOILER INFORMATION Connect a conventional flue 1 Remove the insulation from the rear top panel (do To suit wall thickness (mm) Square low level balanced not discard it) and remove the blanking panel. flue kits Rear exit Side exit Discard the panel, but retain the nuts and washers.
- Page 17 Distances measured to rim of terminal. A Below a gutter or sanitary pipework * 600 Horizontal from an opening, air brick or window Clearances recommended by Grant Above ground or balcony level **300 Engineering (UK) Limited in accordance with D Below eaves or balcony *600 British Standards and Building Regulations.
- Page 18 3 - GENERAL BOILER INFORMATION Frost protection Water connections 3.10 3.12 For additional protection of either the entire heating 1 Combi 70: Three push-fit elbows connections are system, or the boiler and localised pipework, it is supplied with the boiler for connection of the recommended that a frost thermostat be installed.
- Page 19 3 - GENERAL BOILER INFORMATION d Automatic air vent, fitted to the top of the 10 One or more drain taps (to BS 2879) must be used boiler, ensures the boiler is vented. to allow the system to be completely drained. e Filling loop.
- Page 20 The outlets should water supply serving the appliance and in accordance be shrouded and unable to have a temporary hand with the manufacturers instructions. Grant Engineering held spray attached. Arrangements for anti- (UK) Ltd. cannot be held responsible for any damage syphonage are not necessary.
-
Page 21: Boiler Installation
3 - GENERAL BOILER INFORMATION Method of operation 3.16 Once the boiler is switched on (amber neon on) it will Domestic Hot Water Mode - When a demand for hot always provide domestic hot water upon demand. The water (by opening a hot tap, etc.) is sensed by the timer only controls the operating times of the central diverter valve flow switches, the pump starts and the heating. - Page 22 4 - BOILER INSTALLATION Fig. 13 - Square low level balanced flue Fig. 13a - Concentric low level balanced flue Dimension (mm) Combi 70 Combi 90 A (dia) B (min) 1200 1195 B (max) 2100 2095 C (side) Fig. 14 - High level balanced flue Combi 70 &...
- Page 23 4 - BOILER INSTALLATION Fig. 15 - High level balanced flue High level and vertical balanced flue Note: The overall assembled flue length should not Fitting instructions for the high level balanced flue and exceed 4.0 metres from the top of the boiler to the end vertical balanced flue are supplied with the flue kits.
- Page 24 4 - BOILER INSTALLATION Make the water connections Note: Water connections may be from the left or 9 Balanced flue models - proceed with the flue right hand side. If using low level side exit flue, the installation as described in either section 4.5 (Low flue must be on the opposite side to the top water level balanced flue) or separate fitting instructions connections.
- Page 25 4 - BOILER INSTALLATION Fig. 17 - Combi 70 Left hand low level flue - Right hand water connections Right hand low level flue - Left hand water connections Rear low level flue - Right hand water connections Fig. 18 - Combi 70 pipework/flue configurations (square flue) Combi 70 &...
- Page 26 4 - BOILER INSTALLATION Fig. 18a - Combi 70 pipework/flue configurations (round concentric flue) Combi 70 & Combi 90 Oil Boilers...
- Page 27 4 - BOILER INSTALLATION Fig. 19 - Combi 90 Left hand low level flue - Right hand water connections Right hand low level flue - Left hand water connections Rear low level flue - Right hand water connections Fig. 20 - Combi 90 pipework/flue configurations (square flue) Combi 70 &...
- Page 28 4 - BOILER INSTALLATION Fig. 20a - Combi 90 pipework/flue configurations (round concentric flue) Combi 70 & Combi 90 Oil Boilers...
- Page 29 4 - BOILER INSTALLATION Fit a low level balanced flue (square only) To fit a concentric (round) low level, high level or vertical balanced flue, refer to the instructions supplied with the kit. 1 Lift off the boiler case top panels. Remove and discard the appropriate blanking panel from the rear or side of the boiler casing as required.
- Page 30 4 - BOILER INSTALLATION 11 Make good the hole in the wall and fit the terminal Important notes: dress plate using a suitable mastic sealant (not a When engaging the flue assembly over the flue supplied) to provide a weatherproof seal. See Fig. 27. elbow, take care not to dislodge the seal from the recess in the flue pipe.
- Page 31 4 - BOILER INSTALLATION Fig. 29 Fig. 30 13 Remove and discard the conventional flue flexible air tube supplied with the boiler from the burner air spigot retaining the clamp. 14 Fit the terminal guard over the flue terminal and secure using the screws and plugs supplied.
- Page 32 Connection of external remote timeswitch in the control panel fascia, by firmly pressing on the Grant logo (in the centre of the black square) until it See section 10.3 (10.4 for Grant remote timer) is detached from the rear of the fascia. Remove the Important: Any remote timer must be of a single blanking piece from the panel and discard.
- Page 33 The supply enters through one Grant logo (in the centre of the black square) until it of the holes at the bottom of the case sides. is detached from the rear of the fascia. Remove the blanking piece from the panel and discard.
-
Page 34: Fill And Vent The System
5 - FILL AND VENT THE SYSTEM Expansion vessel pressure The expansion vessel fitted is supplied with a 5 Vent each radiator in turn, starting with the lowest charge pressure of 1.0 bar (equivalent to a max. in the system, to remove the air. static head of 10.2 metres). -
Page 35: Commissioning
6 - COMMISSIONING Refer to Fig. 32 for boiler controls Fig. 32 - shown with pipework cover removed It is important that the following commissioning 6 Fully open a hot tap and allow it to run for a few procedure is carried out to ensure safe and efficient moments to vent the internal primary circuit. - Page 36 Combi 70 - In the cleaning cover on top of the further information concerning inhibitors contact boiler. Grant Engineering (UK) Limited. Combi 90 - In the cleaning door on the front of the boiler. 20 Replace the case bracing bracket and top panel, if A flame viewing point is provided, just above the they are not already fitted.
-
Page 37: Information For The User
This information may be required to tank. validate the Grant extended warranty. 6 With the fuel supply valve closed, clean/replace the filter element and clean the filter bowl. IMPORTANT... - Page 38 8 - BOILER SERVICING Dismantling prior to servicing 1 Open the case door and remove the grey plinth - loosen the screw securing the right hand side of the Cleaning cover plinth inside the case. Withdraw the plinth forward from the right and away from the case. 2 Carefully lift up the expansion vessel and remove it from the front of the boiler.
- Page 39 8 - BOILER SERVICING Fig. 34 - Combi 90 baffle positions Cleaning the burner See section 12.1 electrodes away from the nozzle. Remove the nozzle using a good fitting spanner (16 mm). The 1 Combustion head - Loosen the two screws use of an ill-fitting spanner will damage the nozzle securing the combustion head to the burner flange and could lead to an incorrect flame pattern.
-
Page 40: Replacement Of Boiler Components
8 - BOILER SERVICING 4 Photocell - The photocell is a push-fit in the burner body, see Fig. 36. Carefully pull out the photocell to clean. 5 Fan - With the air intake spigot removed, remove the screws securing the fan housing cover (R/H side of burner) and remove the cover. - Page 41 9 - REPLACEMENT OF BOILER COMPONENTS Fig. 37 - Boiler components (plinth and pipework cover removed for clarity) 8 Fit a replacement pump using the reverse of the 5 Close the primary return isolating valve (B) and the above procedure, ensuring the sealing washers are pump isolating valve (D).
- Page 42 9 - REPLACEMENT OF BOILER COMPONENTS Diverter valve diaphragm 1 Follow steps 1 to 4 of section 9.2. f) Re-assemble the valve using reverse of the above procedure, ensuring that the large diameter of the 2 Unscrew and disconnect pipe unions 1, 5 & 9. See spring is at the bottom of the valve.
- Page 43 9 - REPLACEMENT OF BOILER COMPONENTS 5 Reconnect the flexible hose, ensuring that the 4 Working from the front of the boiler, if it is not sealing washer is correctly fitted in the union possible to remove the front top casing panel (e.g. before tightening.
- Page 44 9 - REPLACEMENT OF BOILER COMPONENTS Pressure relief (safety) valve - Combi 90 Automatic air vent - Combi 70 9.7a Note: If there is access to the boiler from above, e.g. it 1 From above the boiler, remove the front top casing is not fitted below a fixed worktop, use the procedure panel by pulling it up on one side to disengage the as for the Combi 70 - See previous section 9.7.
- Page 45 9 - REPLACEMENT OF BOILER COMPONENTS Fig. 38 - Combi 70 water components/connections Major Components Connections Cold water inlet isolating valve Diverter valve - cold water inlet Primary return isolating valve Diverter valve - primary inlet Lower pump union Diverter valve - primary outlet Upper pump union - isolating valve Plate heat exchanger - hot water outlet Heating flow check valve...
- Page 46 9 - REPLACEMENT OF BOILER COMPONENTS Fig. 39 - Combi 90 water components/connections Major Components Connections Cold water inlet isolating valve Diverter valve - cold water inlet Primary return isolating valve Diverter valve - primary inlet Lower pump union Diverter valve - primary outlet Upper pump union - isolating valve Plate heat exchanger - hot water outlet Heating flow check valve...
-
Page 47: Wiring Diagrams
10 - WIRING DIAGRAMS Control panel wiring diagram 10.1 10.2 Functional flow wiring diagram Combi 70 & Combi 90 Oil Boilers... - Page 48 Typical connection of external timer 10.3 Important: If a remote timer is used, it must be a single channel 240V unit incorporating voltage free output contacts. 10.4 Connection of Grant remote wall mounted mini programmer Combi 70 & Combi 90 Oil Boilers...
-
Page 49: Fault Finding
11 - FAULT FINDING Combi 70 & Combi 90 Oil Boilers... - Page 50 11 - FAULT FINDING Combi 70 & Combi 90 Oil Boilers...
- Page 51 11 - FAULT FINDING Combi 70 & Combi 90 Oil Boilers...
- Page 52 11 - FAULT FINDING Combi 70 & Combi 90 Oil Boilers...
- Page 53 11 - FAULT FINDING Combi 70 & Combi 90 Oil Boilers...
-
Page 54: Burner Spares
12 - BURNERSPARE PARTS Riello RDB burner - exploded view 12.1 Combi 70 Description Riello Grant Description Riello Grant Part No. Part No. Part No. Part No. Not applicable Needle valve 3007582 RBS109 Flange 3005786 RBS28 Regulator 3008651 RBS120 Combustion head LD2SX (70) -
Page 55: Health And Safety Information
13 - HEALTH AND SAFETY INFORMATION Under the Consumer Protection Act 1987 and Section 6 of the Health & Safety at Work Act 1974, we are required to provide information on substances hazardous to health (COSHH Regulations 1988). Adhesives, sealants and paints used in the manufacture of the product are cured and present no known hazards when used in the manner for which they are intended. -
Page 56: Ec Declaration Of Conformity
All goods sold are subject to our official Conditions of Sale, a copy of which may be obtained on application. © Grant Engineering (UK) Limited 2003. No part of this manual may be reproduced by any means without prior written consent.
Need help?
Do you have a question about the COMBI 70 MkII and is the answer not in the manual?
Questions and answers