Table of Contents
Advertisement
Quick Links
Important
Please read this User's Manual and Setup
Manual (separate volume) carefully to
familiarize yourself with safe and effective
usage.
PRECAUTIONS
Chapter 1 Features and Overview
1-1 Features
1-2 Names of Switches
1-3 Functions
Chapter 2 Basic Operation
2-1 Operation Switch Usage
2-2 Menu Operation
2-3 Resumption of Default Settings
2-4 Locking Switches
Chapter 3 Settings and Adjustment
3-1 Input Signal Switching
3-2 Screen Adjustment
3-3 Color Adjustment
3-4 Sound Adjustment
3-5 PinP (Picture in Picture) Display
3-6 Screen Size Changing
3-7 Off Timer Setting
3-8 Monitor Power-saving Mode Setting
3-9 Power Indicator/EIZO Logo Display Setting
3-10 Beeper Setting
3-11 Information Checking
3-12 Language Setting to be Displayed
Chapter 4 Troubleshooting
Chapter 5 Reference
5-1 Attaching an Arm
5-2 Cleaning
5-3 Specifications
5-4 Glossary
5-5 Preset Timing
How to Setup
Please read the Setup Manual (separate volume)
Advertisement
Table of Contents

Related Manuals for Eizo FlexScan HD2441W-BK


Summary of Contents for Eizo FlexScan HD2441W-BK
- Page 1 3-5 PinP (Picture in Picture) Display 3-6 Screen Size Changing 3-7 Off Timer Setting 3-8 Monitor Power-saving Mode Setting 3-9 Power Indicator/EIZO Logo Display Setting 3-10 Beeper Setting 3-11 Information Checking 3-12 Language Setting to be Displayed Chapter 4 Troubleshooting...
- Page 2 EIZO NANAO CORPORATION’s receipt of said information. Although every effort has been made to ensure that this manual provides up-to-date information, please note that EIZO monitor specifications are subject to change without notice.
-
Page 3: Precautions
PRECAUTIONS IMPORTANT • This product has been adjusted specifically for use in the region to which it was originally shipped. If the product is used outside the region, it may not operate as specified in the specifications. • To ensure personal safety and proper maintenance, please read carefully this section and the caution statements on the monitor. - Page 4 WARNING Place the unit at the strong and stable place. A unit placed on an inadequate surface may fall and result in injury or equipment damage. If the unit falls, disconnect the power immediately and ask your dealer for advice. Do not continue using a damaged unit.
- Page 5 WARNING Handle the power cord with care. • Do not place the cord underneath the unit or other heavy objects. • Do not pull on or tie the cord. If the power cord becomes damaged, stop using it. Use of a damaged cord may result in fire or electric shock.
- Page 6 CAUTION Handle with care when carrying the unit. Disconnect the power cord and cables when moving the unit. Moving the unit with the cord attached is dangerous. It may result in injury. When handling the unit, grip the bottom of the unit firmly with both hands ensuring the panel faces outward before lifting.
-
Page 7: Lcd Panel
LCD Panel In order to suppress the luminosity change by long-term use and to maintain the stable luminosity, use of a monitor in lower brightness is recommended. The LCD panel is manufactured using high-precision technology. However, note that the appearance of any missing pixels or lit pixels does not indicate damage to the LCD monitor. -
Page 8: Table Of Contents
To turn off the power indicator while a screen is ● To reset all settings [Reset] ......14 displayed [Power Indicator] ......30 ● To set EIZO logo display/no EIZO logo display Locking Switches .......... 14 when the monitor turns on ● To lock the available functions [EIZO Logo Appearing Function] ...... -
Page 9: Chapter 1 Features And Overview
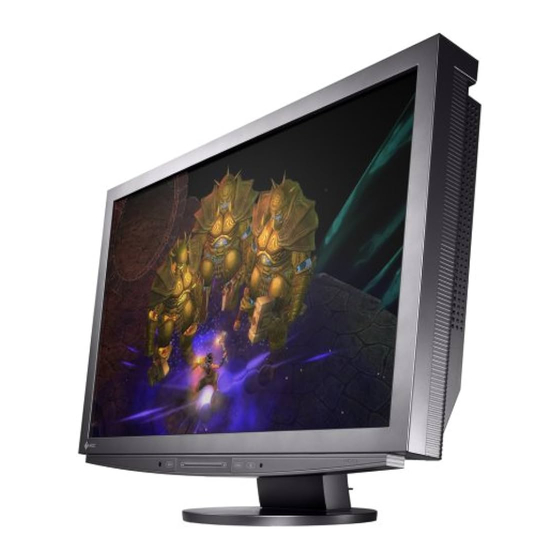
Chapter 1 Features and Overview Thank you very much for choosing an EIZO color LCD monitor. 1-1 Features • 24” wide format LCD with Video signal input connector • Resolution 1920 dots × 1200 lines • Equipped with the ContrastEnhancer and OutlineEnhancer functions •... - Page 10 Connecting to peripheral devices equipment Speakers (with built-in amplifier) Allows you to enjoy sound from a connected PC or AV equipment, etc. Enables you to use as a monitor by connecting to a Windows PC or a Macintosh. NOTE • Enables you to adjust the speaker Attention volume connected to the monitor •...
-
Page 11: Names Of Switches
Power off Indicator/EIZO Logo Display ScreenManager ® is an EIZO’s nickname of the Setting menu. Setting,” on page 30). (In this manual, the setting/adjustment item names in the Setting menu are put in angle brackets < >. ex.: <Color>) Chapter 1 Features and Overview... -
Page 12: Functions
1-3 Functions Switching the Input Signal Single display PinP (Picture in Picture) display Input Selection menu (As for the menu operation, refer to page 13.) ● To switch the input signal for the Main Window/ Sub-Window ………………………… see page 25 ●... -
Page 13: Settable Functions Differ Depending On The Input Signal
Page 30 ● To set when the image color is not displayed ● To set EIZO logo display/no EIZO logo display correctly [Color Space] …………… see page 35 when the monitor turns on Field Rate Setting [EIZO Logo Appearing Function] ●... -
Page 14: Chapter 2 Basic Operation
Chapter 2 Basic Operation 2-1 Operation Switch Usage ■ Turning the power On/Off Power On: Touch any of the keys to turn on the monitor. Power Off: Touch ■ Displaying/Quitting a menu Input Selection menu Setting menu Touch Touch NOTE Volume menu • There are three methods of operation: Tap the slide bar. (When the menu is not displayed on the screen) • Touching the switch ■ Selecting a menu item Setting and Adjusting Trace the slide bar left and right. -
Page 15: Menu Operation
2-2 Menu Operation ● Basic operation of the Input Selection menu [Displaying the Input Selection menu and selecting the input signal] (1) Touch on the operation panel. The Input Selection menu appears. (2) Trace the slide bar left and right to select the input signal and tap the slide bar. -
Page 16: Resumption Of Default Settings
- Power ON by touching is displayed with the operation lock. or the slide bar. - Operation lock function ON/OFF [Unlocking] - EIZO Logo appearing function (1) Touch to turn off the monitor. ON/OFF (Page 30) (2) Touch for approx. three seconds. -
Page 17: Chapter 3 Settings And Adjustment
Chapter 3 Settings and Adjustment 3-1 Input Signal Switching ● To switch the input signal for the desired image sent from the equipment [Input Selection] [Procedure] NOTE • When “PinP” is selected, the monitor (1) Touch display changes to PinP (Picture in The Input Selection menu appears. -
Page 18: Screen Adjustment (Only For Analog Input Signal Sent From A Pc)
NOTE [Adjustment Procedures] • Use the “Screen Adjustment Program” on the supplied EIZO LCD Utility Choose the <Screen> icon in the Setting menu and tap the Disk. slide bar. The <Screen> menu appears. -
Page 19: Advanced Screen Adjustment
Run the Screen Adjustment Program. NOTE • For how to start the Screen Load the EIZO LCD Utility Disk on the PC, and start the Screen Adjustment Program, refer to the Adjustment Program compatible with the PC in use. “Readme.txt” or the “Readme” file. -
Page 20: To Correct Screen Position
● To correct screen position [Hor.Position/Ver.Position] Since the number of pixels and the pixel positions are fixed on the LCD monitor, only one position is provided to display images correctly. The position adjustment is made to shift an image to the correct position. -
Page 21: Color Adjustment
3-3 Color Adjustment Simple Adjustment ● To select the color mode [Color Mode] NOTE • The adjustment status of the Color Switching the color mode enables you to set the monitor to the appropriate Mode may be changed. (Refer to display mode. -
Page 22: Advanced Adjustment
Advanced Adjustment ● To adjust/set Color Mode Attention • Perform [Auto Range Adjust] Independent adjustments/settings and saving of the Color adjustment are before starting color adjustment for available for each mode. analog input signals sent from a PC. Refer to “To adjust color gradation ✓... -
Page 23: Adjustment Items
● Adjustment items NOTE • The values shown in the “%” are Menu Description Adjustment range available only as reference. Brightness To adjust the full screen 0 to 100% brightness as desired Black Level To adjust the black level as 0 to 100% desired NOTE... -
Page 24: To Adjust The Brightness Automatically [Brightregulator]
[Procedure] (1) Choose the <Color> icon in the Setting menu and tap the slide bar. (2) Choose the <Color Mode> icon in the <Color> menu and tap the slide bar. (3) Select the desired color mode in the <Color Mode> menu and tap the slide bar. -
Page 25: Sound Adjustment
3-4 Sound Adjustment ● To adjust [Volume/Treble/Bass/Balance/Sound Level]. NOTE • The sound adjustments other than [Sound Level] are available to Menu Description Adjustment range perform for speakers and headphones Volume respectively. When adjusting the To adjust the volume 0 to 30 headphone sound, connect the headphone to the monitor. -
Page 26: Pinp (Picture In Picture) Display
3-5 PinP (Picture in Picture) Display ● To display the PC input signal screen (Main Window) NOTE • When the <PinP> is set to “On”, the and the VIDEO input signal screen (Sub-Window) monitor displays the images for the simultaneously [PinP] PC input signal currently selected and When a PC and an AV equipment are connected to the monitor, the monitor the VIDEO input signal previously... -
Page 27: To Hide The Sub-Window Display With Its Sound Being Heard [Sub-Window Off]
■ To switch the input signal for Main Window/Sub-Window [Procedure] (1) Touch Attention • The setting items of the Input The Input Selection menu appears. Selection menu in PinP display mode (2) Trace the slide bar left and right to select <Main Window>/<Sub-Window> is different from those in the single and tap the slide bar. -
Page 28: To Change The Sub-Window Position [Sub-Window Position]
● To change the Sub-Window position [Sub-Window Position] You can select the Sub-Window position either “Upper Left”, “Upper Right”, “Lower Left” and “Lower Right”. Upper Left Upper Right Lower Left Lower Right [Procedure] (1) Choose the <PinP Settings> icon in the Setting menu and tap the slide bar. (2) Choose the <Sub-Window Position>... -
Page 29: Screen Size Changing
3-6 Screen Size Changing ● To change the screen image/projected image size appearing on the screen [Screen Size] [PC Input Signal] If you set the resolution other than recommended resolution on the monitor, the monitor shows the image automatically enlarged on the whole screen. The <Screen Size>... - Page 30 The screen sizes and kinds are shown below. The available setting value differs depending on the input signal. Input signal:Aspect ratio 16:9 Letterbox (Format) (480i/480p/ (480i/480p/ (480i/480p/ (1080i/720p/1080p) 576i/576p) 576i/576p) 576i/576p) Screen size − − Letterbox 16:9 − − − 16:9 Full Letterbox shows a 4:3 screen display keeping the vertical and horizontal ratio of 16:9.
-
Page 31: Off Timer Setting
3-7 Off Timer Setting ● To set monitor power-off time [Off Timer] This function allows the monitor to automatically turn off after a specified time has passed. [Procedure] Attention • “The power will turn off soon. To (1) Choose the <Off Timer> icon in the Setting menu and tap the slide bar. cancel Off Timer, touch the slide bar.”... -
Page 32: Power Indicator/Eizo Logo Display Setting
To set EIZO logo display/no EIZO logo display when the monitor turns on [EIZO Logo Appearing Function] When the unit is turned on, the EIZO logo appears at the center of the screen. NOTE • The logo appears with the default This function enables you to select Logo display/No logo display. -
Page 33: Information Checking
[Procedure] (1) Choose the <Monitor Settings> icon in the Setting menu and tap the slide bar. (2) Choose the <Beep> icon in the <Monitor Settings> menu and tap the slide bar. The <Beep> menu appears. (3) Trace the slide bar left and right to select either “On” or “Off” and tap the slide bar. -
Page 34: Chapter 4 Troubleshooting
Chapter 4 Troubleshooting If a problem still remains after applying the suggested remedies, contact your local dealer. • No picture problems→See No. 1 and 2 in [PC Input Signal], No. 1 and 2 in [VIDEO Input Signal] • Imaging problems→See No. 1 - 6 in [Common], No. 3 - 7 in [PC Input Signal], No.3 in [VIDEO Input Signal] •... - Page 35 [PC Input Signal] Problems Possible cause and remedy No Picture • Check whether the power cord is correctly connected. • Power indicator does not light up. • Touch • Power indicator lights in orange. • Switch the input signal with •...
- Page 36 Problems Possible cause and remedy No sound/Volume control is not available. • Check whether the [USB] setting is corresponding to the input signal from the PC. The USB devices connected to the monitor do not • Check whether the USB cable is connected correctly. work.
- Page 37 [VIDEO Input Signal] Problems Possible cause and remedy No Picture • Check whether the power cord is correctly connected. • Power indicator does not light up. • Touch • Power indicator lights in orange. • Switch the input signal with •...
- Page 38 ● Messages List The meanings of the main messages appearing on the screen are described below. Messages Description “Your current setting will be lost, if you perform “Auto Appears when performing [Auto Screen Adjust]. Screen Adjust”. Do you continue?” “Your current setting will be lost, if you perform “Auto Appears when performing [Auto Range Adjust].
-
Page 39: Chapter 5 Reference
The stand can be removed and replaced with an arm (or another stand) to be Attention • When attaching an arm or stand, attached to the monitor. Use an arm or stand of EIZO option. follow the instructions of their user’s manual. -
Page 40: Cleaning
5-2 Cleaning Clean the monitor periodically to keep the monitor clean and extend its life. Attention • Never use any solvents or chemicals, such as thinner, benzene, wax, Cabinet alcohol, and abrasive cleaner, which Clean the cabinet with a soft cloth dampened with a little mild detergent. may damage the cabinet or LCD panel. -
Page 41: Specifications
5-3 Specifications Panel LCD Panel 24.1-inch (610 mm) TFT color LCD with anti-glare hard coating Viewing angle: Vertical 178°, Horizontal 178° (CR: 10 or more) Dot Pitch 0.270mm Resolution 1920 dots × 1200 lines Max. Display Approx. 16.77 million colors: Applicable to 8 bit (1048.77 million colors) Color Display Area 518.4mm ×... - Page 42 Dimensions (Main unit) 566 mm (22.3”) (W) × 362.5 - 480mm (14.3 - 18.9”) (H) × 230mm (9.1”) (D) Dimensions (without Stand) 566mm (22.3”) (W) × 396mm (15.6”) (H) × 92.3mm (3.6”) (D) Weight (Main unit) 10.3kg (22.7 lbs) Weight (without Stand) 7.9kg (17.4 lbs) Environmental Conditions Operating temperature : 0°C - 35°C...
- Page 43 Setting menu list Item PC 1 PC 2 VIDEO 1 VIDEO 2 PinP − − − Auto Screen Adjust ✓ ✓ Screen − − − Auto Range Adjust ✓ ✓ − − − Clock ✓ ✓ − − − Phase ✓...
- Page 44 − Auto PC 1 Screen Size Full Screen [480i/480p/576i/576p signal] [1080i/720p/1080p signal] 16:9 Full Off Timer Disable Option list Cleaning Kit EIZO ScreenCleaner LA-011-W (wall mount arm [1-axis]) LA-030-W (wall mount arm [3-axes]) LA-131-D (flexible arm [3-axes]) Chapter 5 Reference...
-
Page 45: Glossary
5-4 Glossary Clock The analog input monitor needs to reproduce a clock of the same frequency as the dot clock of the graphics system in use, when the analog input signal is converted to a digital signal for image display. This is called clock adjustment. - Page 46 HDMI (High-Definition Multimedia Interface) HDMI is a digital interface standard, developed for consumer electrical appliance or AV equipment. This standard is issued on the basis of the DVI standard which is one of an interface specification for the connection between a PC and a monitor.
-
Page 47: Preset Timing
5-5 Preset Timing The following table shows factory preset video timing. (for analog signal only) Attention • Display position may deviate Frequency depending on the PC connected, Mode Dot clock Polarity Horizontal: kHz which may require screen adjustment Vertical: Hz using the Setting menu. - Page 48 Horizontal 64.67 Positive VESA CVT RB 119.0 MHz 1680×1050 Vertical 59.88 Negative Horizontal 74.04 Positive VESA CVT RB 154.0 MHz 1920×1200 Vertical 59.95 Negative (The signal specified below is also applicable for the use of some AV equipment.) Frequency Mode Dot clock Horizontal: kHz Polarity...
- Page 49 Applicable to White/Silver and Black cabinet only. Congratulations! The display you have just purchased carries the TCO’03 Displays label. This means that your display is designed, manufactured and tested according to some of the strictest quality and environmental requirements in the world. This makes for a high performance product, designed with the user in focus that also minimizes the Impact on our natural environment.
- Page 50 Changes or modifications not expressly approved by the party responsible for compliance could void the user’s authority to operate the equipment. Note Use the attached specified cable below or EIZO signal cable with this monitor so as to keep interference within the limits of a Class B digital device. - AC Cord...
- Page 51 Hinweise zur Auswahl des richtigen Schwenkarms für Ihren Monitor Dieser Monitor ist für Bildschirmarbeitsplätze vorgesehen. Wenn nicht der zum Standardzubehör gehörige Schwenkarm verwendet wird, muss statt dessen ein geeigneter anderer Schwenkarm installiert werden. Bei der Auswahl des Schwenkarms sind die nachstehenden Hinweise zu berücksichtigen: Der Standfuß...
Need help?
Do you have a question about the FlexScan HD2441W-BK and is the answer not in the manual?
Questions and answers