Table of Contents
Advertisement
Quick Links
Advertisement
Table of Contents

Summary of Contents for LABEL & MARK INDUSTRIES COMPANY LK-320
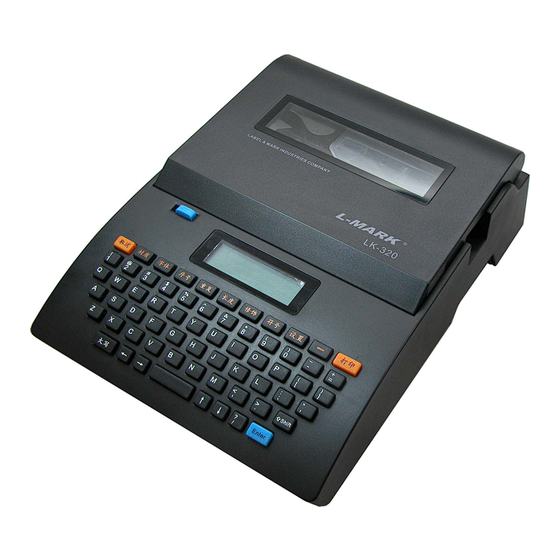
- Page 1 User’s Manual LK-320 Tubing and Label Printer LABEL & MARK INDUSTRIES COMPANY...
-
Page 3: Table Of Contents
USER’S MANUAL OF LK-320 Contents Chapter I Foreword ..........................3 Chapter II Preparation ........................8 2.1 Configuration of the Main Unit ................... 8 2.1.1 Basic configuration....................8 2.1.2 List of consumables provided................9 2.2 Nomenclature and Functions ..................... 11 2.2.1 Main unit........................ 11 2.2.2 LCD display description.................. - Page 4 USER’S MANUAL OF LK-320 4.2.9.1 Orientation......................33 4.2.9.2 Spacing ......................34 4.2.9.3 Density ....................... 34 4.2.9.4 Alignment......................35 4.2.9.5 Cutting set ......................36 4.2.9.6 Cut depth ......................37 4.2.9.7 Correct ....................... 38 4.2.9.8 File ........................40 4.2.9.9 Online......................... 42 4.2.9.10 Machine Set....................43 Ⅰ...
-
Page 5: Chapter I Foreword
Chapter I Foreword Welcome to use LK-320 (Includes two models LK-320E/LK320P) label & mark printer! This manual describes the features of LK-320 and the points of attention during operating and using it. Please study this manual to have an adequate understanding of LK-320 features before you use this machine so as to take a better advantage of it. - Page 6 USER’S MANUAL OF LK-320 printing. Warning: Do not touch the print head face or the connector; otherwise the print head may be damaged as a result of static. Warning: This equipment is fitted with a cutting knife. Do not put your fingers near it during use. Be careful to keep clear of the cutting knife during handling.
- Page 7 USER’S MANUAL OF LK-320 11) For the benefit of safety, when the “protective cover” is opened the printer will not work. Therefore, put on the protective cover when printing. During opening the “protective cover”, do not let any object touch the moving parts of the printer.
- Page 8 USER’S MANUAL OF LK-320 [Caution] 1. Not all consumables are compatible with your machine. Compatibility is dependent on the features and specifications of consumables. Please use original consumables, which ensure a steady printing quality and L-MARK help protect your machine.
- Page 9 USER’S MANUAL OF LK-320 [Description of features] Full English operation interfaces, possible to enter English, numbers, symbols; various editing functions enabled; LK-320E is the English version printer and LK320P can connect with PC. Fully automatic semi-cutting operation;...
-
Page 10: Chapter Ii Preparation
The function of each key is also described. 2.1 Configuration of the Main Unit 2.1.1 Basic configuration 1. LK-320 label and mark printer 1 piece 2. Warranty card 1 sheet 3. Packing list 1 sheet 4. -
Page 11: List Of Consumables Provided
USER’S MANUAL OF LK-320 2.1.2 List of consumables provided Product Commodity Description Package Code Label cassette tape (White 6mm) LM406WL 5pcs(8m×5)/box Label cassette tape (White 9mm) LM409WL 5pcs(8m×5)/box Label cassette tape (White 12mm) LM412WL 5pcs(8m×5)/box Label cassette tape (Yellow 6mm) LM406YL 5pcs(8m×5)/box... - Page 12 USER’S MANUAL OF LK-320 Ribbon Label cassette/Heat shrink tube cassette LABEL & MARK INDUSTRIES COMPANY...
-
Page 13: Nomenclature And Functions
USER’S MANUAL OF LK-320 2.2 Nomenclature and Functions 2.2.1 Main unit LABEL & MARK INDUSTRIES COMPANY... -
Page 14: Lcd Display Description
USER’S MANUAL OF LK-320 2.2.2 LCD display description Display Interpretation words Length Length of the page in which the cursor exists Font Font size of the page in which the cursor exists Status of semi-cutting function Cutting C: semi-cutting L: demarcating... -
Page 15: Keyboard
USER’S MANUAL OF LK-320 2.2.3 Keyboard [Medium] ( page 24 ) This key is used to selecting the print medium; available in label tape, PVC tube, and heat shrink tube [Font ] (Font Size) ( page 24 ) This key is used to change character size... -
Page 16: Installation
USER’S MANUAL OF LK-320 This key is used to delete the character that precedes the cursor [Print] ( page 42 ) This key is used to print the entire current document under edition [Shift] This key is used to in combination with the input keys to input upper-case character. - Page 17 USER’S MANUAL OF LK-320 Installation of Ribbon [Attention] The Ribbon can not be detected by the printer if it is not properly installed. Therefore see that the Ribbon is placed into the correct place. If the Ribbon becomes loose, the machine may be unable to detect the Ribbon and the ribbon is prone to be torn broken or corrugated.
-
Page 18: Installation And Removal Of Printing Material Cassette
USER’S MANUAL OF LK-320 Removal of Ribbon 3. Remove the ribbon cassette when the catches on both sides are fully released. 4. Close the protective cover. 2.3.2 Installation and removal of printing material cassette Installation of printing material cassette 1. Open the protective cover. -
Page 19: Installation Of Sleeve Tube Guide
USER’S MANUAL OF LK-320 Installation of Label cassette 3. Close the protective cover Removal of printing material cassette 1. Prior to removing printing material cassette, please press [Reverse] key and then press (Yes) and then press [Enter] key to roll back the printing material (cf. -
Page 20: Connection Of Ac Power Adaptor
USER’S MANUAL OF LK-320 2.3.4 Connection of AC power adaptor 1. Switch off the power supply. 2. Plug one end of the AC power adaptor connection cable into the round socket on the side of the machine. 3. Plug the other end of the AC power adaptor connection cable into an AC power supply socket. - Page 21 USER’S MANUAL OF LK-320 Take off the cutter to be replaced and install a new cutter. Note: Be careful not to cut your finger when replacing cutter and anvil. If a new cutter does not produce the desired performance, please replace the anvil by appeal the sale agents.
-
Page 22: Chapter Iii Basic Operation
USER’S MANUAL OF LK-320 Chapter III Basic Operation Note: In order to have a correct print out, please configure material options and specifications correctly and ensure that the tube printer configuration is compatible with your material and its specifications. 3.1 Power-on Upon powered on, the machine will produce the following power-on display. -
Page 23: Selection Of Printing Material Specifications
USER’S MANUAL OF LK-320 and then press [Enter] key. 3.2 Selection of Printing Material Specifications 3.2.1 Selection of sleeve tube specifications Select “sleeve tube” on the material selection window and then press [Enter] key. The following window will be displayed: Use [ ←... -
Page 24: Selection Of Font Size
USER’S MANUAL OF LK-320 Use [ ← ] or [ → ] keys to select the desired specification, and then press [Enter] key. 3.2.4 Selection of Font Size After the selection of printing material specifications and press [Enter] key to recall the font size selection window. - Page 25 USER’S MANUAL OF LK-320 which you are allowed to input the print contents. For example: to print the following contents in three pages: L-MARK 220V Select [Language], [Capital] as appropriate. Enter L, -, M, A, R, and K one after another and the screen will display as...
-
Page 26: Insertion
USER’S MANUAL OF LK-320 automatically and the text editing window will be displayed automatically. This round of operation has been completed. 3.4 Insertion If you need to insert another page in the already edited contents, you may use [↓] or [↑] keys to move the cursor behind the page behind which you want the new page to be inserted. -
Page 27: Chapter Iv Function Keys
USER’S MANUAL OF LK-320 Chapter IV Function Keys 4.1 Notes to Function Keys 1. [ ] indicates a function key and framed contents indicate screen display. 2. A miss operation will result in a piece of error information on the screen. -
Page 28: Instructions For Function Keys
USER’S MANUAL OF LK-320 4.2 Instructions for Function Keys 4.2.1 Medium You may choose label, PVC sleeve tube, or heat shrink tube as the material to be printed on. Be sure to select the correct material before printing; after replacing the printing material, be sure to change the settings of the tube printer so that they are compatible with the new printing material;... -
Page 29: Number
USER’S MANUAL OF LK-320 Specify font Press [↑] or [↑] to choose Specify font or Auto font , and press [Enter]. Select Specify font and press [Enter], then the screen will display as follows: 1 2 3 4 5 6... - Page 30 USER’S MANUAL OF LK-320 be printed. Serial number printing function is available for any place in a page. Move the cursor to a place in a page desired and press [Number] key, then the screen will display as follows: Numeric:(DEC) Press [↑] or [↑] to choose...
- Page 31 USER’S MANUAL OF LK-320 End: Input the terminating serial number and press [Enter], then the setting is completed and the screen will return to the text editing window automatically. Then, the text editing window will display serial number status as below: For natural serial number (0—999):...
-
Page 32: Repeat
USER’S MANUAL OF LK-320 For UPPER CASE sequential letter (A—Z): A For lower case sequential letter (a—z): a Note: If a page has been assigned both an S/N and a Repeat function, then the S/N function will be executed before Repeat. - Page 33 USER’S MANUAL OF LK-320 adjustment is valid for all the pages in the document. This function is provided to specify the page length to be printed. The length ranges from 6mm to 100mm, and shall be integer numbers only. Press [Length] key, and the screen will display as follows: Auto length Press [↑] or [↑] to choose...
-
Page 34: Frame
USER’S MANUAL OF LK-320 cursor exists and all the pages behind it will assume an automatic length. Then, the screen will show the text editing window automatically. 4.2.6 Frame This function is provided to add frame or underline to certain pages. The initial setting does not have any effects. -
Page 35: Set
USER’S MANUAL OF LK-320 can use English and Chinese and Symble. Press [ Symbol ] to select and current entry status will be displayed on the left lower corner on the screen. CH indicates Chinese pinyin entry method; En indicates English entry method;... -
Page 36: Spacing
USER’S MANUAL OF LK-320 4.2.9.2 Spacing This function is provided to set the spacing between characters. This setting is valid for all the contents to be printed. Press [Spacing] and the screen will display as follows: Spacing ( 0 ): Enter the value you want and press [Enter], and then the screen will return to the text editing window automatically. -
Page 37: Alignment
USER’S MANUAL OF LK-320 4.2.9.4 Alignment This function is used to set the left alignment or center alignment of the characters. This setting is valid for all the contents to be printed. Select [Alignment] and then the screen will display as follows: Center Press [↑] or [↑] to choose Center , Left alignment or Fine adjustment ,... -
Page 38: Cutting Set
USER’S MANUAL OF LK-320 The (+ 0.0) is current value. The fine adjustment ranges from -3.0 to +3.0mm. If you have selectd the label after you press [Enter], then the screen will display as follows: Label adjust Press [Enter], then the screen will display as follows: Set(+ 0.0):... -
Page 39: Cut Depth
USER’S MANUAL OF LK-320 4.2.9.6 Cut depth The initial setting value for half-cut depth is “0”. If you have selectd the tube after press [half-cut depth] and the screen will display as follows: Tube cut depth Press[↑] or [↓] to select... -
Page 40: Correct
USER’S MANUAL OF LK-320 If you have selectd the label after press [half-cut depth] and the screen will display as follows: Label Cut depth Adjust half-cut depth of label Select Label and press [Enter] to finish your label semi-cutting Cut depth depth. - Page 41 USER’S MANUAL OF LK-320 Cutter Choose Cutter , Rang(+0.0): then sent -100~100 can to adjust the position of cutter line. Under the Label medium Select [ Correct ] and the screen will display as follows: Label Length Press[↑] or [↓] to select...
-
Page 42: File
USER’S MANUAL OF LK-320 Set ( -2.0): Then sent -2.0~+2.0 can to adjust the position of printer head. For example: Now the printer head position is -1.0. If input “0.2” the printer head position will move upwards 0.2mm. The position is -0.8mm. - Page 43 USER’S MANUAL OF LK-320 Select Save file and press [Enter], then the screen will be displayed as follows: Input file name: input your file name (10 characters at the most). A: If the name you input exists or the current file has already been saved, then...
-
Page 44: Online
USER’S MANUAL OF LK-320 Delete file Select Delete file and press [Enter], then the screen will display as follows: Delete one file Press[↑] or [↓] to select Delete one file or Delete all file and press [Enter]. A: Delete one by one Press[↑] or [↓] to select Delete one file and press [Enter]. -
Page 45: Machine Set
USER’S MANUAL OF LK-320 Select “Yes” and press [Enter], then the screen will display as follows: Process in PC Processing data... Then you can process the data in the computer use the software and printer out what your want. 4.2.9.10 Machine Set Ⅰ... -
Page 46: Backspace
USER’S MANUAL OF LK-320 4.2.10 Backspace This function is provided to delete the character before the cursor. Move the cursor behind the character you want to delete and press [Backspace], and then the character before the cursor will be deleted. -
Page 47: Chapter V Specifications Description
USER’S MANUAL OF LK-320 Chapter V Specifications Description Model LK-320 Mode of printing Thermal transfer printing Resolution 300dpi Printing character 1.3mm—8mm height Maximum number of input pages Sleeve tube size Φ2.5—Φ5 printable 6mm、9mm、12mm label size printable Printing speed 25mm/sec(without cut) 12.5mm/sec(with half-cut) -
Page 48: Chapter Vi Others
USER’S MANUAL OF LK-320 Chapter VI Others 6.1 Specifications of Original Consumables Product Commodity Description Package Code Label cassette tape (White 6mm) LM406WL 5pcs(8m×5)/box Label cassette tape (White 9mm) LM409WL 5pcs(8m×5)/box Label cassette tape (White 12mm) LM412WL 5pcs(8m×5)/box Label cassette tape (Yellow 6mm) LM406YL 5pcs(8m×5)/box... -
Page 49: Simple Trouble-Shooting
USER’S MANUAL OF LK-320 6.2 Simple Trouble-shooting Problem Cause Solution Text is not center Please use “Fine adjustment” to aligned after Material difference adjust the text alignment. semi-cutting Actual page length differs from the Material difference Please use “Correct” function. -
Page 50: Warranty Card
USER’S MANUAL OF LK-320 6.2 Warranty Card L-MARK ® Product Warranty Card Notes to Product Warranty 1. This card and the invoice for the machine are the evidence for product warranty service. This card and the invoice shall be posted to us when warranty service is demanded. - Page 51 USER’S MANUAL OF LK-320 ® L-MARK Product Warranty Card Product information S/N: Model Product S/N Client information: Name Address Contact Tel. Postal code E-mail Service record: Date Cause and reparation of faults Repaired by Sale agent: Manufacturer: LABEL & MARK INDUSTRIES COMPANY http://www.lmark.net...
- Page 52 USER’S MANUAL OF LK-320 Manufacturer: LABEL & MARK INDUSTRIES COMPANY http://www.lmark.net Printed in china LABEL & MARK INDUSTRIES COMPANY...
Need help?
Do you have a question about the LK-320 and is the answer not in the manual?
Questions and answers
Manual book