Advertisement
Quick Links
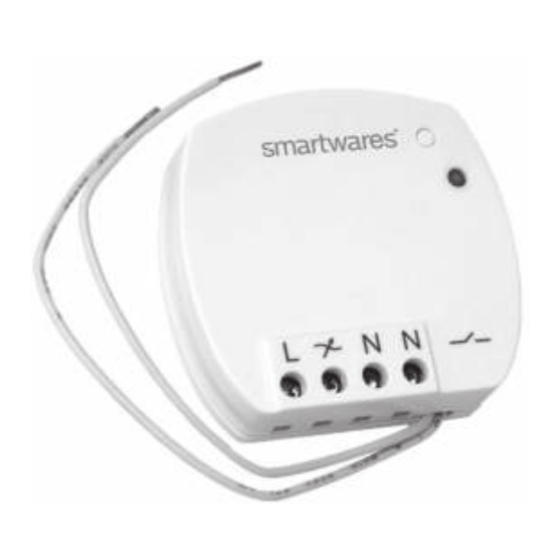
SH4-90262
EN Mini built-in switch
NL Mini-inbouwschakelaar
DE Mini-Einbauschalter
FR Mini-interrupteur intégré
ES Miniconmutador integrado
IT Mini-interrittore integrato
SV Mini-inbyggd brytare
PL Mini-wyłącznik wbudowan
EN
1
PREPARATION BEFORE USE
In your electrical circuit panel, locate the circuit breaker control for the
wall switch you will be working on.
Switch the circuit off.
CONNECTING THE BUILT-IN SWITCH
The built-in switch is designed to be placed behind an existing wall
switch.
Remove and disconnect the wall switch behind which you want to
place the built-in switch (1).
NOTE: The built-in switch only works on single pole switches, it does
not work on multiway switching.
Connect the built-in switch to the power supply (2):
2
Connect the phase wire (brown) to L.
Connect the neutral wire (blue) to N.
Connect the built-in switch to the lamp (3):
Connect the neutral wire (blue) of the lamp to N.
Connect the hot wire (black) to χ.
NOTE: The neutral wire may not always be present in the wall
junction box and needs to be installed in order for the product to work.
Connect the built-in switch to the wall switch (4):
Connect the two white wires of the built-in switch to the wall switch.
220-240 VAC
Attention!
50/60Hz
- The wall switch itself should not be connected to the mains power,
the walls witch should only be connected to the white wires of the
built-in switch.
Switch on the mains power in your electric circuit panel.
3
PAIRING/DISCONNECTING
Pairing the receiver with a sender
A. Press and hold the "LEARN" button (5) on the built-in switch for 3
B. Press the "ON" button on the sender that you want to pair.
C. Repeat these steps for any other sender. You can pair a
Disconnecting a link
Follow above procedure, but during step B press the "OFF" button on
the sender.
4
Disconnecting all links
A. Press and hold the "LEARN" button (5) for 7 seconds until the
OPERATING SENDERS
A. Press the "I" / "ON" button on the sender to turn on the receiver.
B. Press the "0" / "OFF" button on the sender to turn off the receiver.
NL
5
VOORBEREIDING VOOR GEBRUIK
Zoek in uw stoppenkast de stroomonderbreker voor de
wandschakelaar waaraan u gaat werken.
Schakel de stroom uit.
DE INGEBOUWDE SCHAKELAAR AANSLUITEN
De ingebouwde schakelaar is ontworpen om achter een bestaande
wandschakelaar te worden geplaatst.
Verwijder de wandschakelaar waarachter u de ingebouwde
schakelaar wilt plaatsen, en koppel de wandschakelaar los. (1).
Instruction manual
second to put it in pairing mode. The LED on the built-in switch
will blink.
ð The lamp you have connected will turn on.
maximum of 6 senders to the receiver.
LED starts to blink.
ð All links are disconnected.
Gebruiksaanwijzing
Specifications:
Max. switch output: 400W
Frequency: 433.92MHz
Input AC Voltage: 230V ~ 50Hz
Maximum RF output: 0dBm
OPMERKING: De ingebouwde schakelaar werkt alleen met eenpolige
schakelaars, niet met wisselschakelaars.
De ingebouwde schakelaar aansluiten op de voeding (2):
Sluit de fasedraad (bruin) aan op L.
Sluit de neutrale draad (blauw) aan op N.
De ingebouwde schakelaar aansluiten op de lamp (3):
Sluit de neutrale draad (blauw) van de lamp aan op N.
Sluit de fasedraad (zwart) aan op χ.
OPMERKING: De neutrale draad is mogelijk niet altijd aanwezig in de
wandaansluitdoos en moet worden geïnstalleerd om het product te
laten werken.
De ingebouwde schakelaar aansluiten op de wandschakelaar (4):
Sluit de twee witte draden van de ingebouwde schakelaar aan op de
wandschakelaar.
Let op!
- Sluit de wandschakelaar zelf niet aan op de netvoeding. De
wandschakelaar moet alleen worden aangesloten op de witte draden
van de ingebouwde schakelaar.
Schakel de netvoeding in in uw stoppenkast.
KOPPELEN/LOSKOPPELEN
De ontvanger koppelen aan een zender
A. Houd de LEARN-knop (5) op de ingebouwde schakelaar
3 seconden ingedrukt om deze in te koppelingsmodus te zetten.
Het ledlampje op de ingebouwde schakelaar gaat knipperen.
B. Druk op de knop ON op de zender die u wilt koppelen.
ð De lamp die u hebt verbonden gaat branden.
C. Herhaal deze stappen voor alle andere zenders. U kunt maximaal
6 zenders koppelen met de ontvanger.
Een koppeling verbreken
Volg de bovenstaande procedure, maar druk bij stap B op de knop
OFF van de zender.
Alle koppelingen ongedaan maken
A. Houd de LEARN-knop (5) 7 seconden ingedrukt tot het ledlampje
gaat knipperen.
ð Alle koppelingen zijn verbroken.
DE ZENDERS BEDIENEN
A. Druk op de knop I/ON op de zender om de ontvanger in te
schakelen.
B. Druk op de knop 0/OFF op de zender om de ontvanger uit te
schakelen.
Bedienungsanleitung
DE
VORBEREITUNG
Suchen Sie in Ihrem Sicherungskasten den Trennschalter für den
Stromkreis des Wandschalters, den Sie auswechseln wollen.
Schalten Sie den Stromkreis ab.
ANSCHLIESSEN DES EINBAUSCHALTERS
Der Einbauschalter ist zur Installation hinter dem vorhandenen
Wandschalter vorgesehen.
Trennen Sie den Sie den Wandschalter ab, hinter dem der
Einbauschalter installiert werden soll, und entfernen Sei ihn (1).
HINWEIS: Der Einbauschalter funktioniert nur mit einpoligen
Schaltern, nicht jedoch mit einer Wechselschaltung.
Schließen Sie den Einbauschalter an die Spannungsversorgung
an (2):
Verbinden Sie den Phasenleiter (braun) mit L.
Verbinden Sie den Neutralleiter (blau) mit N.
Schließen Sie den Einbauschalter an der Lampe (3) an:
Verbinden Sie den Neutralleiter (blau) mit N an der Lampe.
Verbinden Sie den spannungsführenden Leiter (schwarz) mit χ.
Advertisement

Related Manuals for Smartwares SH4-90262


Summary of Contents for Smartwares SH4-90262
- Page 1 Specifications: Max. switch output: 400W SH4-90262 Frequency: 433.92MHz EN Mini built-in switch NL Mini-inbouwschakelaar Input AC Voltage: 230V ~ 50Hz DE Mini-Einbauschalter FR Mini-interrupteur intégré Maximum RF output: 0dBm ES Miniconmutador integrado IT Mini-interrittore integrato SV Mini-inbyggd brytare PL Mini-wyłącznik wbudowan...
- Page 2 FUNCIONAMIENTO DE LOS EMISORES HINWEIS: Der Neutralleiter ist in manchen A. Appuyez sur la touche « LEARN » et maintenez-la Anschlussdosen nicht vorhanden, muss aber installiert enfoncée (5) sur l'interrupteur intégré pendant 3 A. Pulse el botón “I”/“ON” del emisor para encender el werden, damit das Produkt funktioniert.
- Page 3 Specifications: Max. switch output: 400W SH4-90262 Frequency: 433.92MHz EN Mini built-in switch NL Mini-inbouwschakelaar Input AC Voltage: 230V ~ 50Hz DE Mini-Einbauschalter FR Mini-interrupteur intégré Maximum RF output: 0dBm ES Miniconmutador integrado IT Mini-interrittore integrato SV Mini-inbyggd brytare PL Mini-wyłącznik wbudowan PODŁĄCZANIE WBUDOWANEGO PRZEŁĄCZNIKA...
Need help?
Do you have a question about the SH4-90262 and is the answer not in the manual?
Questions and answers