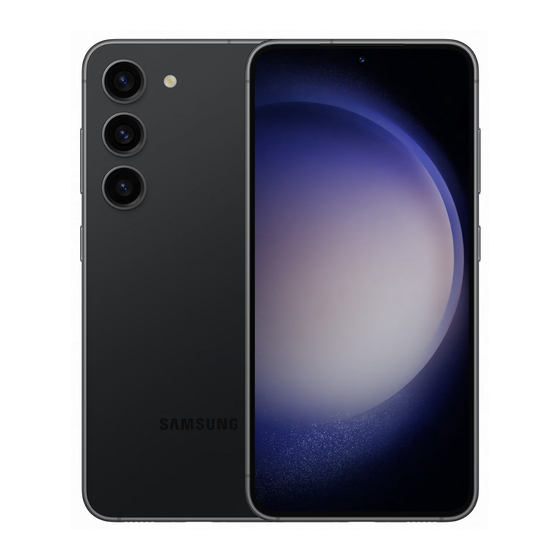
Samsung Galaxy S23 User Manual
Hide thumbs Also See for Galaxy S23:
Table of Contents

Advertisement

USER MANUAL
SM-S911W
SM-S916W
SM-S918W
English. 02/2023. Rev.1.0
www.samsung.com/ca

Advertisement

Table of Contents
loading

Summary of Contents for Samsung Galaxy S23

  • Page 1 USER MANUAL SM-S911W SM-S916W SM-S918W English. 02/2023. Rev.1.0 www.samsung.com/ca...
  • Page 2: Table Of Contents

    106 Voice Recorder 108 My Files Apps and features (Checking and managing files) 108 Clock Installing or uninstalling apps 108 Calculator 38 S Pen (Galaxy S23 Ultra) 109 Game Launcher 54 Phone 110 Game Booster Contacts (Configuring your gaming 59 Messages...
  • Page 3 115 Link to Windows 139 Always On Display (Using the device through a (Displaying information when computer connection) the screen is turned off) 116 Samsung DeX 140 Security and privacy 120 Google apps 141 Face recognition 143 Fingerprint recognition 146 Samsung Pass...
  • Page 4 Table of Contents Usage notices 165 Precautions for using the device 167 Notes on package contents and accessories 168 Maintaining water and dust resistance 169 Device overheating situations and solutions Appendix 172 Accessibility 187 Troubleshooting 192 Removing the battery Health and Safety...
  • Page 5: Getting Started

    Getting started Device layout and functions ▶ Galaxy S23 Ultra: Front camera Volume key Side key SIM card tray Microphone Speaker Front camera Proximity/Light sensor Volume key Touch screen Side key Edge screen Edge screen Fingerprint recognition sensor S Pen...
  • Page 6 Getting started Rear camera Laser AF sensor Rear camera GPS antenna Microphone Flash NFC antenna / Wireless charging coil Main antenna Speaker Microphone Air vent hole...
  • Page 7 Getting started ▶ Galaxy S23+, Galaxy S23: Front camera Volume key Side key SIM card tray Speaker Microphone Proximity/Light sensor Front camera Volume key Touch screen Side key Fingerprint recognition sensor SIM card tray Headphone jack / Multipurpose jack (USB Type-C)
  • Page 8 Getting started Rear camera Rear camera GPS antenna Microphone Flash NFC antenna / Wireless charging coil Main antenna Speaker Microphone Air vent hole...
  • Page 9 If you use the device with its glass or acrylic body broken, there may be a risk • of injury. Use the device only after it has been repaired at a Samsung Service Centre or an authorized service centre. If dust or foreign materials enter the microphone, speaker, or receiver, or if these •...
  • Page 10 Getting started Hard keys Function When the device is off, press and hold to turn it on. • Press to turn on or lock the screen. • Press and hold to start a conversation with Bixby. Refer to • Side key Using Bixby for more information.
  • Page 11: Charging The Battery

    Getting started Charging the battery Charge the battery before using it for the first time or when it has been unused for an extended period. Wired charging Connect the USB cable to the USB power adapter and plug the cable into the device’s multipurpose jack to charge the battery.
  • Page 12 If you use the wireless charger in areas with weak network signals, you may lose • network reception. Use Samsung-approved wireless chargers. If you use other wireless chargers, • the battery may not charge properly. Quick charging Use a super fast charger or fast charger. To use the fast wireless charging feature, use a charger and components that support the feature.
  • Page 13 Only devices that support the wireless charging feature can be charged using • this feature. Some devices may not be charged. To check out devices that support the Wireless power sharing feature, visit the Samsung website. To charge properly, do not move or use either device while charging. •...
  • Page 14 Getting started Setting the limit for power sharing You can set the device to stop power sharing when the remaining battery power drops below a certain level. Open Settings, tap Battery and device care → Battery → Wireless power sharing → Battery limit, and then set the limit.
  • Page 15 Getting started Battery charging tips and precautions Use only Samsung-approved battery, charger, and cable specifically designed for your device. An incompatible battery, charger, or cable can cause serious injuries or damage to your device. Connecting the charger improperly may cause serious damage to the device. Any •...
  • Page 16: Nano-Sim Card And Esim

    • Some services that require a network connection may not be available • depending on the carrier. Inserting the SIM or USIM card ▶ Galaxy S23 Ultra: SIM card tray...
  • Page 17 • Use only a nano-SIM card. • Use caution not to lose or let others use the SIM or USIM card. Samsung is not • responsible for any damages or inconveniences caused by lost or stolen cards. Ensure that the ejection pin is perpendicular to the hole. Otherwise, the device •...
  • Page 18: Turning The Device On And Off

    Getting started Activating an eSIM Open Settings and tap Connections → SIM manager → Add eSIM. When a mobile plan is found, follow the on-screen instructions to activate the eSIM. If you have a QR code provided by your carrier, open Settings, tap Connections → SIM manager →...
  • Page 19: Initial Setup

    Getting started Turning the device off To turn off the device, press and hold the Side key and the Volume Down key simultaneously. Alternatively, open the notification panel, swipe downwards, and then tap Tap Power off. To restart the device, tap Restart. You can set the device to turn off when you press and hold the Side key.
  • Page 20: Samsung Account

    Alternatively, open Settings and tap Accounts and backup → Manage accounts → Add account → Samsung account. Sign in to your Samsung account. If you do not have a Samsung account, tap Create account. Finding your ID and resetting your password If you forget your Samsung account ID or password, tap Find ID or Forgot password? on the Samsung account sign-in screen.
  • Page 21: Transferring Data From Your Previous Device (Smart Switch)

    This feature may not be supported on some devices or computers. • Limitations apply. Visit www.samsung.com/smartswitch for details. Samsung • takes copyright seriously. Only transfer content that you own or have the right to transfer. Transferring data using a USB cable You can connect your previous device to your new phone with the USB cable to transfer data.
  • Page 22 Smart Switch. On the computer, open Smart Switch. If your previous device is not a Samsung device, back up data to a computer using an app provided by the device’s manufacturer. Then, skip to the fifth step. Connect your previous device to the computer using the device’s USB cable.
  • Page 23: Understanding The Screen

    Getting started Understanding the screen Controlling the touch screen Tapping Touching and holding Tap the screen. Touch and hold the screen for approximately 2 seconds. Dragging Double tapping Touch and hold Double tap the an item and screen. drag it to the target position.
  • Page 24 Getting started Navigation bar (soft buttons) When you turn on the screen, the soft buttons will appear on the navigation bar at the bottom of the screen. The soft buttons are set to the Recents button, Home button, and Back button by default. The functions of the buttons can change according to the app currently being used or usage environment.
  • Page 25 Getting started Home screen and Apps screen The Home screen is the starting point for accessing all of the device’s features. It displays widgets, shortcuts to apps, and more. The Apps screen displays icons for all apps, including newly installed apps. Switching between Home and Apps screens On the Home screen, swipe upwards to open the Apps screen.
  • Page 26 Getting started Moving panels: Drag a panel preview to a new location. • Deleting panels: Tap on the panel. • Wallpaper and style: Change the wallpaper settings for the Home screen and the • locked screen. Themes: Change the device’s theme. Visual elements of the interface, such as •...
  • Page 27 Getting started Launching Finder Search for content on the device. On the Apps screen, tap Search. Alternatively, open the notification panel, swipe downwards, and then tap Enter a keyword. Apps and content on your device will be searched. If you tap on the keyboard, you can search for more content.
  • Page 28 Getting started Moving apps from a folder • Drag an app to a new location. Deleting a folder • Touch and hold a folder, and then tap Delete folder. Only the folder will be deleted. The folder’s apps will be relocated to the Apps screen. Edge panel You can access your favourite apps and features from the Edge panels.
  • Page 29 Getting started Lock screen Pressing the Side key turns off the screen and locks it. Also, the screen turns off and automatically locks if the device is not used for a specified period. To unlock the screen, swipe in any direction when the screen turns on. If the screen is off, press the Side key to turn on the screen.
  • Page 30 Getting started Icon Meaning LTE network connected 5G network connected LTE network connected in LTE network that includes the 5G network Wi-Fi connected Bluetooth feature turned on S Pen connected/disconnected S Pen battery power level Location services being used Call in progress Missed call New text or multimedia message Alarm turned on...
  • Page 31: Notification Panel

    Getting started Notification panel When you receive new notifications, indicator icons appear on the status bar. To check out more information about the icons, open the notification panel and check the details. To open the notification panel, drag the status bar downwards. To close the notification panel, swipe upwards on the screen.
  • Page 32 Getting started To change feature settings, tap the text under each button. To access more detailed settings, touch and hold a button. To rearrange buttons, tap → Edit buttons, drag a button to another location. Controlling media playback Control media on your phone and connected nearby devices on the notification panel. Open the notification panel and tap Media output.
  • Page 33: Screen Capture And Screen Record

    Getting started Screen capture and screen record Screen capture Capture a screenshot while using the device and write on, draw on, crop, or share the captured screen. You can capture the current screen and scrollable area. How to capture a screenshot Use the following methods to capture a screenshot.
  • Page 34: Entering Text

    To show the S Pen pointer on the screen, tap . You can use this feature only when • the S Pen is detached from the device. (Galaxy S23 Ultra) To record the screen with a video overlay of yourself, tap . •...
  • Page 35 Getting started Changing the input language → Languages and types → Manage input languages and select the languages to use. When you select two or more languages, you can switch between the input languages by tapping Changing the keyboard On the navigation bar, tap to change the keyboard.
  • Page 36 Getting started : Enter your personal information registered to Samsung Pass. • : Find spelling and grammatical mistakes and get suggestions when writing in • English. : Share music links. • : Share video links. • : Enter emojis. •...
  • Page 37: Installing Or Uninstalling Apps

    Apps and features Installing or uninstalling apps Galaxy Store Purchase and download apps. You can download apps that are specialized for Samsung Galaxy devices. Open the Galaxy Store app. Browse apps by category or tap to search for a keyword.
  • Page 38 S Pen actions. If water enters the S Pen slot, remove the water from the slot before using it. • If the S Pen is not working properly, take it to a Samsung Service Centre or an • authorized service centre.
  • Page 39 Apps and features Detaching the S Pen Press the end of the S Pen to disengage it. Then, pull the S Pen from the slot. To store the S Pen, reinsert it into the slot and push it in until it clicks into place. Charging the S Pen The S Pen must be charged before you can control apps remotely by using the S Pen button.
  • Page 40 Apps and features Air actions (Controlling apps remotely with the S Pen) Control apps remotely using the S Pen connected to your device through Bluetooth Low Energy (BLE). For example, you can open apps, such as the camera app, by pressing and holding the S Pen button.
  • Page 41 Apps and features Changing apps or features to use Change the app, feature, or actions you want to use with the S Pen feature. Open Settings, tap Advanced features → S Pen → Air actions. Set an app or a feature to launch. Set actions for each gesture.
  • Page 42 Insert the S Pen into the slot. Then, open Settings and tap Advanced features → S Pen → → Reset S Pen. You can only connect Samsung-approved S Pens that support Bluetooth Low • Energy (BLE). Do not detach the S Pen from the device when it is being connected. Doing so •...
  • Page 43 S Pen button. Refer to Samsung Notes for more information. View all notes: Access all notes in the Samsung Notes app. • Smart select: Use the S Pen to select an area and perform actions, such as sharing or •...
  • Page 44 Apps and features Air command icon When the Air command panel is closed, the Air command icon will remain on the screen. You can open the Air command panel by tapping the icon with the S Pen. To move the icon, drag to a new location.
  • Page 45 Select an option to use with the selected area. Pin/Insert: Pin the selected area to the screen. You can also insert the image into • other apps, such as Samsung Notes. Drag the image to the other app’s screen. : Extract text from the selected area. •...
  • Page 46 Pin/Insert: Pin the selected area to the screen. You can also insert the GIF into • other apps, such as Samsung Notes. Drag the GIF to the other app’s screen. : Write or draw on the selected area. Tap to check the result before saving •...
  • Page 47 Apps and features Live messages (Recording and sending the message creation process) Instead of a text message, create and send a unique message by recording your actions while handwriting or drawing a live message and saving it as an animated file. When you want to send an animated message, open the Air command panel and tap Live messages.
  • Page 48 Apps and features Translate Hover the S Pen over the text you want to translate. The units included in the text will also be converted. When there is text you want to translate, open the Air command panel and tap Translate.
  • Page 49 Apps and features Bixby Vision When you hover the S Pen over the content, the content is recognized and available search icons will appear. Use the features to search for similar images, detect and translate text, and more. Refer to Bixby Vision for more information.
  • Page 50 Apps and features Write on calendar Fill in your plans by writing or drawing on the calendar screen. Open the Air command panel, tap Write on calendar, and then fill in your plans on the calendar. When you are finished, tap Save. To edit it, tap . Undo Pen settings Select and edit.
  • Page 51 Apps and features Air view Hover the S Pen over an item on the screen to preview content or access information in a pop-up window. In some apps, Action buttons will be displayed on the preview window. Action buttons If this feature is not turned on, open Settings, tap Advanced features → S Pen, and then tap the Air view switch to turn it on.
  • Page 52 When the screen is off, detach the S Pen or double tap the screen while pressing and holding the S Pen button. When you tap Save or reinsert the S Pen into the slot after writing a memo, the memo will be saved to Samsung Notes. Change the pen colour. Save the memo in Samsung Notes.
  • Page 53 The pinned memo will not be saved yet. To edit the pinned memo, double tap the memo. If you pin the edited memo on the Always On Display again, the original memo will be saved to Samsung Notes. To minimize the pinned memo, double tap .
  • Page 54: Phone

    Apps and features Phone Introduction Make or answer voice and video calls. Making calls Open the Phone app and tap Keypad. Enter a phone number. to make a voice call, or tap to make a video call. More options Add the number to the contacts list.
  • Page 55 Apps and features Using speed dial To set a number to speed dial, open the Phone app, tap Keypad → → Speed dial numbers, select a speed dial number, and then add a phone number. To make a call, touch and hold a speed dial number on the keypad. For speed dial numbers 10 and up, tap the first digit(s) of the number, and then touch and hold the last digit.
  • Page 56 Apps and features Blocking phone numbers Block calls from specific numbers added to your block list. Open the Phone app, tap → Settings → Block numbers, and then select contacts or phone numbers to save in the blocked numbers list. When blocked numbers try to contact you, you will not receive notifications.
  • Page 57: Contacts

    Follow the on-screen instructions to import contacts. Syncing contacts with your web accounts Sync your device contacts with online contacts saved in your web accounts, such as your Samsung account. Open Settings, tap Accounts and backup → Manage accounts and select the account to sync with.
  • Page 58 Apps and features Deleting contacts Open the Contacts app and tap → Edit. Select contacts and tap Delete. To delete contacts one by one, tap a contact from the contacts list and tap More → Delete. Sharing contacts You can share contacts with others by using various sharing options. Open the Contacts app and tap →...
  • Page 59: Messages

    Apps and features Messages Introduction Send and check messages by conversation. You may incur additional charges for sending or receiving messages when you are roaming. Sending messages Open the Messages app and tap Add recipients and enter a message. To record and send a voice message, touch and hold , and say your message.
  • Page 60: Camera

    Apps and features Sorting messages You can sort messages by category. Open the Messages app and tap Conversations → If the category option does not appear, tap → Settings and tap the Conversation categories switch to turn it on. Deleting messages Touch and hold a message to delete, then tap Delete.
  • Page 61 Apps and features Taking pictures Open the Camera app. You can also open the app by pressing the Side key twice or dragging to the left on the locked screen. Some camera features are not available when you open the Camera app from •...
  • Page 62 3x: Take pictures and record videos with enlarged subject using the telephoto • camera. 10x: Take pictures or record videos of an enlarged subject using the telephoto • camera (10x). (Galaxy S23 Ultra) Zoom features are available only when using the rear camera.
  • Page 63 Apps and features Locking the focus (AF) and exposure (AE) You can lock the focus or exposure on a selected area to prevent the camera from automatically adjusting based on changes to the subjects or light sources. Touch and hold the area to focus, the AF/AE frame will appear on the area and the focus and exposure setting will be locked.
  • Page 64 Apps and features : Select a metering method. This determines how light values are calculated. • Centre-weighted metering uses the light in the centre portion of the shot to calculate the exposure of the shot. Matrix metering averages the entire scene.
  • Page 65 Apps and features Shot suggestions The camera suggests the ideal composition for the picture by recognizing the position and angle of your subject. On the preview screen, tap and tap the Shot suggestions switch to turn it on. On the shooting modes list, tap PHOTO. A guide will appear on the preview screen.
  • Page 66 Apps and features Taking clear close-up pictures (Galaxy S23 Ultra) Take clear close-up pictures of your subject. On the preview screen, tap 1x. Put the camera near to the subject. When appears, tap to take a picture. If this feature is not turned on, tap to turn it on.
  • Page 67 Apps and features Recording high-resolution videos Record high-resolution videos with a maximum resolution of 8K. and record a video. → When you finish recording a video, play the video in the Gallery app. When you tap a frame that you like, the frame will be saved as a high-resolution picture. Stabilizing videos (Super steady) If there is a lot of shaking when recording videos, use the Super steady feature for further video stabilization.
  • Page 68 Apps and features to stop recording the video. Change the saving option. Change the screen. Picture-in-picture window Thumbnail Controlling the picture-in-picture window while playing the video If you set the screen to Picture-in-picture view, you can change the size or location of the picture-in-picture window while recording or playing the video.
  • Page 69 Apps and features Single take mode Take various pictures and videos with one shot. Your device automatically selects the best shot and creates pictures with filters or videos with certain sections repeated. On the shooting modes list, tap MORE → SINGLE TAKE. to capture the scene you want.
  • Page 70 Apps and features Portrait mode / Portrait video mode By using Portrait mode or Portrait video mode, you can capture pictures or videos where the background is blurred and the subject stands out clearly. You can also apply a background effect and edit it after taking a picture. On the shooting modes list, tap PORTRAIT or tap MORE →...
  • Page 71 Apps and features Pro mode / Pro video mode Capture pictures or videos while manually adjusting various shooting options, such as exposure value and ISO value. On the shooting modes list, tap MORE → PRO or PRO VIDEO. Select options and customize the settings, and then tap to take a picture or tap to record a video.
  • Page 72 Apps and features Separating the focus area and the exposure area You can separate the focus area and the exposure area. Tap the preview screen where you want the focus area to lock and hold until the AF/ AE lock frame appears on the screen, separates into AF lock and AE lock frames, then rejoins to the AF/AE lock frame.
  • Page 73 Apps and features Panorama mode Using panorama mode, take a series of pictures and then stitch them together to create a wide scene. On the shooting modes list, tap MORE → PANORAMA. and move the device slowly in one direction. Keep the image within the frame on the camera’s viewfinder.
  • Page 74 Apps and features Recording super slow motion videos automatically To capture the moment in super slow motion when motion is detected in the motion detection area, tap to turn it on. The motion detection feature will be turned on and the motion detection area will appear on the preview screen.
  • Page 75 Apps and features Hyperlapse mode Record scenes, such as passing people or cars, and view them as fast-motion videos. On the shooting modes list, tap MORE → HYPERLAPSE. and select a frame rate option. If you set the frame rate to , the device will automatically adjust the frame rate •...
  • Page 76 Apps and features Selfies Save selfies as previewed: Set the device to save pictures as they appear on the • preview screen when taken with the front camera (without flipping them). Videos Auto FPS: Set the device to record brighter videos in low-light conditions by •...
  • Page 77 Apps and features General Tracking auto-focus: Set the device to track and automatically focus on a selected • subject. When you select a subject on the preview screen, the device will focus on the subject even if the subject is moving or you change the camera’s position. Tracking a subject may fail in the following conditions: The subject is too big or too small.
  • Page 78: Gallery

    Apps and features Gallery Introduction Access images and videos stored in your device. You can also manage images and videos by album or create stories. Using Gallery Open the Gallery app. More options Search for images and videos. Sync images and videos.
  • Page 79 Apps and features Viewing images Open the Gallery app and select an image. To view other files, swipe to the left or right on the screen. View the content on a large screen using the Smart View feature. Bixby Vision Image and video thumbnail Add the image to favourites.
  • Page 80 Apps and features Viewing videos Open the Gallery app and select a video to play. To view other files, swipe to the left or right on the screen. To use more options during playback, tap → Open in Video player. View the content on a Configure the caption large screen using the...
  • Page 81 You can access images and videos saved in the cloud in your Gallery app and from other devices. When you connect your Samsung account and Microsoft account, you can set the cloud storage as Microsoft OneDrive.
  • Page 82: Ar Zone

    Apps and features AR Zone Introduction AR Zone provides you AR related features. Choose a feature and capture fun pictures or videos. Launching AR Zone Use the following methods to launch AR Zone: Open the AR Zone app. • Open the Camera app and tap MORE → AR ZONE. •...
  • Page 83 Apps and features Follow the on-screen instructions to create an emoji. More options My emojis list Edit the emoji. Selecting an AR emoji to use Open the AR Zone app, tap AR Emoji Studio → , and then select an emoji you want. Deleting AR emojis Open the AR Zone app, tap AR Emoji Studio →...
  • Page 84 Apps and features Creating your contact profile with an AR emoji Use an emoji as your profile picture for your Samsung account and in the Contacts app. You can choose from various poses or create your own expressions. Open the AR Zone app and tap AR Emoji Studio.
  • Page 85 Apps and features AR Emoji Camera Create fun pictures or videos with emojis using various shooting modes. Open the AR Zone app and tap AR Emoji Camera. Select the emoji and the mode you want to use. The available modes may vary depending on the emoji you select.
  • Page 86 The following actions are an example of using your emoji stickers in the Messages app. While composing a message in the Messages app, tap on the Samsung keyboard. Tap the emoji icon. Select one of your emoji stickers. The emoji sticker will be inserted.
  • Page 87 Apps and features AR Doodle (Record videos with the AR feature) Record fun videos with virtual handwriting or drawings on people or pets’ (cat and dog) faces or anywhere else. When the camera recognizes a face or space, the doodles on the face will follow the face as it moves, and the doodles in the space will be fixed in the same place even if the camera moves.
  • Page 88: Bixby

    Press and hold the Side key to launch Bixby. The Bixby intro page will appear. After you select the language to use with Bixby, sign in to your Samsung account, and complete the setup by following the on-screen instructions, the Bixby screen will appear.
  • Page 89: Bixby Vision

    • In the Gallery app, select an image and tap • In the Samsung Internet app, touch and hold an image and tap Search with Bixby • Vision. If you added the Bixby Vision app icon to the Apps screen, open the Bixby Vision app.
  • Page 90: Multi Window

    Apps and features Using Bixby Vision Launch Bixby Vision. Select a feature you want to use. TRANSLATE: Recognize text from documents or images and translate it. • TEXT: Recognize text from documents or images and extract it. • DISCOVER: Search for images similar to the recognized object online and related •...
  • Page 91 Apps and features Split screen view Tap the Recents button to open the list of recently used apps. Swipe to the left or right, tap an app’s icon, and then tap Open in split screen view. Alternatively, drag an app to where Drop here to open appears. On the apps list, select another app to open.
  • Page 92 Apps and features Pop-up view Tap the Recents button to open the list of recently used apps. Swipe to the left or right, tap an app’s icon, and then tap Open in pop-up view. Alternatively, drag an app to where Drop here for pop-up view appears. The app screen will appear in the pop-up view.
  • Page 93: Samsung Internet

    Browse the internet to search for information and bookmark your favourite webpages to access them conveniently. Open the Samsung Internet app. Enter the web address or a keyword, and then tap Go. To access the toolbars, swipe downwards slightly on the screen.
  • Page 94: Samsung Pay

    Open the Samsung Pay app. Sign in to your Samsung account and read and agree to the terms and conditions. Register your fingerprint and a PIN to use when making payments.
  • Page 95 Making payments Drag a card image at the bottom of the screen upwards. Alternatively, open the Samsung Pay app. Then, on the cards list, swipe to the left or right and select a card to use. Scan your fingerprint or enter the payment PIN you set.
  • Page 96: Samsung Health

    Using Samsung Health Open the Samsung Health app. When running this app for the first time or restarting it after performing a data reset, follow the on-screen instructions to complete the setup. To edit items on the Samsung Health home screen, tap → Edit home.
  • Page 97: Samsung Notes

    You can also insert images or voice recordings into your notes. Some features may not be available depending on the model. Creating notes Open the Samsung Notes app, tap , and then create a note. You can change the input method by tapping Insert files.
  • Page 98 Apps and features Composing notes with handwriting On the note composer screen, tap to draw or write in your own handwriting. You can enter your handwriting in a larger size if you magnify the screen by spreading two fingers on it. Eraser Undo S Pen...
  • Page 99 Apps and features Tap or draw a line around the input to select. To move the input to another location, select the input, and then drag it to a new • location. To change the size of the selection, tap the input and drag a corner of the frame •...
  • Page 100 Apps and features Changing styles You can change the style of your handwriting and drawings. After writing or drawing on the screen, tap twice and select a colour or line thickness you want. Then, point the S Pen toward where you want to apply the style. When the icon appears, tap where you want to change the style.
  • Page 101 Apps and features Adding memos to PDF files Open the Samsung Notes app, tap , and then select a PDF file. You can add memos to the PDF file. Pinning a note to the Home screen Pin a note to the Home screen to check it or open and edit it.
  • Page 102: Samsung Members

    You can configure the settings for Samsung Kids and check the usage history. On the Samsung Kids screen, tap → Parental controls and enter your unlock code. Closing Samsung Kids To close Samsung Kids, tap the Back button or tap → Close Samsung Kids, and then enter your unlock code.
  • Page 103: Samsung Global Goals

    2015, consist of goals that aim to create a sustainable society. These goals have the power to end poverty, fight inequality, and stop climate change. With Samsung Global Goals, learn more about the global goals and join the movement for a better future.
  • Page 104: Penup (Galaxy S23 Ultra)

    Apps and features PENUP (Galaxy S23 Ultra) PENUP is a social network service for sharing artwork drawn with the S Pen. Post your artwork, check out others’ artwork, and get useful drawing tips. Open the PENUP app. Calendar Manage your schedule by entering upcoming events in your planner.
  • Page 105: Reminder (Receiving Notifications For To-Do Items)

    Apps and features Reminder (Receiving notifications for to-do items) Register to-do items as reminders and receive notifications according to the condition you set. To receive more accurate notifications, connect to a Wi-Fi or mobile network. • To use location reminders, the GPS feature must be turned on. Location •...
  • Page 106: Voice Recorder

    Apps and features Voice Recorder Record or play voice recordings. Open the Voice Recorder app. to start recording. Speak into the microphone. to pause recording. • While making a voice recording, tap BOOKMARK to insert a bookmark. • to finish recording. Enter a file name and tap Save.
  • Page 107 Apps and features Playing selected voice recordings When you review interview recordings, you can mute or unmute certain sound sources in the recording. Tap List and select a voice recording made in interview mode. To mute certain sound sources, tap for the corresponding direction that sound is to be muted.
  • Page 108: My Files

    Apps and features My Files (Checking and managing files) Access and manage various files stored in the device. Open the My Files app. To check for unnecessary data and free up the device’s storage, tap Analyze storage. To search for files or folders, tap Clock Set alarms, check the current time in many cities around the world, time an event, or set a specific duration.
  • Page 109: Game Launcher

    Apps and features Game Launcher Game Launcher gathers your games downloaded from Play Store and Galaxy Store into one place. Open the Game Launcher app and select the game you want. If Game Launcher does not appear, open Settings, tap Advanced features, and •...
  • Page 110: Game Booster

    Apps and features Game Booster (Configuring your gaming environment) You can play games in an optimized environment with Game Booster. You can use Game Booster while playing games. To open the Game Booster panel while playing games, tap on the navigation bar. If the navigation bar is hidden, drag upwards from the bottom of the screen to show it.
  • Page 111: Smartthings

    The devices you can connect may vary depending on the region. Available • features may differ depending on the connected device. Connected devices’ own problems or defects are not covered by the Samsung • warranty. When problems or defects occur on the connected devices, contact the device’s manufacturer.
  • Page 112 Anyone nearby: Allow any nearby devices to share with your phone. • Sharing through Web link Upload large files to the Samsung storage server and share them with others through Web link. Open the Gallery app and select an image.
  • Page 113: Music Share

    Apps and features Music Share Introduction Using the Music Share feature, you can share a Bluetooth speaker that is already connected to your phone with another person. You can also listen to the same music on your Galaxy Buds and another person’s Galaxy Buds. This feature is available only on devices that support the Music Share feature.
  • Page 114: Smart View

    Apps and features Listening to music together with Galaxy Buds You can listen to music on your phone together through your Buds and a friend’s Buds. This feature is supported only on the Galaxy Buds series. Make sure that each phone and pair of Buds are connected. Refer to Pairing with other Bluetooth devices for how to connect.
  • Page 115: Link To Windows

    Apps and features Link to Windows (Using the device through a computer connection) You can connect your device to a Windows PC to instantly access your device’s data, such as pictures or messages, on the computer. When calls or messages come in, you can receive them on the computer. It is recommended to use the latest version of Windows and the Phone Link app •...
  • Page 116: Samsung Dex

    Samsung DeX Introduction Using Samsung DeX, you can use your phone like a computer by connecting the phone to an external display, such as a TV or monitor. Accomplish tasks you want done on your phone on a large screen using a keyboard and mouse. While using Samsung DeX, you can simultaneously use your phone.
  • Page 117 Apps and features On your phone’s screen, tap Start. Without changing your phone’s screen, the Samsung DeX screen will appear on the connected TV or monitor. HDMI cable HDMI adapter (USB Type-C to HDMI) Connecting to a TV wirelessly You can use Samsung DeX by connecting your phone to a TV wirelessly.
  • Page 118 You can set the mouse pointer to flow from the external display to the phone’s • screen. Open Settings, select Samsung DeX → Mouse and trackpad, and then select the Flow pointer to phone screen switch to turn it on.
  • Page 119 For example, while watching a video on the connected TV or monitor, you can chat with a friend on a messenger app. On the connected TV or monitor, open an app to run on the Samsung DeX screen. Then, open another app on your phone.
  • Page 120: Google Apps

    Apps and features Locking the Samsung DeX screen If you want to lock the Samsung DeX screen and your phone’s screen while using Samsung DeX, select → Lock DeX. While using Samsung DeX, you cannot lock the Samsung DeX screen and your phone’s screen by pressing the Side key.
  • Page 121: Settings

    To search for settings by entering keywords, tap . You can also search for settings by selecting a tag under Suggestions. Samsung account Sign in to your Samsung account and manage it. On the Settings screen, tap Samsung account. Connections Options Change settings for various connections, such as the Wi-Fi feature and Bluetooth.
  • Page 122 Settings Ultra-wideband (UWB): Turn on the UWB feature. • Flight mode: Set the device to turn off all wireless functions on your device. You can • use only non-network services. Follow the regulations provided by the airline and the instructions of aircraft personnel.
  • Page 123: Wi-Fi

    Settings Wi-Fi Turn on the Wi-Fi feature to connect to a Wi-Fi network and access the internet or other network devices. Connecting to a Wi-Fi network On the Settings screen, tap Connections → Wi-Fi and tap the switch to turn it on. Select a network from the Wi-Fi networks list.
  • Page 124: Bluetooth

    Bluetooth Use Bluetooth to exchange data or media files with other Bluetooth-enabled devices. Precautions for using Bluetooth Samsung is not responsible for the loss, interception, or misuse of data sent or • received through Bluetooth. Always ensure that you share and receive data with devices that are trusted and •...
  • Page 125: Nfc And Contactless Payments

    Settings Pairing with other Bluetooth devices On the Settings screen, tap Connections → Bluetooth and tap the switch to turn it on. The detected devices will be listed. Select a device to pair with. If the device you want to pair with is not on the list, set the device to enter Bluetooth pairing mode.
  • Page 126 Settings Reading information from NFC tags Use the NFC feature to read product information from NFC tags. On the Settings screen, tap Connections and tap the NFC and contactless payments switch to turn it on. Place the NFC antenna area on the back of your device near an NFC tag. The information from the tag appears.
  • Page 127: Data Saver

    Settings Data saver Reduce your data usage by preventing some apps running in the background from sending or receiving data. On the Settings screen, tap Connections → Data usage → Data saver and tap the switch to turn it on. When the data saver feature is turned on, the icon will appear on the status bar.
  • Page 128: Mobile Hotspot

    2.4 GHz, tap Advanced, and then tap the Hidden network switch to turn it off. If you turn on the Auto Hotspot feature, you can share your phone’s mobile data • connection with other devices signed in to your Samsung account. More connection settings Customize settings to control other connection features.
  • Page 129 Settings Printing Configure settings for printer plug-ins installed on the device. You can connect the device to a printer through Wi-Fi or Wi-Fi Direct, and print images or documents. Some printers may not be compatible with the device. Adding printer plug-ins Add printer plug-ins for printers you want to connect the device to.
  • Page 130: Connected Devices

    • when you make or answer a call, play media, and more. You can use this feature only when you signed in to the same Samsung account on the other device and you are wearing your Galaxy Buds. Call & text on other devices: Connect your tablet and phone to use calling and •...
  • Page 131: Modes And Routines

    Settings Modes and Routines Introduction Select a mode based on your current activity or location, or add your repeated usage patterns as routines and use your device more conveniently. On the Settings screen, tap Modes and Routines. Using modes Adding modes On the Settings screen, tap Modes and Routines →...
  • Page 132: Sounds And Vibration

    Settings Running routines Auto routines will run automatically when their conditions are detected. For routines which you set the running condition as Start manually, you can run them manually by tapping the button whenever you want. To run routines manually, tap next to the routine you want to run.
  • Page 133: Sound Quality And Effects

    Settings Separate app sound: Set the device to play media sound from a specific app • separately on another audio device. Refer to Separate app sound for more information. Some features may not be available depending on the model. Sound quality and effects Set the device’s sound quality and effects.
  • Page 134: Notifications

    Settings Notifications Change the notification settings. On the Settings screen, tap Notifications. App notifications: Select the apps you want to receive notifications from. • Lock screen notifications: Set how to show notifications on the locked screen. • Notification pop-up style: Select a notification pop-up style and change the •...
  • Page 135 Settings Eye comfort shield: Reduce eye strain by limiting the amount of blue light emitted • by the screen. You can set a schedule for applying this feature. Screen mode: Change the screen mode to adjust the display’s colour and contrast. •...
  • Page 136: Motion Smoothness

    Settings Motion smoothness The refresh rate is the number of times the screen is refreshed every second. Use a high refresh rate to prevent the screen from flickering when switching between screens. The screen will scroll more smoothly. When you select a standard refresh rate, you can use the battery longer.
  • Page 137: Wallpaper And Style

    Settings Adjusting the screen tone by colour value Increase or lower certain colour tones by adjusting the Red, Green, or Blue value individually. On the Settings screen, tap Display → Screen mode → Vivid. Tap Advanced settings. Adjust the R (Red), G (Green), or B (Blue) colour bar to your preference. The screen tone will be adjusted.
  • Page 138: Lock Screen

    Settings Lock screen Options Change the settings for the locked screen. On the Settings screen, tap Lock screen. Screen lock type: Change the screen lock method. • Smart Lock: Set the device to remain unlocked when trusted locations or devices are •...
  • Page 139: Always On Display

    Settings Always On Display (Displaying information when the screen is turned off) You can check information, such as the clock or calendar, or control music playback on the screen when it is turned off. You can also check notifications for new messages or missed calls. The Always On Display is set to appear only when you tap the screen.
  • Page 140: Security And Privacy

    Biometrics: Change the settings for biometric data. Refer to Face recognition • Fingerprint recognition for more information. Samsung Pass: Verify your identity through your biometric data. Refer to Samsung • Pass for more information. Secure Folder: Create a secure folder to protect your private content and apps from •...
  • Page 141: Face Recognition

    Settings Face recognition You can set the device to unlock the screen by recognizing your face. If you use your face as a screen lock method, your face cannot be used to unlock • the screen for the first time after turning on the device. To use the device, you must unlock the screen using the pattern, PIN, or password you set when registering the face.
  • Page 142 Settings Registering your face For better face registration, register your face indoors and out of direct sunlight. On the Settings screen, tap Security and privacy → Biometrics → Face recognition. Read the on-screen instructions and tap Continue. Set a screen lock method. Position your face inside the frame on the screen.
  • Page 143: Fingerprint Recognition

    If your pattern, PIN, or password is forgotten, you will not be able to use the device if you do not reset it. Samsung is not responsible for any data loss or inconvenience caused by forgotten unlock codes.
  • Page 144 Settings Your device has a built-in fingerprint recognition sensor at the bottom centre of • the screen. Ensure that the screen protector or the touch screen on the fingerprint recognition sensor area is not scratched or damaged by objects, such as coins, keys, pens, and necklaces.
  • Page 145 Settings Unlocking the screen with your fingerprints You can unlock the screen with your fingerprint instead of using a pattern, PIN, or password. On the Settings screen, tap Security and privacy → Biometrics → Fingerprints. Unlock the screen using the preset screen lock method. Tap the Fingerprint unlock switch to turn it on.
  • Page 146: Samsung Pass

    Using Samsung Pass to sign in to websites You can use Samsung Pass to sign in to websites that support ID and password autofill. On the sign-in page of the website, enter your ID and password, and then tap the website’s sign-in button.
  • Page 147 Save. Managing sign-in information Check out the list of websites and apps you have set to use Samsung Pass and manage your sign-in information. On the Samsung Pass main screen, tap Apps/websites and select a website or app from the list.
  • Page 148: Secure Folder

    Settings Entering your personal information automatically You can use Samsung Pass to enter your personal information, such as your address or payment card information, on apps that support autofill. On the Samsung Pass main screen, select an option under Private info.
  • Page 149 Samsung account appears, tap Activate. If you have forgotten the lock type, you can reset it using your Samsung account. If you do not turn on this feature, you cannot reset the lock type when you have forgotten it.
  • Page 150 Touch and hold an app to delete, and tap Uninstall. Adding accounts Add your Samsung and Google accounts, or other accounts, to sync with the apps in Secure Folder. Open the Secure Folder app and tap → Settings → Manage accounts → Add account.
  • Page 151: Secure Wi-Fi

    Secure Folder and tap Uninstall. To access data backed up from Secure Folder, open the My Files app and tap Internal storage → Download → Secure Folder. Notes saved in Samsung Notes will not be backed up. Secure Wi-Fi Secure Wi-Fi is a service that secures your Wi-Fi network connection. It encrypts data using Wi-Fi networks and disables tracking apps and websites so that you can use Wi-Fi networks safely.
  • Page 152: Location

    On the Settings screen, tap Security and privacy → Secure Wi-Fi. Tap Protection plan → Upgrade and select the plan you want. For certain protection plans, you can transfer the protection plan to another device signed in to your Samsung account. Follow the on-screen instructions to complete the purchase. Location Change settings for location information permissions.
  • Page 153: Safety And Emergency

    Accounts and backup Options Sync, back up, or restore your device’s data using Samsung Cloud. You can also sign in to accounts, such as your Samsung account or Google account, or transfer data to or from other devices through Smart Switch.
  • Page 154: Samsung Cloud

    Transferring data from your previous device (Smart Switch) for more information. Regularly back up your data to a safe location, such as Samsung Cloud or a computer, so that you can restore it if the data is damaged or lost because of an unintended factory data reset.
  • Page 155: Google

    Labs: Use new features of the device. • S Pen: Change the settings for using the S Pen. Refer to S Pen (Galaxy S23 Ultra) • more information. Side key: Select an app or feature to launch using the Side key. Refer to Setting the •...
  • Page 156: Motions And Gestures

    Settings Video call effects: Set to use the feature that changes the background or block • background noise during video calls. Refer to Video call effects for more information. This feature is only available in some apps. • Some features may not be available depending on the model. •...
  • Page 157: Video Call Effects

    Settings Mute with gestures: Set the device to mute certain sounds by using motions or • gestures. Palm swipe to capture: Set the device to capture a screenshot when you swipe • your hand to the left or right across the screen. You can check the captured images in Gallery.
  • Page 158: Dual Messenger

    Settings Dual Messenger Install a second copy of a messenger app and use two separate accounts for the same app. On the Settings screen, tap Advanced features → Dual Messenger. Supported apps will appear. Tap the switch of an app to install the second app. The second app will be installed.
  • Page 159: Digital Wellbeing And Parental Controls

    Settings Digital Wellbeing and parental controls Check the history of your device usage and use features to prevent your device from interfering with your life. You can also set up parental controls for your children and manage their digital use. On the Settings screen, tap Digital Wellbeing and parental controls.
  • Page 160: Battery

    The available capacity may change when you update the device. You can check the available capacity of the internal storage in the Specification • section for your device on the Samsung website. Memory On the Settings screen, tap Battery and device care → Memory.
  • Page 161: Device Protection

    On the Settings screen, tap Battery and device care → Software update. Diagnostics Test your device using Samsung Members. On the Settings screen, tap Battery and device care → Diagnostics. Select an item to test or tap Test all to test all items.
  • Page 162: General Management

    If the battery becomes fully discharged, the time and date are reset. Samsung Keyboard settings: Change the settings for the Samsung keyboard. • Keyboard list and default: Select a keyboard to use by default and change the •...
  • Page 163: Accessibility

    Settings To set the selected language as the default language, tap Set as default. To keep the current language setting, tap Keep current. The selected language will be added to your languages list. If you changed the default language, the selected language will be added to the top of the list. To change the default language from your languages list, select the language you want and tap Apply.
  • Page 164: About Phone

    Settings About phone Access your device’s information. On the Settings screen, tap About phone. To change your device’s name, tap Edit. Status information: Check out various device information, such as the SIM card • status, Wi-Fi MAC address, and serial number. Legal information: Access legal information related to the device, such as safety •...
  • Page 165: Usage Notices

    Apps related to the content may not work properly depending on the device’s specifications and the environment that it is used in. Samsung is not liable for performance issues caused by apps supplied by providers • other than Samsung.
  • Page 166 The use of ultra-wideband (UWB) transmitters is prohibited when aboard an • airplane or ship. When you turn on flight mode, the UWB feature will be turned off. (Galaxy S23 Ultra, Galaxy S23+) The bandwidths supported by the device may vary depending on the region or •...
  • Page 167: Notes On Package Contents And Accessories

    Appearances and specifications are subject to change without prior notice. • You can purchase additional accessories from your local Samsung retailer. Make sure • they are compatible with the device before purchase. Use only Samsung-approved accessories. Using unapproved accessories may cause •...
  • Page 168: Maintaining Water And Dust Resistance

    Usage notices Maintaining water and dust resistance Your device is water- and dust-resistant and meets the following international standards. IP68 water resistance rating certification: According to the requirements of the • IEC 60529 standard, it was tested in 1.5 m fresh water for 30 minutes without moving.
  • Page 169: Device Overheating Situations And Solutions

    If the lower part of the device overheats, it could be because the connected • USB cable is damaged. Replace the damaged USB cable with a new Samsung- approved one. When using a wireless charger, do not place foreign materials, such as metal •...
  • Page 170 Decrease the screen brightness. • If the device overheats or feels hot for a prolonged period, do not use it for a • while. If the device continues to overheat, contact a Samsung Service Centre or an authorized service centre.
  • Page 171 Usage notices Precautions for device overheating If you begin to feel uncomfortable because of the device overheating, stop using the device. When the device heats up, the features and performance may be limited or the device may turn off to cool down. The feature is only available on supported models. If the device overheats, the screen brightness, the screen refresh rate, and the •...
  • Page 172: Appendix

    Appendix Accessibility About Accessibility Improve accessibility with features that make the device easier to use for users who have impaired vision, hearing, and reduced dexterity. Open Settings and tap Accessibility. To check recommended features and the accessibility features you are using, tap Recommended for you. To turn off the features in use, tap Turn off.
  • Page 173 Appendix Using the reading menu While you are using TalkBack, swipe to the left or right with three fingers. The reading menu will appear and the device will read the options aloud. Swipe to the left or right with three fingers to scroll through the options. When you hear the option you want, swipe upwards or downwards to use the option or adjust the settings for the option.
  • Page 174 Appendix Tutorial and help: Learn how to use TalkBack. • Advanced settings: Configure advanced settings for TalkBack. • Open TalkBack in the Galaxy Store: Open TalkBack from the Galaxy Store and check • for updates. Entering text using the keyboard To display the keyboard, tap the text input field and double tap anywhere on the screen.
  • Page 175 Appendix Bixby Vision for accessibility When you turn on the Bixby Vision accessibility features, you can use additional Bixby Vision features. Open Settings, tap Accessibility → Spoken assistance → Bixby Vision for accessibility, and then tap the switch to turn it on. Tap Open Bixby Vision.
  • Page 176 Using the high contrast keyboard Change the colours of the Samsung keyboard to increase the contrast between the text and the background. Open Settings, tap Accessibility → Visibility enhancements, and then tap the High contrast keyboard switch to turn it on.
  • Page 177 Appendix Colour correction Adjust how colours are displayed on the screen if you have difficulty in distinguishing colours. The device changes the colours into more recognizable colours. Open Settings, tap Accessibility → Visibility enhancements → Colour correction, and then tap the switch to turn it on. Select an option. Colour filter Adjust the screen colours if you have difficulty in reading the text.
  • Page 178 Appendix Magnifying the screen Magnify the screen and zoom in on a specific area. Open Settings, tap Accessibility → Visibility enhancements → Magnification → Magnification shortcut, and then tap the switch to turn it on. Then tick the actions to use to start using this feature directly.
  • Page 179 Appendix Changing font Change the font size and style. Open Settings and tap Accessibility → Visibility enhancements → Font size and style. Changing screen zoom Make the items on the screen larger or smaller. Open Settings and tap Accessibility → Visibility enhancements → Screen zoom. Hearing enhancements Live Transcribe Set the device to capture speech using the device’s microphone and convert it to on-...
  • Page 180 Appendix Sound notifications Set the device to detect sounds, such as the beeping smoke detectors or crying babies. The device will vibrate when it detects sound and the alert will be saved as a log. While this feature is turned on, the voice recognition will not operate. Open Settings and tap Accessibility →...
  • Page 181 Appendix Adapt sound Optimize the sound setting to find the best sound quality and use it for calls or media playback. Open Settings, tap Accessibility → Hearing enhancements → Adapt sound, and then optimize the sound setting. Turning off all sounds Set the device to mute all device sounds, such as media sounds, and the caller’s voice during a call.
  • Page 182 Appendix Interaction and dexterity Universal switch You can control the touch screen by connecting an external switch or by using head movements and face gestures. Open Settings and tap Accessibility → Interaction and dexterity → Universal switch. Read the on-screen instructions and tap Done. Tap the switch to turn it on.
  • Page 183 Appendix Accessing assistive menus The assistive shortcut icon appears as a floating icon for access to the assistive menus from any screen. When you tap the assistive shortcut icon, the icon expands slightly and the assistive menus appear on the icon. Tap the left or right arrow, or swipe to the left or right, to select other menus.
  • Page 184 Appendix Interaction control Turn on the interaction control mode to restrict the device’s reaction to inputs while using apps. Open Settings and tap Accessibility → Interaction and dexterity → Interaction control. Tap the Interaction control shortcut switch to turn it on. Press the Side key and the Volume Up key simultaneously while using an app.
  • Page 185 Appendix Auto action after pointer stops Set the device to select an item automatically when you place the mouse pointer over the item. You can also assign actions to use when you move the pointer to a corner of the screen.
  • Page 186 Appendix Advanced settings Launching accessibility features directly Set to open the accessibility features directly. Open Settings and tap Accessibility → Advanced settings. Tap Accessibility button → Select actions, or select Side and Volume up keys or Volume up and down keys, and then tick the accessibility features you want to use.
  • Page 187: Troubleshooting

    Before contacting a Samsung Service Centre or an authorized service centre, please attempt the following solutions. Some situations may not apply to your device. You can also use Samsung Members to solve any problems you might encounter while using your device.
  • Page 188 • Ensure that your device software is updated to the latest version. • If the touch screen is scratched or damaged, visit a Samsung Service Centre or an • authorized service centre. Your device freezes or encounters a fatal problem Try the following solutions.
  • Page 189 The battery does not charge properly (For Samsung-approved chargers) Ensure that the charger is connected properly. • Visit a Samsung Service Centre or an authorized service centre and have the battery • replaced.
  • Page 190 Restart the device. If you are still having trouble with the camera app after trying • these tips, contact a Samsung Service Centre or an authorized service centre. Picture quality is poorer than the preview The quality of your pictures may vary, depending on the surroundings and the •...
  • Page 191 → Reset settings → Reset to reset network settings. You may lose registered information when performing the reset. If these tips do not solve the problem, contact a Samsung Service Centre or an authorized service centre. The screen brightness adjustment bar does not appear on the...
  • Page 192: Removing The Battery

    Data stored in the device has been lost Always make backup copies of all important data stored in the device. Otherwise, you cannot restore data if it is damaged or lost. Samsung is not responsible for the loss of data stored in the device.
  • Page 193: Health And Safety

    Use only a Samsung-approved battery and charger specifically designed for your • device. An incompatible battery or charger can cause serious injuries or damage to your device. Samsung cannot be responsible for the user’s safety when using accessories or • supplies that are not approved by Samsung.
  • Page 194 Health and Safety Do not carry your device in your back pockets or on your waist The device may be damaged, explode, or result in a fire if too much pressure is • applied to it. You may be injured if you are bumped or fall. •...
  • Page 195 Health and Safety When using the wireless charger, do not place foreign materials, such as metal objects, magnets, and magnetic stripe cards, between the device and the wireless charger The device may not charge properly or may overheat. Do not bite or suck the device or the battery Doing so may damage the device or result in an explosion or fire.
  • Page 196 If you notice strange smells or sounds coming from your device or the battery, or if you see smoke or liquids leaking from the device or battery, stop using the device immediately and take it to a Samsung Service Centre Failure to do so may result in fire or explosion.
  • Page 197 Health and Safety Suspend use in heavy traffic or hazardous weather conditions. Rain, sleet, snow, ice, • and heavy traffic can be hazardous. Do not take notes or look up phone numbers. Jotting down a “to do” list or flipping •...
  • Page 198 Health and Safety Do not store your device with metal objects, such as coins, keys, and necklaces Your device may be scratched or may malfunction. • If the battery terminals come into contact with metal objects, this may cause a fire. •...
  • Page 199 Broken glass or acrylic could cause injury to your hands and face. Take the device to a • Samsung Service Centre to have it repaired. Install mobile devices and equipment with caution Ensure that any mobile devices or related equipment installed in your vehicle are •...
  • Page 200 Any changes or modifications to your device can void your manufacturer’s warranty. • If your device needs servicing, take your device to a Samsung Service Centre. Do not disassemble or puncture the battery, as this can cause explosion or fire.
  • Page 201 Before travelling in remote or undeveloped areas, plan an alternative method of contacting emergency services personnel. Protect your personal data and prevent leakage or misuse of sensitive information While using your device, be sure to back up important data. Samsung is not • responsible for the loss of any data.
  • Page 202 Health and Safety Malware and viruses To protect your device from malware and viruses, follow these usage tips. Failure to do so may result in damages or loss of data that may not be covered by the warranty service Do not download unknown applications. •...
  • Page 203 Health and Safety Acknowledging Special Precautions and ISED (Innovation, Science and Economic Development Canada) Notice Cautions Any changes or modifications to your device not expressly approved in this document could void your warranty for this equipment, and void your authority to operate this equipment.
  • Page 204 Health and Safety to remember is that each device meets strict federal guidelines. Variations in SARs do not represent a variation in safety. All devices must meet the federal standard, which incorporates a substantial margin of safety. As stated above, variations in SAR values between different model devices do not mean variations in safety.
  • Page 205 CONTAINED IN, OR AS A RESULT OF THE USE OF ANY CONTENT OR SERVICE BY YOU OR ANY THIRD PARTY, EVEN IF ADVISED OF THE POSSIBILITY OF SUCH DAMAGES.” Third party services may be terminated or interrupted at any time, and Samsung makes no representation or warranty that any content or service will remain available for any period of time.
  • Page 206 Health and Safety Technical requirements for Wi-Fi operation Wi-Fi access points that are capable of allowing your device to operate in the 5.15 - 5.25 GHz band are optimized for indoor use only. If your Wi-Fi network is capable of operating in this mode, please restrict your Wi-Fi use to indoors to not violate federal regulations to protect mobile satellite services.
  • Page 207 No part of this manual may be reproduced, distributed, translated, or transmitted in any form or by any means, electronic or mechanical, including photocopying, recording, or storing in any information storage and retrieval system. Trademarks SAMSUNG and the SAMSUNG logo are registered trademarks of Samsung • Electronics Co., Ltd. ®...

This manual is also suitable for:

Galaxy s23+Galaxy s23 ultraSm-s911wSm-s916wSm-s918w

Table of Contents