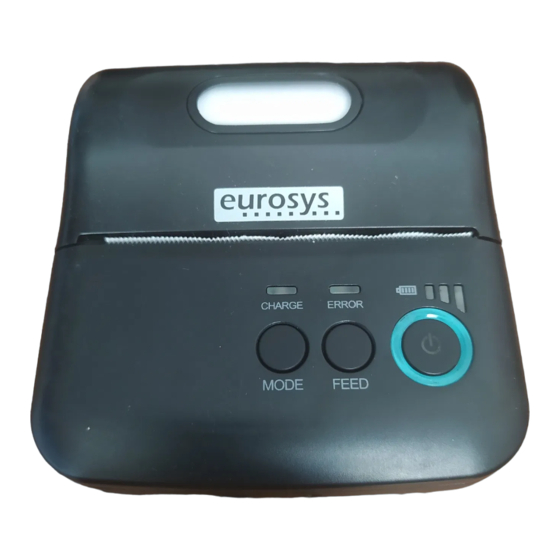
Summary of Contents for Eurosys POSIMPT9BT
- Page 1 Portable Thermal Printer User’s Manual POSIMPT9BT PDF created with pdfFactory trial version www.pdffactory.com...
-
Page 2: Table Of Contents
Content Notice ........................3 Notice on Safety ....................3 Notice of Using ..................... 3 Notice of Storing ....................3 Chapter1 Outer Appearance..................4 1.1 Outer Appearance ....................4 Chapter2 Characteristic Capability ................. 5 2.1 Printing Capability ....................5 2.2 Other Capability.. -
Page 3: Notice
NOTICE Please read this manual carefully before using the printer! Notice of Safety Be sure to use the specified battery and power supply provided by our company. Otherwise it may cause fire, explosion or damage printer, meanwhile, the battery also may be damaged. Don’t put battery into the fire, don’t disassemble or heat the battery, don’t be short circuit, it may cause fire, explosion or damage printer, meanwhile, the battery also may be damaged. -
Page 4: Chapter1 Outer Appearance
Chapter 1 Outer Appearance and Model No. 1.1 Outer Appearance [CHARGE]: Battery Charging Indicator [ERROR]: Error Indicator [FEED]: Feed Button [MODE]: Mode Button PDF created with pdfFactory trial version www.pdffactory.com... - Page 5 Chapter 2 Characteristic Specification 2.1 Printing Specification Printing Method Thermal line Printing Speed 80mm/s Print Resolution 8 dots/mm, 576dots/line Effective Printing Width 72mm Character Set ASCII Character Printing Font ANK: 12 x 24 Character per Line Paper Type Thermal paper Paper Width 79.5±...
- Page 6 Color Beige/Black 0℃~50℃ Environment Operating Temp -40℃~70℃ Storage Temp Operating Humidity 10%~80% Storage Humidity 10%~95% 2.2 Other Specification ● Paper Loading Method: drop-in easy loading ( please refer to details in 3.1.2 Paper Roll Installation). ● Black Mark Location: available(details please see 4.2 pre-printing black mark manual).
-
Page 7: Chapter3 Operation Method
Chapter 3 Operation Method Using Preparation 3.1.1 Battery Installation 1. Put the battery into the battery slot. 2. Install the battery cover. 3.1.2 Paper Roll Installation 1. Hold both sides of the paper case cover, and open it. 2. Pay attention to use paper that effective printing side is outside in the printing paper face when you enchase the new paper roll. -
Page 8: Basic Function Usage
3.2Basic function usage 3.2.1 Switch On Press【POWER】button, the power indicator is on, about 1 second later you will hear ‘one low one high ’prompt tone. The printer will turn into work mode when loosen the 【 POWER】 button. The battery indicator shows power of the battery. 3.2.2 Switch Off Under status of switch on ,the printer will send out the prompt tone of ‘one low one high ’... -
Page 9: Self Test
3.2.4 Self-Test After receiving the printer, user can check its current setting and status at anytime. Self-test way is as below: Power off, then hold down the 【FEED】 button and press the power button at the same time. Then loosen the 【FEED】button when you hear ‘one low one high ’prompt tone, the current setting and status will be printed out. -
Page 10: Printer Parameters Setting
Power class is CLASS 2, effective communication distance is 10meters. The Bluetooth of the printer belongs to the slave device. The initial name of the printer is Eurosys T9, the initial password is ‘1234’; users can change the printer name and password by using<T9 Setting Tools>... -
Page 11: Bluetooth Address Binding
Notice: 1, When pairing, please make switch on. 2. Once printer has paired with the host successful, it can’t be paired with other Bluetooth device until it unconnected with the host. 3, The power indicator flashing after paired successful. 3.4.3 Function of Bluetooth Address Binding Bluetooth Binding: once the printer remembers the device’s address, it only can connect with the first device and can’t connect with others. - Page 12 Including the temperature mistake of printer head and opening of paper case cover. Error Description The flashing way of【ERROR】 ERROR Temperature of The temperature of printer head is too printer head high, it will recover automatically when the temperature is normal Paper case cover of The paper case cover is opened when printer...
- Page 13 Three parts light on: battery is high Two parts light on: battery is medium One part light on: battery is low Minimum part flashing: battery is extremely low, it must be charged Three parts flashing at same time: power supply should be over voltage (external power supply without battery) There is also a buzzer to indicate various status of the printer.
-
Page 14: Chapter4 Other Information
Chapter 4 Other Information 4.1 Command Programming Manual <T9 Technical Manual> is a technical manual for engineer to develop printer utility, and users can claim our company for it. This manual including the technical description of hardware interface ( Bluetooth, USB interface ), technical documentation of printing control command set, and others such as how to print black mark and locate by it. - Page 15 paper is>65%) HPS: it is the distance between edges of black mark and loading position. 4.5mm≤Hps≤6.5mm PDF created with pdfFactory trial version www.pdffactory.com...

Need help?
Do you have a question about the POSIMPT9BT and is the answer not in the manual?
Questions and answers