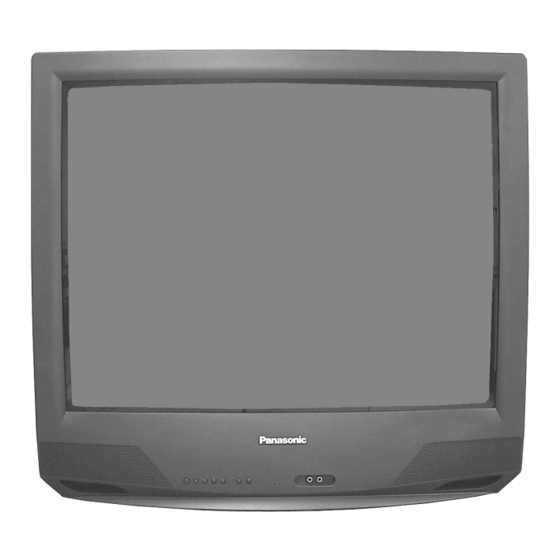
Table of Contents
Advertisement
Quick Links
Installer's Guide
Manual de Instalación
Save this document for future reference.
Conserve este documento para futuras referencias.
PANASONIC
CT-2511HD
Read these instructions completely before operating television.
Lea estas instrucciones completamente antes de operar la televisión.
Contents are subject to change without notice or obligation.
El contenido está sujeto a cambios sin previo aviso u obligación.
Copyright 2000 by Matsushita Electric Corporation of America. All
rights reserved. Unauthorized copying and distribution is a
violation of law.
Derechos Reservados 2000 por Matsushita Electric Corporation
of America. Todos los Derechos Reservados. La copia y
distribución sin autorización es violación de la ley.
PANASONIC
CT-2521HD
CT-2721HD
CT-3221HD
– 1 –
Printed in U.S.A.
Impreso en EE.UU.
TQB2AA0361-1
00612
Advertisement
Table of Contents

Summary of Contents for Panasonic CT-2511HDB
- Page 1 Installer’s Guide Manual de Instalación Save this document for future reference. Conserve este documento para futuras referencias. PANASONIC CT-2511HD Read these instructions completely before operating television. Lea estas instrucciones completamente antes de operar la televisión. Contents are subject to change without notice or obligation.
-
Page 2: Safety Warning
Con el objeto de prevenir el riesgo de incendio o de sacudida eléctrica, este aparato no deberá verse expuesto a la lluvia ni a la humedad. PANASONIC HOME AND COMMERCIAL PRODUCTS COMPANY, DIVISION OF MATSUSHITA ELECTRIC CORPORATION OF AMERICA One Panasonic Way, 4A-4... -
Page 3: Table Of Contents
Setting Individual Volume Limits... 13 Testing the Settings in the Clone Box... 14 Testing the Clone Box Battery ...14 Resetting the Television to Normal TV Mode ... 15 Setting the Television without a Clone Box ...15 Troubleshooting Guide ...16 SPANISH Indice Instrucciones de seguridad... -
Page 4: Care And Cleaning
ENGLISH Care and Cleaning Screen (turn television off) r Use a mild soap solution or window cleaner with a soft clean cloth. DO NOT USE ABRASIVE CLEANERS. r Avoid excessive moisture and wipe dry. Note: Do not spray any type of cleaning fluid directly on the screen. -
Page 5: Adding Mounting Brackets To The Television
Nota: Asegurese de usar un soporte aprobado Use cuatro (4) tornillos tamaño #10 para ensamblar el soporte a la parte inferior de la televisión. Vea el diagrama a continuación. PANASONIC Bottom view of television cabinet Front of television Frente de la televisión –... -
Page 6: Optional Equipment Connection
(See your equipment manual). Procedure 1. Connect equipment as shown to rear or front (some models) Audio/Video input jacks. 2. Select the Video mode by pressing TV/ VIDEO button. 3. Operate optional equipment as instructed in equipment manual. Terminals on back of TV Terminales en la parte posterior de la televisión... -
Page 7: Location Of Controls
Action Button - Press to display Main Menu and access On Screen Feature Adjustment (normal TV mode only). TV/Video Button - Press to select TV or Video Input. ACTION TV/VIDEO Remote Control Sensor Sensor del control remoto... -
Page 8: Remote Control Guide / Guía Para El Control Remoto
Presione aquí y deslize la tapa hacia atrás. – 8 – TV/VIDEO Press to select TV or Video Mode. Presione para seleccionar la modalidad de televisión o vídeo. Press to select next channel and navigate in menus. Presione para seleccionar el siguiente canal y accesar las opciones en los menús. -
Page 9: Main Menu
ENGLISH Main Menu The Main Menu appears only when the television is in Normal TV Mode. Basic Navigation 1. Press the ACTION button on the remote control to display the Main Menu. 2. Press the CH and/or VOL buttons to select an icon. -
Page 10: Commercial (Hotel) Mode Feature
Commercial (Hotel) Mode Feature Table AUTO PROG MANUAL PROG COLOR TINT BRIGHTNESS PICTURE SHARPNESS CHANNEL CAPTION VOLUME LIMITING INITIAL CHANNEL Tabla de características de la modalidad comercial (hotel) AUTO PROG (programación automática de canales) MANUAL PROG (programación manual de canales) COLOR (COLOR) TINTE (TINT) BRILLO (BRIGHTNESS) -
Page 11: Clone Box Use
ENGLISH Clone Box Use The clone box uploads (LEARN) the settings of one television and downloads (TEACH) them to other televisions. This places the television into Commercial (Hotel) Mode. Note: The Clone Box is not supplied with the set. It can be purchased separately. -
Page 12: Uploading Television Settings Into The Clone Box (Learn)
ENGLISH Uploading Television Settings into the Clone Box (LEARN) 1. Press the POWER ON button on the clone box. • The LEDs will flash red and green to confirm power is ON. 2. Connect the clone box to the Digital Interface port on the back of the television. -
Page 13: Setting Individual Volume Limits
8. Refer to the section entitled Setting Up Other Televisions Using the Clone Box (TEACH) r For higher volume The television must be in Normal TV mode. Refer to the section entitled Resetting the Television to Normal TV mode. 1. Turn television ON. -
Page 14: Testing The Settings In The Clone Box
• The red LED will flash while the data is uploaded into the box. The green LED will light for about two (2) seconds when the procedure is complete. • If the green LED does not light for about two (2) seconds, retry by holding the ALT button while pressing the LEARN button. -
Page 15: Commercial (Hotel) Mode Feature Chart
• The green LED will flash while the television is reset to Normal TV mode. The green LED will light for about two (2) seconds when the procedure is complete. 4. Disconnect the clone box from the television and turn it OFF. -
Page 16: Troubleshooting Chart
Revise en el menú de audio: ALTAVOCES > SI Change the Channel Cambie el canal Set TV or Cable Mode Properly Ajuste apropiadamente la modalidad de tv o del cable Check Antenna Cables Revise los cables de la antena Check Power Cord is Plugged into Active Outlet...


Need help?
Do you have a question about the CT-2511HDB and is the answer not in the manual?
Questions and answers