
Related Manuals for Mirpol MIR1008

Summary of Contents for Mirpol MIR1008
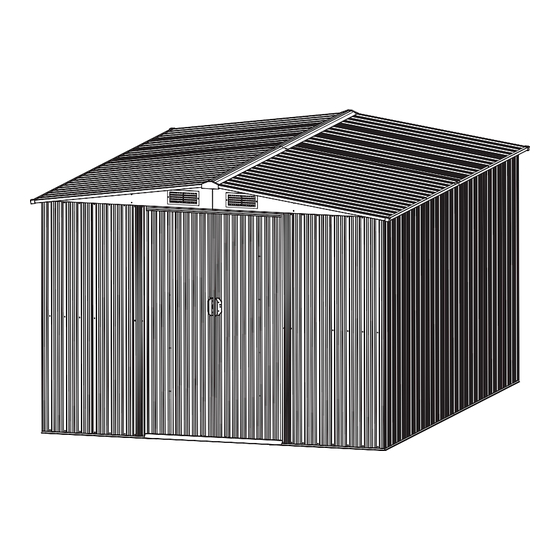
- Page 1 MIR1008 Metalowy domek narzędziowy Instrukcja montażu i obsługi Metal Tool Shed Assembly and use instructions...
- Page 2 Wybierz metodę kotwiczenia i rodzaj podłoża, kt6rego chcesz użyć w celu utworzenia pełnej listy potrzebnych materiałów. Importer: F.H. Mirpol Emil Dudzik ul. Ciasna 3, 35-232 Rzeszów, Polska kontakt@mirpol.rzeszow.pl www.mirpol.rzeszow.pl MIR1008...
- Page 3 LISTA CZĘŚCI / PARTS LIST Część/Part Symbol Ilość/Qty. Część/Part Symbol Ilość/Qty. Część/Part Symbol Ilość/Qty. MIR1008 PL / EN...
- Page 4 MIR1008 PL / EN...
- Page 5 Upewnij sie, ze zestaw in the figures below. Make sure the base bar mounting kit is square montażu prętów bazowych jest w kształcie kwadratu. in shape. Warning: note the sharp edges MIR1008 PL / EN...
- Page 6 (3L), (3R), (4L) i (4R) jak pokazano na rysunku. Otwory w bocznych ścianach domku wyrównaj z prętami bazowymi. Zabezpiecz of the shed with the base bars. Secure with screws (F1) and washers śrubami (F1) z podkładkami od zewnątrz. from the outside. Część Symbol Ilość MIR1008 PL / EN...
- Page 7 Zamontuj pręty wzmacniające (22), (23), (24L) i (24R) od wewnątrz inside of the wall panels as shown below in the picture. Secure them paneli ściennych, tak jak pokazano niżej na rysunku. Zabezpiecz je śrubami (F1) z podkładkami. with screws (F1) and washers. Część Symbol Ilość MIR1008 PL / EN...
- Page 8 śruba je utworzyła przy screw to create them when screwdriving. wkręcaniu. Warning: Ensure that the element of part G2 which is sticking out is facing the inside direction. Część Symbol Ilość MIR1008 PL / EN...
- Page 9 Align the holes in the wall panels and fasten them with górnej części panelu ściennego. Wyrównaj otwory w panelach ściennych i przymocuj je za pomocą śrub (F1). screws (F1). Make sure that the parts overlap Część Symbol Ilość MIR1008 PL / EN...
- Page 10 Then fasten the door column (25L) with i włóż do panelu ściennego. Następnie przymocuj kolumnę drzwi (25L) za pomocą śrub (F1). Powtórz to samo dla prawej kolumny the screws (F1). Repeat for the right door pillar (25R). drzwi (25R). Część Symbol Ilość MIR1008 PL / EN...
- Page 11 (21L) i (21R). Wyrównaj otwory the gable panels (21L) and (21R). Align the holes and secure them i zabezpiecz je za pomocą śruby (F2) i nakrętki. with bolt (F2) and nut. Część Symbol Ilość MIR1008 PL / EN...
- Page 12 ślizgowych (7) (8) i prętów tylnych (10L) (10R). Wyrównaj otwory i zabezpiecz je śrubami (F1) od wewnątrz, jak pokazano na holes and secure them with screws (F1) from the inside as shown in rysunku. the picture. Część Symbol Ilość MIR1008 PL / EN...
- Page 13 Align the holes and secure them with bolts (F1) and nuts with szczytowego . Wyrównaj otwory i zabezpiecz je śrubami (F1) i nakrętkami z podkładkami. washers. Część Symbol Ilość Warning: Ensure that the overlaying panels are placed in the position shown in the larger image MIR1008 PL / EN...
- Page 14 Uwaga: Upewnij się, że zachodzące na siebie położenie panelu dachowego jest takie, jak pokazano na powiększeniu. Warning: Ensure that the roof panels are placed in the position shown in the larger image. Część Symbol Ilość MIR1008 PL / EN...
- Page 15 Następnie umieść 4 części górnego narożnika (GC) na połączeniach of the top corner (GC) on the roof flange joints and secure them kołnierzowych dachu i zabezpiecz je śrubami (F1) z podkładkami. with bolts (F1) and washers. Część Symbol Ilość MIR1008 PL / EN...
- Page 16 (GE) do przedniej i tylnej części dachu i zabezpiecz secure it with the bolts (F1) and washers as shown in the picture. ją śrubami (F1) za pomocą podkładek, jak pokazano na rysunku. Część Symbol Ilość MIR1008 PL / EN...
- Page 17 (20) at both lower edges. Secure them with the bolt (F2) za pomocą śruby (F2) i nakrętki z podkładką. and the nut with washer. Lewe drzwi / Left door Prawe drzwi / Right door Część Symbol Ilość MIR1008 PL / EN...
- Page 18 Fix the 2 handles (GB) to the door panels (D2) from the inside with Przymocuj 2 klamki (GB) do paneli drzwiowych (D2) od wewnątrz the bolt (F2) and the nut. za pomocą śruby (F2) i nakrętki. Część Symbol Ilość MIR1008 PL / EN...
- Page 19 (G2) with the screws (F3). (G2) za pomocą śrub (F3). Zobacz rysunki poniżej. See the pictures below. Warning: ensure the alignment of the door will realign the holes with door panel. Część Symbol Ilość MIR1008 PL / EN...
- Page 20 Uszczelnienia silikonowe mogą być stosowane uszczelnień wodoszczelnych w całym domku. Nie przechowuj chemikaliów basenowych w swoim domku narzędziowym. Materiały palne i żrące muszą być przechowywane w hermetycznie zamkniętych pojemnikach. MIR1008 PL / EN...
Need help?
Do you have a question about the MIR1008 and is the answer not in the manual?
Questions and answers