Table of Contents
Advertisement
Available languages
Available languages
Quick Links
Manual de Instruções
Condicionador de ar
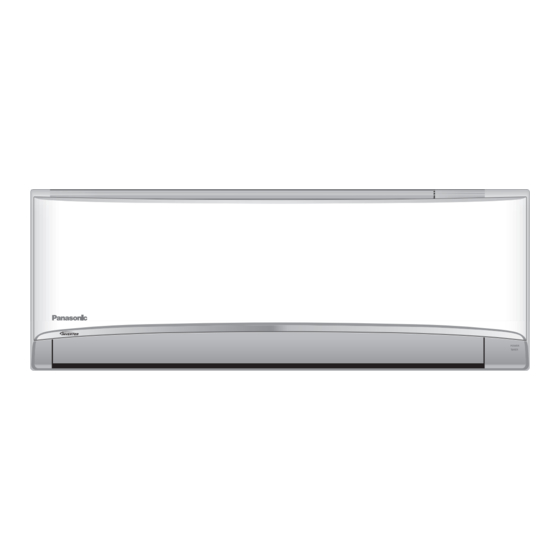
Modelo.
Unidade Interna
CS-PS9VKV-7
CS-PS12VKV-7
00_ACXF55-14790_YZ0917-0.indb 1
Unidade Externa
CU-PS9VKV-7
CU-PS12VKV-7
Manual de Instruções
Condicionador de ar
Antes de operar a unidade, por favor leia as instruções
de operação cuidadosamente e guarde-as para futuras
consultas.
As Instruções de Instalação incluídas devem ser
guardadas e lidas pelo usuário antes da instalação.
o Controle remoto está embalado na unidade interior e
removido pelo usuário antes da instalação.
Operating Instructions
Air Conditioner
Before operating the unit, please read these operating
instructions thoroughly and keep them for future reference.
The included Installation Instructions should be kept and
read by the installer before installation.
Remote control is packaged in the indoor unit and
removed by the installer before installation.
2-13
14-25
ACXF55-14790
8/18/2017 9:57:25 AM
Advertisement
Chapters
Table of Contents

Related Manuals for Panasonic CS-PS9VKV-7


Summary of Contents for Panasonic CS-PS9VKV-7
- Page 1 Manual de Instruções Condicionador de ar Modelo. Unidade Interna Unidade Externa CS-PS9VKV-7 CU-PS9VKV-7 CS-PS12VKV-7 CU-PS12VKV-7 Manual de Instruções 2-13 Condicionador de ar Antes de operar a unidade, por favor leia as instruções de operação cuidadosamente e guarde-as para futuras consultas.
- Page 2 Fornece resfriamento rápido e máximo conforto com métodos ótimos de economia de energia. Use o controle remoto dentro de 8m do receptor do controle remoto da unidade interna. Guia rápido Inserindo as pilhas Ajustando o relógio 1 Pressione o botão e defi...
-
Page 3: Table Of Contents
Obrigado por adquirir o Condicionador de ar da Panasonic. Índice Precauções de segurança..4-5 ......Como usar Para saber mais......8 Instruções de limpeza....9 Solução de problemas..10-12 Informações......13 Acessórios • Controle remoto • Pilhas AAA ou R03 × 2 •... -
Page 4: Precauções De Segurança
Precauções de segurança Para evitar lesões pessoais, lesões a outras pessoas, ou danos materiais, siga as seguintes AVISO informações: A utilização incorreta devido ao descumprimento das instruções pode resultar em ferimentos ou Unidade interna e unidade externa danos cuja gravidade é classifi cada da seguinte forma: Este dispositivo não se destina ao uso por Este aparelho não é... - Page 5 Se o cabo de alimentação for danificado, ele Não use nenhum produto combustível em deve ser substituído pelo fabricante, agente frente da entrada do fl uxo de ar, para evitar a de serviço ou por pessoal qualificado de propagação de incêndio. modo a evitar um acidente.
-
Page 6: Como Usar
Como usar Para ajustar a direção do fl uxo de ar vertical AIR SWING Direção superior • Não ajuste as pás com a mão. Indicador POWER TIMER • Para a direção lateral, ela é ajustável manualmente como mostrado. Para ajustar a velocidade do ventilador AUTO •... - Page 7 Consulte “Para saber mais...” para mais detalhes. Para maximizar o conforto durante a dormência SLEEP (CANCEL) • Esta operação fornece um ambiente confortável enquanto está em dormência. Ela ajustará automaticamente a temperatura do padrão de dormência durante o período de ativação. •...
-
Page 8: Para Saber Mais
Para saber mais... Modo de operação iAUTO : O resfriamento rápido é ideal quando você retorna para casa em um dia quente. COOL : Fornece resfriamento confortável efi ciente que se ajusta às suas necessidades. (FRIO) : A unidade opera a uma velocidade baixa de ventilação para dar um resfriamento (SECO) suave. -
Page 9: Instruções De Limpeza
Instruções de limpeza Para assegurar um desempenho Unidade interna otimizado do aparelho, uma limpeza Aletas de alumínio deve ser feita em intervalos regulares. Painel frontal A unidade suja pode provocar a avaria e poderá indicar o código de erro “H99”. Consulte o serviço autorizado. -
Page 10: Solução De Problemas
Solução de problemas Os seguintes sintomas não indicam uma avaria do aparelho. Sintoma Causa O indicador POWER pisca antes de a • Este é um passo preliminar na preparação para a unidade ser ligada. operação quando o temporizador ON foi ajustado. Quando a função ON do temporizador está... - Page 11 Quando... ■O controle remoto está perdido ou caso tenha ocorrido uma avaria. 1.Levante o painel frontal 2.Pressione o botão uma vez para usar em modo iAUTO 3. Pressione e mantenha pressionado o botão até ouvir um beep e, em AUTO seguida, libere-o para usar no modo COOL (FRIO) forçado.
- Page 12 Solução de problemas Como recuperar códigos de erro Se a unidade parar e o indicador TIMER piscar, use o controle remoto para recuperar o código de erro. Pressione até ouvir um sinal sonoro e, em Pressione por 5 s seguida, anote o código de erro TIMER TIMER CANCEL...
-
Page 13: Informações
Informações Informações para Usuários referentes ao Recolhimento e Descarte de Equipamentos Antigos e Baterias [Informação sobre ao descarte Nota para os símbolos de baterias em outros países fora da União (dois exemplos de símbolos): Europeia] Este símbolo pode ser utilizado com Estes símbolos são válidos, apenas, na um símbolo químico. - Page 14 Provides fast cooling and maximum comfort with optimal energy saving methods. Use remote control within 8 m from the remote control receiver of the indoor unit. Quick Guide Inserting the batteries Clock setting 1 Press and set the time 1 Pull out the back cover of remote control.
- Page 15 Thank you for purchasing Panasonic Air Conditioner. Table of contents Safety precautions....16-17 ......How to use 18-19 ....To learn more... … Cleaning instructions....21 Troubleshooting....22-24 Information....... 25 Accessories • Remote control • AAA or R03 batteries × 2 •...
-
Page 16: Safety Precautions
Safety precautions To prevent personal injury, injury to others or property damage, please comply with the following: WARNING Incorrect operation due to failure to follow instructions below may cause harm or damage, the seriousness of which is classifi ed as below: Indoor unit and outdoor unit This appliance is not intended for accessibility by This appliance is not intended for use by... - Page 17 Do not expose plants or pet directly to airfl ow If the supply cord is damaged, it must be to avoid injury, etc. replaced by the manufacturer, service agent or similarly qualified persons in order to avoid Do not touch the sharp aluminium a hazard.
-
Page 18: How To Use
How to use To adjust vertical airfl ow direction AIR SWING Upper direction • Do not adjust the fl ap by hand. Indicator POWER TIMER • For lateral direction, it is manually adjustable as shown. To adjust fan speed AUTO •... - Page 19 See "To learn more..." for details. To maximise comfort while sleeping SLEEP (CANCEL) • This operation provides you with a comfortable environment while sleeping. It will automatically adjust the sleep pattern temperature during the activation period. • The indoor unit indicator will dim when this operation is activated. This is not applicable if the indicator brightness has been manually dimmed.
-
Page 20: To Learn More
To learn more... Operation mode iAUTO : The fast cooling is ideal when you come home on a hot day. COOL : Provides effi cient comfort cooling to suit your needs. : Unit operates at low fan speed to give a gentle cooling operation. Energy saving temperature setting Operating the unit within the recommended temperature range may save energy. -
Page 21: Cleaning Instructions
Cleaning instructions To ensure optimal performance of the Indoor unit unit, cleaning has to be carried out at Aluminium fi n regular intervals. Dirty unit may cause Front panel malfunction and you may see error code “H 99”. Please consult authorised dealer. •... -
Page 22: Troubleshooting
Troubleshooting The following symptoms do not indicate malfunction. Symptom Cause POWER indicator blinks before the unit • This is a preliminary step in preparation for the is switched on. operation when the ON timer has been set. When ON Timer is set, the unit may start earlier (up to 15 minutes) before the actual set time in order to achieve the desired temperature on time. - Page 23 When... ■The remote control is missing or a malfunction has occurred 1.Raise the front panel. 2.Press the button once to use in iAUTO mode. 3. Press and hold the button until you hear 1 beep, then release to use in AUTO forced COOL mode.
- Page 24 Troubleshooting How to retrieve error codes If the unit stops and the TIMER indicator blinks, use the remote control to retrieve the error code. Press for Press until you hear beep 5 seconds sound, then write down the error code TIMER TIMER Press for 5...
-
Page 25: Information
Information Information for Users on Collection and Disposal of Old Equipment and used Batteries [Information on Disposal in other Note for the battery symbol (bottom Countries outside the European two symbol examples): Union] This symbol might be used in These symbols are only valid in the combination with a chemical symbol. - Page 26 Memo 00_ACXF55-14790_YZ0917-0.indb 26 00_ACXF55-14790_YZ0917-0.indb 26 8/18/2017 9:57:36 AM 8/18/2017 9:57:36 AM...
- Page 27 Memo 00_ACXF55-14790_YZ0917-0.indb 27 00_ACXF55-14790_YZ0917-0.indb 27 8/18/2017 9:57:36 AM 8/18/2017 9:57:36 AM...
- Page 28 Panasonic Corporation 1006 Kadoma, Kadoma City, Osaka, Japan Website: http://www.panasonic.com © Panasonic Corporation 2017 ACXF55-14790 Printed in Malaysia YZ0917-0 00_ACXF55-14790_YZ0917-0.indb 28 00_ACXF55-14790_YZ0917-0.indb 28 8/18/2017 9:57:36 AM 8/18/2017 9:57:36 AM...
Need help?
Do you have a question about the CS-PS9VKV-7 and is the answer not in the manual?
Questions and answers