Table of Contents
Advertisement
Quick Links
Advertisement
Table of Contents

Related Manuals for UNIBOX HD ECO+

Summary of Contents for UNIBOX HD ECO+
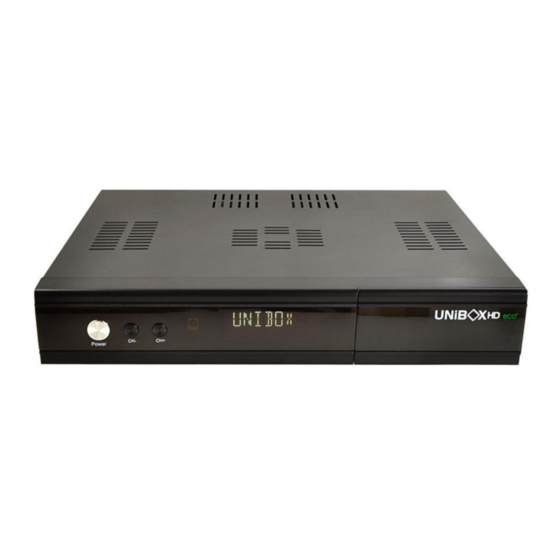
- Page 1 Instruction Manual High Definition Personal Video Recorder Digital Satellite Receiver The UNIBOX HD ECO+ digital receiver is fully compliant with the international Digital Video Broad-casting (DVB) standard, and thus is able to receive digital broadcasts of that standard.
-
Page 2: Safety Precautions
1. Safety Precautions This product has been manufactured to act in accordance with the international safety standards. Please read through the safety instructions carefully before using this product as the manufacturer takes no responsibility for any damages due to the consumer’s misuse of the product. 1.1 Power Supply ... -
Page 3: Installation And Maintenance
1.3. Installation and Maintenance Before connecting or disconnecting the satellite cable to the product, be sure that the product is unplugged. Failure to do so may cause damage to the LNB. The LNB cable must be earthed to the system earth for the satellite dish. Before connecting or disconnecting the cable from the TV, be sure that the product is unplugged. -
Page 4: Table Of Contents
2.4.1 Insertion of Smartcard ....................9 2.4.2 Insertion of CAM (Conditional Access Module) ............. 9 2.5 Technical Specifications ......................9 3. Installation of UNIBOX HD ECO+ ....................11 3.1 Connecting Satellite Cables....................11 A. Two Separate Satellite Cables ................... 11 B. - Page 5 4.0 First use ........................... 18 4.1 Channel List .......................... 18 4.2 Switching Channel ........................ 21 4.3 Program Information ......................21 4.4 Volume Control ........................22 4.5 Selecting Audio Track ......................23 4.6 Subtitle..........................23 4.7 Media Player ......................... 24 4.8 Sleep Timer .......................... 24 4.9 Teletext ..........................
-
Page 6: Introduction
8. Copyright - GNU GPL ........................ 56 2. Introduction The UNIBOX HD ECO+ digital receiver is fully compliant with the international Digital Video Broad- casting (DVB) standard, and thus is able to receive digital broadcasts of that standard. For its operation you need an antenna, which must be installed appropriately. -
Page 7: Product Descriptions
2.2 Product Descriptions Rear Panel LNB IN A satellite cable can be connected. AUDIO R Connects to TV using RCA cable. VIDEO Connects to TV using RCA cable. HDD BRACKET HDD racket. LOOP OUT A satellite cable can be connected to other satellite tuner. AUDIO L Connects to TV using RCA cable. -
Page 8: Remote Controller
2.3 Remote Controller POW ER To switch the receiver in and out of stand-by mode. Sets sleep timer TIMER Enters a service number for service change or to specify values for menu options. < / > Next / Previous channel MENU Displays the Main Menu INFO... -
Page 9: Conditional Access
2.4 Conditional Access Amongst the channels that are scanned via UNIBOX HD ECO+, some channels can be properly tuned in only with the corresponding Smartcard. UNIBOX HD ECO+ provides two Smartcard Reader slots and users need to purchase those Smartcards that are required for viewing such subscription based services. - Page 10 Power Mains voltage: 95~250 / 50~60 V/Hz Power consumption: 65/35/1 W (Max./typ. operation/stand-by) RF range: 950~2,150 MHz Modulation, FEC, de-multiplexer: DVB-S/DVB-S2 standard Video Video resolution: CCIR601 (720 x 576 lines), 576p, 720p, 1080i, 1080p@30 Video decoding: MPEG-2, MPEG-4 compatible Input data rate: 2~45 MSymb/s S/N: >...
-
Page 11: Installation Of Unibox Hd Eco
3.1 Connecting Satellite Cables UNIBOX HD ECO+ is integrated with triple satellite tuners, and one of the first steps is to connect satellite cable(s) to UNIBOX HD ECO+ in order to gain optimal signal quality. You can either choose one of the following connection methods depending on the equipment you have. -
Page 12: Connecting Power
POWER key is normally used to turn the power of UNIBOX HD ECO+ on or off. If you press POWER, it instantly switches your UNIBOX HD ECO+ off or on. In this mode, the system is not completely shut down and thus it takes a shorter time to turn it on and off. -
Page 13: First Time Installation
Step 1. Video Input Selection UNIBOX HD ECO+ will automatically probe the video input port. Press OK if you can see this page on your TV. Or you can select a different input port (HDMI, SCART, or YPbPr). Use UP/DOWN key to scroll up and down to find the input port you want. -
Page 14: Step 3. Refresh Rate Selection
Adjust the refresh level to a value suiting your taste. If you are happy with the result, press OK. Step 4. Language Selection UNIBOX HD ECO+ provides various languages and here you can choose the main language for your UNIBOX HD ECO+. Use UP/DOWN key to scroll up and down to find the language you want. -
Page 15: Step 6. Configuring Tuner A
● Equal to: mode to use the same configuration as that of Tuner B. ● Advanced: for an advanced user configuration. If you choose Simple configuration mode, the following picture will appear. The five modes are available for the satellite cable connection between LNB and your UNIBOX HD ECO+ as below:... -
Page 16: Single
Single This option is used to receive a single satellite with a single LNB. The cable from LNB is directly connected to UNIBOX HD ECO+. ToneBurst A/B This option is used if you want to receive two satellites using a ToneBurst switch. -
Page 17: Diseqc A/B/C/D
DiSEqC A/B/C/D This option allows you to configure four satellites in Port A, Port B, Port C, and Port D. Positioner This option is used when you have a motorized satellite antenna. Step 7. Configuring Tuner B This step is for the configuration of TUNER B Input and the process is same as that of Tuner A. -
Page 18: First Use
After press OK, You can choose if installation should be automatic or manual. 4.0 First use 4.1 Channel List How to use > Press UP/DOWN If press Navigation UP/DOWN key, this will activate Channel Selection Menu. Four types of the channel lists are available to help you manage your channel selection. - Page 19 It displays the list of all scanned channels. GREEN It displays the list of all satellites scanned. Per each satellite, channels are arranged according to Services, Provider, and New. YELLOW It displays the list of providers.
- Page 20 BLUE It displays the list of your favorite channels. ① Call up the Channel Selection list by Pressing UP or DOWN key. ② Go to All lists by pressing RED key. In order for you to add certain channels to this favorites list. ③...
-
Page 21: Switching Channel
How to use > Press CHANNEL +/ - or press UP / DOWN or Press LEFT / RIGHT to move to the next channels UNIBOX HD ECO+ offers various channel zapping methods. You can switch the current channel by pressing. -
Page 22: Volume Control
① 19,2E: The satellite position being used for the current channel ② SNR (Signal to Noise Ratio) : Signal Level ③ AGC (Automatic Gain Control) : Signal Strength ④ The name of the current channel ⑤ Remaining time of the current program ⑥... -
Page 23: Selecting Audio Track
4.5 Selecting Audio Track How to use > Press AUDIO You can check what audio tracks are available to choose by pressing AUDIO key. By using UP/DOWN key and Color key, you can select a different audio language or Stereo sound. NOTE: Available options on this menu will differ depending on the service. -
Page 24: Media Player
How to use > Press MENU- > ‘Media Player’ UNIBOX HD ECO+ is truly a multimedia receiver capable of playing media contents. Using Media Player, you can enjoy Music, Photo and Video contents stored on the internal HDD and/or a USB memory stick plugged into UNIBOX HD ECO+. -
Page 25: Teletext
You can set a specific time when your UNIBOX HD ECO+ goes into Standby mode or Deep Standby mode, using this menu. Three color keys are used to setup this sleep timer. ① RED: This option is used to EXIT from menu GREEN: This option is used to save settings. -
Page 26: Electronic Program Guide
MUTE key Once you activated Teletext, you can toggle between the live mode and the Teletext page by pressing MUTE key instantly. In this case, loading of the Teletext page takes place instantly. VOLUME + key If you want to enlarge the page, press VOLUME + key. VOLUME - Key If you want to reduce the page size, press VOLUME - key. - Page 27 Detailed information of the current channel will be displayed on EPG. On this menu, three options are provided. RED (Similar) This option helps you find similar programs. If there are one or more programs that are similar to the current program, EPG Selection window displays them.
- Page 28 YELLOW (Single EPG) Press YELLOW while Eventview menu is on, to call up the program event schedules of the selected channel. In this state, you can sort the list according to A-Z order or Time by pressing YELLOW. NOTE: To add a timer for recording or zapping, press GREEN. BLUE (Multi EPG) Press BLUE to activate EPG Selection Multi EPG window.
-
Page 29: Timeshift
4.11 Timeshift How to use > Press PLAY/PAUSE ll during watching TV For your information, Timeshift is an instant recording of the current program that you are watching. Press PLAY/PAUSE key, it will instantly pause the audio and video of the program, and a small window displaying elapsing time information will appear on the top side of the screen. -
Page 30: Recording
4.12 Recording UNIBOX HD ECO+ is a Personal Video Recorder with an integrated DVB-S2 tuner. You can record multiple programs at the same time. There are two ways to operate and manage recording. ⑤ Instant Recording How to use > Press REC button Press REC key to start the recording of the current program. - Page 31 Add recording (enter recording end time) This option is used when you want to define a certain date and time when the recording is to stop. Add recording (indefinitely) This option is used when you want to keep recording running without a specific end time. Recording will continue unless you stop it.
- Page 32 GREEN (Add) This option is used to add a timer. YELLOW (Disable) This option is used to disable the timer and X mark will appear. NOTE: if you want to enable the disabled timer, press YELLOW again. BLUE (Cleanup) This option is used to remove those finished timers from the Timer list.
-
Page 33: Recording Play
NOTE: Make sure that the HDD on your UNIBOX HD ECO+ has enough free space available for recording. If the free space on the HDD is not sufficient, recording might stop before the defined end time. Stop Recording How to use > Press RED → ‘Stop Recording’... -
Page 34: Managing Recording Files
Select the file that you want to play. It will instantly replay the file and display the recording infobar. ① Title of the recording This infobar gives you the following information of the recording. ② Total duration of recording ③ Remaining time ④... -
Page 35: System Configuration
UNIBOX HD ECO+ is a very sophisticated device designed to allow users a variety of system setting options as detailed as possible. You can fine-tune your UNIBOX HD ECO+ to be your OWN system to fit your taste. This chapter will guide you through the entire menu of system configuration. -
Page 36: System Configuration
5.2 System Configuration The main menu of UNIBOX HD ECO+ consists of the following sub menus. ① Media player: Activate Media player of UNIBOX HD ECO+. For more information, please refer to the “4.7 Media Player”. ② File Browser: You can browse, mange all files inside USB and HDD. -
Page 37: System Configuration
5.3.1. System Configuration How to use > Press MENU→ ‘Setup’ → ‘System’ Here you can find most of the necessary settings that you might need to optimize your UNIBOX HD ECO+ in the way you like it. Please read the followings carefully. -
Page 38: Auto Language Selection
This menu allows to setup default language speech, turn on automatically subtitles and more. Using LEFT/RIGHT key, you can control a value that you want to use for your UNIBOX HD ECO+. After setting, press GREEN to confirm and save the changed setting. -
Page 39: Buttons Setup
Buttons Setup In this menu You can setup actions for button. You can change actions after press OK button. Customization In this menu you will find various customization options and this menu can be displayed in three different formats: Simple, Intermediate, and Expert. NOTE: RED is for cancel and GREEN is OK. -
Page 40: Channel Selection Settings
Amongst the options given in this menu, the following ones are generally what you may need to know. Setup mode: Expert, Simple, Intermediate Enable teletext caching: If you set this option at YES, it will cache teletext. 12V Output: If you set this option at YES, it will turn on 12V on SAT output. Alternative services tuner priority: You can setup which tuner should be used as priority Preferred tuner: Force to use tuner number Include ECM in http streams: Send ECM while streaming... -
Page 41: Recording Settings
How to use > Press MENU → ‘Setup’ →‘System’ → ‘Recording settings’ UNIBOX HD ECO+ provides options for Recording function. ① Recording always has priority: YES option is used to set the recording to have a priority over any existing timer. If there occurs a conflict between a timer and a recording in progress, the recording has a priority over the timer. -
Page 42: Language Selection
How to use > Press MENU → Setup’ → ‘System’ → ‘Timezone’ Using LEFT/RIGHT key, you can find a time zone that you want to use for your UNIBOX HD ECO+ .After selecting a time zone, press GREEN to confirm and save the changed setting. -
Page 43: Hard Disk Setup
Hard Disk Setup How to use > Press MENU → Setup’ →‘System’ → ‘Storage devices’ → ‘Harddisk setup’ You can set the duration of time after which HDD is to be put into standby mode. Here, you can choose from ●... -
Page 44: Network Setup
UNIBOX HD ECO+ is integrated with standard 10/100Mbps Ethernet with RJ 45 connector standard. You are recommended to use this network capability of UNIBOX HD ECO+ to fully enjoy the system. You can setup the network settings through this Network Configuration menu. - Page 45 ② Nameserver settings This option is required if you selected not to use DHCP. You need to enter the address of the Nameserver. ③ Network test: When you are not sure whether the network configuration has been done correctly or not, you can run this test.
-
Page 46: Skin Setup
How to use > Press MENU → ‘Setup’ →‘System’ →‘Skin Setup’ UNIBOX HD ECO+ is a Linux based set top box and there are a lot of Skins available for Linux set top box. Using this menu, you can use a different Skin other than the default one. -
Page 47: Tuner Configuration: Dvb-C
Tuner Configuration: DVB-C How to use > Press MENU -> ‘Setup’ -> ‘Service Searching’ -> ‘Tuner Configuration’ Use UP/DOWN to select DVB-C Tuner and press the OK-Button. The Reception Settings menu will open up. Frequency bands This type of searching scans the frequencies used by most cable providers. This setting is the default. Use LEFT/RIGHT to set the “Used service scan type”... -
Page 48: Checking Cam
⑧ Network Scan: Here you have two options for YES and NO. NO is used to scan the transponder (TP) based on the data that your UNIBOX HD ECO+ currently has. YES is used to scan the TP not just based on the existing TP data but also using new TP data, if there is TP data newly transported from the TP. -
Page 49: Parental Control
5.3.4. Parental Control How to use > Press MENU -> ‘Setup’ -> ‘Parental Control’ If you want to prevent certain channels from being accessed by others, you can do so using this menu. ① Go to Parental Control menu by pressing MENU >... -
Page 50: Factory Reset
How to use > Press MENU -> ‘Information’ If you want to check the H/W or S/W system of your UNIBOX HD ECO+, this is the menu that you need to use. Also, here you can check very detailed information of a specific service. -
Page 51: System Information
How to use > Press MENU -> ‘Information’ -> ‘About’ ① S/W version This menu is for you to check the current system of your UNIBOX HD ECO+.You can see the following information: ② Detected NIMs for both Tuner A & B... -
Page 52: Menu Structure
6. Menu Structure Main Menu 1st level 2nd level 3rd level 4th level 5th level Media Player File browser Timer Timer Editor File Browser Service Service Information Informations About About Plugins Plugin browser A/V Settings A/V Setup Video Video enhancement Enhancement settings Setup... - Page 53 HDMI-CEC HDMI-CEC Setup Setup Choose Your Skin Skin Video Fine- Brightness Contrast Tuning Tuner Select Tuner Tuner Settings configuration Service Service Automatic Scan Searching Searching Manual Scan Service Scan Positioner setup N/A Satfinder Satfinder Common Slot1 Interface Parental control Parental control setup Factory reset Configure...
- Page 54 Info about database About OSD 3D Setup 3D mode Setup Manage Extensions extensions management Software Software update management Software update (Offline) Software restore Image Wizard Backup system Command settings Execution Restore system settings Install local extension Advanced Restore restore Choose backup location Choose backup Advanced...
-
Page 55: Troubleshooting
● Check first if the product is powered on and in operation mode. ● Check if the video cable is properly connected between TV and UNIBOX HD ECO+. ● Check if the satellite cable is properly connected to UNIBOX HD ECO+. -
Page 56: Copyright - Gnu Gpl
● Check if your system correctly detects the smartcard and CAM. 6. Recording problem ● Check if the HDD has a sufficient space for recording. ● Check if there is a conflict between recording timers. 8. Copyright - GNU GPL GNU GENERAL PUBLIC LICENSE Version 2, June 1991 Copyright (C) 1989, 1991 Free Software Foundation, Inc. - Page 57 TERMS AND CONDITIONS FOR COPYING, DISTRIBUTION AND MODIFICATION 0. This License applies to any program or other work which contains a notice placed by the copyright holder saying it may be distributed under the terms of this General Public License. The ‘Program’, below, refers to any such program or work, and a ‘work based on the Program’...
- Page 58 (This alternative is allowed only for noncommercial distribution and only if you received the program in object code or executable form with such an offer, in accord with Subsection b above.) The source code for a work means the preferred form of the work for making modifications to it. For an executable work, complete source code means all the source code for all modules it contains, plus any associated interface definition files, plus the scripts used to control compilation and installation of the executable.
- Page 59 10. If you wish to incorporate parts of the Program into other free programs whose distribution conditions are different, write to the author to ask for permission. For software which is copyrighted by the Free Software Foundation, write to the Free Software Foundation; we sometimes make exceptions for this. Our decision will be guided by the two goals of preserving the free status of all derivatives of our free software and of promoting the sharing and reuse of software generally.
Need help?
Do you have a question about the HD ECO+ and is the answer not in the manual?
Questions and answers