Table of Contents
Advertisement
Advertisement
Table of Contents

Subscribe to Our Youtube Channel
Summary of Contents for Larsen & Toubro Star 55
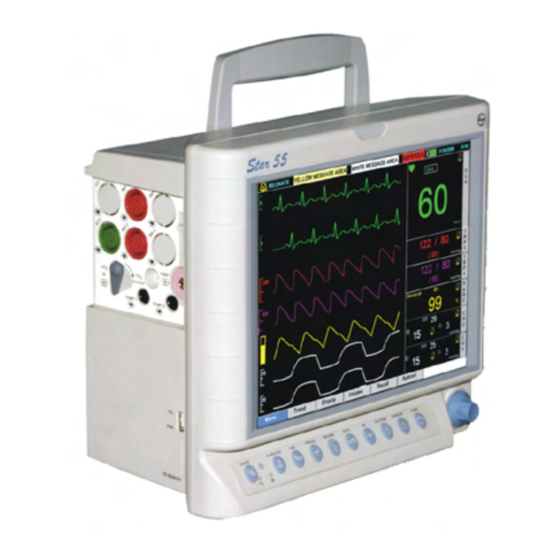
- Page 2 LARSEN & LARSEN & T T T T T OUBR LARSEN & OUBR OUBR O LIMITED O LIMITED OUBR O LIMITED O LIMITED LARSEN & LARSEN & OUBR O LIMITED Star 55 8 channel multiparameter color monitor Operating Manual Star 55...
- Page 3 L&T medical reserves the right to make changes in specifications and features shown herein or discontinue the product described at any time without notice or obligation. The contents in this manual are strictly not to be reproduced in any form, by any method, for any purpose. Star 55...
- Page 4 Star 55 has graded and colour coded alarms. It has 72 hours tabular and graphical trend for 200 patients of all parameters except NIBP. Star 55 has special tabular trend for NIBP to store last 240 readings. Recall feature offers storage of last 24 critical alarm conditions and ECG trend.
-
Page 5: Table Of Contents
Non Invasive Blood Pressure 2.11 • Invasive Blood Pressure (Optional). 2.13 • Capnography (Optional) . 2.16 3. Operations And Main Screen. • Operation • Main screen . 4. Parameter Setting . • ECG . • Respiration . • Temperature • Star 55... - Page 6 • NIBP . • Capnography (Optional) . • IBP (Optional) . 4.11 • Drug cal . 4.15 5. System Functions . • System Functions . • Menu . • Trend . 5.10 • Display 5.18 • Volume 5.20 • Recall 5.21 •...
-
Page 7: Exemptions
AAMI SP 10 for NIBP. Regulatory Requirement "United States law restricts this device to sale or use by or on the order of a physician" Disposal Instructions • Follow the local regulations and procedures for the disposal of unit and battery. Star 55... -
Page 8: Caution
Read all the Cautions, Warnings and Notes provided throughout the Operating Manual before using the monitor. Caution Cautions are intended to alert you to the importance of following correct operating procedures to prevent the risk of damage to the system. Electrical installation of the room or the building in which the equipment is to be used, should comply with regulations specified by the country in which the equipment is to be used. -
Page 9: Warning
Pay extra attention if the parts of the equipment are provided with protections against burning the patient when used with High Frequency (HF) surgical equipment. Observe extreme caution when a defibrillator is used on a patient. Do not touch any part of patient, table or monitor when a defibrillator is in use. Star 55... -
Page 10: Unpacking
Unpacking Check for any signs of transportation damage after removing the Patient Monitor from the packing carton. Verify the material in the packing carton as per the packing list sent along with the monitor. Preserve the packing carton as it may required/useful for future use. -
Page 11: Indication For Use
Indication For Use The Star 55 multiparameter patient monitoring system is intended to monitor a single adult, pediatric or neonatal patient's vital signs at the bedside or during intra-hospital transport along with the appropriate accessories mentioned / supplied with the unit. -
Page 12: Handling Precautions
Handling Precautions This monitor is intended for use by only qualified medical personnel. Please read these precautions thoroughly before attempting to operate this monitor. For effective use of monitor , operation of the unit must be fully understood. While installing or storing the monitor, take the following precautions. Avoid moisture or contact with water, extreme atmospheric pressure, excessive humidity and temperatures, poorly ventilated areas and dusty air. - Page 13 ECG, SpO , IBP and Temperature are not protected. To Shutdown After Use Turn power OFF with all controls returned to their original positions. Remove all accessories gently, do not use force to remove them. Star 55...
-
Page 14: Symbols
Symbols Logo Mains 110 / 230 Volts ON indicator Unit ON indicator Equipotential ground Attention, refer to manual Defibrillation – Proof type-CF of Applied Part Defibrillation – Proof type-BF of Applied Part Global Alarm suspended Alarm Acknowledge Indicates valid QRS/Pulse detection Indicates detection of PR from Plethysmograph Indicates detection of PR from NIBP Indicates detection of PR from IBP... - Page 15 Stand By Home Pump NIBP Trend ECG Lead selection ECG Gain adjustment Display Format selection Beep and Alarm Volume adjustment PR Source selection NIBP Timer Left Navigator Selection Key Right Navigator Auto Zeroing of IBP Drug Calculation window Star 55...
-
Page 16: Acronyms And Abbreviations
Acronyms and Abbreviations Oxygen Saturation in %. Heart Rate (derived from ECG). Beats Per Minute (HR/PR). Breaths Per Minute (RR). Fault. Systolic Blood Pressure. Diastolic Blood Pressure. MEAN Mean Blood Pressure. CHECK HR Displayed Heart Rate may not be valid (More than 30 BPM diff). RECORDING ... - Page 17 Central Nursing Station Physiological Alarm Technical Alarm No Alarm Communication Interface Card Star 55...
- Page 18 Star 55...
-
Page 19: Front Panel
Front Panel 1 234 5 11 12 Figure 1.1... - Page 20 (highlighted rectangular block) right or left in the Menu area of the screen. Pressing the optical encoder selects the particular function. Yellow Message Area Displays error messages in black text with yellow background Star 55...
- Page 21 Crossed bell indication for alarm silence. Parameter/Numeric Displays numerical values for all parameters. Menu Display Area Displays Main menus. Battery status Area Displays the status of the battery. Non display parameters Displays the alarm of non display parameter Star 55...
- Page 22 Left blank intentionally Star 55...
-
Page 23: Rear Panel
Rear Panel 0843 Figure 1.2 Star 55... - Page 24 For external grounding. Mains Plug Connection for 110V AC, 60Hz / 230V AC, 50 Hz. Communication Interface Card. AGM/CO Connecting to Gas Monitoring Module. CIC available in Star 55: Connectors CIC-2 VGA + PC Dump CIC-4 PC Dump + CNS...
-
Page 25: Left Side Panel
Left Side Panel Figure 1.3... - Page 26 To transfer the trend data from one monitor to another. Figure 1.4 ** Use 1GB or 512 MB of Sandisk make. *** Use 1GB, 2GB or 512 MB of Sandisk make. # Use USB Printer which supports PCL5e and PCL6. Star 55...
-
Page 27: Right Side Panel
Right Side Panel Figure 1.5... - Page 28 Right Side Panel Description Connector Function Recorder To print the waveform with the digital values. Nurse Call Configurable relay to activate nurse call. Defib. Sync For synchronizing monitor with defibrillator. Star 55 1.10...
-
Page 29: Procedure To Connect And Disconnect The Connectors
Procedure To Connect And Disconnect The Detachable Connectors Power Cord Connect Disconnect a) Switch OFF the unit. a) Switch OFF the unit. b) Hold the unit with one hand b) Hold the unit with one hand and insert the power cord into and gently pullout the head of the slot provided on the rear the power cord from the unit... - Page 30 Insert the NIBP connector in the Press the NIBP connector on the slot provided on the side panel side panel of the unit and remove of the unit as shown in Figure1.12. connector as shown in Figure1.13. Figure 1.12 Figure 1.13 Star 55 1.12...
- Page 31 Connect Disconnect a) Open the CO inlet shutter in the a) Turn the CO Filterline connector direction as shown in the unit. in anticlockwise direction to b) Insert and turn the CO Filterline unlock as shown in Figure1.15. connector in clockwise direction b) Gently pull out the CO connector to lock as shown in Figure 1.14.
- Page 32 Insert the grounding connector Hold the unit with one hand and in the slot provided on the pull out the connector as shown rear panel as shown in the in the Figure.1.19 Figure.1.18. Figure 1.18 Figure 1.19 Star 55 1.14...
-
Page 33: Recorder (Optional)
Recorder Green LED Red LED Feed Key Figure 1.20 Function Green LED Indicates Power ON. Red LED It blinks if recorder cover is not properly closed or paper is not present. Feed Key Step feeding of paper (approx. 0.5 cm jump) On-line Recording Output: Delayed recording Any two waveforms will be recorded with digital... - Page 34 08 : 52 : 55 25 OCT 06 125/80 20 * NIBP : 127 / 81 mmHg 14 : 41 : 10 ( 95 ) - / - ( 96 ) - / - Figure 1.23 Figure 1.21 Figure 1.22 Star 55 1.16...
-
Page 35: Remote
Remote Figure 1.24 21 hotkeys along with Standby key and an LED is provided on the wireless hand-held remote. Maximum distance in which the remote can operate is as shown below: Maximum distance at zero degree to (remote sensor) IR detector is 12ft. Maximum distance at 62 degree to IR detector is 5ft on each side. - Page 36 Star 55...
-
Page 37: Ecg
LL (F) Green crest. left midclavicular line Right midclavicular line at the N (RF) Black same level as F Any of the chest electrode White positions Figure 2.2 Lead I Figure 2.3 Lead II Figure 2.4 Lead III Star 55... - Page 38 ELECTRODE PLACEMENT (5 LEAD) Chest electrode positions C1 (V1) : Fourth intercostal space at right border sternum C2 (V2) : Fourth intercostal space at the left border of the sternum C3 (V3) : Halfway between C2 (V2) and C4 (V4) C4 (V4) : Fifth intercostal space of the left midclavicular line.
- Page 39 Bipolar Limb Leads Unipolar Limb Leads Unipolar Chest Leads Figure 2.6 Lead I Figure 2.7 Lead aVR Figure 2.8 Lead V1-6 Figure 2.9 Lead II Figure 2.10 Lead aVL Figure 2.11 Lead III Figure 2.12 Lead aVF Star 55...
- Page 40 Note Place the electrodes on the patient before the electrode cable is plugged into the monitor. Special consideration should be given to electrode placement when an electrosurgical unit is to be used. The active electrodes should be equidistant from the proposed cutting line, but situated as far away as possible.
- Page 41 Patients with burns may need special needle electrodes. Star55 has 3 / 5 lead ECG options for monitoring ECG. L&T offers either of these cables: • 3 lead ECG cable (I, II, III) • 5 lead ECG cable (I, II, III, aVR, aVL, aVF, V) Star 55...
-
Page 42: Respiration
18-20 breaths per minute. There are several ways to measure respiration. In Star 55, respiration can be measured either through Capnography or ECG. Priority is given to Capnography. -
Page 43: Temperature
TEMPERATURE Temperature is one of the important parameters of multiparameter monitor. L&T offers dual temperature monitoring facility in Star 55 series. It is a useful diagnostic tool when differential temperatures needs to be monitored. e.g.: Body temperature of premature baby and temperature of the incubator. -
Page 44: Pulse Oximetry
With each heart beat, a pulse of oxygenated arterial blood flows to the sensor site. This oxygenated hemoglobin differs from deoxygenated hemoglobin in the amount of red and infrared light that it absorbs. The Star 55 measures absorption of both red and infrared light and uses those measurements to determine the percentage of functional hemoglobin that is saturated with oxygen. - Page 45 Incorrect application or use of a sensor may cause tissue damage or improper operation of the Star 55. Carefully read the “WARNING” section of this manual and the directions for use provided with the sensor.
- Page 46 Although the Star 55 is designed to minimize any effects of electrosurgical interference, if such interference gives a problem, evaluate the following solutions: Move the cables of the Star 55 and the cautery unit as far as possible. Plug the Star 55 and cautery unit into different mains socket.
- Page 47 If NIBP, SpO and ECG all three are connected to patient; then heart rate (HR) is derived from ECG. Do not measure NIBP continuously, as it might result in prolonged impairment of the blood circulation of the patient. Star 55 2.11...
- Page 48 Caution Extreme caution must be taken when NIBP is set to STAT mode for all types of patients. Reports have been made of nerve injury occurring during use of automatically cycled blood pressure measurements. Caution For NIBP measurements : The cuff selected must fit the upper limb properly and must overlap to encircle the limb on which it is applied.
-
Page 49: Invasive Blood Pressure (Optional)
Usually this is where the catheter tip is placed. (For eg., in centrally located catheters, the tip is generally considered to be in the mid-chest position. The transducer level is then set to corresponding to the patient's mid-chest level). Star 55 2.13... - Page 50 Close the pressure line to the patient and open the transducer venting stopcock to atmosphere. Zero the monitor by pressing zero soft key ( Select appropriate averaging time from SETUP menu. SLOW, NORMAL and FAST options are provided. Close the venting stopcock to atmosphere, and open the stopcock to the patient.
- Page 51 Figure 2.15 Star 55 2.15...
-
Page 52: Capnography (Optional)
CAPNOGRAPHY Theory of operation The principle of Capnography is based on the absorption of infrared radiation by CO . The technique is known as non-dispersive infrared absorption technique. The spectral region is particularly appropriate for measuring carbon dioxide because it has a strong absorption band in the near Infrared wavelength. CO selectively absorbs specific wavelengths of Infrared light. - Page 53 CO is transported into venous circulation. During contraction of heart, venous blood is pumped through pulmonary circulation to the lungs for gas exchange. Lungs are made up of millions of alveoli, which permits easy gas diffusion Star 55 2.17...
- Page 54 from pulmonary blood to alveolar gas space. CO diffuses into this space because continuous breathing keeps CO concentration in alveoli lower than that in pulmonary circulation. During exhalation, gas leaving lungs mixes thoroughly, so Capnograph measures average concentration of CO from all the alveoli.
- Page 55 The module prevents the triggering of an auto zero in the following situations: In case of purging until the end of this state. 20 seconds to 3 minutes from the last detected breath. While wait up to 5 minutes for host auto zero enable command. Star 55 2.19...
- Page 56 Leak Tightness The leak rate of the module flow system is less than 40 mBr per minute when a 30% vacuum is invoked on the flow system. FilterLine Recognition Safeguard (FRS) The "FRS" enables the module to detect the presence of the FilterLine at startup and in normal operation.
- Page 57 Prepare the patient (Refer Figure 2.18 and Figure 2.19) for CO measurement. Use recommended accessories. Screw up one end of the ‘T’ Connector to the unit through Filter Line. Use proper types for adults and neonatal accessories. Star 55 2.21...
- Page 58 FilterLine will not surround any part of the body. Ensure that the FilterLine does not have blockage or occlude with moisture before use. Following accessories are provided for Capnography along with Star 55 monitor. Capno Line Adult Pediatric...
- Page 59 Star 55...
-
Page 60: Operation
POWER ON Plug in the power cord into the power socket on the rear panel of Star 55 to switch ‘ON’. Amber color indicator (LED) on the front panel turns ‘ON’. Press ON/OFF switch on the front panel so... -
Page 61: Main Screen 1
MAIN SCREEN 1 Figure 3.1 Note Main screen when maximum i.e. eight waveforms are present. - Page 62 MAIN SCREEN 2 Figure 3.2 Note Main screen when maximum ECG waveforms are present. Star 55...
- Page 63 MAIN SCREEN 3 Figure 3.3 Note Main screen when single ECG waveform and three digital fields are present.
- Page 64 Star 55...
-
Page 65: Ecg
Menu Select this to go to Monitor settings / System functions. Trend Select this to retrieve the data of the patients recorded. Display Select this to choose different display formats. Volume Select this to set and vary alarm volume and beep volume. Recall Select this to recall alarm and ECG trend. - Page 66 RESP Select this to enter into RESPIRATION menu. Select this to enter into SpO menu. NIBP Select this to enter into NIBP menu. Select this to enter into CAPNOGRAPHY menu. TEMP Select this to enter into TEMPERATURE MENU. Star 55...
- Page 67 Special Function Adjustment Menu Is Displayed If Optical Encoder Is Pressed During Self Test (Start-up Sequence)
- Page 68 Vol% Temp Centigrade and Fahrenheit Height Inches and Cms Weight Kg and lb mmHg and Kpa Default Setting Select this to set monitor for Hospital or Factory setting as default in real time screen. Star 55...
- Page 69 Hospital Setting : Press ALARM ACK and HOME keys simultaneously in set up screen to store required display settings. Select Hospital in Default setting. Factory Setting Select facotry in Default setting. Default Factory settings are as follows. ECG: Alarm Disable Gain Lead Trace Speed...
- Page 70 89.6(A) 89.6(N) Resp: Alarm Disable Gain No Breath 30 sec (If enabled) RR Upper Limit 30(A) 100(P) 100(N) RR Lower Limit 10(A) 10(P) 50(N) Resp Speed 12.5 mm/sec A - Adult P - Pediatric N - Neonatal Star 55 3.11...
- Page 71 Recorder waveform will be ECG Lead II and SpO Alarm volume will be 6th step. Beep volume will be 6th step. ECG filter mode will be Mon. pump will be ON. Rec ON Ala will be OFF. Star 55 3.12...
- Page 72 Select this to choose PC Dump, Nurse call and barcode*. Exit Select this to go back to the screen. DEMO Access for L&T Medical's authorised personnel only. EXIT Select this to save and exit from the Configuration mode. * Future upgrade Star 55 3.13...
- Page 73 Star 55...
- Page 74 Select this to exit from the Lead setup without saving the settings. Gain Allows the user to change the amplitude of the ECG waveform in scales X0.2, X0.5, X0.75, X1, X2, X5 and Auto. X0.2 will provide the lowest amplitude and X5 will have maximum amplitude. Star 55...
- Page 75 Note Select ECG gain so that entire ECG waveform should appear without clipping at top or bottom as seen on the display or on print-out. Alarm Select this to Enable or Disable HR alarm detection from the drop down list. High Limit Select this to set upper alarm limits for HR from Numeric keypad as shown in Figure 4.4 (To use this function ensure that HR...
- Page 76 ECG recording not possible when CAL is selected. Notch filter in the monitor automatically gets set to 50 or 60 Hz after sensing the line frequency. Power on the monitor with AC mains during installation for the appropriate notch filter selection. Star 55...
- Page 77 RESP (When sourced from ECG cable) When RESP is selected in the Main screen, Resp setup window will pop-up on the screen as shown in Figure 4.5. Figure 4.5 Alarm Select this to enable / disable the alarm from the drop down list. High Limit Select this to set upper alarm limits for Respiration Rate from Numeric keypad (To use this function, ensure that alarm is...
- Page 78 Numeric keypad (To use this function, ensure that alarm is enabled). Delta T Allows the user to Enable or Disable Delta T. Select this to Enable or Disable calibration of temperature. Exit Select this to exit from Temp Setup window. Star 55...
-
Page 79: Spo
When SpO is selected in the main screen, SpO setup window will pop-up on the screen as shown in Figure 4.7. Figure 4.7 Response Select this to set the response mode for SpO readings from the drop down list. Norm Preferred for adults. -
Page 80: Nibp
Select this to enable (switch ON) or disable (switch OFF) the NIBP alarm. Sys High Limit Select this to set upper alarm limit for Systolic alarm from Numeric keypad ( To use this function, ensure that alarm is enabled). Star 55... - Page 81 Sys Low Limit Select this to set lower alarm limit for Systolic alarm from Numeric keypad ( To use this function, ensure that alarm is enabled). Dia High Limit Select this to set upper alarm limit for Diastolic alarm from Numeric keypad ( To use this function, ensure that alarm is enabled).
-
Page 82: Capnography (Optional)
Numeric keypad (To use this function, ensure that CO alarm is enabled). EtCO Low Limit Select this to set lower alarm limit for EtCO alarm from Numeric keypad (To use this function, ensure that CO alarm is enabled). Star 55... - Page 83 Scale Select this to change the amplitude of the CO waveform in scales 20, 40, 60, 80 or 100 mmHg from the drop down list. RR Source Select this to choose the source of Respiration either from the (if connected) or from ECG (RA-LA or RA-LL). Pump Select this to ON/OFF the CO pump.
-
Page 84: Ibp (Optional)
Select this to add label through Alpha English keyboard. Select this to get static value of 100mmHg. Press this key again to come out of this mode. This function can be used to ascertain accuracy of IBP detection circuit. Star 55 4.11... - Page 85 CAL FAC Select this to calibrate the IBP transducer. 1. Press 'CAL' (machine will introduce 100mmHg CAL signal) 2. Press 'CAL FAC' and adjust display to read 100mmHg. 3. Press 'CAL' again to come out of calibration mode. Note Note This is not a routine procedure and needs to be carried out only in case of major This is not a routine procedure and needs to be carried out only in case of major discrepancies in IBP readings which might be due to ageing effect in reusable...
- Page 86 The screen will now display the patient pressure waveform and the systolic, diastolic and mean readings. Select appropriate waveform label : To help identify the source/type of pressure being monitored, each waveform can be allocated with a label. Star 55 4.13...
- Page 87 The table below identifies the labels available Label : Invasive Blood Pressure Intracranial Pressure Central Venous Pressure Pulmonary Artery Pressure Left Atrial Pressure Right Atrial Pressure Left Ventricular Pressure Arterial Blood Pressure P C W Pulmonary Capillary Wedge Pressure To change label, select the IBP option from the main screen using Optical Encoder key and choose LABEL.
-
Page 88: Drug Cal
The corresponding message weight dependent / independent is displayed depends on the drug selected. Patient Weight : Enter Patient Weight in kg or lb. Star 55 converts the weight entered into kg and is displayed. Note Patient Weight and the Unit field is masked when weight independent drug is selected. - Page 89 Calculate Concentration, Flow Rate and Drip Rate is calculated and displayed in Unit, ml/hr and Drops/min respectively. Note Reverse calculation from Flow Rate, Drip Rate and Concentration to get quantity of Drug, Volume and Dose is not possible. Titration Select this to view titration table as shown in Figure 4.12 Figure 4.12 Select this to go to the previous page.
- Page 90 The user can additionally enter 10 drugs. If the user wants to add the 11th drug, selecting add drug will pop-up a “Drug Deletion” window from which user has to select the drug to be deleted and select ok to “Add New Drug”. Star 55 4.17...
- Page 91 Star 55...
- Page 92 Star 55...
-
Page 93: System Functions
System Functions Menu Trend Display Volume Recall Autoset Menu Select this to go to Monitor Settings / System Functions. Trend Select this to retrieve the data of the patient recorded. Display Select this to choose the Display Formats. Volume Select this to adjust the Alarm Volume and Beep Volume. Recall Select this to Recall alarm and ECG trend. -
Page 94: Menu
(Maximum 9 characters). Last Name Select this to enter patient’s last name from Alpha English keyboard (Maximum 9 characters). Select this to enter patient’s age from Numeric keypad. The age will be in years for adults and days for neonates. Star 55... - Page 95 Select this to enter patient’s sex from drop down list. Weight Select this to enter patients’s weight from Numeric keypad. Height Select this to enter patient’s height from Numeric keypad. Clear All Select this to reset entered data. Save Select this to save the entered data. Exit Select this to return to the patient info menu.
- Page 96 Select this to record waveforms from the drop down list. Waveform 2 Alarm Record Select this to ON/OFF recording during patient alarm condition. Timer Select this to choose the time interval between two consecutive recordings. Exit Select this to return to the main Menu. Star 55...
-
Page 97: Trend
Offline Options Select this to transfer the Trend data into removable devices. Star 55 will display the Offline Transfer Options Menu as shown in Figure 5.4. Figure 5.4 Trend Select this to get the window for choosing the device. The window will appear as shown in Figure 5.5. - Page 98 Figure 5.9. Select Confirm to proceed further or Cancel to exit from the window. Figure 5.9 Caution Ensure that the Monitor is switched OFF before connecting / Disconnecting Thumb drive /SD Card. Don’t remove SD card during data transfer. Star 55...
- Page 99 Select this to return to the main Menu. Color Select this to choose the color of the parameter from the color box. Setup Select this to set the general settings. Star 55 will display the Setup menu as shown in Figure 5.10. Figure 5.10 ECG Filt Mode Select this to choose the bandwidths for ECG monitoring from drop down list.
- Page 100 Select this to choose PR Source either NIBP, SpO , IBP or Auto from drop down list. Alarm Vol Select this to adjust alarm volume. Star 55 will display volume menu. Select this to increase the alarm volume. Select this to decrease the alarm volume. Exit Select this to return to the Setup panel.
- Page 101 Exit Select this to return to the Set up panel. Limit Display Select this to enable / disable the Display limits. Exit Select this to return to the Main menu. Exit Select this to return to the Main screen. Trend Graphical Tabular NIBP...
- Page 102 Tachy High Figure 5.12 The Graphical Trend taken from the External Printer is as shown in the Figure 5.13. Star 55 5.11...
- Page 103 Figure 5.13 5.12...
- Page 104 Select this to record the current page of the tabular trend. Exit Select this to return to the Tabular Resolution menu. Exit Select this to return to the Trend menu. The Tabular Trend taken from the External Printer is as shown in the Figure 5.15. Star 55 5.13...
- Page 105 - - - -TABULAR TREND- - - - DATE : 05 NOV 2006 TIME : 03:55 NAME : Patient 67 ID NO : BED NO : SEX : F AGE : 1Y 1M 1D WT : 1Kg *PR SOURCE : SpO # PR SOURCE : NIBP *RR SOURCE : ECG $PR SOURCE : IBP...
- Page 106 When the external USB Printer is connected with the monitor, internal recorder will be disabled. All prints will be obtained on the external printer. The data will be printed in internal recorder if printer is not connected. Star 55 5.15...
- Page 107 Select this to save and return to the Trend menu. PC Dump Select this to Start / Stop PC Dump. Connect PC dump port (DB9) of Star 55 to PC serial port through RS 232 cable. Run (.exe file) in the PC. PC will display the Dump PC Dump Application window as shown in the Figure 5.18.
- Page 108 PC Dump application should exist in the computer. Contact L&T authorised service personnel for installation of software. Date and Time will be the default file name if the file name is not entered. Exit Select this to return to the Main screen. Star 55 5.17...
-
Page 109: Display
Display Standard User 1 User2 User3 User4 User5 User6 Drug Cal Exit Standard Select this to set the standard display format which includes ECG, cascaded ECG, Respiration/CO , SpO , Temperature and NIBP. User1 - User6 Select this to view or edit pre configured user defined display formats. - Page 110 Select this to save the new settings. Display Select this to display the new format. Exit Select this to exit from user format configuration. Drug Cal Select this to enter into Drug Cal menu. Exit Select this to exit from display window. Star 55 5.19...
-
Page 111: Volume
Volume Alarm Vol Beep Vol Exit Star55 displays the Volume Setup menu as shown in Figure 5.20. Figure 5.20 Alarm Vol Select this to adjust alarm volume. Star55 displays volume menu. Select this to increase the alarm volume. Select this to decrease the alarm volume. Exit Select this to return to the Volume Setup menu. -
Page 112: Recall
Figure 5.22. Each 30 sec strip stores in the form of 5 individual strips. Each individual strip duration will be 6 sec. There will be maximum of eight pages with five strips in each page. Star 55 5.21... -
Page 113: Autoset
Figure 5.22 Select this to go to the previous page. Select this to go to the next page. Select this to record the current page. Exit Select this to return to the Main menu. Autoset Select this to set alarm limits for all the parameters (except for NIBP). 5.22... - Page 114 Star 55...
-
Page 115: Accessories
Action General ECG, RESP, SpO TEMP, NIBP, IBP, CO 1.Check patient connections and accessories 2.Cleaning and sterilization of accessories 3.Clean monitor exterior 4.Check power cord 5.Check battery 6.Check monitor operation 7.Check monitor calibration Star 55... -
Page 116: Ecg
Action Details Leads, sensor and probes should be carefully checked for any signs of damage. Damaged leads should be replaced. Do not attempt to repair. All accessories must be cleaned before use. Following precautions must be observed while cleaning and sterilizing of accessories. Cleaning WARNING Do not use sharp instrument for cleaning cables. - Page 117 If the green LED is flashing with LOW BATTERY indication, connect monitor to mains supply. Leave the unit for charging. If low battery indication still remains on the screen, refer the monitor to service personnel for battery replacement. Caution Batteries will be permanently damaged if left discharged. Star 55...
- Page 118 6AB) Connect the power cable to the mains supply, switch ON the monitor and check the following: Adjustment of alarm volume. Adjustment of Beep volume. Adjustment of alarm limits. Enabling and disabling of individual alarms. Operation of alarm functions. Operation of recorder functions (optional). Operation of fault function (patient cable disconnected).
- Page 119 Message "Calibrating... Please wait" will display. • Message "Calibrating ... Please remove gas" will display. • After calibration , message "Calibration succeded" will display • Remove filter line from the monitor. Check the last calibrated date in Menu System All Info Star 55...
- Page 120 Battery Maintenance Schedule The batteries used in this Monitor are Li Ion Batteries. • Whenever the monitor is not in use or stored for an extended period, it is recommended to remove the batteries from the monitor to avoid permanent battery damage, fire hazard or complete discharge.
- Page 121 Star 55...
- Page 122 Star 55 offers 3 lead and 5 lead ECG monitoring facility. • 3 lead ECG cable (I, II, III) (Refer Figure 7.1) • 5 lead ECG cable (I, II, III, aVR, aVL, aVF, V) (Refer Figure 7.2) Figure 7.1 Figure 7.2...
-
Page 123: Temperature
Temperature L&T Star 55 is compatible with YSI 400 series of temperature probes. YSI 401 Rectal/Esophageal temperature probe (Adult) (Refer Figure 7.6) YSI 402 Rectal/Esophageal temperature probe (Neonatal) (Refer Figure 7.7) YSI 409A Tape-on skin probe (Refer Figure 7.8) Figure 7.6 Rectal/Esophageal Temperature Probe (Adult)* Figure 7.7... -
Page 124: Pulse Oximetry
(Refer Figure 7.9) • DURA Y™ for universal application (patients above 1 Kg to 80 Kg) (Refer Figure 7.10) • Extension cable (Refer Figure 7.11) Figure 7.9 DS 100 Figure 7.10 Dura Y Figure 7.11 Extension Cable Optional Star 55... - Page 125 Non Invasive Blood Pressure NIBP basic configuration comprises of following accessories: • Adult cuff (14 cm x 37 cm) (Reusable) (Refer Figure 7.12 ) • Child cuff (9 cm x 27 cm) (Reusable) (Refer Figure 7.13 ) • Neonate cuff (3 cm x 9 cm) (Disposable) (Refer Figure 7.14 ) •...
-
Page 126: Capnography (Optional)
Capnography (Optional) Following accessories are provided for Capnography (Microstream) along with Star 55 monitor. • Capno Line Adult (Refer Figure 7.16) Paediatric (Refer Figure 7.17) Infant - Neonate (Refer Figure 7.18) Figure 7.16 Capno Adult Figure 7.17 Capno Paediatric Figure 7.18... - Page 127 • Filter Line Adult / Paediatric (Refer Figure 7.19) H set Adult / Paediatric (Refer Figure 7.20) H set Infant / Neonatal (Refer Figure 7.21) Figure 7.19 Adult / Paediatric Filter Line Figure 7.20 Adult / Paediatric H Set filter Line Figure 7.21 Infant / Neonatal H set filter Line...
-
Page 128: Invasive Blood Presure (Optional)
Reusable Blood Pressure Transducer (Medex) Reusable Interface Cable (Refer Figure 7.23) Figure 7.22 : Disposable Blood Pressure Figure 7.23 : Reusable Interface Transducers Cable Grounding Cable This cable is used for grounding the unit (Refer Figure 7.24) Figure 7.24 : Grounding Cable Star 55... - Page 129 Standard Accessories 3 Lead Cable Durasensor Extension Cable NIBP NIBP Hose Adult Cuff Grounding Cable Optional Accessories 5 Lead Cable Capnoline H - Adult Filterline H - Set Adult/Pediatric Filterline H - Set Infant/Neonatal Temperature Rectal/Esophageal probe - Adult Rectal/Esophageal probe - Neonatal Tape on skin probe Dura Y Sensor IBP Interface Cable...
- Page 130 Star 55...
-
Page 131: Troubleshooting Chart
SD Card. Not getting download/ SD Card not functioning Format the SD Card through upload the trend / monitor properly Monitor and Check for settings. functioning. If still problem persists change the SD Card. Star 55... - Page 132 Problems Cause Corrective Action After NIBP measurement Cuff not connected properly. Check cuff for proper connection is taken, unit displays (- -) and position. The cuff must be in NIBP window. properly wrapped around the limb and must not be loosely attached.
-
Page 133: Error Messages
Patient RR value below Patient needs medical the lower alarm limit. attention (Acknowledge the alarm). Reset the limit, if require. Fault RA-LA or RA-LL leads Connect the leads are not connected properly to the patient. properly to the patient. Star 55... - Page 134 Problem Cause Corrective Action Alarm Type Temperature Patient Temperature Patient needs medical value exceeding higher attention (Acknowledge alarm limit. the alarm). Reset the limit, if require. Patient Temperature Patient needs medical value below the lower attention (Acknowledge alarm limit. the alarm). Reset the limit, if require.
- Page 135 Loose Cuff Cuff is loosely wrapped. Wrap the cuff properly. Cuff Position Error Cuff placement is not at Place the cuff in proper the proper position. position. Communication Module not Call L&T authorized Error responding. service personnel. Star 55...
- Page 136 Problem Cause Corrective Action Alarm Type Patient EtCO value Patient needs medical exceeding higher alarm attention (Acknowledge limit. the alarm). Reset the limit, if require. Patient EtCO value Patient needs medical below the lower alarm attention (Acknowledge limit. the alarm). Reset the limit, if require.
- Page 137 “CO Ready” will replace the “CO Warm-up” message. Cal Reqd. Shown if CO Real time Screen. calibration is overdue. Maintenance Shown if CO Real time Screen. Reqd..” maintenance is overdue. Star 55...
- Page 138 Parameter Message Condition Display Position Auto Zeroing During auto zeroing on calibration((Module sends the request for Real time Screen zeroing and automatically zeroing command is sent from the host to the module). RR/ CO No Breath When there is no Real time screen breath detected.
-
Page 139: Problems Observed During Ecg Monitoring
Assuring the patient that the procedure will not hurt and setting his mind at ease will help relieve natural anxieties. Ensure the room temperature is warm enough for the patient. B. VOLUNTARY MOVEMENT Figure 8.2 Star 55... - Page 140 IDENTIFICATION : Gross body movement will cause base line deviation. The signal will be present but, there will be baseline wanders. Myoelectricity may be present as well (Refer Figure 8.2). CORRECTIVE ACTION : The patient should be comfortable and relaxed. Again, reassuring the patient that the monitoring will not hurt him, will restore confidence.
- Page 141 Electrodes should be placed on fleshy areas which will help to place electrodes properly. Check that the patient cables are not pulling the electrodes and the electrode is attached properly to the body of the patient. Figure 8.5 Star 55 8.11...
- Page 142 IDENTIFICATION : This signal usually degenerates with time. Characteristics such as low amplitude, diphasic QRS complexes, 60/50 Hz frequency interference and base line wander will usually be present (Refer Figure 8.5). CORRECTIVE ACTION : Check the electrode to make sure that the electrolyte is moist and is in sufficient quantity and is in proper contact with the electrode and skin.
- Page 143 CORRECTIVE ACTION : Bad grounding may also create a shock hazard. If grounding is doubtful, request for an electrical maintenance check. TV sets, electrical cords and fluorescent bed lamps near the bed may also cause 60/50 Hz frequency interference. Star 55 8.13...
- Page 144 D. STATIC ELECTRICITY Figure 8.9 IDENTIFICATION : Static electricity may throw the trace off the screen abruptly. The trace will gradually recentre itself within few seconds ( Refer Figure 8.9). CORRECTIVE ACTION : Synthetic fabrics in bed sheets and clothing may generate static electricity. This can disturb the trace abruptly without patient movement, especially when cables without proper shieldings are used.
-
Page 145: Problems Observed During Co
Figure 8.11 Possible Causes: Increase in respiratory rate Increase in Tidal Volume Decrease in metabolic rate. Fall in body temperature NOTE: Exponentially decrease in CO can also be because of cardiac arrest or severe hypotension (massive bleeding). Star 55 8.15... - Page 146 Hypoventilation: An increase in the level of the End Tidal CO from previous levels (Refer Figure 8.12). Figure 8.12 Possible Causes: Decrease in respiratory rate Decrease in tidal Volume Increase in metabollic rate Rapid rise in body temperature (malignant hyperthermia) Muscle Relaxants: Clefts are seen in the final third portion of the alveolar plateau.
- Page 147 Partial obstruction in the expiratory limb of the breathing circuit Presence of a foreign body in the upper airway Partially kinked or occluded artificial airway Herniated endotracheal / tracheostomy tube cuff B r o n c h o s p a s m Star 55 8.17...
- Page 148 Endotracheal Tube Kinked: Figure 8.16 Waveform Evaluation: Any obstruction will cause an abrupt change in the ascending limb resulting in either a diminished plateau or no plateau. EtCO and slope will depend on the degree of obstruction ( Refer Figure 8.16). Inadequate Seal Around Endotracheal Tube: A Capnogram in which the downward slope of the plateau blends in with the descending limb (Refer Figure 8.17).
- Page 149 Figure 8.19 Waveform Evaluation: Baseline elevated Sloping descending limb of capnogram Allows patient to rebirth exhaled gas ( Refer Figure 8.19 ). Paediatric Capnogram Figure 8.20 Typical Capnogram for a Paediatric Patient ( Refer Figure 8.20 ). Star 55 8.19...
- Page 150 Star 55...
- Page 151 12 Hrs (one pack) Discharge time 2/4 hrs For 2 hrs backup: One pack fully charged new batteries at 25 Discharge condition: ECG, RESP, SpO , Temp, NIBP running at 15 min interval, without CO and recorder printing. Star 55...
- Page 152 For 4 hrs backup: Two packs fully charged new batteries at 25 Discharge condition: ECG, RESP, SpO , Temp, NIBP running at 15 min interval without CO and recorder printing. Low battery indication voltage 13.3 +/- 0.2V Battery cut-off voltage 12.2 +/- 0.2V Indicator: Green LED ON and Yellow LED OFF indicates battery operation.
- Page 153 HR/PR, SpO %, IBP, 72 hours graphical and tabular trend Temperature, RR, EtCO FiCO NIBP Last 240 readings will be displayed in Tabular format. OXYCRG display 8 min. online monitoring of HR, SpO RR with the resolution of 2sec. Star 55...
- Page 154 Graphical trend view resolution 30sec, 1min, 3min, 4.5min, 6min, 12min and 18 min. Tabular trend view resolution 5sec, 10sec, 15sec, 30sec, 1min, 2min, 4min and 8min. Alarm Trend (Recall) Tabular trend for display of last 24 patient alarms Patient information Max storage of 72 Hrs Data of 200 patients Storage of ECG strips 8 ECG strips (strip duration depends on the...
- Page 155 0.5 - 20 Hz for OT mode Gain X0.2, X0.5, X0.75, X1, X2, X5 mV, Auto - User selectable Tall T Wave rejection Up to 1.2mV or QRS amplitude (whichever is higher) QRS beep volume Control 12 steps (Off to Maximum) Star 55...
- Page 156 Beep source User selectable beep source from ECG/IBP/ /NIBP Leads 3 leads for 3 lead cable. 5 leads for 5 lead cable QRS Indicator Beep and flashing heart symbol for every QRS complex detected. 9. Heart Rate Range 20-350 BPM Accuracy 2BPM or 2% which ever is greater HR alarms...
- Page 157 (-?-) in the event of short circuit or open circuit probes Out of range condition also indicated if the Temperature raises above 50 C or falls below 1 Calibration Injects signal of (37.0 +0.1) C into both inputs Star 55...
- Page 158 12. SpO Tone variation with change in SpO Provided Measurement range 1 - 100% Accuracy Adults (+1 Std. Dev.) 70 - 100% +2 digits 0 - 69% unspecified Neonates (+1 Std. Dev.) 70 - 100% +3 digits 0 - 69% unspecified Alarms Adjustable alarm limits Upper...
- Page 159 In Stat mode, unit will take as many readings as possible in 5 minutes • Duration between measurements is 10-12 sec Unit (User selectable) mmHg or kPa Range 20 - 250 mmHg Accuracy +5 mmHg with a standard deviation no greater than 8 mmHg Cuffs Single quick connect hose Star 55...
- Page 160 Auto zero Zero pressure reference is automatically established after every reading Cuff inflation Initial inflation Adult 160 mmHg Neonates 90 mmHg Pediatric 120 mmHg Subsequent inflation approximately 30 mmHg greater than previous systolic pressure Cuff deflation Automatic Alarms Adjustable alarm limits (for both Sys and Dia) Upper 30 to 250 mmHg Lower...
- Page 161 Measurement range -40 to 300mmHg Calibration 100mmHg signal injected into the screen. Alarms Adjustable alarm limits. PR range 30-350 BPM Accuracy +/- 3 BPM PRESSURE TABLE : ALARMS - ADULT/PEDIATRIC LABEL SYSTOLIC DIASTOLIC PCW P User Defined 12 Star 55 9.11...
- Page 162 Pressure Table : Alarms - Neonatal LABEL SYSTOLIC DIASTOLIC 17. Alarms: Accessory alarms Audio (Alarm beep), Visual (Flashing Yellow LED) and message indication Patient alarms Audio (Alarm beep), visual (Flashing Red LED alarms) and message indication Re-alarm 3 min after an alarm is acknowledged Alarms suspend Continuous Yellow LED to indicate “Alarms Suspend”...
- Page 163 Operating humidity 10 to 90% RH (Non condensing) Storage and Transportation -10 to 50 temperature Storage and Transportation 0 to 90% RH (Non condensing) humidity Operating pressure 500 to 760 mmHg Storage pressure 500 to 760 mmHg Star 55 9.13...
- Page 164 22. Accessories Supported: ECG/Respiration 3 lead cable with electrodes DS (Dura sensor) 100A (Adult) Oxy-A / N (Adult / Neonate) (Optional) Dura Y (Universal) – ear clip (Optional) NIBP Reusable blood pressure cuffs (Infant to large adult sizes) Disposable Transducer kit and IBP cable (optional) Temperature (Optional) YSI 400 series temperature probes...
- Page 165 5 cycles Power Frequency (50/ 3 A/m 3 A/m magnetic field 60 Hz) magnetic field strength IEC 61000-4-8 Conducted RF Immunity 3 Vrms 3 Vrms Voltage150 KHz to IEC 61000-4-6 150 KHz to 80 MHz 80 MHz Frequency Star 55 9.15...
- Page 166 Star 55...
- Page 167 L&T shall not be liable for any special or consequential damages of any kind or nature. L&T will not be liable in any manner for use of or failure in the performance of other equipment to which the product is attached / connected. Star 55 10.1...
- Page 168 EUROPE Business Manager M/S Larsen & Toubro Infotech Limited Tel : 0044 207 517 1610 Suite 11.01, 11th Floor, Exchange tower Fax : 0044 207 538 3883 1 Harbour exchange square, Limeharbour, London - E149GE. United Kingdom Medical Equipment & Systems 1051 Perimeter Drive, Tel : 00 1 847-230-1058 Suite 470, Schaumburg, IL - 60173 Fax : 00 1 847-517-9138 USA.
Need help?
Do you have a question about the Star 55 and is the answer not in the manual?
Questions and answers