
Related Manuals for HIGHONE DVB-PM27236052HCAT


Summary of Contents for HIGHONE DVB-PM27236052HCAT
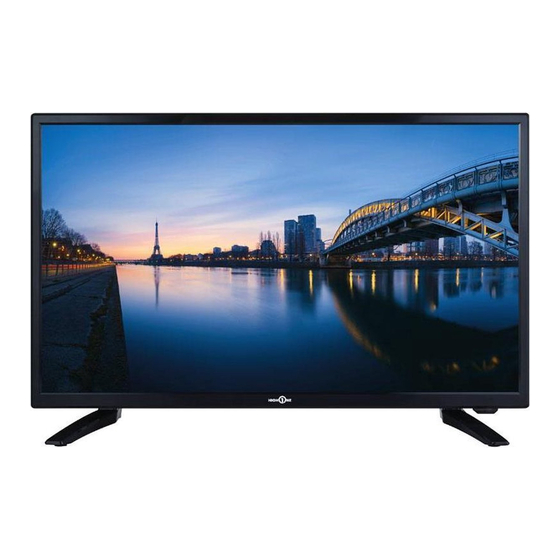
- Page 1 10/2021 Téléviseur Television 972724 – HI2412HD-MM GUIDE D’UTILISATION HANDLELING GUIDE...
- Page 3 Merci ! Merci d’avoir choisi ce produit HIGHONE. Choisis, testés et recommandés par ELECTRO DEPOT, Les produits de la marquee HIGHONE vous assurent une utilisation simple, une performance fiable et une qualité irréprochable. Grâce à cet appareil, vous savez que chaque uitlisation Vous apportera satisfaction.
-
Page 4: Table Of Contents
Table des matières INSTRUCTIONS IMPORTANTES POUR COMMENCER ACCESSOIRES CARACTERISTIQUES DESCRIPTION PHYSIQUE TÉLÉCOMMANDE PREPARATION DE LA TÉLÉCOMMANDE CONNEXIONS DE BASE UTILISATION BASIQUE UTILISATION MENU PRINCIPAL PREMIERE INSTALLATION MODE TNT ATV ET AUTRES MODES ENTRETIEN POUR RÉFÉRENCE FIXATION MURALE INSTALLATION DU SOCLE CARACTÉRISTIQUES TECHNIQUES DÉPANNAGE... -
Page 5: Pour Commencer
POUR COMMENCER INSTRUCTIONS IMPORTANTES DE SECURITE Le signe ATTENTION : POUR EVITER LES Le signe d’avertissement RISQUES D'ELECTROCUTION, NE d'avertissement représentant un éclair PAS RETIRER LE CAPOT (NI représentant un dans un triangle indique L'ARRIÈRE DE L'APPAREIL). point d’exclamation que ce produit contient AUCUNE PIÈCE N’EST dans un triangle des "tensions... - Page 6 POUR COMMENCER ● Aucun objet rempli de liquide tel qu’un vase ne doit être placé sur ou au-dessus de l'appareil. ● Ne touchez jamais au cordon d’alimentation électrique avec les mains mouillées, ceci pourrait provoquer un court-circuit ou un choc électrique. ●...
- Page 7 POUR COMMENCER ATTENTION – : POUR EVITER LES RISQUES DE BLESSURES OU DE DOMMAGES AU PRODUIT OU A D’AUTRES MATÉRIELS : ● Ce produit est destiné à une utilisation domestique et personnelle uniquement. N’utilisez pas ce produit pour un usage commercial, industriel ou à d'autresfins. ●...
-
Page 8: Accessoires
POUR COMMENCER ATTENTION : POUR EVITER LES RISQUES OCULAIRES : ● Il est préférable d’avoir un éclairage doux indirect pour regarder la télévision, d’éviter les environnements complètement sombres et toute réflexion sur l’écran, car ils peuvent causer une fatigue oculaire. UTILISATION ET MANIPULATION DES PILES: ●... - Page 9 POUR COMMENCER CARACTÉRISTIQUES ECRAN LED 23.6" Ce modèle est équipé d'un écran LED intégré qui offre une qualité d'image exceptionnelle et de bas niveaux de radiation. Avec verrou hôtel Prend en charge la recherche TV auto Prend en charge la réception de chaînes numériques Prise en charge du guide TV Prend en charge l’affichage du télétexte (en Europe) Prend en charge la lecture multimédia depuis USB...
-
Page 10: Description Physique
POUR COMMENCER DESCRIPTION PHYSIQUE UNITÉ PRINCIPALE Vue avant Vue de côté 1. Écran LED 2. Récepteur de télécommande / Indicateur d'alimentation - En veille, l'indicateur s'illumine en rouge ; allumé, l'indicateur s'illumine en bleu. 3. Support du socle 4. VOL+/ - Pour augmenter et réduire le volume ou naviguer vers la droite ou la gauche. 5. - Page 11 POUR COMMENCER DESCRIPTION PHYSIQUE Vue arrière 1. Alimentation 2. Terminal de sortie COAXIAL 3. Terminal d'entrée AV 4. Terminal d'entrée AUDIO PC 5. Terminal d'entrée VGA 6. Terminal d'entrée HDMI 7. Terminal d'entrée ANT - Pour connecter l'antenne extérieure. 8. Terminal d'entrée PCMCIA (CI+) 9.
-
Page 12: Télécommande
POUR COMMENCER TÉLÉCOMMANDE 1 ALLUMER/ÉTEINDRE Met l’appareil en mode veille ; appuyez à nouveau pour l’allumer. 2 TV/RADIO Pour basculer entre la télé et la radio. 3 Touche rouge 4 Bouton VERT 5 Bouton BLEU 6 Bouton JAUNE Les touches de couleurs sont utilisées dans les sous-menus. - Page 13 POUR COMMENCER TÉLÉCOMMANDE Lire le fichier suivant. INDEX Affiche la liste des enregistrements ou l’index du télétexte. Lire le fichier précédent. Pour afficher la liste des chaînes favorites. 19 MENU Ouvrir le menu principal ou retourner au menu précédent. 20 SOURCE Sélectionne une source d’entrée.
-
Page 14: Preparation De La Télécommande
POUR COMMENCER PRÉPARATION DE LA TELECOMMANDE INSTALLATION DES PILES – Installez les piles selon les illustrations suivantes. Assurez-vous que les pôles + et sont orientés tel qu'indiqué dans le compartiment (Illus. 1) DUREE DE VIE DES PILES - Les piles durent normalement une année, mais ceci peut être changé par votre utilisation. -
Page 15: Connexions De Base
POUR COMMENCER CONNEXIONS DE BASE ● Assurez-vous que tous les câbles sont déconnectés de l'unité principale avant de connecter la source AC par l'adaptateur secteur. ● Lisez les instructions avec attention avant de connecter tout autre appareil. CONNECTER AU SECTEUR Vers prise secteur CONNECTER UNE ANTENNE EXTERNE Branchez une antenne dans le jack d'antenne pour obtenir la meilleure qualité... - Page 16 POUR COMMENCER CONNEXION HDMI Utilisez un câble HDMI pour connecter la TV à un autre appareil pour recevoir un signal multimédia haute définition. Câble HDMI (non fourni) Arrière du DVD/VCR CONNEXION PC AUDIO/VGA Câble VGA Câble audio (non fourni) (non fourni) Utilisez le câble VGA pour connecter la TV à...
- Page 17 POUR COMMENCER CONNEXION AV (VIDÉO COMPOSITE) Câble AV (non fourni) Arrière du DVD/enregistreur CONNEXION COAXIALE Utilisez un câble coaxial pour connecter un amplificateur audio ou autre appareil de décodage audio pour sortie audio coaxiale. (Le câble coaxial n'est pas fourni)
- Page 18 POUR COMMENCER TERMINAL D'ENTREE USB Clé USB (non fourni) INSERER UNE CARTE CI Fente CI (La carte CI n'est pas fourni) CONNEXION CASQUE Câble CASQUE (non fourni)
-
Page 19: Utilisation Basique
UTILISATION VÉRIFIEZ QUE TOUS LES ÉQUIPEMENTS ET LEURS ADAPTATEURS SECTEUR SONT CONNECTÉS CONVENABLEMENT ET QU'ILS SONT CORRECTEMENT CONFIGURÉS AVANT DE CONTINUER. UTILISATION BASIQUE - Appuyez sur le bouton MARCHE/ARRÊT de l'unité principale ou sur la télécommande pour Allumer (l'indicateur s'allume en bleu) ; appuyez dessus de nouveau pour Éteindre (veille), l'indicateur s'allume en rouge. - Page 20 UTILISATION CONFIGURATION MULTIAUDIO Appuyez à plusieurs reprises sur la touche AUDIO de la télécommande pour sélectionner la langue audio souhaitée. REMARQUE : Avant d’activer cette fonction, assurez-vous que la chaîne que vous regardez prend en charge les langues multi-audio. AFFICHAGE DES INFORMATIONS Appuyez sur la touche DISPLAY de la télécommande pour afficher les informations sur les programmes en cours.
- Page 21 UTILISATION LISTES DES FAVORIS En regardant une chaîne disponible, appuyez sur la touche FAV de la télécommande pour l’ajouter à la page de menu Liste des favoris. Appuyez sur les touches de navigation HAUT ou BAS pour sélectionner une chaîne préférée. Appuyez sur la touche OK pour confirmer la sélection.
- Page 22 UTILISATION Appuyez sur la touche de navigation GAUCHE ou DROITE pour sélectionner l’option souhaitée. Appuyez sur la touche OK pour confirmer la sélection. Si la barre d’outils disparaît, appuyez sur la touche EXIT de la télécommande pour la faire réapparaitre. Appuyez sur la touche pour afficher un message de rappel.
- Page 23 UTILISATION LECTURE MULTIMÉDIA Appuyez sur la touche SOURCE de l’unité ou de la télécommande pour passer en mode USB. Insérez un dispositif de stockage USB dans le port correspondant avant les opérations suivantes. Appuyez sur les touches de navigation HAUT/BAS/GAUCHE/DROITE pour déplacer le curseur.
- Page 24 UTILISATION Pour supprimer des fichiers, appuyez sur la touche ROUGE pour accéder au sous-menu et supprimer éventuellement le fichier. Utilisez les touches de navigation pour sélectionner un fichier et appuyez sur OK pour l’ajouter à la liste de lecture. Appuyez sur la touche pour lancer la lecture.
- Page 25 UTILISATION Appuyez sur la touche EXIT pour revenir en arrière. TEXTE Utilisez les touches GAUCHE/DROITE pour sélectionner Texte dans le menu principal et appuyez sur OK pour y accéder. Utilisez les touches de navigation pour sélectionner un dossier ou un fichier. Pour supprimer des fichiers, appuyez sur la touche ROUGE pour accéder au sous-menu et supprimer éventuellement le fichier.
-
Page 26: Menu Principal
UTILISATION MENU PRINCIPAL ● L'unité comporte différents menus de paramètres. Une fois les choix effectués, ceux-ci resteront en mémoire jusqu'à leur modification, et l'unité fonctionnera ainsi toujours selon vos besoins. ● Les paramètres resteront en mémoire jusqu'à modification, même si l'unité est mise en veille. -
Page 27: Mode Tnt
UTILISATION MODE TNT Appuyez sur le bouton SOURCE de l’unité ou de la télécommande pour sélectionner la source d'entrée TNT. CHAÎNE 1.1 Antenne Appuyez sur OK ou le bouton DROITE pour y accéder. Utilisez les boutons de navigation pour sélectionner DVB-T ou DVB-C. 1.2 Recherche automatique Appuyez sur la touche OK ou DROITE. - Page 28 UTILISATION 1.4 Recherche manuelle des chaînes numériques Appuyez sur la touche OK ou DROITE. Utilisez les touches GAUCHE/DROITE pour sélectionner une chaîne. Appuyez ensuite sur la touche OK pour lancer la recherche. REMARQUE : Le menu et les opérations varient pour DVB-T et DVB-C.
- Page 29 UTILISATION Utilisez les touches GAUCHE/DROITE pour passer de la liste de programmation à la liste enregistrement. Appuyez sur la touche ROUGE pour supprimer l’option sélectionnée. Appuyez sur la touche JAUNE pour accéder au menu Ajouter. Appuyez sur la touche BLEU pour accéder au menu Modification. 1.7 Liste des enregistrements Les programmes précédemment enregistrés devraient apparaître sur cette liste.
- Page 30 UTILISATION IMAGE 2.1 Mode image Utilisez les touches de navigation HAUT/BAS/GAUCHE/DROITE pour sélectionner une option. Mode image : Options disponibles : Standard, Mild (Doux), Personal (Personnalisé), Dynamic (dynamique). Contraste/Luminosité/Couleur/Teinte/Netteté : Valeurs réglable : 0-100. REMARQUE : Le contraste, la luminosité, la couleur et la netteté sont réglables uniquement lorsque le mode Image est «...
- Page 31 UTILISATION 3.1 Mode Son Utilisez les touches de navigation HAUT/BAS/GAUCHE/DROITE pour sélectionner une option. Mode sonore : Options disponibles : Standard, Musique, Film, Sports, Personnalisé. Aigus/Graves : Valeurs réglable : 0-100. REMARQUE : Aigus et Graves sont réglables uniquement lorsque le mode Sonore est «...
- Page 32 UTILISATION HEURE 4.1 Horloge Il affiche l’heure actuelle du système lorsqu’une chaîne disponible a été enregistrée. 4.2 Fuseau horaire Cette option permet de sélectionner un fuseau horaire. 4.3 Heure d’arrêt Heure d’arrêt : Options disponibles : Désactivé/Une fois/Tous les jours/Lun ~ Ven/Lun ~ Sam/Sam ~ Dim Heures/Minutes : utilisez les touches de navigation pour régler les heures/minutes lorsque l’heure d’arrêt n’est pas «...
- Page 33 UTILISATION 4.6 Veille automatique Cet élément permet de choisir le délai de veille automatique (veille) lorsqu’aucune opération n’a été effectuée via la télécommande. Options disponibles : Off (Désactivé), 3/4/5 heures. 4.7 Minuteur OSD Cette option permet de choisir le délai d'affichage d'un menu OSD. Options disponibles : Désactivé, 5/10/15/20/25/30/35 secondes.
- Page 34 UTILISATION 5.6 Mode Hôtel Appuyez la touche de navigation DROITE pour y accéder. Appuyer sur la touche de navigation HAUT/BAS pour déplacer le curseur. Utilisez les touches de navigation Gauche/Droite pour sélectionner une option. Mode Hôtel : cette option active/désactive le mode Hôtel. Verrouillage de source : Active/désactive le verrouillage des sources disponibles.
- Page 35 UTILISATION 6.1 Langue Cette option permet de choisir la langue d'affichage à l'écran par défaut. 6.2 Langue du télétexte Cette option permet de choisir la langue télétexte par défaut. 6.3 Langue audio Appuyez sur la touche de navigation DROITE. Vous pouvez ensuite sélectionner la langue audio principale et secondaire. 6.4 Langue de sous-titrage Appuyez sur la touche de navigation DROITE.
-
Page 36: Atv Et Autres Modes
UTILISATION 6.8 Écran Bleu Cette option permet d'activer/désactiver l'écran bleu. Si cette option est activée, le fond de l'écran devient bleu si le signal est trop faible ou absent. 6.9 Première installation Cette option permet de rappeler le menu Première installation. 6.10 Mode énergie Cette option sert à... -
Page 37: Pour Référence
POUR RÉFÉRENCE ENTRETIEN ● Assurez-vous d'appuyer sur le bouton STANDBY pour mettre le lecteur en veille et de déconnecter l'alimentation avant d'effectuer une opération d'entretien. ● Essuyez le lecteur avec un chiffon doux et sec. ● Si la surface est très sale, essuyez-la avec un chiffon doux légèrement imbibé d'un mélange d'eau et de savon. -
Page 38: Installation Du Socle
POUR RÉFÉRENCE INSTALLATION DU SOCLE Votre TV est livrée avec socle et boîtier non installés. Avant d'utiliser cette TV, installez le socle comme indiqué ci-dessous. Étape 1 Posez la TV à plat, écran tourné vers le bas, sur un tissu doux ou coussin, pour éviter de l'endommager. Étape 2 Alignez le bas de la TV avec l'extrémité... - Page 39 POUR RÉFÉRENCE CARACTÉRISTIQUES RÉF. 972724 - HI2412HD-MM N° MODELE DVB-PM27236052HCAT Affichage 23.6" LED Résolution 1366×768 Affichage des couleurs 16.7M Contraste 3000 :1 Ratio 16 :9 Durée de vie 30,000 Heures Tuner DVB-T / DVB-C Alimentation électrique TV AC 100-240V~50/60Hz Consommation Max.42W...
- Page 40 POUR RÉFÉRENCE FICHE PRODUIT RELATIVE A L’ENERGIE Marque HIGHONE HI2412HD-MM Référence Modèle DVB-PM27236052HCAT) Classe d’efficacité énergétique Diagonale d'écran visible 60 cm ; 23.6 pouces Consommation électrique en mode marche (kWh/1000h) 19 kWh/1000h Consommation électrique en mode veille (W) <0.5W Consommation électrique en mode arrêt (W) Résolution de l'écran (pixels)
- Page 41 POUR RÉFÉRENCE Le marquage CE indique que le produit répond aux principales exigences des directives européennes 2014/35 (basse tension), 2014/30 (compatibilité électromagnétique), 2014/53 / EU (équipement radio), 2011/65 / EU (Restriction de l'utilisation de certaines substances dangereuses dans les équipements électroniques). Afin d’éviter d’éventuelles lésions auditives, ne pas écouter à...
- Page 42 POUR RÉFÉRENCE https://eprel.ec.europa.eu/qr/1006957...
- Page 43 POUR RÉFÉRENCE CONSEILS DE DÉPANNAGE GÉNÉRAUX Vérifiez les points suivants avant de considérer une défaillance : Symptôme [COMMUN] Solution Branchez le cordon d'alimentation avec précautions à une prise Pas d'alimentation. murale. Aucune image Assurez-vous que l'équipement est correctement branché. ● Assurez-vous que l'équipement est correctement branché.
- Page 44 POUR RÉFÉRENCE La directive européenne 2012/19/EU sur les Déchets des Equipements Electriques et Electroniques (DEEE), exige que les appareils ménagers usages ne soient pas jetés dans le flux normal des déchets municipaux. Les appareils usagés doivent être collectés séparément afin d'optimiser le taux de récupération et le recyclage des matériaux qui les composent, et réduire l'impact sur la santé...
- Page 45 POUR RÉFÉRENCE Service après-vente Si vous rencontrez un problème lié à l’utilisation de votre appareil, veuillez d’abord effectuer les démarches suivantes : Assurez-vous du respect des consignes d’utilisation incluant les chapitres relatifs au nettoyage, l’entretien et la maintenance. Consultez l’outil de diagnostic d’aide à la résolution de problèmes via le site web : FR : www.electrodepot.fr/sav BE: www.electrodepot.be/fr/sav/www.electrodepot.be/nl/dnv ES : www.electrodepot.es/servicio-postventa...
- Page 46 POUR RÉFÉRENCE MISE EN GARDE : Toute intervention et/ou réparation du produit par l’utilisateur ou un tiers non professionnel peut mettre en jeu la sécurité des personnes et des biens. • Pour les particuliers et réparateurs professionnels, ces pièces sont disponibles au minimum 7 ans après la date d’achat de l’appareil neuf et selon les spécificités de l’appareil Sources d’alimentation externes Télécommandes...
- Page 47 Thank you! Thank you for choosing this product HIGHONE. Selected, tested and recommended by the ELECTRODEPOT, HIGHONE products ensure you the utility model has the advantages of simple use, reliable performance and good quality. Through this device, you will know that it would satisfy you every time.
- Page 48 Table of contents IMPORTANT INSTRUCTIONS GETTING STARTED ACCESSORIES FEATURES GENERAL PARTS REMOTE CONTROL REMOTE CONTROL PREPARATION BASIC CONNECTION BASIC OPERATIONS OPERATIONS MAIN MENU FIRST TIME INSTALLATION DTV MODE ATV AND OTHER MODES MAINTENANCE FOR REFERENCE WALL MOUNTING STAND INSTALLATION SPECIFICATIONS TROUBLESHOOTING...
-
Page 49: Getting Started
GETTING STARTED SAFETY PRECAUTIONS The warning sign CAUTION: TO AVOID THE RISK OF The warning sign showing a lightning bolt ELECTROCUTION, DO NOT showing an in a triangle indicates REMOVE THE COVER (OR THE exclamation point in that this product BACK OF THE DEVICE). - Page 50 GETTING STARTED ● The device is intended for use only in a temperate climate. ● If smoke, an unusual odour or strange noise is emitted by the device: unplug the mains cable from the electrical outlet and consult the after-sales service or repair centre.
- Page 51 GETTING STARTED DISPOSAL OF OLD ELECTRICAL APPLIANCES The European directive 2012/19/EU on Waste Electrical and Electronic Equipment (WEEE), requires that old household electrical appliances must not be disposed of in the normal unsorted municipal waste stream. Old appliances must be collected separately in order to optimize the recovery and recycling of the materials they contain, and reduce the impact on human health and the environment.
-
Page 52: Features
GETTING STARTED FEATURES 23.6" LED Display This unit has a built-in LED display window to provide clear vision and low radiation. With Hotel Lock Support Auto TV Scanning Support Digital Broadcasting Reception Support TV Guide Function Support TELETEXT (Europe) Function Support USB Multimedia Playback Support Multi-languages On Screen Display Support Full Function Remote Control... -
Page 53: General Parts
GETTING STARTED GENERAL PARTS MAIN UNIT 1. LED display screen 2. Remote control sensor / Power indicator- In standby mode the indicator light will display red color; when switching on the unit the indicator light will display blue color. 3. Stand holder 4. - Page 54 GETTING STARTED GENERAL PARTS Back View 1. AC Power cord 2. COAXIAL output terminal 3. CVBS & Audio L/R input terminal 4. PC AUDIO input terminal 5. VGA input terminal 6. HDMI input terminal 7. RF input terminal- To connect the external antenna. 8.
-
Page 55: Remote Control
GETTING STARTED REMOTE CONTROL 1 STANDBY Set the unit in standby mode; press it again to switch it on. 2 TV/RADIO Switch the unit between TV and Radio. 3 RED button 4 GREEN button 5 BLUE button 6 YELLOW button 7 SUBTITLE Enable/disable subtitles. - Page 56 GETTING STARTED REMOTE CONTROL Play the previous file. Display the favorite channels list. 19 MENU Call out the main menu or return to previous menu. 20 SOURCE Select desired input source. 21 OK Confirm selection. 22 ▲/▼/◄/► Navigation buttons 23 EXIT Exit the menu page.
-
Page 57: Remote Control Preparation
GETTING STARTED REMOTE CONTROL PREPARATION BATTERY INSTALLATION Install the batteries as the following pictures. Be sure + and – terminals are positioned as indicated in the battery compartment (Fig1). SERVICE LIFE OF BATTERIES - The batteries normally last for one year although this depends on how often the remote control is used. -
Page 58: Basic Connection
GETTING STARTED BASIC CONNECTION ● Ensure all the cables are disconnected from the main unit before connecting to AC power source. ● Read through the instructions before connecting other equipments. CONNECTING TO AC POWER SOURCE To power outlet CONNECT EXTERNAL ANTENNA TO UNIT Install external antenna into antenna jack for best picture. - Page 59 GETTING STARTED HDMI CONNECTION Use HDMI cable to connect the unit with other devices to receive high-definition multimedia signal. HDMI cable (Not included) Back of DVD/VCR PC/VGA CONNECTION VGA cable Audio cable (Not included) (Not included) Use VGA cable and Audio cable to connect the unit with TV or PC, and use this product as a monitor.
- Page 60 GETTING STARTED AV (COMPOSITE VIDEO) CONNECTION For basic connection, use the composite Audio L/R (white/red) and CVBS (yellow) cable to connect the unit with other devices. AV cable (Not included) Back of DVD/VCR COAXIAL CONNECTION Use coaxial cable (not included) to connect the unit with amplifier or other audio decoding devices for coaxial audio signal output.
- Page 61 GETTING STARTED USB CONNECTION USB Memory Device (Not included) INSERT A CI CARD Insert your CI card (Conditional Access Module) to watch special digital (Not included) channels in your area. EARPHONE CONNECTION Earphone cable (Not included)
-
Page 62: Basic Operations
OPERATIONS MAKE SURE ALL THE EQUIPMENTS AND POWER PLUG ARE CONNECTED PROPERLY AND THE UNIT IS SET IN CORRECT MODE BEFORE KINDS OF OPERATIONS. BASIC OPERATIONS - Press STANDBY button on the unit or remote control to power ON the unit (indicator will glow blue);... - Page 63 OPERATIONS INFORMATION DISPLAY - Press the DISPLAY button on the remote control to display information of current programs. TV GUIDE (FOR DTV MODE ONLY) - Press the EPG button on the remote control to display the programme guide. - Press the UP/DOWN navigation button to select a preferred program - Press the LEFT/RIGHT navigation button to switch between the left column and right column.
- Page 64 OPERATIONS FAVORITE LIST When viewing an available channel, press the FAV button on the remote control to enter it into the Favorite List menu page. - Press the UP or DOWN navigation button to select a preferred channel. - Press the OK button to confirm the selection. Note: To add a favorite channel, please refer to the operations of “Channel>Programme Edit”.
- Page 65 UTILISATION RECORDER (FOR DTV MODE ONLY) - Insert your USB memory device into the USB slot first. - When watching digital programs, press the button on the remote control and the tool ● bar below will appear on the screen: - Press the LEFT or RIGHT navigation button to select the desired option.
- Page 66 OPERATIONS MEDIA PLAYBACK - Press the SOURCE button on the remote control to switch to USB mode. - Insert a USB memory device into the USB slot before the following operations. - Press the UP/DOWN/LEFT/RIGHT navigation button to move the cursor. - Press the EXIT button to return to the previous menu page.
- Page 67 - Press button to start playback. OPERATIONS - Use the navigation buttons to select a desired option and press OK to confirm the selection. - Press the EXIT button to return. 3. MOVIE - Press the LEFT/RIGHT navigation button to select Movie in the main menu and press the OK button to enter the selection.
- Page 68 OPERATIONS 4. TEXT - Press the LEFT/RIGHT navigation button to select Text in the main menu and press the OK button to enter it. - Use navigation buttons to select a desired folder or file. - To delete files, press the RED button to enter the submenu and you can delete a file accordingly.
-
Page 69: Main Menu
OPERATIONS MAIN MENU ● The unit contains different setting menus. Once the initial programming is entered, it will be remained in the memory until change, and the unit can always be operated under the same conditions. ● The settings will be remained in the memory until the settings are changed, even after setting the player to standby mode. -
Page 70: Dtv Mode
OPERATIONS DTV MODE - Press the SOURCE button on the remote control to select DTV input source. 1. CHANNEL 1.1 Antenna - Press OK or RIGHT navigation button to enter it. - Use navigation buttons to select DVB-T or DVB-C. 1.2 Auto Tuning - Press the OK or RIGHT navigation button. - Page 71 OPERATIONS 1.4 DTV Manual Tuning - Press the OK or RIGHT navigation button. - Use the LEFT/RIGHT navigation button to select the channel. Then press the OK button to start searching. Note: Menu and operations here will vary for DVB-T and DVB-C.
- Page 72 OPERATIONS - Press the LEFT/RIGHT navigation button to switch between Schedule List and Recorded List. - Press the RED button to delete the highlighted option. - Press the YELLOW button to enter the Add menu page. - Press the BLUE button to enter the Edit menu page. 1.7 Recorded List Previously recorded programs should appear on this list.
- Page 73 OPERATIONS 2.2 Colour Temp This item is used to adjust the optimum color temperature for suitable viewing. Available options: Normal, Warm, Cold. 2.3 Noise Reduction Available options: Off, Low, Medium, High 2.4 SCREEN (for PC/VGA mode only) 2.5 Dynamic CR Turn on/off dynamic contrast ratio.
- Page 74 OPERATIONS 3.5 SPDIF Mode Available options: Auto, PCM, Off. 3.6 AD Switch This item is used to set AD Switch ON or OFF. For Visually Impaired users, this function enables a user to know a certain scene or action through the narration, instead of seeing it. NOTE: AD Switch function works only when you are viewing programs that contain related narration information.
- Page 75 OPERATIONS 4.5 Sleep Timer This item is used to set the automatic sleep time. Available options: Off, 10min, 20min, 30min, 60min, 90min, 120min, 180min, 240min 4.6 Auto Standby This item is used to select a desired Auto Sleep (standby) duration when no operations are done through the remote control.
- Page 76 OPERATIONS 5.3 Channel Lock - Press OK or RIGHT navigation button to enter it. - Press UP/DOWN navigation button to select the channel which you want to lock. - Press GREEN button repeatedly to lock/unlock the highlighted channel. 5.4 Parental Guidance This item is used to select desired program rating.
- Page 77 OPERATIONS 6. SETUP 6.1 Language This item is used to select the default on-screen display language. 6.2 TT Language This item is used to select the default teletext language. 6.3 Audio Language - Press the RIGHT navigation button. - Then you can select the desired primary audio language and secondary audio language. 6.4 Subtitle Language - Press the RIGHT navigation button.
- Page 78 OPERATIONS 6.7 PVR File System - Press the RIGHT navigation button. - Press the UP/DOWN navigation button to select a desired option, and then press the LEFT/RIGHT navigation button to adjust the selected option. - Press the OK button to enter the submenu or confirm the setting.
-
Page 79: Atv And Other Modes
OPERATIONS ATV AND OTHER MODES - Press the SOURCE button on the remote control to select a desired input source. - For these modes, please refer to the menu operations of DTV mode. -
Page 80: For Reference
FOR REFERENCE MAINTENANCE ● Be sure to press POWER button to set the player to the standby mode and disconnect the power plug before maintaining the player. ● If the surface is extremely dirty, wipe clean with a cloth which has been dipped in a weak soap-water solution and wrung out thoroughly, and then wipe again with a dry cloth. -
Page 81: Stand Installation
FOR REFERENCE STAND INSTALLATION Your TV may be packaged with the Stand and the Cabinet separated. Before enjoying this TV, please carry out the Stand Installation according to the instructions below. Step 1 Place the TV faced down on a soft cloth or cushion to prevent the panel from being damaged. -
Page 82: Specifications
FOR REFERENCE SPECIFICATIONS Reference. 972724 - HI2412HD-MM Model DVB-PM27236052HCAT Display Device 23.6" LED Resolution 1366×768 Display Colors 16.7M Contrast Ratio 3000 :1 Aspect Ratio 16 :9 Life Time 30,000 Heures Tuner DVB-T / DVB-C Power Source AC 100-240V~50/60Hz Power Consumption Max.42W... - Page 83 FOR REFERENCE FICHE PRODUIT RELATIVE A L’ENERGIE Brand HIGHONE HI2412HD-MM Refrence Model DVB-PM27236052HCAT) Energy Efficiency Grade Visual Screen Diagonal 60 cm ; 23.6 inch Power consumption in Operation mode (kWh/1000h) 19 kWh/1000h Power consumption in Standby mode (W) <0.5W Power consumption in Shutdown mode (W) Screen resolution (pixels) 1366×768...
- Page 84 FOR REFERENCE The CE marking indicates that the product meets the main requirements of the European Directives 2014/35/EU (Low Voltage), 2014/30/EU (Electromagnetic Compatibility), 2014/53/EU (Radio Equipment), 2011/65/EU (Restriction of the use of certain hazardous substances in electronic equipment). To avoid possible hearing damage, do not listen at high audio volume for long periods of time.
- Page 85 FOR REFERENCE https://eprel.ec.europa.eu/qr/1006957...
- Page 86 FOR REFERENCE GENERAL TROUBLESHOOTING Check the following points before assuming malfunctions of this unit: Symptom Remedy No power. Insert the power plug securely into the power outlet. No picture. Ensure that the equipment is connected properly. ● Ensure that the equipment is connected properly. ●...
- Page 87 FOR REFERENCE After Sales Service If you have a problem using your device, please complete the steps first following: - Make sure that the operating instructions are followed, including the chapters relating to cleaning, maintenance and maintenance. - Consult the diagnostic tool to help resolve problems via the website: FR: www.electrodepot.fr/sav BE: www .electrodepot.be/fr/sav / www.electrodepot.be/nl/dnv ES: www .electrodepot.es/servicio-post venta...
- Page 88 FOR REFERENCE • For individuals and professional repairers, these parts are available at least 7 years after the date purchase of the new device and according to the specificities of the device: - External power sources - Remote controls • For professional repairers, these parts are available at least 7 years after the date of purchase of the new device and according to the specific features of the device: - Internal power sources...
- Page 89 CONDITION DE GARANTIE Ce produit est garanti pour une période de 2 ans à partir de la date d'achat*, contre toute defaillance résultant d'un vice de fabrication ou de matériau. Cette garantie ne couvre par les vices ou les dommages résultant d'une mauvaise installation, d'une utisation incorrecte ou de l'usure anormale du produit.
Need help?
Do you have a question about the DVB-PM27236052HCAT and is the answer not in the manual?
Questions and answers