Advertisement
Introduction

Dear Customer, Please read and comply with these instructions prior to the initial operation of your appliance. Retain these operating instructions for future reference or for subsequent possessors.
Before first start-up it is definitely necessary to read the operating instructions and safety indications Nr. 5.951-949! In case of transport damage inform vender immediately
Environmental protection
 | The packaging material can be recycled. Please do not place the packaging into the ordinary refuse for disposal, but arrange for the proper recycling. |
 | Old appliances contain valuable materials that can be recycled. Please arrange for the proper recycling of old appliances. Batteries, oil, and similar substances must not enter the environment. Please dispose of your old appliances using appropriate collection systems. |
Please do not release engine oil, fuel oil, diesel and petrol into the environment Protect the ground and dispose of used oil in an environmentally-clean manner.
Overview
Device elements
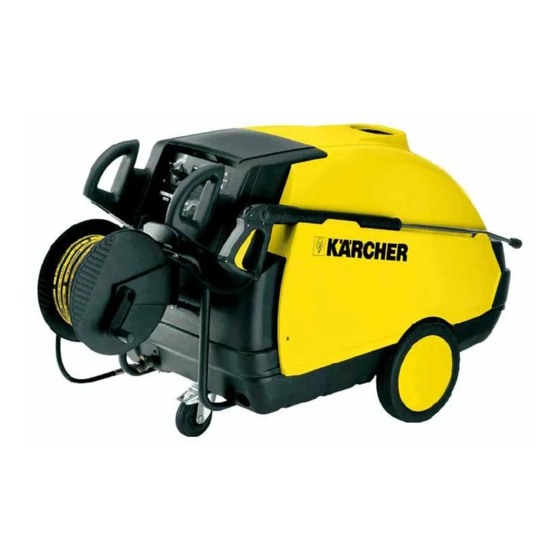
Figure 1

- Power supply
- Guiding roll with fixed position brake
- Handle
- Recessed grips in the floor trough
- Hose drum (Only MX / SX Eco)
- hand crank for hose drum
(Only MX / SX Eco) - Support for spray lance
- Cover
- Closing flap for storage compartment
- Storage compartment for accessories, reset button of exhaust temperature limiter
- Operating instructions in brief
- Pouring vent for fuel
- Front closing flap
- Pouring vent for detergent 1
- Pouring vent for detergent 2 (only HDS 1295)
- Pouring vent for liquid softner
- Fine filter
- Pressure/ quantity regulation
- Connection for water supply with filter
- High pressure connection (Only M / S Eco)
- High pressure hose
- Hand spraygun
- Spray lance
- High pressure nozzle
- Cover lock
- Electronic display for maintenance jobs/ interruptions
Operating field
Figure 2

- Power switch
- Temperature controller
- Fuel indicator lamp
- Liquid softner indicator lamp
- Indicator lamp: Detergent 1
- Indicator lamp: Detergent 2 (only HDS 1295)
- Indicator lamp: Engine/ Electronics
- "Ready for use" indicator lamp
- Manometer
- Dosage valve for detergent
Indication toward operating instructions
All subsequent specified position numbers in this operating instruction are listed in the device illustration
Proper use
Cleaning of: Machines, Vehicles, Structures, Tools, Facades, Terraces, Gardening tools, etc.

Risk of injury! Follow the respective safety regulations when operating at gas stations or other dangerous areas.
Please do not let mineral oil contaminated waste water reach soil, water or the sewage system. Perform engine cleaning and bottom cleaning therefore only on specified places with an oil trap.
Safety Devices
Overflow valve with two pressure switches
- While reducing the water supply at the pump head or with the Servopress - regulation the overflow valve opens and part of the water flows back to the pump suck side.
- If the hand-spray gun is closed, so that the whole water flows back to the pump suck side, the pressure switch at the overflow valve shuts down the pump.
- If the hand spray gun is opened, the pressure switch on the cylinder head turns the pump back on.
The overflow valve is set by the manufacturer and sealed. Setting only by customer service.
Safety valve
- The safety valve opens, when the overflow valve resp. the pressure switch is broken.
The safety valve is set by the manufacturer and sealed. Setting only by customer service.
Water shortage safeguard
- The water shortage safeguard prevents the burner to be turned on when there is water shortage.
- A sieve prevents the contamination of the safeguard and must be cleaned regulary.
Engine protection switch
- The engine protection switch interrupts the electric circuit if the engine is overloaded.
Temperature stop for exhaust gases
- The temperature stop switches off the machine when the waste gases have reached very high temperatures.
Start up
Risk of injury! Device, tubes, high pressure hose and connections must be in faultless condition. Otherwise, the appliance must not be used.
 Lock parking brake.
Check oil level
Figure 3


In case of lacteous oil inform Kärcher customer service immediately
If oil level approaches the MIN marking, fill oil until MAX marking
Close oil refill nozzle
Oil grade: see Technical Data
Refill liquid softener
Note
A sample bundle of liquid softener is included
Figure 1 - Pos. 16
Refill liquid softener.
The liquid softener prevents the calcification of the heating spiral while operating with calciferous tap water It is dosed into the supply drop by drop
The metering is set to medium water rigidity by the manufacturer
For other water rigidity call for Kärcher customer service and have it adapted to local facts
Refill fuel
Figure 1 - Pos. 12
Never operate device with empty fuel tank
The fuel pump will otherwise be destroyed.
Risk of explosion! Only refill diesel oil or light fuel oil. Unsuitable fuels, e.g. petrol, are not to be used.
Refill fuel.
Close tank lock.
Wipe off spilled fuel.
Refill detergent
Risk of injury!
- Use Kärcher products only.
- Under no circumstances fill solvents (petrol, aceton, diluting agent etc.)
- Avoid eye and skin contact.
- Observe safety and handling instructions by the detergent manufacturer.
Kärcher offers an individual cleaning and care appliances program.
Your dealer will consult you gladly.
Figure 1 - Pos. 14+15
Refill detergent.
Install the hand-spray gun (appliances without hose drum)
Connect ray tube with hand spray gun
Insert high pressure nozzle into covering nut
Install covering nut and tighten firmly
Figure 1 - Pos. 20
Connect the high pressure host to the high pressure connection point of the machine.
Install the hand-spray gun and hose drum (appliances with hose drum)
Connect ray tube with hand spray gun
Insert high pressure nozzle into covering nut
Install covering nut and tighten firmly
Figure 4

Install the hose drum with the enclosed screws, discs and nuts (4 pieces each).
Figure 5

Connect the high pressure hose to the high pressure connection point of the hose drum and the appliance.
Connect the high pressure hose of the hand-spray gun to the hose drum.
Wind the high pressure hose with the least possible bends (in the clock-wise direction) on the hose drum.
Roll off the high-pressure hose from the hose-drum completely while operating the machine.
Installing spare high pressure hose
Figure 6

Installing the handle
Figure 7

Water connection
For connection values refer to technical specifications
Figure 1 - Pos. 19
Connect the supply hose to the water connection point of the machine and at the water supply point (for e.g. a tap).
Note
The supply hose is not included.
suck in water from vessel
If you want to suck in water from an external vessel, the following modification is necessary:
Remove water connection from the pump head.
Unscrew the upper supply hose with the fine filter to the swimmer container and connect it to the pump head.
Connect suction hose (minimum diameter 3/4") with filter (accessory) to the water connection point.
- Max. suck height: 0.5 m Until the pump sucked in water, you should:
Turn the pressure and quantity regulation to MAX.
Close the dosing valve for the detergent.
Never suck in water from a drinking water container. Never suck in liquids which contain solvents like lacquer thinner, petrol, oil or unfiltered water. The sealings within the device are not solvent resistant. The spray mist of solvents is highly inflammable, explosive and poisonous.
Power connection
For connection values, see technical data and type plate.
The highest allowed net impedance at the electrical connection point (refer to technical data) is not to be exceeded.
Check direction of rotation of the engine at every socket change.
- With correct direction of rotation a strong airflow can be felt out of the exhaust opening of the burner.
Figure 16

Exchange the poles at the device plug if the rotation direction is wrong.
If you have to use an extension chord, then the same must always be rolled up and have an adequate cross-section.
Operation
Never operate device with empty fuel tank The fuel pump will otherwise be destroyed.
Turning on the Appliance
Figure 2 - Pos. 1
Set the appliance switch to "I". Indicator lamp for operational readiness lights up.
Note
The temperature regulator must be at "0" position because otherwise the burner will switch off.
The device starts briefly and turns off, as soon as the working pressure is reached.
Note
If the indicator lamps for fuel, liquid softner, detergent or engine/ electronics are on during operation, turn off device immediately and repair malfunction, refer to malfunctions.
Figure 8

Release the hand spray gun (A). When activating the hand spray gun the device switches back on.
Note
If no water comes out of the high pressure nozzle, vent pump. Refer to malfunctions "Device is not building up pressure".
Adjust cleaning temperature.
Figure 2 - Pos. 2
Set temperature regulator to desired temperature.
30°C to 90°C
- Clean with hot water.
100°C to 150°C
- Clean using steam.
Replace the high-pressure nozzle with steam nozzle (refer "Using steam").
Set working pressure and flow rate
Appliance setting
Figure 9

Turn the regulation spindle in a clockwise direction: Increase working pressure (MAX).
Turn the regulation spindle in an anticlockwise direction: Reduce working pressure (MIN).
Servo pressure regulation
Set thermostat to max. 98°C.
Set the operating pressure on the appliance to the maximum value.
Figure 8
Set working pressure and flow rate through turning (directly) at the pressure- and amount regulation (B) of the handgun (+/-).
Note
For long term work with low pressure, set pressure at device.
Operation with detergent
- For considerate treatment of the environment use detergent economically.
- The detergent must be suitable for the surface to be cleaned.
Figure 2 - Pos. 10
With support of the detergent dose valve set detergent concentration as determined by the manufacturer.
Note
Recommended value at maximum working pressure.
Cleaning
set pressure/temperature and detergent concentration according to the surface to be cleaned.
Note
To prevent damage due to too much pressure, always position high pressure ray first from a greater distance towards object to be cleaned.
Working with the high pressure nozzle
The spray angle is essential for the effectiveness of the high pressure ray. Normally work is performed with a 25° flat ray nozzle (included).
Recommended nozzles are deliverable as accessories
- For strong contaminations
0° full ray - nozzle - For sensitive surfaces and light contaminations
40° flat ray - nozzle - For thick layered, persistent contaminations
Dirt grinder - Nozzle with adjustable spray angle, for adaption to different cleaning tasks
Angle-Vario-Nozzle
Recommended cleaning method
- Loosen the dirt:
→ Spray detergent economically and let it work for 1...5 minutes but do not let it dry up. - Remove the dirt:
→ Spray off loosened dirt with the highpressure ray.
Operating with cold water
Removal of light contaminations and clear rinse, i.e.: Gardening tools, terrace, tools, etc.
Set operating pressure according to need.
Set temperature regulator to "0".
Operating with hot water
Scalding danger!
Set temperature regulator to desired temperature.
We recommend the following cleaning temperatures:
- Light contaminations
30 -50°C - Contaminations containing protein, i.e. in the food processing industry
max. 60°C - Vehicle cleaning, machine cleaning
60 -90°C
Safety switch-off
If the hand-spray gun is not closed or opened for more than 30 minutes, the pump is automatically switched off for safety reasons.
Press the appliance switch for restart to "0" and then to "I".
Note
You can also get an EPROM without switch-off (Order No. 6.682-595) from Customer Service.
Operating with steam
Scalding danger! When operating with temperatures above 98°C, the operating pressure must not exceed 3.2 MPa (HDS 1295: 2.8 MPa).
Therefore the following measures must definitely be performed:

Replace the high pressure nozzle with the steam nozzle.
| Order No. | Type |
| 4.766-023 | HDS 995 |
| 4.766-024 | HDS 1295 |
Open up the pressure/ quantity regulator on the hand spray gun completely, direction + until stop.
Set the operating pressure on the appliance to the minimum value.
Set temperature regulator to min. 100°C.
Scalding danger!
We recommend the following cleaning temperatures:
- De-preserve, contaminations containing strong fat contents
100 -110°C - De-frosting of surcharge substances, partially facade cleaning
up to 140°C
After each operation
Danger of scalding by hot water. After the operation with hot water or steam, the device must be operated with openend gun with cold water for at least two minutes.
After operation with detergent
Set dosing value for detergent to "0".
Set the appliance switch to "I".
Open the hand spray gun and rinse the appliance for at least 1 minute.
Turn off the appliance.
Set the appliance switch to "0".
Shut off water supply.
Turn on pump shortly (appr. 5 seconds) with device switch.
Pull main plug out of socket with dry hands only.
Remove water connection.
Activate hand spray gun until device is pressure less.
Secure hand spray gun, Figure 8 (A).
Lock in the steel pipe into the holder of the appliance hood.
Roll up high pressure hose and electrical conduit and hang them into the respective holders.
Device with hose drum:
Before rolling up, stretch out the high pressure hose.
Turn the hand crank clockwise (Direction of the arrow).
Note
Do not twist high pressure hose and electrical conduit.
Frost will destroy the not completely water drained device.
Store in a frost free area. If the device is connected to a chimney, the following must be observed:
Threat of damage by penetrating cold air through the chimney.
Disconnect device from chimney when outside temperature drops below 0°C. If it is not possible to store frost free, shut down device.
Shutdown
For longer work breaks or if a frost free storage is not possible:
Drain water.
Flush device with anti-freeze agent.
Empty detergent tank.
Dump water
Screw off water supply hose and high pressure hose.
Screw off supply hose at boiler bottom and drain heating spiral empty.
Operate device for max. 1 minute until the pump and conduits are empty.
Flush device with anti-freeze agent
Note
Observe handling instructions of the antifreeze agent manufacturer.
Fill anti-freeze agent of the trade into swimmer container.
Switch on appliance (without heater) till the appliance has been completely rinsed.
A certain corrosion protection is achieved with this as well.
Maintenance and care
Risk of injury! Always disconnect the device from the electrical power supply before performing maintenance or repair work.
Only use original spare parts. After each work, turn off device, refer to "After each operation".
Set the appliance switch to "0".
Disconnect the main plug from the socket.
Shut off water supply.
Activate hand spray gun until device is pressure less.
Remove water connection.
Allow device to cool down.
Your Kärcher vender will inform you about the performance of a periodic safety inspection resp. signing of a maintenance contract.
Maintenance intervals
Weekly
Clean the sieve in the water connection.
Clean the fine filter.
Check oil level.
In case of lacteous oil inform Kärcher customer service immediately
Monthly
Clean sieve in the water shortage safe guard.
Clean filter at the detergent suck hose.
After 500 operating hours, at least annually.
Oil change.
Maintenance Works
Indicator lamp: Engine/ Electronics is lit up
Figure 2 - Pos. 7
This indicator lamp is lit up when certain maintenance jobs are necessary on account of reaching a certain number of operating hours.
Carry out the necessary maintenance jobs.
Open the covering flap of the storage compartment.
Press the Reset button of the electronic display for at least 7 seconds until the indicator lamp goes off.
Display

Necessary maintenance jobs
Do a visual check.
Check high pressure connections for leaks.
Clean fuel tank und fuel filter.
Display

Necessary maintenance jobs
Check pump for leaks.
Change oil in the pump.
Clean the sieve in the water connection.
Clean sieve in the water shortage safe guard.
Display

Necessary maintenance jobs
Remove the soot from the heating coil (Customer Service)
Remove the calciul deposits from the heating coil (Customer Service).
Clean/ replace ignition electrodes (Customer Service).
Clean/ replace burner nozzle (Customer Service).
Adjust burner (Customer Service)
Display

Necessary maintenance jobs
Check overflow valve of the pump for leaks (Customer Service).
Check high-pressure hose (Customer Service).
Clean hand-spray gun.
Check pressure accumulator (Customer Service).
Clean the sieve in the water connection
Figure 1 - Pos. 19
Take out sieve.
Clean sieve in water and reinstall.
Cleaning the fine filter
Figure 10

Unpressurize the appliance.
Unscrew lid with filter.
Clean the filter with clean water or compressed air.
Reinstall in reverse sequence.
Clean sieve in the water shortage safe guard
Figure 11

Loosen covering nut and take off hose.
Figure 12

Take out sieve.
Note
If necessary turn in screw M8 appr. 5 mm inwards and therewith pull out sieve.
Clean sieve in water.
Push sieve inwards.
Put on hose.
Tighten covering nut firmly.
Clean filter at the detergent suck hose
Figure 13

Take out detergent suck supports.
Clean filter in water and reinstall.
Oil change.
Figure 14

Ready a catch bin for appr. 1 Liter oil.
loosen release screw.
Dispose of old oil ecologically or turn in at a gathering point.
Tighten release screw.
Fill oil slowly up to the MAX marking.
Note
Air pockets must be able to leak out.
For oil type refer to technical specifications.
Faults
Indicator lamp: Engine/ Electronics is blinking
Figure 2 - Pos. 7
This indicator lamp blinks if there is a malfunction.
Rectify the fault.
Turn on the appliance again. Indicator lamp goes off.
Display

Troubleshotting
Increase water flow quantity.
Clean the sieve in the water connection.
Clean sieve in the water shortage safe guard.
Display

Troubleshotting
Replace the reed switch of the water shortage safeguard (Customer Service).
Clean the water shortage safeguard (Customer Service).
Display

Troubleshotting
Remove leaks in the high pressure system.
Display

Troubleshotting
- Engine overload/overheat
![]() Turn device switch on "0" and let engine cool off for min. 5 minutes.
Turn device switch on "0" and let engine cool off for min. 5 minutes.
![]() If malfunction still occurs, have device checked by customer service.
If malfunction still occurs, have device checked by customer service.
Figure 17

![]() Check exhaust temperature limiter; reduce it, if required.
Check exhaust temperature limiter; reduce it, if required.

Display

Troubleshotting
- This error code is displayed only for appliances with the flame monitoring attachment.
- See Assembly Instructions of Flame monitoring attachment.
Indicator lamp "Ready for use" turns off
Figure 2 - Pos. 8
- Engine overload/overheat
![]() Turn device switch on "0" and let engine cool off for min. 5 minutes.
Turn device switch on "0" and let engine cool off for min. 5 minutes.
![]() If malfunction still occurs, have device checked by customer service.
If malfunction still occurs, have device checked by customer service.
![]() No line voltage, see "Appliance is not running".
No line voltage, see "Appliance is not running".
Fuel indicator lamp glows
Figure 2 - Pos. 3
- Fuel tank empty
![]() Refill.
Refill.
Indicator lamp liquid softener glows
Figure 2 - Pos. 4
- Liquid softener tank is empty, due to technical reasons a remainder stays in the tank.
![]() Refill.
Refill. - Electrodes in the tank are dirty
![]() Clean the electrodes.
Clean the electrodes.
Indicator lamp for detergent glows
Figure 2 - Pos. 5+6
- Detergent tank is empty.
![]() Refill.
Refill.
Appliance is not running
- No power
![]() Check power connection/conduit.
Check power connection/conduit.
Device is not building up pressure
- Air within the system
Vent pump:
Set dosing value for detergent to "0".
With open hand spray gun turn device on and off multiple times with the device switch.
Close and open the regulating spingle (figure 9) with open hand spray gun.
Note
By dismantling the high pressure hose from the high pressure connection the venting process is accelerated.
If detergent tank is empty, refill.
Check connections and conduits.
- Pressure is set to MIN
![]() Set pressure to MAX.
Set pressure to MAX. - Sieve in the water connection is dirty
![]() Clean sieve.
Clean sieve.
![]() Clean the fine filter; replace it, if necessary.
Clean the fine filter; replace it, if necessary. - Amount of water supply is too low.
![]() Check water supply level (refer to technical data).
Check water supply level (refer to technical data).
High pressure side is leaky
- Pump leaky
Note
3 drops/minute are allowed.
With stronger leak, have device checked by customer service.
Device turns on and off while hand spray gun is closed
- Leak in the high pressure system
![]() Check high pressure system and connections for tightness.
Check high pressure system and connections for tightness.
Device is not sucking in detergent
Leave device running with open detergent dosage valve and closed water supply, until the swimmer tank is sucked empty and the pressure falls to "0".
Open the water supply again. If the pump still is not sucking in any detergent, it could be because of the following reasons:
- Filter in the detergent suck hose dirty
![]() Clean filter.
Clean filter. - Backflow valve stuck
Figure 15

![]() Remove the detergent hose and loosen the backflow valve using a blunt object.
Remove the detergent hose and loosen the backflow valve using a blunt object.

Burner does not start
- Fuel tank empty
![]() Refill.
Refill. - Water shortage
![]() Check water supply, check connections, clean water shortage safeguard.
Check water supply, check connections, clean water shortage safeguard. - Fuel filter dirty
![]() Change fuel filter.
Change fuel filter. - Direction of rotation is wrong. With correct direction of rotation a strong airflow can be felt out of the exhaust opening of the burner.
Figure 16
Check direction of rotation. Exchange the poles at the device plug, if required.
- No ignition spark
If device is in use and no ignition spark can be seen through the viewing glas, have device checked by customer service.
Set temperature is not achieved while using hot water
- Working pressure/flow rate to high
![]() Reduce working pressure/flow rate through regulating spindle (Figure 9).
Reduce working pressure/flow rate through regulating spindle (Figure 9). - Sooty heating spiral
![]() Have device de-sooted by customer service.
Have device de-sooted by customer service.
If malfunction can not be fixed, the device must be checked by customer service.
Warranty
The warranty terms published by our competent sales company are applicable in each country. We will repair potential failures of the appliance within the warranty period free of charge, provided that such failure is caused by faulty material or defects in fabrication.
The warranty comes only into effect if your vender fills out the supplied reply card completely at purchase, stamps and signs and you send it to the local distribution company of your country.
In the event of a warranty claim please contact your dealer or the nearest authorized Customer Service centre. Please submit the appliance, including all accessories, and the proof of purchase.
General notes
Accessories and Spare Parts
- Only use accessories and spare parts which have been approved by the manufacturer. The exclusive use of original accessories and original spare parts ensures that the appliance can be operated safely and troublefree.
- At the end of the operating instructions you will find a selected list of spare parts that are often required.
- For additional information about spare parts, please go to the Service section at www.kaercher.com.
Guidelines for liquid rays
- The accident prevention regulation (BGR 500) "Work with liquid rays" is valid. High pressure spraying units must be checked every 12 months in accordance with these guidelines by an expert and the result of this check must be written down.
Operating procedures
- Operating procedures create short term power sinkings.
- During unfavorable net conditions other devices might be disturbed.
- With a net impedance lower then 0,15 Ohm no disturbances are to be expected.
Specifications
| Type | HDS 995 M / MX Eco | HDS 1295 S / SX Eco | |||
| Main Supply | |||||
| Voltage | V | 230 | 400/420 | 230 | 400/420 |
| Current type | Hz | 3~ 50 | 3~ 50 | 3~ 50 | 3~ 50 |
| Connected load | kW | 6.8 | 6.8 | 8.2 | 8.2 |
| Protection (slow) | A | 25 | 16 | 35 | 16 |
| Maximum allowed net impedance Ω |  | -- | -- | (0.307+j0.192) | |
| Water connection | |||||
| Max. feed temperature | °C | 30 | 30 | ||
| Min. feed volume | l/h (l/min) | 1200 (20) | 1500 (25) | ||
| Suck height from open container (20°C) | m | 0.5 | 0.5 | ||
| Max. feed pressure | MPa (bar) | 1 (10) | 1 (10) | ||
| Performance data | |||||
| Water flow rate | l/h (l/min) | 470-1000 (7.8-16.7) | 600-1200 (10-20) | ||
| Operating pressure of water (using standard nozzle) | MPa (bar) | 3-18 (30-180) | 3-18 (30-180) | ||
| Max. excess operating pressure (safety valve) | MPa (bar) | 19 (190) | 19 (190) | ||
| Steam flow rate | l/h (l/min) | 470 (7.8) | 600 (10) | ||
| Max. operating pressure for working with steam (using steam nozzle) | MPa (bar) | 3.2 (32) | 2.8 (28) | ||
| Part no. of steam nozzle | 4.766-023 | 4.766-024 | |||
| Max. operating temperature of hot water | °C | 95 | 95 | ||
| Working temperature steam operation | °C | 98-155 | 98-155 | ||
| Detergent suck in | l/h (l/min) | 0-40 (0-0.7) | 0-48 (0-0.8) | ||
| Burner performance | kW | 86 | 103 | ||
| Maximum consumption of heating oil | kg/h | 6.9 | 8.3 | ||
| Max. recoil force of hand spray gun | N | 43 | 60 | ||
| Type | HDS 995 M / MX Eco | HDS 1295 S / SX Eco | |||
| Noise emission | |||||
| Sound pressure level (EN 60704-1) | dB(A) | 75 | 73 | ||
| Guaranteed sound power level (2000/14/EC) | dB(A) | 91 | 89 | ||
| Machine vibrations | Vibration total value (ISO 5349) | ||||
| Hand spraygun | m/s 2 | 2.5 | 1.7 | ||
| Spray lance | m/s 2 | 1.8 | 1.7 | ||
| Fuel | |||||
| Fuel | Fuel oil EL or Diesel | Fuel oil EL or Diesel | |||
| Amount of oil | l | 0.75 | 0.75 | ||
| Oil grade | Hypoid SAE 90 (6.288-016) | Hypoid SAE 90 (6.288-016) | |||
| Dimensions and weights | |||||
| Length x Breadth x Height M/S Eco | mm | 1285 x 690 x 835 | 1285 x 690 x 875 | ||
| Length x Breadth x Height MX/SX Eco | mm | 1525 x 690 x 835 | 1525 x 690 x 875 | ||
| Weight without attachments, M/S Eco | kg | 133 | 155 | ||
| Weight without attachments, MX/ SX Eco | kg | 141 | 163 | ||
| Fuel tank | l | 25 | 25 | ||
| Detergent Tank | l | 20 | 20+17 | ||

Documents / Resources
References
Download manual
Here you can download full pdf version of manual, it may contain additional safety instructions, warranty information, FCC rules, etc.
Advertisement


Need help?
Do you have a question about the HDS 995 M/MX Eco and is the answer not in the manual?
Questions and answers