Advertisement
Quick Links
Advertisement

Related Manuals for Friendly Robotics RoboMower RL1000


Summary of Contents for Friendly Robotics RoboMower RL1000
- Page 1 Operating & Safety Manual RL1000 & Docking Station www.friendlyrobotics.com DOC0064A...
- Page 2 7. Technical documentation kept by Mr. Dedy Gur, QA director. I hereby declare that the above product conforms to the requirements as specified above. *The original RL500 was tested by BSI in 2000. All Friendly Robotics models currently sold were tested by F.Robotics Acquisitions Ltd.
- Page 3 The products are manufactured by F. Robotics Acquisitions (Friendly Robotics). © Friendly Robotics, 2004-A. All rights reserved. No part of this document may be photocopied, reproduced, electronically or translated without the prior written consent of Friendly Robotics. Product, product specifications and this document are subject to change without notice. All other trademarks are property of their respective owners.
- Page 4 Table of Contents Safety Warnings & Precautions ………………………………………….….……… 5 Safety Features …………………………………………………………….….…..…. 7 What’s in the Box ……………………………………………………………….……. 9 Chapter 1 – Docking Station & Perimeter Wire Setup…………………….….….. 11 ® Chapter 2 – Preparing the RoboMower …………………………………………. 28 Chapter 3 – Manual & Automatic Operation…………………………………….…36 Chapter 4 –...
- Page 5 Safety Warnings & Precautions Read the owners/operating manual carefully and follow all safety and warning instructions. This machine has sharp rotating blades! Never allow the mower to operate unattended; keep bystanders, children and pets away from mower when in operation. Never allow anyone to ride or sit on mower.
- Page 6 Safety Warnings & Precautions Warning Decal Definitions 1. WARNING-this is a dangerous power tool. Use care when operating and follow all safety instructions and warnings. 2. Read the owner/operating manual carefully and follow all safety instructions. 3. Objects can be thrown from mower while operating, take caution. 4.
- Page 7 ® RoboMower - Safety Features 1. Child Guard / Safety Guard This menu option offers a safety feature to help prevent children or others not familiar with the safe operation of the mower to operate it freely. 2. Lift Sensor There is a sensor located on the front caster wheel of the mower.
- Page 8 11. Over-Current Monitoring Protection Each of the three blade motors and each of the two wheel drive motors are monitored continuously during operation for any situation that may cause these motors to over-heat. In the event this is detected, the RoboMower will stop operation of at least that motor and possibly the mower itself and indicate that the motor is cooling down.
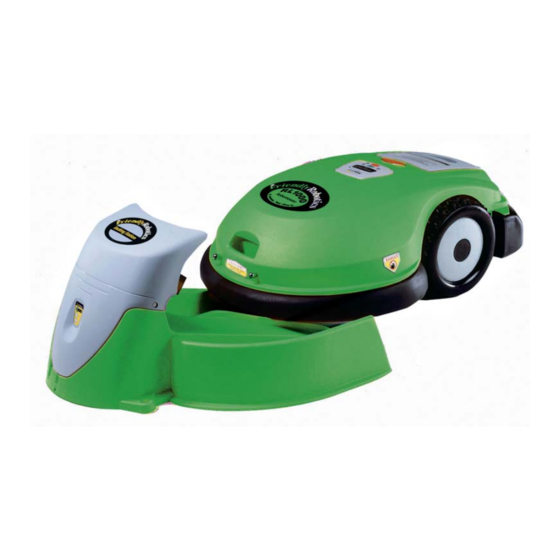
- Page 9 What’s in the Box ® (RoboMower ® 1. RoboMower 2. Power Pack 3. Operating & Safety Manual 4. Standard charger Used for recharging the RoboMower power pack. Indoor use only. 5. RoboRuler Used for setting the distance of the perimeter wire from the lawn edge. 6.
- Page 10 What’s in the Box (Docking Station) 12. Base Used for directing the RoboMower to the charging contacts. 13. Cover including the Perimeter Switch & a Power Supply Used for recharging the Robomow Power Pack and activates the perimeter wire, which defines the area in which the RoboMower will operate.
- Page 11 Chapter 1 Docking Station & Perimeter Wire Setup Cover Cover Base Base Screw (x2) Screw (x2) Stake (x5) Stake (x5) Fence Fence Figure 1.1 Docking Station Assembly CAUTION! Refer to the specific safety instructions related with operation of the RoboMower with a Docking Station, as specified in the Safety chapter. 1.1 Docking Station Zone Before setting up the perimeter wire and Docking Station, it is best to examine your lawn and determine the best location for the docking station.
- Page 12 Important Note: The power supply is for indoor use only, be sure to locate it and its connection to the extension cord in a dry location. It is recommended to place the Docking Station as close as possible to a receptacle, roll the extra cable and store it near the power supply.
- Page 13 • A minimum distance of 8 feet (2.5 meters) is required between the Docking Station fence and the perimeter island. See figure 1.5. Greater than 8 feet (2.5m) Figure 1.5 – Distance From Perimeter Island Place the Docking Station on level ground. Do not place the Docking Station on a slopping ground. See figure 1.6.
- Page 14 • The RoboMower is impervious to water and rain, however it is recommended to place the Docking Station away from sprinkler heads for maximum protection. See figure 1.7 Figure 1.7 – Avoid Placement Near Water Sprinklers Now, knowing the location of the Docking Station, you can begin to setup the Perimeter Wire in the docking zone.
- Page 15 WARNING! Damage to the eye is possible. Use proper eye protection and wear appropriate work gloves when hammering the pegs. Hard or dry ground may cause pegs to break when driving them in. In extreme cases, watering the lawn where the pegs will be driven can be beneficial.
- Page 16 Add pegs in to pull the perimeter wire down to the ground surface, below the Perimeter Wire grass tips. Figure 1.10 – Pegging the Perimeter Wire 1.6 Corners & Sharp Turns Care must be taken not to create a corner sharper than 90 degrees when setting up the perimeter wire. A corner sharper than 90 degrees can cause the RoboMower to lose track of the perimeter wire.
- Page 17 1.8 Defining Obstacles-Perimeter Islands Many obstacles can be left in the lawn without consideration to excluding them using the perimeter wire. The basic rule of thumb is that the obstacle must be at least 6 inches (15 cm) high from the ground and the obstacle must be relatively rigid.
- Page 18 Figure 1.13 – Perimeter Wire Setup Distances for Obstacles Tree too close to perimeter, less than 4 Trees large enough to allow Small tree, must feet (1.2m), loop out with RoboMower to bump into do not exclude with perimeter perimeter wire require a perimeter wire around it wire Minimum distance...
- Page 19 1.9 Multiple Zones/Areas As mentioned earlier, your home may require more than one zone to be set up in order for the RoboMower to work in all of your lawn effectively. Having two or even three zones does not affect the efficiency of the RoboMower and in many circumstances is more desirable than one large zone.
- Page 20 1.10 Slopes As a general rule of thumb, any slope that can safely be cut using a walk behind mower can also be cut using the RoboMower in the automatic mode. The maximum slope limit is 15 degrees, the same as a traditional walk behind mower.
Need help?
Do you have a question about the RoboMower RL1000 and is the answer not in the manual?
Questions and answers