Table of Contents
Advertisement
Quick Links
Advertisement
Table of Contents

Related Manuals for First Alert C-RED 2


Summary of Contents for First Alert C-RED 2
- Page 1 C-RED 2 & C-RED 2 ER Quick Start Manual C-RED 2 – C-RED 2 ER Quick Start_20230315...
-
Page 2: Symbols And Indications
Thank you for choosing a C-RED camera! C-RED 2 and C-RED 2 ER features and performances are described in detail within their respective User Manual, that you can find on your USB key or on your First Light Library: https://www.first-light- imaging.com/my-library/... - Page 3 4. WARNINGS General warnings The equipment must be plugged on an electrical wiring compliant with the relevant standards in the country (in France: NFC 15-100). This wiring must be protected from overcurrent, overvoltage and ground defaults. Equipments connected must be compliant with the EN 60950-1 Ed.2006 standard, or to their own standards. The power cable plug serves as a disconnection device and should be easily accessible.
-
Page 4: Contents Of Package
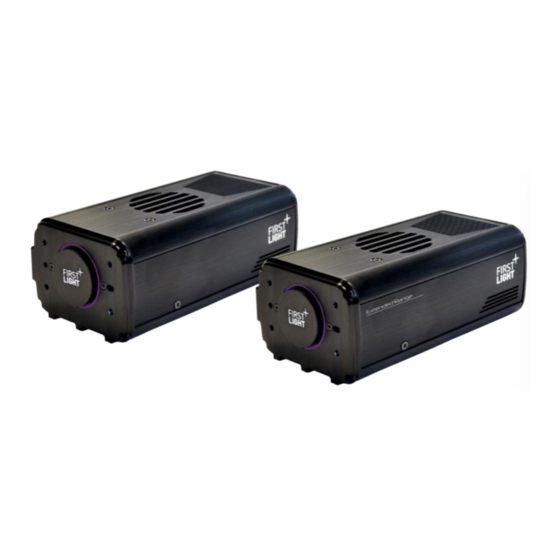
6. CONTENTS OF PACKAGE* C-RED 2 / C-RED 2 ER Camera Pack Item name Quantity Picture Camera Power supply Power cable USB-C to USB-A cable Quick coupling set USB key with User manual + Demo software + Test report Quick start Manual Accessories Please note that accessories can be ordered separately. -
Page 5: Camera Description And Start Up
With the following conditions liquid cooling (1) allows to cool the detector down to nominal -40°C (for C-RED 2 and C-RED 2 ER 1.9µm) or – 55°C (for C-RED 2 ER 2.2µm). Water cooling with water at 35°C requires the fan to run a little bit, even at minimum speed. - Page 6 Setting up the Quick coupling set Installing the Hydraulic Quick coupling set must be done very carefully to avoid damaging the insert at the back of the camera. To do so, we recommend using a torque screwdriver. Using a 13 mm square drive socket, a maximum tightening torque of 2.5 N.m must be applied.
- Page 7 Data connection The camera can operate either with Camera Link or USB-3.1 Gen 1. ® Camera Link connection (2) ® The camera is compliant with Camera Link Full and requires two data cables with male SDR-26 Mini ® Camera Link connectors.
-
Page 8: Powering Up/Down
8. POWERING UP/DOWN Power ON: When the power LEMO is connected to the camera, and the power supply to the line plug, the camera is ON. Power OFF: Please use the CLI command “shutdown” from a simple terminal before turning off the camera. First unplug the power supply from the line plug, then unplug the LEMO cable from the camera. - Page 9 10. C-RED 2 OPERATION By default, the camera operates in CDS mode. C-RED 2 can also operate in IMRO mode. The camera can operate in full frame or in cropping mode. Integration/readout function The acquisition speed can be set to any value from 0.001 to 600 fps.
- Page 10 Factory correction (C-RED 2 ER 2.2 µm) Factory correction can be done on-the-fly by the camera. This feature is only available for C-RED 2 ER 2.2µm. The correction file is loaded in the camera during the calibration of the camera, in factory. It enables the compensation of the extended range artefacts.
-
Page 11: Maintenance
12. PRECAUTIONS C-RED 2 and C-RED 2 ER are high end scientific instruments and should not be exposed to shocks, extreme temperatures, humidity, dusty environment, and static shocks. Any electronic equipment that is connected to C-RED 2 or C-RED 2 ER should be fitted with appropriate protection on all power lines. - Page 12 14. CONTACTS For the USA: FIRST LIGHT IMAGING Corp. 185 Alewife Brook Parkway, Ste 210 Cambridge, MA 02138 Tel.: + 33 4 42 61 29 20 E-mail: support@first-light.fr Website: www.first-light-imaging.com For the rest of the world: FIRST LIGHT IMAGING SAS Europarc Sainte Victoire, Bât.
- Page 13 Notes...
Need help?
Do you have a question about the C-RED 2 and is the answer not in the manual?
Questions and answers