Table of Contents
Advertisement
Quick Links
ORIGIINAL INSTRUCTIONS
INSTRUCTION MANUAL
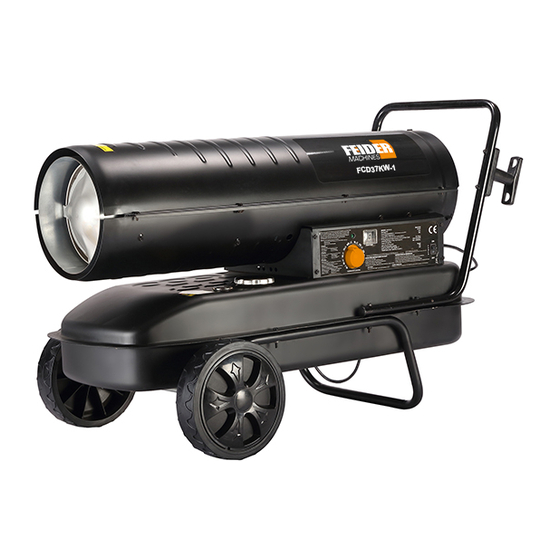
Diesel heater 37KW
FCD37KW-1
BUILDER SAS
ZI-32, rue Aristide Bergès, 31270 Cugnaux, France
MADE IN PRC
IMPORTANT:
Read and understand all of the directions in this manual before assembling, starting, or servicing the
heater. Improper use of this heater can cause serious injury.Keep this manual for future reference, not
Retain this manual for future reference.
suitable for use wood floors or other combustible materials.
1
Advertisement
Table of Contents

Related Manuals for Feider Machines FCD37KW-1

Summary of Contents for Feider Machines FCD37KW-1
- Page 1 ORIGIINAL INSTRUCTIONS INSTRUCTION MANUAL Diesel heater 37KW FCD37KW-1 BUILDER SAS ZI-32, rue Aristide Bergès, 31270 Cugnaux, France MADE IN PRC IMPORTANT: Read and understand all of the directions in this manual before assembling, starting, or servicing the heater. Improper use of this heater can cause serious injury.Keep this manual for future reference, not Retain this manual for future reference.
-
Page 2: Table Of Contents
ORIGIINAL INSTRUCTIONS Table of Contents 1. Safety information......................3 2. Features..........................5 3. Specification........................6 4. Unpacking...........................6 5. Assembly..........................7 6. Operation..........................8 7. Ventilation..........................9 8. Long Tern Storage......................11 9. Maintenance........................12 10. Wiring Diagrams......................16 11. Troubleshooting.......................16 12. DECLARATION OF CONFORMITY................18 13. -
Page 3: Safety Information
ORIGIINAL INSTRUCTIONS 1. Safety Information NEVER LEAVE HEATER UNATTENDED WHILE BURNING OR WHILE COONECTED TO A POWER SOURCE! Indicates an imminently hazardous. Situation which, if not avoided, WILL result in death or serious injury. Indicates an potentially hazardous. situation which, if not avoided, COULD result in death or serious injury. Indicates an potentially hazardous. - Page 4 ORIGIINAL INSTRUCTIONS rectification or electrical work including the connection of a plug must be carried out by a qualified electrician. You must also comply with electrical safety requirements including the Electricity at Work Act 1989 which requires portable electrical appliances used on business premises be PAT tested annually. The Health &...
-
Page 5: Features
ORIGIINAL INSTRUCTIONS -NEVER move or handle heater while still hot. -NEVER transport heater with fuel in its tank. -If equipped with a thermostat, the heater may start at any time. -ALWAYS locate heater on a stable and level surface. -ALWAYS keep children and animals away from heater. -Bulk fuel storage should be a minimum of 762cm from heaters, torches, portable generators or other sources of ignition. -
Page 6: Specification
ORIGIINAL INSTRUCTIONS 3. Specifications FCD37KW-1 Model Heat Output (KW) Fuel Consumption (L/Hr) Fuel Tank Capacity Pump Pressure 38.0/5.5 (Kpa/Psi) Power Supply 220-240/50/5 (V/Hz/A) Phase single Size 105*54.2 (L*W*H CM) Net Weight (Kgs) 23.1 62.0 cm 120.0 cm 60.0 cm Fig.2 4. -
Page 7: Assembly
ORIGIINAL INSTRUCTIONS Fig.3 Fig.4 5. Assembly ASSEMBLING CORDWRAP 1) .Insert tabs on cord wrap into slots in shell support, lining up the holes on the cord wrap with those on the side cover. 2) Insert and tighten screws securely with screw driver. -Tools required: Medium Phillips screw driver, 5/16’... -
Page 8: Operation
ORIGIINAL INSTRUCTIONS Fig.5 6. Operation Diesel (1-K Kerosene) For optimal performance of this heater, it is strongly suggested that 1-K kerosene be used, 1-K kerosene has been refined to virtually eliminate contaminants, such as sulfur. Which can cause a rotten egg odor during the operation of the heater, However, #1 or #2 fuel oil - Diesel may also be used if 1-K kerosene is not available. -
Page 9: Ventilation
ORIGIINAL INSTRUCTIONS burner head. Air also passes through the nozzle where it mixes with the fuel and is sprayed into the combustion chamber in a fine mist. Quick-Fire Ignition: A transformer sends high voltage to a two pronged spark plug. The spark ignition the fuel/air mixture as it is sprayed into the combustion chamber. - Page 10 ORIGIINAL INSTRUCTIONS be at least six feet (1.8 meters) long. -Extension cord wire size requirements are as follows: -6 to 10 feet(1.8 to 3 meters),use 18 AWG wire. -11 to 100 feet(3.4 to 30.4 meters),use 16 AWG wire. -101 to 200 feet (30.8 to 61 meters ), use 14 AWG wire. 4.Turn thermostat control knob to desired temperature setting The setting range is from 40°F to 110 °F.
-
Page 11: Long Tern Storage
ORIGIINAL INSTRUCTIONS Fig 7.for Drain Plug Removal 8. LONG TERM STORAGE Drain Fuel Tank 1) drain fuel through the Drain Plug at the bottom of the fuel tank. To remove the Drain plug, Pull the plug grip downward and remove seal head from drain hole tank. -
Page 12: Maintenance
ORIGIINAL INSTRUCTIONS 9. Maintenance WARNING Never service heater while it is plugged in or while hot! Use only original equipment replacement parts. The use of alternate or third party components can cause unsafe operating conditions ,and will void your warranty. We suggest following a maintenance schedule as follows: FUEL/FUELTANK Flush every 200 hours of operation or as needed. - Page 13 ORIGIINAL INSTRUCTIONS Figure 10. Nozzle Replacement. NOTE:Use of Diesel (1-K Kerosene) may require additional maintenance. Using this heater without proper maintenance or with contaminated or old fuel may lead to improper combustion and possible soot production. BE SURE FUEL USED IS APPROVED. SPARK PLUG: Clean and re-gap every 600 hours of operation, or replace as needed.
- Page 14 ORIGIINAL INSTRUCTIONS Figure 11. Spark plug Replacement PHOTOCELL: The Photocell should be cleaned at least once per heating season or more depending on condition. Use a cotton swap dipped in water or alcohol to clean the lens of the photocell. Note the proper photocell position as noted in Figure 12 Figure 12.
- Page 15 While heater is operating, turn relief valve clockwise to increase. Counterclockwise to decrease (see Figure 14). Use flat blade screw driver to turn valve. Correct pump pressure is as follows Model# Pump Pressure(Kpa/Psi) FCD37KW-1 38.0/5.5 Tolerance +/-10% Figure 14. Pump pressure adjustment...
-
Page 16: Wiring Diagrams
ORIGIINAL INSTRUCTIONS 10. Wiring Diagrams 11. Troubleshooting Guide Possible Cause Solution Heater fires, but main PCB 1.Incorrect pump pressure. Adjust pump Pressure shuts heater off after a short 2.Dirty input output or lint filter Clean/replace air filter period of time lame is 3.Dirty fuel filter. - Page 17 ORIGIINAL INSTRUCTIONS Heater will not operate, or 1. No Diesel in fuel tank. Fill tank with fresh Diesel motor runs for short time, 2. Incorrect pump pressure. Adjust pump pressure Lamp flickers and LED 3.Corroded spark plug or incorrect Clean/replace spark plug display shows”E1”(1flash) plug gap.
-
Page 18: Declaration Of Conformity
BUILDER SAS ZI, 32 RUE ARISTIDE BERGES – 312070 CUGNAUX – FRANCE Declare that the machine designated below: Diesel heater 37KW ModeL : FCD37KW-1 S/N: 20200821480-20200821659 Complies with the provisions of the following European directives: LVD Directive 2014/35 / EU... -
Page 19: Warranty
13. WARRANTY WARRANTY The manufacturer guarantees the product against defects in material and workmanship for a period of 2 years from the date of the original purchase. The warranty only applies if the product is for household use. The warranty does not cover breakdowns due to normal wear and tear. The manufacturer agrees to replace parts identified as defective by the designated distributor. -
Page 20: Product Failure
14. PRODUCT FAILURE WHAT TO DO IF MY MACHINE BREAKS DOWN? If you bought your product in a store: a) Empty the fuel tank. b) Make sure that your machine is complete with all accessories supplied, and clean! If this is not the case, the repairer will refuse the machine. -
Page 21: Warranty Exclusions
15. WARRANTY EXCLUSIONS THE WARRANTY DOES NOT COVER: • Start-up and setting up of the product. • Damage resulting from normal wear and tear of the product. • Damage resulting from improper use of the product. • Damage resulting from assembly or start-up not in accordance with the user manual. •...
Need help?
Do you have a question about the FCD37KW-1 and is the answer not in the manual?
Questions and answers