Table of Contents
Advertisement
Quick Links
Advertisement
Table of Contents

Summary of Contents for SECURICO GALAXY 4016 GSM A6
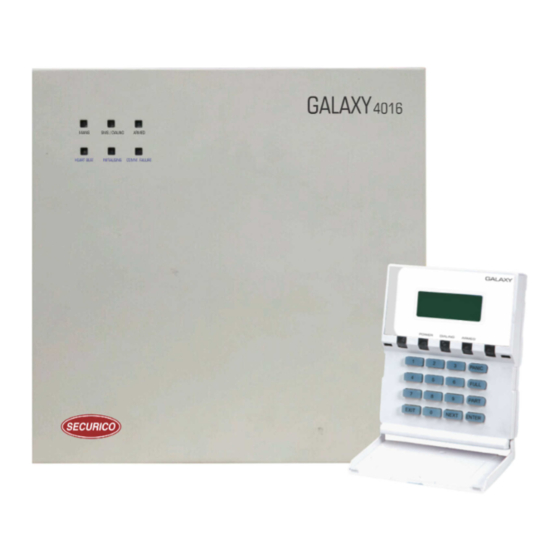
- Page 1 GALAXY 4016 GSM A6 / A7 USER MANUAL...
- Page 2 GALAXY 4016 GSM Document No.: Please read this manual carefully before operating your security system and retain it for future reference. If you have any questions related to our products, kindly write to us at support@securicoelectronics.com. WARRANTY This product is sold subject our standard warranty conditions and is warranted against defects in workmanship for a period of one year.
- Page 3 Solutions including Intruder Alarms, CCTV Systems, Fire Alarms, Video Door Phones, Energy Saving Devices and a State of the Art 24X7 Video & Alarm Monitoring Station. Securico is the chosen brand of more than 3000 security system integrators in over 250 cities across India. With a highly qualified in house R&D team and modern manufacturing plant, Securico is...
- Page 4 GALAXY 4016 GSM FEATURES Micro-controller based Ÿ 04 / 12 wired zones control panel Ÿ Can connect wireless sensors by adding wireless Ÿ receiver module (only in A6 model) Inbuilt GSM based speech and SMS dialer module Ÿ Separate remote key pad with 16x4 LCD display and 16 key Ÿ...
- Page 5 Daily System On health status SMS sent once a day to Ÿ admin user on first number Power status SMS for AC power on/off, low battery Ÿ User editable name and address for alarm SMS Ÿ Message playback Ÿ Android App is SMS based, no internet required for daily use Ÿ...
- Page 6 GALAXY 4016 GSM System goes into alarm state after three incorrect code Ÿ attempts Previous state (armed or disarmed) retained when panel is Ÿ re-powered Independent entry delay time 2 to 255 seconds Ÿ Independent exit delay time 2 to 255 seconds Ÿ...
-
Page 7: Table Of Contents
CONTENTS GETTING STARTED GET TO KNOW YOUR GALAXY CONFIGURATION 1-2-1 PREVIOUS SETTING MODE 1-2-2 FACTORY SETTING MODE FACTORY SETTING SYSTEM STATUS OPERATING PROCEDURES ZONES OPERATING PROCEDURE 1 - THROUGH REMOTE KEY PAD TO ARM THE SYSTEM 2-1-1 FULL ARMING 2-1-2 NIGHT ARMING 2-1-3 SILENT ARMING... - Page 8 GALAXY 4016 GSM TIMER SETTING 2-8-1 ENTRY TIME 2-8-2 EXIT TIME 2-8-3 SOUNDER TIME AUTO OPERATION 2-9-1 ARMING TIME 2-9-2 DISARMING TIME 2-9-3 SET HOLIDAY 2-10 TEXT SMS 2-11 BUTTONS ON THE KEY PAD 2-11-1 PANIC BUTTON 2-11-2 FIRE ALARM OPERATING PROCEDURE 2 - THROUGH SMS FULL ARM THE SYSTEM DISARM THE SYSTEM...
- Page 9 3-8-2 EDIT FIRE NUMBERS EDIT NAME AND ADDRESS 3-10 ALARM RESET 3-11 SOUNDER STOP 3-12 RECORD VOICE MESSAGE 3-12-1 RECORD INTRUSION VOICE MESSAGE 3-12-2 RECORD FIRE VOICE MESSAGE 3-13 PLAY VOICE MESSAGE 3-13-1 PLAY INTRUSION VOICE MESSAGE 3-13-2 PLAY FIRE VOICE MESSAGE OPERATING PROCEDURE 3 - THROUGH MOBILE APP OTHER USEFUL INFORMATION...
-
Page 10: Getting Started
GALAXY 4016 GSM 1 - GETTING STARTED 1-1 GET TO KNOW YOUR GALAXY FRONT VIEW BACK VIEW... - Page 11 FRONT VIEW 1. On Screen LCD Display with back light 2. Armed Indication LED 3. Dialing Indication LED 4. Power Indication LED 5. Panic Button - Onboard Panic Switch 6. Full Button - For full arming 7. Enter Button 8. Next Button 9.
-
Page 12: Configuration
GALAXY 4016 GSM 1-2 CONFIGURATION The Remote Keypad(s) must be connected to the main control station prior to connecting it to a power supply. When the Remote Key Pad is connected to the main control station, the screen will display: GALAXY 1- PREVIOUS SETTING... -
Page 13: Factory Setting
The screen will display: GALAXY 00:00 SUN 01 JAN POWER DIALING ARMED 1-2-2 FACTORY SETTING MODE Press FACTORY SETTING , The system will reset to Factory Setting Mode. GALAXY RESTORING FACTORY SETTINGS POWER DIALING ARMED GALAXY UPDATING DATA... POWER DIALING ARMED (In this MODE, system will reset to Factory Default Settings.) - Page 14 USER 1 : 11 FACTORY SETTINGS: ADMIN CODE : ENTER + 00 + 1234 USER 1 CODE : ENTER + 11 + 1234 (Only in A6 model) GALAXY 4016 GSM A6 ZONE DETAILS ZONE NO DESCRIPTION USER SIREN / SILENT...
-
Page 15: System Status
GALAXY 4016 GSM A7 ZONE DETAILS ZONE NO DESCRIPTION USER SIREN / SILENT Zone 1 Delay (D1) ADMIN/USER-1 SIREN / SILEN Zone 4 Immediate (I1) ADMIN/USER-1 SIREN / SILENT Zone 15 Panic (P1) ADMIN SIREN Zone 17 Fire (F1) ADMIN SIREN Zone 24 Tamper (TAMP) -
Page 16: Zones
GALAXY 4016 GSM 1-6 ZONES There are six types of zones in the control panel: ENTRY/EXIT (also called Delay): An entry/exit zone will actively raise an alarm only if the system is armed. However, an entry / exit zone allows for a programmed delay during which the user can enter the code and prevent the alarm from sounding. -
Page 17: Through Remote Key Pad
2 - OPERATING PROCEDURE 1 - THROUGH REMOTE KEY PAD 2-1 TO ARM THE SYSTEM Arming options: FULL ARM: The system is fully armed when all existing zones have been armed. 2-1-1 FULL ARMING Press ENTER Press FULL All zones will be armed and the screen will display: GALAXY 22:30 SUN 01 JAN... -
Page 18: Night Arming 1
GALAXY 4016 GSM 2-1-2 NIGHT ARMING This unique feature enables you to temporarily make all delay (entry/ exit) zones into immediate zones. In the case that all users are within the premises when the system is armed at night and no delay zones are required, the Night Arming feature can be used. -
Page 19: To Disarm The System
All the zones will be armed silently and the screen will display : GALAXY 22:30 MON 01 JAN FULL ARM POWER DIALING ARMED 2-2 TO DISARM THE SYSTEM Press ENTER+00ADMIN CODE to disarm all zones Important : If the system is in alarm state, ENTER+00ADMIN CODE has to be entered twice. -
Page 20: Omit Zones & Arm System
GALAXY 4016 GSM CHANGE CODE SET TIME & DATE TIMER SETTING AUTO OPERATION PLAY & RECORD MESSAGES To select a menu option, scroll down using the NEXT button and press ENTER To skip and go to the next menu option press NEXT To skip and go to the previous menu option press 0 To exit the menu and return to Day Mode, press EXIT 2-4 OMIT ZONES &... - Page 21 Select the window number as per the zone number you wish to omit. Example: If you want omit zones from zone number 01 to 15 PRESS 1 to select window 1 The display will change to: GALAXY WINDOW 1 ZN01 - 15 POWER DIALING ARMED...
-
Page 22: Intrusion Log
GALAXY 4016 GSM The display will change to: GALAXY PRESS FULL POWER DIALING ARMED Press FULL to omit zones and full arm panel. The display will change to: GALAXY GALAXY 22:30 SUN 01 JAN 22:30 SUN 01 JAN ARMING... FULL ARM POWER DIALING ARMED... -
Page 23: Change Code
Press 1 GALAXY PAGE 001 023I 17:22 110117 023C 17:10 110117 002I 18:00 110117 POWER DIALING ARMED Press NEXT to shift on the next page. To skip and go to the previous menu option press 0 Last 500 intrusions can be checked with time and date. The screen will display the last triggered zone on the second line. - Page 24 GALAXY 4016 GSM GALAXY CHANGE CODE 1 - ADMIN CODE POWER DIALING ARMED Press to change ADMIN CODE The screen will display: GALAXY NEW ADMIN CODE POWER DIALING ARMED Note: The code must be 4 digits numerical. The screen will display: GALAXY RE-ENTER CODE POWER...
-
Page 25: Change User Code
2-6-2 CHANGE USER CODE (ONL Y IN A16 MODEL) This option allows user to change their user codes. There are 1 user in this panel and user can change only their code. Enter previous code GALAXY CHANGE CODE POWER DIALING ARMED PRESS ENTER GALAXY... -
Page 26: Set Time & Date
GALAXY 4016 GSM Note: If both new entered codes are not same, an error message will be displayed and the code will not be changed. The screen will display: GALAXY PASSWORD NOT MATCHED PLEASE TRY AGAIN POWER DIALING ARMED 2-7 SET TIME & DATE 2-7-1 SET TIME The RKP screen displays the time and date at all times. -
Page 27: Set Date
Use numeric keys to enter hours and minutes. Press NEXT to move to the next digit after entering each digit To go to the previous digit option press 0 Press ENTER to confirm. 2-7-2 SET DATE GALAXY SET TIME & DATE 1-SET TIME 2-SET DATE POWER... -
Page 28: Timer Setting
GALAXY 4016 GSM 2-8 TIMER SETTING GALAXY TIMER SETTING POWER DIALING ARMED Press ENTER The screen will display: GALAXY TIMER SETTING 1-ENTRY TIME 2-EXIT TIME 3-SOUNDER TIME POWER DIALING ARMED ENTRY TIME: The entry time is the time the user has to enter the code before the alarm sounds when entering from an entry / exit (delay) zone. -
Page 29: Entry Time
2-8-1 ENTRY TIME GALAXY TIMER SETTING 1-ENTRY TIME 2-EXIT TIME 3-SOUNDER TIME POWER DIALING ARMED Press ENTRY TIME The screen will display: GALAXY ENTRY TIME ENTER 2-255 SECONDS POWER DIALING ARMED Enter a time between seconds for ENTRY TIME Press ENTER to confirm 2-8-2 EXIT TIME... -
Page 30: Sounder Time
GALAXY 4016 GSM Enter time between seconds for EXIT TIME Press ENTER to confirm 2-8-3 SOUNDER TIME GALAXY TIMER SETTING 1-ENTRY TIME 2-EXIT TIME 3-SOUNDER TIME POWER DIALING ARMED Press SOUNDER TIME The screen will display: GALAXY SOUNDER TIME ENTER 2-20 MINUTES POWER DIALING... -
Page 31: Arming Time
GALAXY AUTO OPERATION POWER DIALING ARMED Press ENTER The screen will display: GALAXY AUTO OPERATION 1-ARMING TIME 2-DISARMING TIME 3-SET HOLIDAY POWER DIALING ARMED Press AUTOMATIC ARMING TIME Press AUTOMATIC DISARMING TIME Press SET HOLIDAY 2-9-1 ARMING TIME Press to set AUTOMATIC ARMING TIME The screen will display GALAXY... -
Page 32: Disarming Time
GALAXY 4016 GSM FULL PART keys to toggle between ENABLE DISABLE. This will either enable or disable automatic arming. Press ENTER to confirm 2-9-2 DISARMING TIME GALAXY AUTO OPERATION 1-ARMING TIME 2-DISARMING TIME 3-SET HOLIDAY POWER DIALING ARMED Press to set AUTOMATIC DISARMING Follow the same procedure as automatic arming to set the disarming time and enable / disable function. -
Page 33: Text Sms
Use the NEXT button to move the cursor to ENABLE / DISABLE. FULL PART keys to toggle between ENABLE DISABLE. Press ENTER to confirm 2-10 TEXT SMS GALAXY GSM sends out two types of TEXT SMS: ALARM STATUS. Alarm are sent to all numbers where as Status are sent to the first number of intrusion only. -
Page 34: Buttons On The Key Pad
GALAXY 4016 GSM 2-11 BUTTONS ON THE KEY PAD 2-11-1 PANIC BUTTON The remote key pad has an onboard panic alarm activation. To trigger the panic alarm: Press ENTER Press PANIC 2-11-2 FIRE ALARM The remote key pad has an onboard fire alarm activation. To trigger the fire alarm: Press NEXT Press 3/FIRE... -
Page 35: Full Arm The System
3-1 FULL ARM THE SYSTEM < ADMINCODE >< SPACE >< FULL > New message < SPACE > <ARM >< SPACE >< > CONTROL PANEL NUMBER Example: 1234 FULL ARM END † Refer to the illustration of the mobile phone screen for sample text message £... -
Page 36: Change Delay Time
GALAXY 4016 GSM 3-4 CHANGE DELAY TIME 3-4-1 CHANGE ENTRY TIME < ADMIN CODE >< SPACE >< ENTRY > <SPACE >< TIME >< SPACE >< #XXX* > < SPACE >< > XXX = Time in seconds from 002 to 255 New message CONTROL PANEL NUMBER Example:... -
Page 37: Set Auto Operation
New message XX = Time in minutes (02-20 minutes) CONTROL PANEL NUMBER Example: 1234 SOUNDER TIME #04* END Refer to the illustration of the mobile phone † screen for sample text message to £ ³ ENTER program the sounder time to 04 minutes. 3-6 SET AUTO OPERATION 3-6-1 SET AUTOMATIC ARMING <... -
Page 38: Set Holiday
GALAXY 4016 GSM HH:MM = Time in HH:MM (24 hour format) FOR ENABLE FOR DISABLE New message CONTROL PANEL NUMBER Example: Refer to the illustration of the mobile 1234 AUTO DISARM #06:30* ENA END † phone screen for sample text message to program the automatic disarming enable £... -
Page 39: Edit Numbers
= ZONE NO SS:TT = Start time in HH:MM (24 hour format) HH:MM = End time in HH:MM (24 hour format) = Sounder Enable / Disable N = Sounder Disable Y = Sounder Enable = Schedule Enable / Disable N = Schedule Disable Y = Schedule Enable Example: ... - Page 40 GALAXY 4016 GSM REMOVE ONE SAVED TELEPHONE NUMBER IN INTRUSION This option is used to remove one saved telephone number in intrusion. < ADMIN CODE >< SPACE >< > < SPACE >< >< SPACE >< INTRUSION > < SPACE >< #XX-REMOVE* ><...
-
Page 41: Edit Fire Numbers
3-8-2 EDIT FIRE NUMBERS < ADMIN CODE >< SPACE >< > < SPACE >< >< SPACE >< FIRE > < SPACE >< #YY-XXXXXXXXXX* > < SPACE >< > YY = Phone no. location (01, 02, 03..10) XXXXXXXXXX = 10 digits mobile number. ... -
Page 42: Edit Name And Address
Refer to the illustration of the mobile 1234 NAME ADDRESS #SECURICO ELECTRONICS* END phone screen for sample text message to † set a address (securico electronics) be £ ³ incorporated in all SMS sent by the panel. ENTER 3-10 ALARM RESET... -
Page 43: Sounder Stop
3-11 SOUNDER STOP This message is to used only to stop the sounders only in case of an alarm. < ADMIN CODE >< SPACE >< SOUNDER > New message < SPACE >< >< SPACE >< > CONTROL PANEL NUMBER Example: 1234 SOUNDER OFF †... -
Page 44: Record Fire Voice Message
GALAXY 4016 GSM 3-12-2 RECORD FIRE VOICE MESSAGE This function allows the user to record or re-record the fire voice message. < ADMIN CODE >< SPACE >< RECO > < SPACE >< FIRE >< SPACE >< > New message <... -
Page 45: Play Fire Voice Message
3-13-2 PLAY FIRE VOICE MESSAGE This function allows the user to listen to the recorded fire voice message. < ADMIN CODE >< SPACE >< PLAY > < SPACE >< FIRE > < SPACE > < > New message CONTROL PANEL NUMBER <... -
Page 46: Key Pad And Lcd Lighting
GALAXY 4016 GSM GALAXY 1- PREVIOUS SETTING 2- FACTORY SETTING POWER DIALING ARMED Press 2 The panel will reset to factory settings and the ADMIN CODE will be reset to 1234. Note: The programmed messages and telephone numbers stored in the panel will not be erased when the panel is reset to factory settings. -
Page 47: Active Zone
power failure. In case of complete power failure (AC and battery), when the system restarts, an option to retrieve previous settings or to reset to factory settings is given. Following information is retrieved in this case: 1. Arm or Disarm status 2. -
Page 48: Technical Specifications
GALAXY 4016 GSM BYPASS PANIC, FIRE and TAMPER on following the below steps : Press ENTER Press EXIT 6 - TECHNICAL SPECIFICATIONS ELECTRICAL REMOTE KEY PAD ONL Y Quiescent current : 30 mA Max. Quiescent current with backlit LCD : 90 mA Max. MAIN CONTROL STATION WITH ONE REMOTE KEY PAD Quiescent current : 100 mA Quiescent current with backlit LCD : 360 mA... - Page 49 ENVIRONMENTAL Operating Temperature : 0C to 45C Storage Temperature : -20C to 60C PHYSICAL REMOTE KEY PAD Dimensions : 310mm x 315mm x 100mm MAIN CONTROL ENVIRONMENTAL Operating Temperature : 0C to 45C Storage Temperature : -20C to 60C PHYSICAL REMOTE KEY PAD Dimensions : 150mm x 121mm x 33mm MAIN CONTROL STATION...
- Page 50 GALAXY 4016 GSM 7 - CONNECTIVITY GALAXY 4016 GSM A6 CONTR0L PANEL +D1- ZONE No. 1 Devices (Short with jumper if not applicable) +D2- ZONE No. 2 Devices (Short with jumper if not applicable) +D3- ZONE No. 3 Devices (Short with jumper if not applicable) +I1- ZONE No.
- Page 51 15) +AUX- 12V DC supply for Sensors & Remote Key Pads A of Remote Key Pads B of Remote Key Pads REMOTE KEY PAD A To RA of Control Panel B To RB of Control Panel ‘+’ / ‘-’ + AUX- in the Control Panel. TAMP Tamper circuit in the Control Panel GALAXY 4016 GSM A7 CONTR0L PANEL...
-
Page 52: Connection Diagram
GALAXY 4016 GSM 8 - CONNECTION DIAGRAM GALAXY 4016 GSM A6 CONTR0L PANEL +HT- +P1- +P2- +F1- +F2- +TMPR- RA RB +AUX- +AUX- REMOTE KEYPAD GALAXY 4016 GSM A7 CONTR0L PANEL +D1- +I1- +P1- +F1- +HT- +TAMP- RA RB +AUX-... - Page 53 Dialers Systems Securico Electronics India Limited Securico House, Plot No. 4, 14/3, Delhi-Mathura Road, Faridabad - 121003, Haryana, India Tel.:+91-129-4270000 | Email: info@securicoelectronics.com w w w . s e c u r i c o e l e c t r o n i c s . c o m...
Need help?
Do you have a question about the GALAXY 4016 GSM A6 and is the answer not in the manual?
Questions and answers