
Related Manuals for Lavex 687FM3509LY

Summary of Contents for Lavex 687FM3509LY
- Page 1 INSTRUCTION MANUAL READ ENTIRE MANUAL BEFORE USE AIR CURTAIN MODELS: #687FM3509LY 08/2022 Lavex Industrial • 2205 Old Philadelphia Pike • Lancaster, PA 17602...
-
Page 2: Table Of Contents
WARNING TO REDUCE THE RISK OF FIRE, ELECTRIC SHOCK, OR INJURY TO PERSONS, OBSERVE THE FOLLOWING: A. Always disconnect, lock, and tag power source before installing or servicing. Failure to disconnect power source can result in fire, shock, or serious injury. B. -
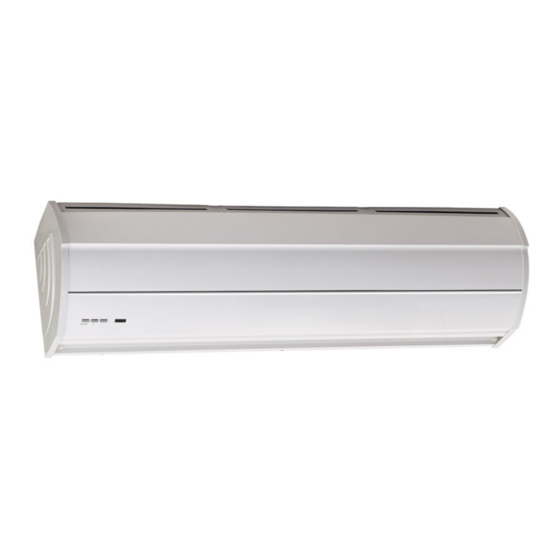
Page 3: Product Introduction
They can reduce penetration of insects, dust, and unconditioned air into a conditioned space by forcing an air stream over the entire entrance to create a comfortable environment. INSTALLATION DIMENSIONS UNIT MEASUREMENTS (INCHES): MODEL 687FM3509LY 35.43 27.36 2.91 3.94 8.46 9.06... -
Page 4: Installation Cautions
INSTALLATION CAUTIONS Observe the following when installing air curtains: Please install the unit on a firm supporting Please install the unit inside the room. structure. The mounting plate should be mounted to at least one wall stud to avoid shaking and to ensure its security as the unit running may cause it to become loose or shake and make noise. -
Page 5: Installation Instructions
INSTALLATION INSTRUCTIONS A. Installing on a concrete wall: Unscrew the mounting plate and remove Determine the mounting location with it from the back of the main body. the mounting plate. Fix the bolts in place and pour cement into the bolt holes. Tighten the nuts to secure the mounting Mount the main body onto the mounting plate to the wall after cement has set. - Page 6 C. Installing on a ceiling: Remove the mounting plate from the back Fix the ceiling brackets as shown below. of the main body. Fix the mounting plate to the ceiling brackets Mount the main body onto the mounting and tighten it securely as shown below. plate as shown below and screw it back The position of the mounting plate can be to the mounting plate.
-
Page 7: Technical Parameters
FREQ (dB) MODEL WEIGHT (m/s) (Hz) (LB) 687FM3509LY 1100 28.66 NOTE: Technical parameters are subject to change without notice due to product development. WIRING DIAGRAM *Door Switch: The installation of magnetic door contact door switch is optional. OPERATING INSTRUCTIONS 1. Connect power to the unit. -
Page 8: Maintenance And Cleaning
MAINTENANCE AND CLEANING WARNING A. Any service is to be performed only by qualified personnel who are familiar with local codes and regulations and are experienced with this type of product. B. Always unplug or disconnect the appliance from the power supply before servicing or cleaning the unit.