Table of Contents
Advertisement
Quick Links
Advertisement
Table of Contents

Summary of Contents for Stumpfl PIXERA four
- Page 1 NEXT GENERATION MEDIA SERVER PIXERA four MANUAL English | 2020-09 | V20...
-
Page 3: Table Of Contents
Table of Contents Important Information............................. 5 Identifying the product and other information ....................5 General information about this instruction manual ................... 5 Safety information ............................... 6 Installation on site ............................... 7 Initial installation ..............................9 Operation, maintenance, modifications, cleaning and disassembly ..............10 Instructions for disposal ............................ - Page 4 CLI programs to change screen resolution, setup mosaic and set sync ............44 Resetting the Operating System ........................45 Making Updates ..............................45 Servicing ................................. 46 Replacing the power supply ..........................46 Backlight ON/OFF .............................. 47 AV Stumpfl contact ..............................48 Imprint ................................48 Declaration of Conformity ............................. 49...
-
Page 5: Important Information
Important Information Identifying the product and other information This instruction manual relates to media server and media player systems from AV Stumpfl GmbH. The model designation and serial number are located on the media server’s serial number tag. The serial number tag is located on the back of the unit. -
Page 6: Safety Information
Safety information The safety information in this instruction manual can be broken down into the following categories: WARNING is used for hazards that could result in death or serious injuries. CAUTION is used for hazards that could result in minor injuries. ... -
Page 7: Installation On Site
Installation on site Checking for transport damages Check the packaging and the media server system for possible damage that could have arisen during transport. If you find damage, please report it immediately to your vendor or AV Stumpfl GmbH. IMPORTANT! Add-on cards can sometimes become partially detached from their slots during transport. - Page 8 Installation on site AV Stumpfl GmbH recommends installing the server in an air-conditioned server room. Select a site that is: Clean, dry and free of particles in the air (except for normal dust). Not near sources that cause vibrations or shaking.
-
Page 9: Initial Installation
Initial installation Notes for rack system installations Install a line disconnector for the entire rack system. This line disconnector must be easily accessible and have a label that states that it controls the power supply to the entire unit and not just the servers. Danger from improper voltage supply ... -
Page 10: Operation, Maintenance, Modifications, Cleaning And Disassembly
Operation, maintenance, modifications, cleaning and disassembly Electrical hazards Incidents arising from electrical hazards can occur during operation, maintenance, when making modifications, cleaning or disassembling the server. Turn off all connected peripheral devices before opening the media server system. NOTE: Opening the media server system will void its warranty! ... - Page 11 Disassembly and assembly of the housing Should you need to remove the media server system’s housing for maintenance work or any similar work inside the system, make sure to store all screws and fastenings in a safe place. NOTE: Opening the media server system will void ins warranty! Once you have completed your work on the media server system, reassemble the housing using the original screws and fasteners.
- Page 12 Danger from batteries WARNING! A danger of explosion and corrosion can arise from improper battery replacements. Hazardous substances can be leaked. Improper use can result in serious injury. o Only use the battery types recommended! o Never try to charge or open a battery! Preventing damage caused by a lack of ESD measures ...
-
Page 13: Instructions For Disposal
Instructions for disposal The media server system and batteries must be properly disposed of as electrical waste at the end of their use. The disposal of electrical and electronic equipment is regulated by law. Please observe all local regulations. Disposal via household waste or ordinary industrial waste is not permitted. You are responsible for deleting all data on the device, including confidential and personal data, before you hand it over for recycling. -
Page 14: Specifications
Specifications To ensure proper operation, make sure that the following operating conditions are met for the media server. IMPORTANT! When you receive your media server, place it in the environment where you will install it. Leave the server in its shipping crate at its final destination for 12 hours and do not connect it to the power supply! This resting period prevents thermal shock and condensation. -
Page 15: Environmental Specifications - Operating
Environmental specifications – operating Temperature (altitude less than 1000m, no direct 10°C to 30°C sunlight) Maximum Temperature Gradation 10°C per hour Temperature De-Rating (altitude more than 1000m) Reduce max. temp. by 1°C per 300m Maximum Altitude 3000m Relative Humidity (noncondensing) 20%RH to 80%RH Maximum Humidity Gradation 10%RH per hour... -
Page 16: Physical
Physical Case Dimension (WxDxH) 445 x 482 x 176mm Max. Product Dimension 484 x 550 x 176mm (WxDxH)* Product Weight 18,5kg Shipping Dimension 500 x 310 x 110mm Shipping Weight 20,0kg... -
Page 17: Dimensions
Dimensions IMPORTANT! Please note that due to the production process there may be deviations in the dimensions. For exact dimensions please use the measures of the actual device. Dimensions PX4 493mm 468mm Manual PIXERA Server... -
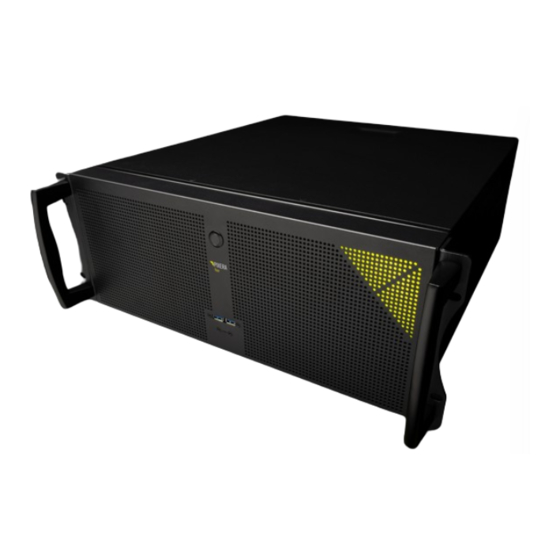
Page 18: Front View
Front view Front view PX4 Description front views 1. Power button 2. USB-C Port 3. 2x USB3.0 port... -
Page 19: Rear View
Rear view Rear view PX4 Description rear views PX4 1. Socket for main connection, redundant power supplies. Both connections must be made. 2. Switch and indication light of power supply 3. Switch Backlight 4. 2x USB3.0 5. IPMI LAN: The IP address of the IPMI LAN port is similar to the IP address of LAN2 (see [6] below), but instead of 10.31.x.x. -
Page 20: Options Px4
Options PX4 Performance upgrade The Performance Options consist of a faster CPU Option Code: X83, X110, Standard Configuration: Standard Configuration PX4 Option Name AMD X68 128GB RAM Code Server Grade Hardware Components CPU Type AMD Epyc CPU Performance Index CPU # of Cores / # of Threads 24/48 CPU Min/Max Frequency 2,85/4,0GHz... -
Page 21: Video Outputs
Video Outputs Video Outputs are always supplied with the Server. Port description Video output standard: DP1.4a Video output resolution (max.): 5120x2880 @60Hz EDID management: Yes Output option: GUI Output Quad channel GUI output. Option Code: G2 Option Slot PX4: FP1 Port description GUI Output... -
Page 22: Output Option: Framelock And Genlock
Output option: Framelock and Genlock Framelock and genlock input and outputs. Option Code: S2 Port description FL0, FL1: Framelock 0/1 Input/Output IMPORTANT! Do not connect to LAN! This will damage the sync card and the LAN equipment! LED yellow: Port is an output, but no signal is present ... -
Page 23: Nvme-Ssd Option: 7,68Tb (10Gb/S)
NVMe-SSD option: 7,68TB (10GB/s) NVMe storage for high data rate applications. Option Code: U7TR0x2 The maximum constant physical read rate of this drive is 10 GB/s. (Peak values can be higher.) NVMe-SSD option: 15,36TB (10GB/s) NVMe storage for high data rate applications. ... -
Page 24: Nvme-Ssd Option: 30,72Tb (20Gb/S)
NVMe-SSD option: 30,72TB (20GB/s) NVMe storage for high data rate applications. Option Code: U30TR0x4 Option Slot PX4: FP6,FP7 The maximum constant physical read rate of this drive is 20GB/s. (Peak values can be higher.) NVMe-SSD option: 61,44TB (20GB/s) NVMe storage for high data rate applications. ... -
Page 25: Network Card Option: 1Gbe Quad
Network Card option: 1GbE Quad Quad channel 1GbE Network Card Option Code: PXO-L1x4 Ethernet 3 Ethernet 4 Ethernet 5 Ethernet 6 Option Slot PX4: FP6,FP7 Network Card option: 25GbE Quad Dual channel 25GbE Network Card Option Code: PXO-L25x2 Ethernet 3 Ethernet 4 Option Slot PX4: FP6,FP7... -
Page 26: Live Input Option: Hdmi1.4-I2
Live input option: HDMI1.4-I2 Dual channel HDMI 1.4b input (297MHz TMDS clock). Option Code: IH1 Option Slot PX4: FP5, FP6,FP7 HDMI1 HDMI2 Port description HDMI-IN 1, HDMI-IN 2: HDMI Input 1, HDMI Input 2 Video display resolutions: up to 4096x2160@24Hz or 3840x2160@25/30Hz or 1080p@120Hz ... -
Page 27: Live Iput Option: 3Gsdi-I4
Live iput option: 3GSDI-I4 Single/dual/quad channel 3G-SDI input. Option Code: IS4 Option Slot PX4: FP5,FP6,FP7 SDI1 SDI3 SDI3 SDI4 Port description 3GSDI-IN 1, …, 3GSDI-IN 4: 3G-SDI input 1, …, 3G-SDI input 4 Video Interfaces and Formats: o HD_292_1: S296M_720p_50Hz, S296M_720p_60Hz, S274M_1080p_24Hz, S274M_1080p_25Hz, S274M_1080i_50Hz, S274M_1080i_60Hz o HD_DUAL_372: S274M_1080p_50Hz, S274M_1080p_60Hz o 3G_A_425_1: S274M_1080p_50Hz, S274M_1080p_60Hz... -
Page 28: Live Input Option: Hdmi2.0 /4X 3Gsdi
Live input option: HDMI2.0 /4x 3GSDI Quad Channel 3G-SDI, Single Channel 12G SDI Input or Output Single Channel HDMI 2.0 Input Option Code: PXO-CT1H1 HDMI Option Slot: FP6,FP7 SDI3 SDI4 SDI1 SDI2 Port description IMPORTANT! As this option does not have BNC connectors for space reasons, DIN-BNC adapters are required for operation with BNC cables. -
Page 29: Live Input Option: 4X 12G Sdi Io/8X 3Gsdi Io
Live input option: 4x 12G SDI IO/8x 3GSDI IO Quad Channel 12G-SDI or Octo Channel 3G SDI Input or Output SDI6 Option Code: PXO-CT4 SDI7 Option Slot: FP5,FP6,FP7 SDI4 SDI5 SDI2 SDI3 SDI0 SDI1 Port description IMPORTANT! As this option does not have BNC connectors for space reasons, DIN-BNC adapters are required for operation with BNC cables. -
Page 30: Audio Output Option: Hdspe Aio
Audio output option: HDSPe AIO RME HDSPe AIO sound interface. Option Code: A1 Breakout 1 Option Slot :FP7 ADAT IN ADAT OUT Breakout 2 Port description Breakout 1: Breakout cable for Analog input/output and MIDI input/output The 15-pin analog breakout cable has four RCA connectors (stereo analog I/O), a 1/4" TRS jack (headphones), and two 5-pin DIN connectors (MIDI I/O). -
Page 31: Audio Output Option: Hdspe Aes
Audio output option: HDSPe AES RME HDSPe AES sound interface Option Code: A5 Option Slot PX: FP7,FP6 AES/EBU 1-4 Main Card: OUT/IN WORK CLOCK IN WORK CLOCK OUT Expansion Card: AES/EBU 5-8 OUT/IN Midi IUT/IN Port description AES/EBU 4-8, AES/EBU 5-8 IN/OUT ... -
Page 32: Mechanical Installation
Mechanical installation This section provides information on installing the media servers. There are a variety of rack units on the market, which may mean that the assembly procedure will differ slightly from the instructions provided. You should also refer to the installation instructions that came with the rack unit you are using. -
Page 33: Mounting The Rail Kit On Px4
Mounting the Rail Kit on PX4 Manual PIXERA Server... -
Page 35: Starting Up The Media Server
Starting up the media server Plug in all cables first! Do not connect or disconnect any cables during operation. This can cause damage to the device. Press the power switch to turn the device on and off. The power button does not disconnect the server from the mains voltage! To completely disconnect it from the mains voltage, unplug the power plug(s) from all power supply inputs. -
Page 36: Software
For security reasons, the media servers must be operated in a separate network, from which you have no access to other networks (e.g. operational company networks, etc.). AV Stumpfl GmbH cannot accept any liability for damage (e.g. virus attack, loss of data, etc.) resulting from disregard of this guideline. -
Page 37: Preinstalled Programs
Preinstalled Programs On PIXERA servers there are important tools pre-installed. These can be found in the Windows start menu. The following programs are pre-installed: PIXERA NDI Tools Dante Virtual Soundcard Deltacast Tools Google Chrome (web browser) ... -
Page 38: Startmenu
1. Starts "PIXERA". The version to be started is set in the PIXERA hub. 2. Starts "Presence". The version to be started is set in the PIXERA hub. The following AV Stumpfl tools will help you for easy handling: 3. Starts the "PIXERA Hub". -
Page 39: Edid Management
EDID Management The EDID management can be set in the Nvidia Control Panel. To open the Nvidia Control Panel, right-click on the desktop and select Nvidia Control Panel. To open the EDID Settings open "View system topology" [1]. Then select "EDID" [2] at the corresponding graphics card port to export, load or unload EDIDs. - Page 40 Export EDID to File To export an EDID file, open the tab "Export", select the corresponding display and click on "Export EDID". The resulting file can then be loaded into any graphics card output. Load EDID from File To load an EDID, the tab "Load EDID" must be opened, the corresponding EDID file must be selected and the graphic card outputs into which the corresponding EDID is to be loaded must be selected.
-
Page 41: Genlock And Framelock Setup
Genlock and Framelock Setup To synchronize graphic card outputs, the Framelock and Genlock Option must be installed in the server. If installed, the menu item "Synchronize displays" is visible in the Nvidia Control Panel. To synchronize the displays the menu item "Synchronize displays" [1] must be selected. The system on which the time server is running can be selected here. -
Page 42: Mosaic Setup
Mosaic Setup Mosaic creates a single desktop from multiple displays and GPUs. To activate this mode, select the menu item "Set up Mosaic" [1]. Click on "Create new configuration" [2] to start the setup wizard. Select Topology Define the number of displays [3], the number of rows and columns [4] and the orientation of the displays [5]. - Page 43 Select Displays Select the displays to be used [6], the resolution [7] and the refresh rate [8] of each display. Click "Next". Arrange Displays The single displays must be arranged to the combined mosaic display. The corresponding numbers are shown on the real displays and should be arranged according to your setup. By simply dragging and dropping [9] the display areas can be placed.
-
Page 44: Cli Programs To Change Screen Resolution, Setup Mosaic And Set Sync
CLI programs to change screen resolution, setup mosaic and set sync CLI programs are installed on a PIXERA server to change the screen resolutions, set up a mosaic or synchronize the outputs. These programs are installed on the system and can be used in the Power Shell or Command Prompt. -
Page 45: Resetting The Operating System
If you still need to install Windows Updates for security reasons, you must first enable the Windows Update service in the AV Stumpfl Settings Manager. Only then a Windows Update can be made. IMPORTANT! The Windows Update service must be deactivated AV Stumpfl Settings Manager after the update process is complete to avoid interfering with subsequent playbacks. -
Page 46: Servicing
Servicing Replacing the power supply The PIXERA four media server has a redundant power supply. They automatically sense and operate at a 100V to 240V input voltage and are autoswiching. One power supply can be replaced without powering down the system. -
Page 47: Backlight On/Off
Backlight ON/OFF To switch the Backlight ON or OFF press this Button (1) Manual PIXERA Server... -
Page 48: Av Stumpfl Contact
AV Stumpfl contact If you encounter any problems using our products, please contact our Support. If you have any questions or would like to make any suggestions, you can reach us on the phone from Monday to Thursday from 8.00 to 12.00 and from 13.00 to 16.30 and on Fridays from 8.00 to 12.00 (UTC+1). -
Page 49: Declaration Of Conformity
Declaration of Conformity Manufacturer: AV Stumpfl GmbH Mitterweg 46, 4702 Wallern, Austria Tel.: +43(7249)42811-0 AVStumpfl@AVStumpfl.com www.AVStumpfl.com Products: • PIXERA four We hereby declare that the server described above complies with all relevant regulations. It meets the requirements of the following guidelines and standards. - Page 50 Version History Date Document Hardware Changes Version Version 2022-12 V1.0.0 First hardware release version First manual release version V1.0.1 Deltacast PXO-CT4 added 2023-03 V1.0.2 Rackmount added...
- Page 51 Manual PIXERA Server...
Need help?
Do you have a question about the PIXERA four and is the answer not in the manual?
Questions and answers