Advertisement
Available languages
Available languages
Quick Links
ASSEMBLY INSTRUCTIONS
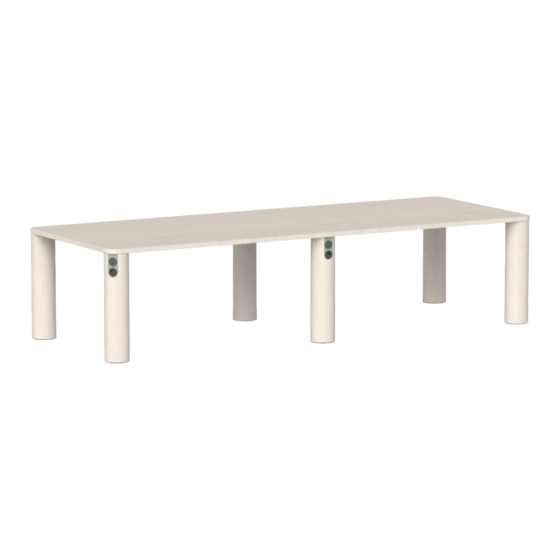
KOLONN EXTEND 6 LEG / +8 LEG
COMPONENTS
COMPONENTS
2 x Tabletop (edge)
Tabletop (middle)
4 x Leg
2/4/6 x Leg
(corner)
(connection)
4/6/8 x frame
M6 x 14
M6 x 20
Required tools:
Cross-head screwdriver.
www.balzar.se
1
Put the edge tabletop upside down on a protective
cover.
3
Now place the assembled corner leg in the
designated cavity.
Use a cross-head screwdriver to screw
5 x M6 bolts per leg.
Apply normal force.
KOLONN EXTEND 6 LEG
2
Mount the frames in the designated holes.
Use a cross-head screwdriver to screw
7 x M6 bolts per leg. Apply normal force.
4
Now place the assembled connection leg
in the designated cavity.
Use a cross-head screwdriver to screw
4 x M6 bolts per leg.
Apply normal force.
KOLONN EXTEND +8 LEG
5
Gently turn the table back to its
normal position, without straining
the legs latteraly.
Adjust the adjustable feet to level
the table.
Advertisement

Related Manuals for Balzar Beskow KOLONN EXTEND 6 LEG


Summary of Contents for Balzar Beskow KOLONN EXTEND 6 LEG
- Page 1 ASSEMBLY INSTRUCTIONS KOLONN EXTEND 6 LEG / +8 LEG KOLONN EXTEND 6 LEG KOLONN EXTEND +8 LEG Mount the frames in the designated holes. Put the edge tabletop upside down on a protective COMPONENTS COMPONENTS Use a cross-head screwdriver to screw cover.
- Page 2 ASSEMBLY INSTRUCTIONS KOLONN EXTEND 6 LEG / +8 LEG If building KOLONN EXTEND 6 LEG proceed to step 10. KOLONN EXTEND 6 LEG KOLONN EXTEND +8 LEG Mount the frames in the designated holes. COMPONENTS COMPONENTS Put the middle tabletop upside down on a protective Use a cross-head screwdriver to screw cover.
- Page 3 ASSEMBLY INSTRUCTIONS KOLONN EXTEND 6 LEG / +8 LEG KOLONN EXTEND 6 LEG KOLONN EXTEND +8 LEG COMPONENTS Put the other edge tabletop upside down Mount the frames in the designated holes. on a protective cover. Use a cross-head screwdriver to screw 7 x M6 bolts per leg.
- Page 4 ASSEMBLY INSTRUCTIONS KOLONN EXTEND 6 LEG / +8 LEG KOLONN EXTEND 6 LEG KOLONN EXTEND +8 LEG COMPONENTS Plug in the connector from the leg/legs to the docky. Mount the docky to the designated holes. Use a cross-head screwdriver to screw 4 x (3x15mm) screws.
- Page 5 ASSEMBLY INSTRUCTIONS KOLONN EXTEND 6 LEG KOLONN EXTEND 6 LEG COMPONENTS 1. Connect 1 x GST-CABLE to each DOCKY. Attach the rubberbands to fix the 2. Connect the other ends of the GST-CABLEs to the T-CONNECTOR. cables to the frames using the 3.
- Page 6 ASSEMBLY INSTRUCTIONS KOLONN EXTEND +8 LEG KOLONN EXTEND +8 LEG COMPONENTS 1. Connect 1 x GST-CABLE to each DOCKY. Attach the rubberbands to fix the 2. Connect the other ends of the GST-CABLEs to the T-CONNECTOR. cables to the frames using the designated holes.
- Page 7 MONTERINGSANVISNINGAR KOLONN EXTEND 6 BEN / +8 BEN KOLONN EXTEND 6 BEN KOLONN EXTEND +8 BEN Lägg ändbordsskivan upp och ner på ett skyddande Montera sargen i de anvisade hålen. KOMPONENTER underlag. Använd en stjärnskruvmejsel för att skruva i 7 x M6 skruvar/ben.
- Page 8 MONTERINGSANVISNINGAR KOLONN EXTEND 6 BEN / +8 BEN Om du bygger KOLONN EXTEND 6 BEN fortsätt till steg 10. KOLONN EXTEND 6 BEN KOLONN EXTEND +8 BEN KOMPONENTER Lägg mittbordsskivan upp och ner på ett skyddande Montera sargen i de anvisade hålen. Använd en stjärnskruvmejsel för att skruva i underlag.
- Page 9 MONTERINGSANVISNINGAR KOLONN EXTEND 6 BEN / +8 BEN KOLONN EXTEND 6 BEN KOLONN EXTEND +8 BEN Lägg ändbordsskivan upp och ner på ett skyddande Montera sargen i de anvisade hålen. KOMPONENTER underlag. Använd en stjärnskruvmejsel för att skruva i 7 x M6 skruvar/ben. 2 x Bordsskiva Bordsskiva (mitten) (ände)
- Page 10 MONTERINGSANVISNINGAR KOLONN EXTEND 6 BEN / +8 BEN KOLONN EXTEND 6 BEN KOLONN EXTEND +8 BEN KOMPONENTER Montera dockyn i de anvisade hålen. Koppla in kontakt från ben till docky. Använd en stjärnskruvmejsel för att skruva i 4 x (3x15mm) skruvar. Docky Skruv 1 2 3...
- Page 11 MONTERINGSANVISNINGAR KOLONN EXTEND 6 BEN KOLONN EXTEND 6 BEN KOMPONENTER 1. Koppla 1 x GST-KABEL till varje DOCKY. Fäst gummibanden för att fixera kablarna. Använd de anvisade hålen. 2. Koppla den andra änden av GST-KABELN till T-KONTAKTEN. 3. Koppla 1 x GST-SCHUKO till T-KONTAKTEN. 4.
- Page 12 MONTERINGSANVISNINGAR KOLONN EXTEND +8 BEN KOLONN EXTEND +8 BEN KOMPONENTER 1. Koppla 1 x GST-KABEL till varje DOCKY. Fäst gummibanden för att fixera kablarna. Använd de anvisade hålen. 2. Koppla den andra änden av GST-KABELN till T-KONTAKTEN. 3. Koppla 1 x GST-SCHUKO till T-KONTAKTEN. 4.