Table of Contents
Advertisement
Quick Links
Important safety Information
•
SAVE THESE INSTRUCTIONS – This manual contains important safety and
operating instructions.
•
Before using this product, read all instructions and cautionary markings.
•
Remove negative battery cable before installation.
•
Ensure the headlights are fitted using the appropriate wiring harness or an
equivalent auxiliary wiring system.
•
Ensure the lights are mounted securely to a solid surface on the vehicle.
•
Cables connected to the light must not be subjected to wear or other damage.
•
Do not operate device in proximity to flammable or combustible objects.
•
Do not operate or disassemble the product if it has been dropped, received a
sharp blow, or otherwise damaged in any way - replace it immediately.
•
To reduce risk of damage or electric shock, disconnect the headlight from
the vehicle battery before attempting any maintenance. Turning off controls
will not reduce this risk
info@projectxoffroad.com
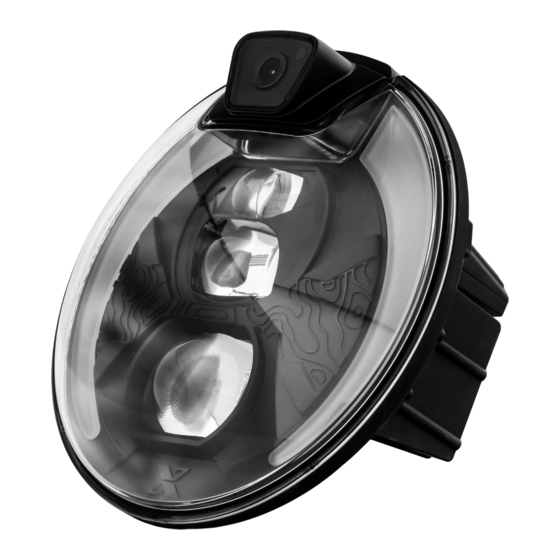
P R E M I U M H E A D L I G H T S W I T H CA M E R A
(866) 294-9244
Model No. HL538822
Mon-Sat 8am-5pm PST
Advertisement
Table of Contents

Summary of Contents for PROJECT X ELITE OPTX JK.70
- Page 1 P R E M I U M H E A D L I G H T S W I T H CA M E R A Model No. HL538822 Important safety Information • SAVE THESE INSTRUCTIONS – This manual contains important safety and operating instructions. • Before using this product, read all instructions and cautionary markings. • Remove negative battery cable before installation. • Ensure the headlights are fitted using the appropriate wiring harness or an equivalent auxiliary wiring system.
-
Page 2: Technical Specifications
Technical Specifications HEADLIGHT Input Voltage: 12V DC Operating Voltage Range: 10V - 30V DC Current Draw 12V DC: High Beam: 2.85A 0.58A Low Beam: 2.00A 0.40A Operating Temp: -40°F ~ 140°F Waterproof Rating: IP67 Weight: 5.54 lbs Raw Lumens: High Beam: 3000 lm Low Beam: 2000 lm Effective Lumens: High Beam: 1645 lm Low Beam: 909 lm Beam Pattern: Forward Lighting – High Beam Forward Lighting – Low Beam DRL (Diffuser) Position (Diffuser) Color Temp: Hight/Low Beam: 5900K DRL/Position: 5700K CAMERA... -
Page 3: Installation
INSTALLATION • Loosen and remove all the plastic retainer clips and remove the front grill. • Unplug the wire harness behind both turn signal lights. • Loosen the screws that are holding the metal trim ring and remove the trim ring. • Unplug and remove the original factory headlight. - Page 4 INSTALLATION • Install the Elite Optx JK.70 Headlight into the headlight bucket base. WIRING Refer to the illustration below and connect different parts of the headlights to your vehicle. WARNING: Disconnect the negative terminal on the vehicle’ s battery prior to installation. Do not allow the wires or metal ends to come into contact with each other, as this may cause damage to the product as well as your vehicle’ s battery, charging system, and/or electronics. HEADLIGHT WITH HEADLIGHT WITH 4K CAMERA 1080P CAMERA (DRIVER SIDE) (PASSENGER SIDE)
- Page 5 WIRING CAMERA ANTENNA Route the antenna cable and place the antenna near the dashboard. Clean the area you desire thoroughly with isopropyl alcohol to ensure a good sticking surface. Peel off the 3M VHB™ double sided tape backer and mount the antenna on any flat surface. NOTE: Please test the signal strength using the App for best mounting spot before peeling off the tape backer. WIRE CONNECTION Wire = Positive (+) Post Black Wire = Negative (-) Post Yellow Wire = ACC / Ignition Fuse The hardwire cables are color coded, RED for POSITIVE (+) and BLACK for NEGATIVE (-). Connect the RED cable to the POSITIVE (+) battery clamp as illustrated. The POSITIVE battery post will be slightly larger than the NEGATIVE post, and will be marked with a PLUS (+) sign. There may also be a RED protective cover over the positive battery post. Connect the BLACK cable to the NEGATIVE (-) battery clamp as illustrated. The NEGATIVE will be marked with a MINUS (-) sign. There may also be a BLACK plastic protective cover over the negative battery post. Every installation is unique. The above diagram is meant to be for illustrative purposes only. Professional installation is highly recommended. When the Camera is connected to the vehicle's constant power source through hardwiring, it will monitor vehicle battery's voltage. The camera will perform low voltage cut-off when voltage drops around 12V. WARNING: DO NOT mix up the cables or allow the metal ends to touch together because this may damage the battery, charging system and/or electronics on your vehicle. When installing, please make sure the battery is disconnected. 3M VHB™ is a trademark of 3M Company.
- Page 6 WIRING POWER & SIGNAL CABLE Connect the power & signal cable of both headlights to each other. Make sure the 3-pin weatherproof connectors are aligned and securely fastened. Route the cable away from the engine. The connectors are directional, make sure to connect to the correct position and fasten each end of the cap. 3-pin connectors DRL & POSITION LIGHT Connect the pigtail to the AMP Plug. Splice the pigtail wires to the fuse panel according to the below diagram. 1. Black Wire -> Ground 2. Blue Wire -> Daytime Running Light 3. Brown Wire -> Position Light H13 PLUG Plug in the H13 Plug. The installation is done. Reassemble everything and close the front grill.
-
Page 7: Download App
DOWNLOAD app PROJECT X Off-Road Compatible with iPhone 4s and higher, Compatible with phones with iPad3, iPad Mini, iPad Air and higher, and Android™ 5.0 or higher. iPod touch 5th Generation and higher. Requires iOS 9.0 or higher. Scan the above QR code or search “PROJECT X Off-Road” in the App Store or Google Play. Download and install the App. Once installed, open the App and begin enjoying your PROJECT X Off-Road App. NOTE: The App is only available on smartphones with apple iOS 9 or newer, and Android 5.0 or newer. The PROJECT X Off-Road App is not accessible from browsers or PCs. iPhone, iPad and iPod touch are trademarks of Apple Inc. Android is a trademark of Google Inc. ADD DEVICE We recommend that you connect a battery charger to the vehicle during the set up and pairing process if your vehicle is not running. Follow these instructions to add the Elite Optx JK.70 Premium Headlights with Camera to the App. 4. Tap Settings on 3. The App will search 1. Tap ADD DEVICE on 2. Tap HEAD LIGHT. the APP permissions for nearby devices. Tap home page. WiFi SETTING. setting page to enter your device’ s WiFi setting page. - Page 8 ADD DEVICE PROJECT_X_HL01_4K_DDD42C ASUS_89 5. Look for the SSID “PROJECT_X_HL01_4K_XXXXXX” . Enter the default password “12345678” and tap JOIN THIS NETWORK. 6. Return to the PROJECT X Off-Road App. 7. Tap CONFIRM to complete the connection. 8. Now the Headlight is added as a new device. Tap HEAD LIGHT to enter live view. 9. The Headlight is connected to the App successfully when you see this live view. NOTE: For detailed instructions on customizing your accessories with the PROJECT X Off-Road App, check out our video library at www.projectxoffroad.com. PRODUCT OVERVIEW - 4K CAMERA 1. Power Button 2. Power Reset Button 3. Micro USB input port 4. MicroSD card slot 5. LED Indicator...
-
Page 9: Memory Card
MEMORY CARD NOTE: If you decide to use another MicroSD card, it is recommended that the card meets the following requirements: - UHS U3 - Video Speed Class: V30 - Application Performance Class: A2 The product will format the SD card automatically if the SD card can't be recognized or the SD card has read/write errors. Park & Record LOGIC Camera Mode Behavior Without time-lapse record, captures 30 4K Camera Normal frames per second. Without time-lapse record, captures 25 1080P Camera Normal frames per second. Time-lapse record, captures 1 frame per 4K + 1080P Camera Park & Record (Lapse 1 sec.) second. Time-lapse record, captures 1 frame per 4K + 1080P Camera Park & Record (Lapse 3 sec.) 3 seconds. Time-lapse record, captures 1 frame per 4K + 1080P Camera Park & Record (Lapse 5 sec.) 5 seconds. NOTE: The camera will switch into Park & Record Mode 10 minutes after the vehicle engine is off and the vehicle is not moving. The camera switches back to Normal Mode when engine starts. POWER BUTTON Button Functions Description LED status and color... -
Page 10: Power Reset Button
POWER RESET BUTTON Button Functions Description LED status and color Press once Camera reboots Red LED light flashes LED STATUS Description LED status and color Recording Red LED light flashes every 1 second Recording stopped Solid red LED light Parking Mode Red LED light flashes every 2 seconds Firmware Upgrade Red and blue LED light alternating Cautions 1. Do not install or the use the product if it, in any way, impairs the safe operation of your vehicle. 2. N EVER use the App while driving. Use it when the vehicle is stationary only. 3. F ollow manufacturer’ s instructions to ensure the product is properly and safely installed. 4. C heck your state or provincial laws before installing. Vehicle owner must comply with all applicable laws. -
Page 11: Warranty
Warranty This PROJECT X product carries a Limited Lifetime warranty against defects in workmanship and materials subject to the conditions and additional warranty information available at: www.projectxoffroad.com/pages/returns-warranty DISCLAIMER OF WARRANTIES, INCLUDING WARRANTY OF MERCHANTABILITY AND WARRANTY OF FITNESS FOR PARTICULAR PURPOSE EXCEPT AS SPECIFICALLY SET FORTH HEREIN, NO WARRANTY OR REPRESENTATION, EXPRESS OR IMPLIED, IS MADE AS TO THE ELITE OPTX JK.70 PREMIUM HEADLIGHTS WITH CAMERA. PROJECT X AND/ OR ITS AFFILIATES EXPRESSLY DISCLAIMS, WITHOUT LIMITATION, ANY STATUTORY WARRANTIES AND ALL IMPLIED WARRANTIES, INCLUDING ANY IMPLIED WARRANTY OF MERCHANTABILITY OR FITNESS FOR A PARTICULAR PURPOSE. PROJECT X 2975 Red Hill Ave. Ste. 100 Costa Mesa, CA 92626... -
Page 12: Fcc Compliance Statement
FCC Compliance statement This device complies with Part 15 of the FCC rules. Operation is subject to the following two conditions: (1) This device may not cause harmful interference, and (2) this device must accept any interference received, including interference that may cause undesired operation. WARNING: Changes or modifications to this unit not expressly approved by the party responsible for compliance could void the user’s authority to operate the equipment. The manufacturer is not responsible for any radio or TV interference caused by unauthorized modifications or change to this equipment. Such modifications or change could void the user’s authority to operate the equipment. NOTE: This equipment has been tested and found to comply with the limits for a Class B digital device, pursuant to part 15 of the FCC Rules. These limits are designed to provide reasonable protection against harmful interference in a residential installation.
Need help?
Do you have a question about the ELITE OPTX JK.70 and is the answer not in the manual?
Questions and answers