Download Print this page
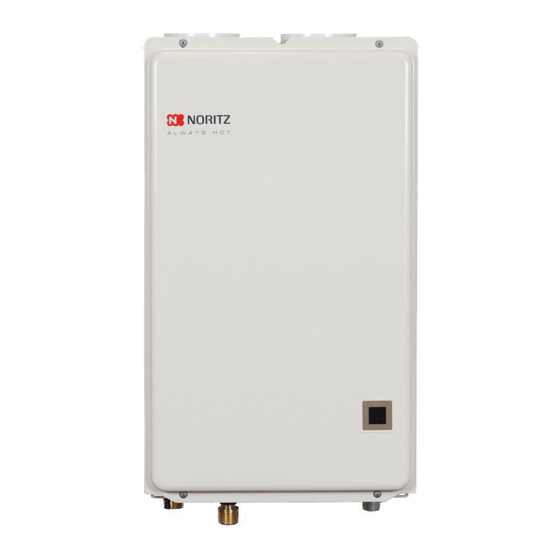
Noritz NRC661A Series Replacement

Noritz NRC661A Series Replacement

Heat exchanger replacement

Advertisement

Quick Links

Model Include:
This instructional manual is only intended for use by a qualified service professional or authorized Noritz
Service Representative. Any unauthorized use of this manual may result in voiding the warranty.
Please contact Noritz Technical Support (866-766-7489) for additional support.
SKJ70RF
Rev. 10/13
NRC661A, NRC711 Series Heat Exchanger
Replacement
NRC661A-DV, NRC661A-OD, NRC711-DV, NRC711-OD
Noritz America Corporation
11160 Grace Avenue, Fountain Valley, CA 92708
Phone 866-766-7489 Fax 714-241-1196
Page 1

Advertisement

loading

Summary of Contents for Noritz NRC661A Series

  • Page 1 Model Include: NRC661A-DV, NRC661A-OD, NRC711-DV, NRC711-OD This instructional manual is only intended for use by a qualified service professional or authorized Noritz Service Representative. Any unauthorized use of this manual may result in voiding the warranty. Please contact Noritz Technical Support (866-766-7489) for additional support.
  • Page 2 NRC661A, NRC711 Series Heat Exchanger Replacement Procedure Procedure Diagram Remove the front cover (1) Disconnect electrical power to the unit (2) Turn off gas and water (3) Remove 4 screws (4) Remove drain 2 valves and drain unit completely (5) Remove the cover - circuit board Cover - Circuit Board Disconnect the connectors from the circuit board and remove OD model has only a screw...
  • Page 3 NRC661A, NRC711 Series Heat Exchanger Replacement Procedure Procedure Diagram Remove the manifold plate (1) Remove 3 big silver screws on the manifold plate that attach the manifold to the burner (2) Remove 2 smaller silver screws from the manifold plate that attach the manifold to the gas valve (3) Remove the manifold plate and unplug the connector from gas solenoid valves (3) Disconnect water pipes from the water flow sensor and the...
  • Page 4 NRC661A, NRC711 Series Heat Exchanger Replacement Procedure Procedure Diagram Remove the exhaust flue from top of the unit *DV model only (1) Disconnect the venting from the unit (2) Remove 4 screws and pull the flue off of the unit and set aside Remove the drain hose from Stainless Steel Heat Exchanger(SS HE)
  • Page 5 NRC661A, NRC711 Series Heat Exchanger Replacement Procedure Procedure Diagram Remove the heat exchanger from the case (1) Remove the 2 set screws on the bottom of the burner (2) Remove the upper left and right set screws near the top of the case (In OD Model, the screws will be at the top of the case) (support bottom of assembly) (3) SS HE, Copper Heat Exchanger(CU HE), Burner, and...
  • Page 6 NRC661A, NRC711 Series Heat Exchanger Replacement Procedure Procedure Diagram Replacing the SS HE Note: If you are not replacing the SS HE then you can skip this step and set the SS HE aside. (1) Remove old gasket between the SS HE and the CU HE Exhaust Box and replace with new one (2) *OD model only Remove the gasket on the front of the SS HE and place...
  • Page 7 NRC661A, NRC711 Series Heat Exchanger Replacement Procedure Procedure Diagram (3) Attach the thermal fuse and 5 clamps from 4 sides of Right side the heat exchanger, See 4 views of the heat exchanger to make sure the thermal fuse is routed correctly Install the thermal fuse(White) inside of the stopper...
  • Page 8 NRC661A, NRC711 Series Heat Exchanger Replacement Procedure Procedure Diagram (4) *DV model only Place the new freeze prevention heater with one that Left side of HE was shipped in the heat exchanger kit. Wrap the freeze prevention heater around inlet pipe to the CU HE.
  • Page 9 NRC661A, NRC711 Series Heat Exchanger Replacement Procedure Procedure Diagram Reattach Burner, CU HE, and SS HE (1) Attach the inlet pipe to the CU HE with the “C” Clamp. Make sure to insert the pipe in all the way before attaching “C”...
  • Page 10 NRC661A, NRC711 Series Heat Exchanger Replacement Procedure Procedure Diagram Replace the flue from top of the unit *DV model only (1) Attach the flue to the unit and secure the 4 screws (2) Reconnect the venting to the unit Reconnect water connections (1) Maintain the high limit switch, the thermistor - heat exchanger and the water level electrode wiring harness as shown in diagram (1)
  • Page 11 NRC661A, NRC711 Series Heat Exchanger Replacement Procedure Procedure Diagram Replace the manifold plate (1) Plug the connector to gas solenoid valves (3) as right diagram (2) Confirm that there is O-Ring before replace the manifold plate (3) Replace 2 smaller silver screws from the manifold plate O &...
  • Page 12 NRC661A, NRC711 Series Heat Exchanger Replacement Procedure Procedure Diagram Plug all wires that attach to the wiring harness and the body of Thermistor - Air the water heater (1) Plug all wires that attach to the wiring harness (2) Tie wires by the cable tie as right diagram (3) Tie wires by the cable tie as right diagram Thermistor - Cold Water...
  • Page 13 NRC661A, NRC711 Series Heat Exchanger Replacement Procedure Procedure Diagram (6) Replace the circuit board; secure 2 screws, one on the OD model has only a screw right-side and middle-upper of the circuit board. of the upperside Secure the ground wire. DV model;...
  • Page 14 NRC661A, NRC711 Series Heat Exchanger Replacement Procedure Procedure Diagram (11) Replace the cover - water level electrode to the condensate container (11) (12) *DV model only Reinstall power supply cord as right diagram (13) Put all wires as the diagram (12) DV model OD model...
  • Page 15 NRC661A, NRC711 Series Heat Exchanger Replacement Procedure Procedure Diagram (14) Replace the cover - circuit board Cover - Circuit Board Check for gas leaks and doing trial operation (1) Turn on gas (2) Turn on the unit. Check for leaks around manifold plate and joining areas.

This manual is also suitable for:

Nrc711 seriesNrc661a-dvNrc661a-odNrc711-dvNrc711-od