Advertisement
Quick Links
25AG Operating Switch Instructions
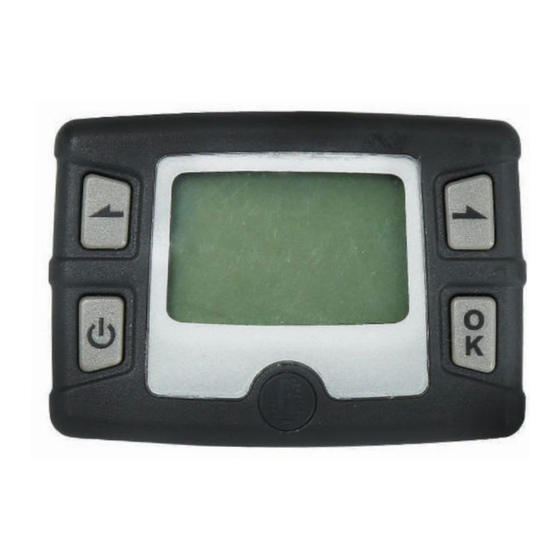
The 25AG is provided with a multi-functional operating switch. It is capable of manual and timer controlled
switching of the heater and conveys heater operational parameters and diagnostics.
Mount the operating switch in a suitable location using panel mount method shown in Figure S1
Route the switch harness from the heater to the Operating Switch and connect.
Overview
The operating switch allows you to turn the heater on and off, regulate temperature, set operating mode,
timed shutdown and timed start-up functions. It also facilitates troubleshooting by providing diagnostic
codes.
Figure S1
Drill holes as shown to panel mount switch
Wire Access Hole
11 mm (7/16")
15 mm (0.6")
Pinch Mount Hole
8mm (5/16")
Copyright © 2023 PHP Parking Heater Products®
®
1
Advertisement

Summary of Contents for PHP 25AG
- Page 1 25AG Operating Switch Instructions ® The 25AG is provided with a multi-functional operating switch. It is capable of manual and timer controlled switching of the heater and conveys heater operational parameters and diagnostics. Mount the operating switch in a suitable location using panel mount method shown in Figure S1 Route the switch harness from the heater to the Operating Switch and connect.
- Page 2 ON / OFF On / Off Control < Adjust heat settings Toggle through menu > Adjust heat settings Toggle through menu Select Menu settings Icons: Heating Mode Fan Mode Not Used Program Mode Clock Settings Copyright © 2023 PHP Parking Heater Products®...
- Page 3 7. Press “OK” to confirm hour setting Minutes of day flashes 8. Adjust Minutes of day using “<” or “>” Minutes of day flashes 9. Press “OK” to confirm minute setting Reverts back to home screen. Clock icon flashes Copyright © 2023 PHP Parking Heater Products®...
-
Page 4: On/Off Control
“Automatic Climate Control Mode” allows you to set the desired cabin temperature in range of 5 ºC to 35 ºC. Selecting Heat Output Mode With heater in operation, Press and hold the “OK” button. Display will change from either showing the target temperature or target power mode setting. Copyright © 2023 PHP Parking Heater Products®... - Page 5 NOTE: To prolong the life of the blower motor, we recommend limiting this use. 1. Press “OK” Icons Displayed and heat symbol flashing 2. Press “>” or “<” to select “Fan” Icon Fan Icon Flashes Copyright © 2023 PHP Parking Heater Products®...
- Page 6 “P” Icon flashes 3. Press “OK” Preset Options 1,2,3 are displayed “1” Will be flashing 4. Press “>” or “<” to select the desired preset profile (1-3) Display will toggle through display profiles Copyright © 2023 PHP Parking Heater Products®...
- Page 7 Start Time Displayed, Hours flashing 11. Press “OK” 4. Minutes flashing Start Time Displayed, Minutes flashing 2. Hours flashing 12. Press “>” or “<”to adjust start up time minutes Start Time Displayed, Minutes flashing Copyright © 2023 PHP Parking Heater Products®...
- Page 8 (Mo – Su) 17. Once you confirm settings for Sunday, display reverts to home screen. Program is activated. Home screen is displayed “P” is flashing Preset 1, 2 or 3 displayed. Copyright © 2023 PHP Parking Heater Products®...
-
Page 9: Fuel System Priming
While toggling through the settings to activate the “Fuel Priming” function, you will discover that there are other programmable menu settings. There are no other beneficial settings that can be adjusted and so they are not discussed in these instructions. Copyright © 2023 PHP Parking Heater Products®...


Need help?
Do you have a question about the 25AG and is the answer not in the manual?
Questions and answers