Onkyo T-4555 Instruction Manual
Multi-platform tuner
Hide thumbs
Also See for T-4555:
- Service manual (34 pages) ,
- Instruction manual (28 pages) ,
- Brochure & specs (8 pages)
Table of Contents
Advertisement
Quick Links
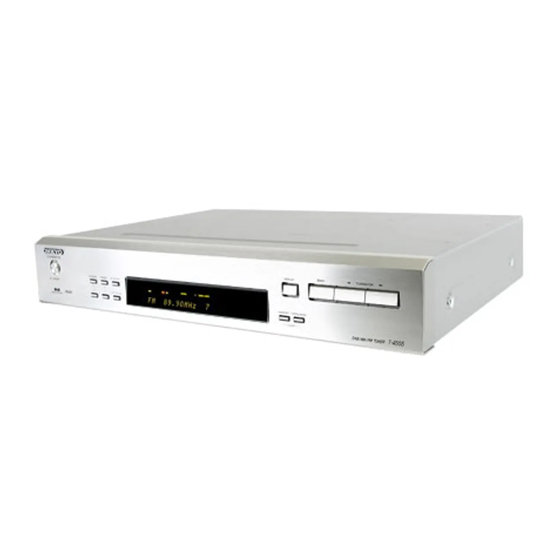
Multi-Platform Tuner
T-4555
(North American model)
Instruction Manual
Thank you for purchasing an Onkyo Multi-Platform
Tuner. Please read this manual thoroughly before mak-
ing connections and plugging in the unit.
Following the instructions in this manual will enable
you to obtain optimum performance and listening
enjoyment from your new Tuner.
Please retain this manual for future reference.
Contents
Introduction .................................... 2
Connections ................................. 11
Enjoying Audio Sources.............. 16
Troubleshooting........................... 32
Specifications .............................. 34
E
n
Advertisement
Table of Contents

Subscribe to Our Youtube Channel
Related Manuals for Onkyo T-4555


Summary of Contents for Onkyo T-4555
- Page 1 Multi-Platform Tuner T-4555 (North American model) Instruction Manual Thank you for purchasing an Onkyo Multi-Platform Tuner. Please read this manual thoroughly before mak- ing connections and plugging in the unit. Following the instructions in this manual will enable you to obtain optimum performance and listening enjoyment from your new Tuner.
-
Page 2: Important Safety Instructions
WARNING: TO REDUCE THE RISK OF FIRE OR ELECTRIC SHOCK, DO NOT EXPOSE THIS APPARATUS TO RAIN OR MOISTURE. CAUTION: TO REDUCE THE RISK OF ELECTRIC SHOCK, DO NOT REMOVE COVER (OR BACK). NO USER-SERVICEABLE PARTS INSIDE. REFER SERVICING QUALIFIED PERSONNEL. -
Page 3: Precautions
T-4555 must be plugged into an AC outlet in order to charge the backup system. Once it has been charged, the T-4555 will retain the set- tings for several weeks, although this depends on the environment and will be shorter in humid climates. -
Page 4: Features
(Plug type varies from country to country.) * In catalogs and on packaging, the letter added to the end of the product name indicates the color of the T-4555. Specifi- cations and operation are the same regardless of color. , the T-4555 must be connected with an... -
Page 5: Table Of Contents
Selecting Presets... 30 Deleting Presets ... 30 Changing the Remote ID... 31 Others Troubleshooting ... 32 If you can’t resolve an issue, try resetting the T-4555 by holding down the [MEMORY] button and pressing the [STANDBY/ON] button. Specifications ... 34... -
Page 6: Getting To Know The T-4555
STANDBY/ON button (16) Sets the T-4555 to On or Standby. STANDBY indicator (16) Lights up when the T-4555 is on Standby. CATEGORY [ ]/[ ] buttons (20, 24, 29) Used to select categories for satellite radio. With HD Radio stations, they’re used to select multicast channels. -
Page 7: Display
Getting to Know the T-4555—Continued Display SIRIUS A box appears around this indicator when SIRIUS Satellite Radio is selected. A box appears around this indicator when XM Sat- ellite Radio is selected. A box appears around this indicator when FM is selected. -
Page 8: Rear Panel
The 12V TRIGGER OUT jack can be connected to the 12-volt trigger input on another component, so that when the T-4555 is turned on, the other compo- nent turns on as well. 5 6 7 8 jacks on your other See pages 13–15 for connection information. -
Page 9: Remote Controller
Remote Controller Remote Controller STANDBY/ON button (16) Sets the T-4555 to On or Standby. Number buttons (17, 20, 24, 31) Used to select radio presets by number, and to enter AM/FM station frequencies and Satellite Radio channel numbers in Direct Tuning mode. -
Page 10: Before Using The T-4555
fluorescent lights. Keep this in mind when installing. • If another remote controller of the same type is used in the same room, or the T-4555 is installed close to equipment that uses infrared rays, the remote control- ler may not work reliably. -
Page 11: Connecting Antennas
Attach the FM antenna, as shown. Insert the plug fully into the jack. Once the T-4555 is ready for use, you’ll need to tune into an FM radio station and adjust the posi- tion of the FM antenna to achieve the best possi- ble reception. -
Page 12: Connecting An Outdoor Fm Antenna
TV reception, as this can cause interference problems. If circumstances demand it, use a TV/FM antenna splitter, as shown. TV/FM antenna splitter To T-4555 Connecting an Outdoor AM Antenna If good reception cannot be achieved using the supplied AM loop antenna, an outdoor AM antenna can be used in addition to the loop antenna, as shown. -
Page 13: Connecting The T-4555
TUNER Amplifier Note: • If the T-4555 is used with another Onkyo component, such as the A-9555, refer to its instruction manual as well. RCA Audio Connection Color Coding • Red plugs are used for the right channel, white plugs are used for the left channel. -
Page 14: Connecting The 12V Trigger Jacks
Connecting the T-4555—Continued With (Remote Interactive), you can control your -capable Onkyo CD player, T-4555, and so on with your amp’s remote controller. • To use , you must make an analog audio con- nection between your amplifier and each audio component. -
Page 15: Controlling Components That Are Out Of Range
Xantech Controlling the T-4555 When It’s Out of Range If the T-4555 is located in another room, installed in a cabinet, or out of range of its remote controller, you can use a commercially available IR receiver to pickup the remote controller signals and feed them to the T-4555, as shown below. -
Page 16: Turning On And Listening To Am And Fm Radio
T-4555 or remote control- ler. The T-4555 turns on, and the STANDBY indicator goes off. Remote controller To turn off the T-4555, press the [STANDBY/ON] button. The T-4555 will enter Standby mode. Note that the T-4555 is not completely shutdown in Standby mode. -
Page 17: Adjusting The Antennas
Turning On and Listening to AM and FM Radio—Continued Number buttons DIRECT TUNING Adjusting the Antennas Adjusting and installing the FM antenna Choose a location for the FM antenna while listening to an FM station. Change the direction of the Affix the antenna with a thumbtack. -
Page 18: Listening To Xm Satellite Radio
® Dock To receive XM Satellite Radio, you need an XM Mini- Tuner and Home Dock, which includes a home antenna. These are sold separately. For connection information, refer to the instruction manual supplied with the XM Mini-Tuner and Home Dock. -
Page 19: Setting The Satellite Radio Mode
Radio IDs: I, O, S, F. • XM Satellite Radio will transmit a special signal to the T-4555 to activate the full channel lineup. Activa- tion normally takes between 10 and 15 minutes, but during busy peak periods, you may need to leave the... -
Page 20: Selecting Xm Radio Channels
Channel Search Mode Press the [TUNING MODE] but- ton to select Channel Search mode. Remote controller Use the T-4555’s TUNING/CH ] button, or remote con- troller’s Up and Down Arrow ] buttons to select a chan- nel. You can also use the remote control- Remote controller ler’s Left and Right Arrow [... -
Page 21: Displaying Xm Radio Information
The signal is too weak. Check the XM Mini-Tuner DISPLAY and/or antenna connection and reposition it for the best reception. LOADING The T-4555 is tuning or decoding audio or text data. Please wait. OFF AIR The XM channel you selected is not currently broad- casting. Select another channel. -
Page 22: Listening To Sirius Satellite Radio
See the SiriusConnect Home tuner’s instructions for more information. Use the 8-pin mini DIN connector cable to connect the SiriusConnect receiver to the SIRIUS antenna jack on the rear of the T-4555. ® 8-pin mini DIN connector cable... -
Page 23: Setting The Satellite Radio Mode
first sign up for an account. You’ll need a major credit card and your SIRIUS Satellite Radio ID, which you can get from the T-4555, as explained below, or from the SiriusConnect Home tuner package. Use the Up and Down Arrow [ ]/[ ] buttons to select “RADIO... -
Page 24: Selecting Sirius Satellite Radio Channels
Channel Search Mode Press the [TUNING MODE] but- ton to select Channel Search mode. Remote controller Use the T-4555’s TUNING/CH ] button, or remote con- troller’s Up and Down Arrow ] buttons to select a chan- nel. You can also use the remote control- Remote controller ler’s Left and Right Arrow [... -
Page 25: Displaying Sirius Satellite Radio Information
ACQUIRING The SiriusConnect receiver is acquiring the signal or no signal is present. Make sure the SiriusConnect Home tuner is connected properly and that there are no obsta- cles close by. ANTENNA ERROR Make sure the SiriusConnect Home tuner is connected properly. -
Page 26: Parental Lock
Listening to SIRIUS Satellite Radio—Continued If you cannot receive a satellite signal, press the Down [ the terrestrial (TER) signal strength meter and adjust your antenna so that the bar is as long as possible. Terrestrial signals are only available in certain areas. -
Page 27: Changing The Pin Number
Listening to SIRIUS Satellite Radio—Continued Number buttons DIRECT TUNING ENTER Changing the PIN Number Press the [SETUP] button. Remote controller Use the Up and Down Arrow ] buttons to select Remote controller “Parental Lock,” and then press [ENTER]. Use the Up and Down Arrow ] buttons to select “Edit Remote controller Code,”... -
Page 28: Listening To Hd Radio™ Stations
Listening to HD Radio™ Stations HD Radio technology brings digital radio to conven- tional analog AM and FM radio stations, with improved sound quality, better reception, and new data services. HD Radio technology provides CD-quality sound for FM stations, and FM-quality sound for AM stations. In addition, FM HD Radio stations can transmit multiple programs on the same frequency by using multicast channels. -
Page 29: Selecting The Audio Format (Blend Mode)
Listening to HD Radio™ Stations— Continued ■ Using the T-4555: Press the [CATEGORY] [ buttons. Selecting the Audio Format (Blend Mode) HD Radio stations transmit both analog and digital ver- sions of their programs and you can choose which one you want to listen to. -
Page 30: Using Presets
■ Using the Auto Scan function: Remote controller Deleting Presets ■ Using the T-4555: To select a preset, use the T-4555’s PRESET [ ]/[ ] buttons, or the remote controller’s PRE- SET [+]/[–] buttons. Press the [AUTO SCAN] button. The Auto Scan function automatically selects and outputs each radio preset in turn for 5 seconds. -
Page 31: Changing The Remote Id
ENTER Remote controller Remote controller Note: • The remote controller and T-4555 must be set to the same remote control ID. Otherwise, you won’t be able to control the T-4555 with the remote controller. Press the [SETUP] button. Once you’ve changed the T-4555’s... -
Page 32: Troubleshooting
If you have any trouble using the T-4555, look for a solution in this section. If you can’t resolve the issue yourself, try resetting the T-4555 before contacting your Onkyo dealer. To reset the T-4555 to its factory defaults, turn it on and, while holding down the [MEMORY] button, press the [STANDBY/ON] button. - Page 33 • The T-4555 is located behind the glass doors of a audio rack or cabinet. • The T-4555 and remote controller may be set to different remote control IDs. Set the T-4555’s remote control ID first, and then set the remote controller to the same ID (see page 31).
-
Page 34: Specifications
Specifications General Power Supply: Power Consumption: Stand-by Power Consumption: Dimensions (W × H × D): Weight: Analog Outputs: RS232 Control: IR Input/Output: 12V Trigger Out: Tuning frequency range: Usable sensitivity: Signal-to-noise ratio: THD (total harmonic distortion): analog THD (total harmonic distortion): digital Stereo separation: Tuning frequency range: Usable sensitivity:... - Page 35 Memo...
- Page 36 Unit 1&12, 9/F, Ever Gain PlazaTower 1, 88, Container Port Road, Kwai Chung, N.T., HONG KONG Tel: 852-2429-3118 Fax: 852-2428-9039 http://www.ch.onkyo.com/ SN 29344514A (C) Copyright 2008 ONKYO CORPORATION Japan. All rights reserved. HOMEPAGE http://www.onkyo.com/ I0803-1 * 2 9 3 4 4 5 1 4 A *...
Need help?
Do you have a question about the T-4555 and is the answer not in the manual?
Questions and answers