Table of Contents
Advertisement
Advertisement
Table of Contents

Subscribe to Our Youtube Channel
Related Manuals for Ariel Rider X-CLASS 52V - STEP THRU


Summary of Contents for Ariel Rider X-CLASS 52V - STEP THRU
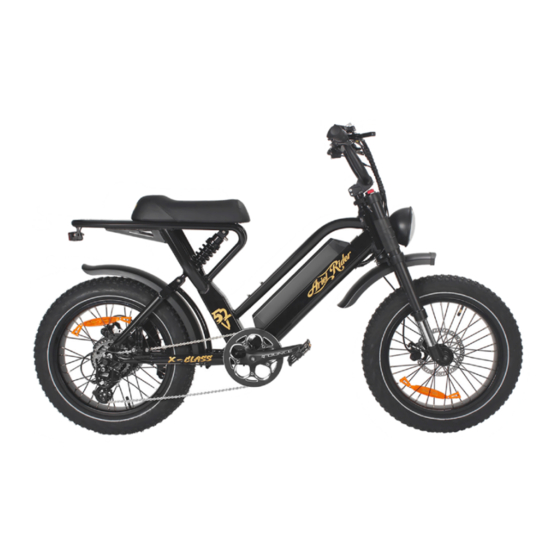
- Page 1 X-CLASS 52V - STEP THRU USER MANUAL...
- Page 2 We take pride in bringing you a quality product that will offer years of enjoyment. Please read and understand this manual fully before assembling and riding your bike. If you have questions after reading this manual, please reference the Ariel Rider Ebikes Help Center, contact us by email, and/or give us a call on the phone.
- Page 3 ...
-
Page 4: Using This Manual
All information in this manual should be carefully reviewed and if you have any questions, you should contact Ariel Rider E-bikes immediately. Users should also pay special attention to information marked in this manual beginning with an exclamation mark as below: The notes, warnings, and cautions contained within the manual and marked by the triangular Caution Symbol at the left of this page should also be given special care. - Page 5 Furthermore, Ariel Rider accepts no liability whatsoever for the safety, reliability, durability, and performance of any of Ariel Rider’s products. By buying, using, or allowing the use of Ariel Rider products, you represent and warrant that electronic bicycles can be associated with a high level of risk and YOU EXPRESSLY AND...
- Page 6 Ariel Rider E-bikes. ...
-
Page 7: Table Of Contents
TABLE OF CONTENTS Using this Manual ..................... General Info ....................... Assembly Instructions ................... Battery Charging .................... Operation ......................Maintenance ....................Troubleshooting ..................... Warnings and Safety ..................Limited Warranty .................... -
Page 8: General Info
first ride, Ariel Rider E-bikes recommends having a certified, reputable bike mechanic check your work. A critical aspect of assembling your bike from Ariel Rider E-bikes is securing the front wheel and checking the tightness of the rear wheel axle nuts. Both wheels need to be properly secured before operating your bike, and these nuts are to be checked every 45-50 miles. - Page 9 MANDATORY EQUIPMENT AND USE LOCATIONS Before all rides, ensure you have all required and recommended safety equipment and are following all laws pertaining to using an electric bike in your region. For example, these laws may specify the need for mandatory equipment, use of hand signals, and where you can ride.
- Page 10 If the throttle, brake lever cutoff switches, pedal assistance, or lighting is not functioning normally, intermittent, or not working, please discontinue using your X-Class 52V immediately and contact the Ariel Rider E-bikes Technical Support team for assistance. BRAKES Ensure brakes are working correctly, all braking system components are free from damage, and properly secured.
- Page 11 It is recommended that a certified, reputable bike mechanic performs all wheel tuning and truing operations on your bike from Ariel Rider E-bikes. Ensure your tires and inner tubes are in good working condition without any visual damage and have the correct amount of air pressure.
- Page 12 SUSPENSION, HANDLEBAR, AND GRIPS The suspension fork on your X-Class 52V will affect the handling of the bike so you MUST understand how it works before use. Check to ensure the front wheel, handlebar, and handlebar stem are properly fastened, aligned, and fitted to the user.
- Page 13 ...
-
Page 14: Assembly Instructions
NOTICE: The following assembly steps are only a general guide to assist in the assembly of your bike from Ariel Rider E-bikes and is not a complete or comprehensive manual of all aspects of assembly, maintenance, and repair. We recommend you consult a certified, reputable bike mechanic to assist in the assembly, repair, and maintenance of your bike. - Page 15 STEP 2: Install handlebar onto stem. • Remove the faceplate from the stem. • Make sure that the control cables from the handlebar are not twisted or wrapped around the fork when you mount them to the stem. • When affixing the faceplate, tighten the faceplate bolts incrementally and evenly in an “X”...
- Page 16 STEP 4: Install the pedals. It is very important to install the pedals onto the correct sides of the bike. The pedals are not identical. The threads on each are different, and they will damage the crank arms if they are installed on the wrong sides.
- Page 17 • If the levers can be pulled all the way back to the grips, DO NOT RIDE THE BIKE, seek out a qualified bike mechanic, or contact Ariel Rider product support . • Check that all the cables are secured and that nothing is going to rub on the chain or the tires.
- Page 18 Ariel Rider shall not be responsible for any and all injuries or damages resulting from hardware not being tightened correctly or components that are...
- Page 19 TORQUE SPECIFICATIONS Hardware Location Hardware Torque Required (Nm) Handlebar Area Handlebar Stem Clamp Bolts Handlebar Area Stem Faceplate Bolts Handlebar Area Brake Lever Clamp Bolt Handlebar Area Shifter Clamp Screw Handlebar Area Stem Angle Adjust Brakes Caliper Adapter to Frame Brakes Caliper to Adapter Brakes...
- Page 20 Ariel Rider shall not be responsible for any and all damages resulting from any latches, or levers not being properly secured or that are damaged.
- Page 21 LIGHTS ALWAYS TURN THE BIKE OFF BEFORE DISCONNECTING/CCONNECTING THE HEADLIGHT OR ANY OTHER ELECTRICAL COMPONENT OF THE BIKE, OR DAMAGE TO THE CONTROLLER WILL RESULT!! The X-Class 52V is equipped with extra lighting features not normally found on other e-bikes. One of the greatest dangers to bike riders comes from other vehicles and drivers.
- Page 22 • Rear Turn Indicators: The tail/brake light also has integrated turn indicators that can be activated with the left-hand control switch. They do not have an audible click, and do not have an automatic cancelling feature. They are only viewable from directly behind the rider, and are not meant to replace traditional hand signals..
- Page 23 REAR SHOCK The X-Class 52V comes equipped with a rear shock & suspension spring. A specialized shock pump can be used to increase the pressure within the upper chamber of the shock to reduce sag when the bike is loaded. The valve looks similar to a tire valve but requires a specialized pump that can pump in excess of 150 psi.
-
Page 25: Battery Charging
Always charge your battery in temperatures between 50 °F – 77 °F (10 °C - 25 °C) and ensure the battery and charger are not damaged before initiating charge. If you notice anything unusual while charging, please discontinue charging and use of the bike and contact Ariel Rider E-bikes for help. - Page 26 BATTERY CHARGING INFORMATION • Check the charger cables, charger, and battery for damage before beginning each charge. • Always charge in dry, indoor locations away from direct sunlight, dirt, or debris. • Charge in a clear area away from potential to trip on the charging cords or for damage to occur to the bike, battery, or charging equipment while parked and/or charging.
- Page 27 Do not open the battery housing, which will void the warranty and can result in damage to the battery, property, serious injury, and/or death. Ariel Rider shall not be responsible for any and all damages or injuries resulting from opening the battery housing.
- Page 28 In the case of damage to the terminals or battery mounts, please discontinue use and contact Ariel Rider E-bikes Technical Support immediately. Ariel Rider shall not be responsible for any and all injuries or damage resulting from damaged batteries.
-
Page 29: Operation
When charging a battery, the red charging indicator light on the charger should illuminate, indicating the battery is charging. When charging is complete, or when the battery is already charged, the light will be green. Distance Traveled Estimated Charge Time 5 mi (8 km) 1 hour 10 mi (16 km) - Page 30 ▪ Charge the battery with the charger originally supplied with the bike from Ariel Rider E-bikes, or a charger purchased directly from Ariel Rider E-bikes, designed for use with your specific bike serial number, as approved by Ariel Rider E-bikes.
- Page 31 The charger will get hot when operating as designed. If the charger becomes too hot to touch, you notice a strange smell, or any other indicator of overheating, discontinue charger use immediately and contact Ariel Rider E-bikes Technical Support. ...
- Page 32 Ariel Rider E-bikes, the battery, the charger, personal property, and/or serious injury or death. Ariel Rider shall not be responsible for any and all damages or injuries resulting from improper charging. ...
- Page 33 LONG-TERM BATTERY STORAGE If storing your bike from Ariel Rider E-bikes for longer than two weeks at a time, follow the instructions below to maintain the health and longevity of your battery. • Charge (or discharge) the battery to approximately 75% charged. (3 out of 4 lights on the battery indicator) •...
- Page 34 Ariel Rider E-bikes can lead to death or serious injury, please heed this warning. Ariel Rider shall not be responsible for any and all injuries or damages resulting from your improper use of an Ariel Rider E-bike Users must follow the instructions and warnings contained in this manual for safety.
- Page 35 START UP PROCEEDURE After the bike has been properly assembled following the assembly video, all components are secured correctly, and you have read this entire manual, you may turn the bike on and select a power level following the steps outlined below: •...
- Page 37 Begin riding carefully. With the proper safety gear, rider knowledge, and understanding you may now proceed to operate your bike from Ariel Rider E-bikes. You can begin by pedaling the bike in the appropriate drivetrain gear with pedal assist level 0 or 1. You may also use the throttle to accelerate and maintain your desired speed.
- Page 38 LCD DISPLAY CONTROLS The LCD display is the main interface for the motor control system and is used to power on the bike, adjust Pedal Assist levels, and display information such as the current speed, distance travelled, and error conditions. It has 2 buttons on its face, and two buttons on the lower edge. It also has a USB port (500mA) on the right edge underneath a protective rubber cover.
- Page 39 SYSTEM POWER • The POWER button is located on the bottom-right edge of the display. • To turn on/off the bike press and hold POWER for 1-2 seconds then release.
- Page 40 ASSIST LEVELS: • Press the keys on the face of the display to adjust the Pedal Assist level (0 – 5) DISPLAY MODE • MODE Press to cycle though the 5 different display modes. AVG Speed MAX Speed SPEEDOMETER SPEEDOMETER SPEEDOMETER Trip Distance Trip Distance...
- Page 41 • Press and hold for 2 seconds to turn on/off display backlight. NOTE: THIS DOES NOT TURN ON THE HEADLIGHT/TAILLIGHT. WALK MODE (3 mph) • Press and hold to activate walking mode. This turns on the motor at low speed for assistance in walking the bike uphill, or where riding is not feasible.
- Page 42 Sometimes these errors are due to bad connections (dirty connectors or connectors that aren’t seated fully) Your bike will not operate if it has an error condition. If you see an error like this on your display, contact Ariel Rider Support. Error...
- Page 43 BEST PRACTICES FOR MOTOR LONGEVITY Notice: It is recommended that users pay close attention and ride within the following limitations to ensure the hub motor does not overheat or become damaged from excessive loading. • To ensure adequate airflow to cool the electric components, keep the bike moving over 10 mph, or under 500 watts.
- Page 44 MAXIMIZING RANGE The range of your bike from Ariel Rider E-bikes is the distance the bike will travel on a single full charge of the onboard battery pack. The range values in this manual are estimates based on Ariel Rider E-bikes expected usage characteristics.
- Page 45 Always hold onto the bike when cargo is being loaded, in place, or attached to the bike by Ariel Rider E-bikes. Ariel Rider shall not be responsible for any and all injuries or damages resulting from cargo being loaded, in place, or attached to an Ariel Rider E-bikes...
- Page 46 Ariel Rider shall not be responsible for any and all damages or injuries resulting from using the front brake by itself or for any excessive stress that is placed on the components, damages occurring to the bike or parts, and/or damages or injuries that occur from loss of control.
- Page 48 It is recommended to park indoors. If you must park outdoors in rain or wet conditions, you should only leave your bike from Ariel Rider E-bikes outside for a few hours and proceed to park the bike in a dry location afterwards to allow all the systems to dry out.
- Page 49 • Do not park, store, or transport your bike from Ariel Rider E-bikes on a rack not designed for the bike’s size and weight. • When storing your bike or carrying your bike on a rack for transport, remove the battery pack to reduce the weight of the bike, make lifting and loading easier, and to protect the battery by transporting in the cab of a vehicle.
-
Page 50: Maintenance
MAINTENANCE BASIC BIKE CARE To ensure safe riding conditions you must properly maintain your bike from Ariel Rider E-bikes. Follow these basic guidelines and see a certified, reputable bike mechanic at regular intervals to ensure your bike is safe for use and fun to ride. - Page 51 • Riding on the beach or in coastal areas exposes your bike to salt, which is very corrosive. Wipe down your bike frequently and wipe or spray all unpainted parts with anti-rust treatment. Damage from corrosion is not covered under warranty so special care should be given to extend the life of your bike when used in coastal areas or areas with salty air or water.
- Page 52 Failure to remove all air pressure from the inner tube could result in serious injury. Ariel Rider shall not be responsible for any and all damages or injuries resulting from not removing all air pressure from the inner tube or from incorrectly changing the tire or tube.
- Page 53 law, ensure replacement aftermarket tires have sufficient reflective sidewall striping.
- Page 54 PRE-RIDE SAFETY CHECKLIST Notice: Before each ride, and after every 25-45 miles, we strongly advise following the pre-ride safety checklist in the table below. ✓ Basic Steps Safety Check ✓ Ensure front and rear brakes work properly. 1. Brakes ✓ Check brake pads for wear and ensure they are not over-worn. ✓...
- Page 55 ✓ Ensure tires are inflated to within the recommended limits displayed on the tire 2. Wheels and Tires sidewalls and holding air. ✓ Ensure tires have good tread, have no bulges or excessive wear, and are free from any other damage. ✓...
- Page 56 ✓ Check that the derailleur is adjusted and functioning properly. 7. Derailleurs ✓ Ensure shifter and brake levers are attached to the handlebar securely. ✓ Ensure all brake and shift cables are properly lubricated. ✓ Check that the frame and fork are not bent or broken. 1.
- Page 57 ✓ Look over connectors to make sure they are fully seated, free from debris or 11. Electrical Cables moisture. ✓ Check cables and cable housing for obvious signs of damage. ✓ Ensure headlight, taillight, and brake light are functioning, adjusted properly, and unobstructed.
- Page 58 RECOMMENDED SERVICE INTERVALS Regular inspection and maintenance are key to ensure bikes from Ariel Rider E-bikes function as intended, and to reduce wear and tear on their systems. Recommended service intervals are meant to be used as guidelines. Real world wear and tear, and the need for service, will vary with conditions of use. We generally recommend inspections, service, and necessary replacements be performed at the time or mileage interval that comes first in the following table.
- Page 59 Monthly, Check brake pad alignment, brake Clean and lubricate the drivetrain. Replace brake and shift 250-750 cable tension. cables if necessary. Check crankset and pedal torque. miles Check bike is shifting properly, Replace brake pads if Clean and optionally lubricate brake proper derailleur cable tension.
-
Page 60: Troubleshooting
TROUBLESHOOTING Symptoms Possible Causes Most Common Solutions It doesn’t work 1. Insufficient battery power 1. Charge the battery pack 2. Faulty connections 2. Clean and repair connectors 3. Battery not fully seated in tray 3. Install battery correctly 4. Improper turn on sequence 4. - Page 61 Reduced range 1. Low tire pressure 1. Adjust tire pressure 2. Low or faulty battery 2. Check connections or charge battery 3. Driving with too many hills, headwind, 3. Assist with pedals or adjust route braking, and/or excessive load 4. Battery discharged for long period of 4.
-
Page 62: Warnings And Safety
Notice: It is recommended that users pay special attention to all the general operating rules below before operating their bike from Ariel Rider E-bikes. Ariel Rider shall not be responsible for any and all injuries or damages resulting from failing to adhere to all general operating guidelines before, during, and/or after operating your Ariel Rider E-Bike. - Page 64 Failure to review these notes can lead to serious injury or death. Ariel Rider shall not be responsible for any and all damages or injuries resulting from your misuse of Ariel Rider E- bikes, including but not limited to the examples of misuse set forth below.
- Page 65 Ariel Rider shall not be responsible for any and all injuries or damages resulting from extreme riding.
- Page 66 • Any aftermarket changes to your bike from Ariel Rider E-bikes not expressly approved by Ariel Rider E- bikes could void the warranty and create an unsafe riding experience. Ariel Rider shall not be responsible for any and all damages or injuries resulting from aftermarket changes to your e-bike.
- Page 68 Ariel Rider shall not be responsible for any and all injuries or damages resulting from not wearing a helmet. You are REQUIRED to wear a helmet and you assume the risk of all injuries or damages resulting from refusing to protect yourself from head or neck injuries caused from not wearing a helmet.
- Page 69 Ariel Rider shall not be responsible for any and all damages or injuries resulting from your use of the Ariel Rider E-bikes. Like any sport, bicycling involves risk of damage, injury, and death. By choosing to ride a bike, you assume the responsibility for that risk, so you need to know, and practice, the rules of safe and responsible riding and the proper use and maintenance of this bike.
- Page 70 WET WEATHER Avoid riding in wet weather whenever possible. Ride in wet weather only if necessary. This electric bike is not meant for use in puddles, heavy rain, or streams. Never immerse or submerge this product in water or liquid as the electrical system may be damaged. •...
- Page 71 NIGHT RIDING Avoid riding at night whenever possible. Ride at night only if necessary. • Wear reflective and light-colored clothing. • Slow down and use familiar roads with street lighting, if possible. • Ensure tire wall, pedal, and other reflectors are installed and unobstructed. •...
- Page 72 Do not exceed the load rating limit of 325 lbs for the rider, passenger, and gear. Ariel Rider shall not be responsible for any and all injuries or damages resulting from riding with a passenger, regardless of whether or not properly installed equipment and safety gear were used. It...
- Page 74 A NOTE FOR PARENTS AND GUARDIANS As a parent/guardian, you are responsible for the activities and safety of your child. The X-Class 52V is not designed for use by children. The X-class 52V is not designed for use with child seats. See the RIDING WITH A PASSENGER section for the requirements of riding with a passenger.
- Page 75 (3) if Ariel Rider provides plans or specifications for the manufacture or preparation of the product and such plans or specifications were a proximate cause of the defect in the product, or (4) if the Bikes are marketed under a trade or brand name of Ariel Rider.
- Page 76 Moreover, pursuant to TX CIV PRAC & REM §82.003 and applying to those residing in Texas, Ariel Rider shall not be liable for any product liability action due to the fact that electronic bicycles are products known to be unsafe by the ordinary consumer who consumes the product with the ordinary knowledge common to the...
- Page 78 For those residing in the state of California, You must comply with AB-1096, which provides that: a. You shall not operate the Bike on a bicycle path or trail, bikeway, bicycle lane, equestrian trail, or hiking or recreational trail, unless it is within or adjacent to a roadway or unless the local authority or the governing body of a public agency having jurisdiction over the path or trail permits, by ordinance, that operation;...
- Page 79 Moreover, pursuant to IL ST CH 735 §5/13-213 and applying to those residing in Illinois, Ariel Rider shall not be liable for injury or damages claimed to have resulted from an alteration, modification, or change of the Bike, when that injury or damage is claimed to have resulted from said alteration, modification, or change of the Bike.
- Page 80 Bike, regardless of whether or not Ariel Rider provides adequate warning or instruction. Ariel Rider shall not be responsible for injuries resulting from unsafe aspects of the Bikes, regardless of whether or not such unsafe aspects are an inherent characteristic of the product or are such that an ordinary person who uses the Bike with the ordinary knowledge common to the Class of persons for whom the product is intended is aware of such aspects.
- Page 81 Michigan, Ariel Rider shall not be responsible for failure to warn of a material risk that is or should be obvious to a reasonably prudent Bike user or a material risk that is a matter of common knowledge to those in the same or similar position as the person upon whose injury a claim is premised on.
- Page 82 Moreover, pursuant to ORS 30.915 and applying to those residing in Oregon, Ariel Rider shall not be responsible for foreseeable and unforeseeable modifications, alterations, and/or changes to the Bike,...
- Page 83 Ariel Rider provided warning associated with modifications, alterations, or changes to the Bike. For those residing in the state of Massachusetts, You must comply with Massachusetts Code, Ch. 85, Sec. 11B, which provides that: a. You shall not ride a Class 3 Bike on a bike path or shared-use path unless permitted by the municipality, local authority or state agency having jurisdiction over that path;...
- Page 84 b. You shall wear a properly fitted and fastened bicycle helmet that meets the standards provided by either the United States Consumer Product Safety Commission or the American Society for Testing and Materials, or standards subsequently established by those entities, regardless of Your age and whether or not You are an operator or passenger;...
-
Page 85: Limited Warranty
LIMITED WARRANTY Every bike by Ariel Rider E-bikes is covered under a manufacturer's one-year all-inclusive warranty for the original owner against all manufacturing defects. Warranty details below are subject to change at any time; for the most current warranty version, visit https://arielrider.com/pages/warranty. Ariel... - Page 86 WARRANTY EXCLUSIONS • normal wear and tear, Liability for material defects does not cover which occurs from the manufacturers’ intended use of the product. Components such as the battery pack, motor system, braking system, drivetrain system, seat, grips and pedals are all subject to intended use-related wear and are not covered under the warranty from normal wear.
- Page 87 Ariel Rider E-bikes will not be liable and/or responsible for any damage, failure, or loss caused by any unauthorized service or use of unauthorized parts. In no event shall Ariel Rider E-bikes be...
- Page 88 Worn components should be replaced immediately. If you are unfamiliar with regular maintenance, a certified, reputable bike mechanic should be consulted. Ariel Rider shall not be responsible for any and all damages or injuries resulting from the use of an Ariel Rider E-bike past its useful life. ...
- Page 89 WE ARE HERE TO HELP! IF YOU HAVE ANY QUESTIONS, PLEASE: Access Ariel Rider E-bikes Help Center https://arielrider.zendesk.com/hc/en-us Contact us directly by email info@arielrider.com...
- Page 90 WARRANTY REGISTRATION Please send the following information to info@arielrider.com Customer Name: Serial Number of the bike: Serial Number of the battery: Order #: Date of receiving the bike:...
Need help?
Do you have a question about the X-CLASS 52V - STEP THRU and is the answer not in the manual?
Questions and answers