Table of Contents
Advertisement
Quick Links
ATSC 3.0 6000L Broadband Gateway
Installation and Description Guide
Version 2.0
Copyright © 2020 Zinwell Corporation. All rights reserved.
Zinwell and the logo of Zinwell are the distinctive trademarks of Zinwell Corporation in R.O.C. (Republic of China) and/or other jurisdictions.
This product is under the protection of Taiwan, R.O.C. (Republic of China) and international copyright and intellectual property laws.
2021. Jul.
Version 2.0
Set-Top-Box Model: ASTC 3.0 Broadband Set-Top-Box
Certified by
1
Advertisement
Table of Contents

Summary of Contents for Zinwell ATSC 3.0
- Page 1 Copyright © 2020 Zinwell Corporation. All rights reserved. Zinwell and the logo of Zinwell are the distinctive trademarks of Zinwell Corporation in R.O.C. (Republic of China) and/or other jurisdictions. This product is under the protection of Taiwan, R.O.C. (Republic of China) and international copyright and intellectual property laws.
- Page 2 Federal Communication Commission Interference Statement This equipment has been tested and found to comply with the limits for a Class B digital device, pursuant to Part 15 of the FCC Rules. These limits are designed to provide reasonable protection against harmful interference in a residential installation. This equipment generates, uses and can radiate radio frequency energy and, if not installed and used in accordance with the instructions, may cause harmful interference to radio communications.
-
Page 3: Table Of Contents
Contents Important Safety Instruction and Precaution ................4 Knowing Your Set-Top-Box ....................5 2.1 Theory of Operation ........................ 5 2.2 Model Specification ........................ 5 2.3 Features ............. …………………………………………………...6 2.4 Package Contents ........................6 2.5 Panel Specification ........................7 Finding Out the IR Remote Control ..................8 Installing Your Set-Top-Box .................... -
Page 4: Important Safety Instruction And Precaution
1 Important Safety Instruction and Precaution Read through all the instructions carefully before use. Operate this product only in the manner described. Only a Water-dampened soft-cloth is recommended to clean the surface of this product. Do not expose this product excess vibration. ... -
Page 5: Knowing Your Set-Top-Box
2 Knowing Your Set-Top-Box 2.1 Theory of Operation 2.2 Model Specification ATSC1.0/3.0 Dual Mode Tuner Input Tuner Frequency Range 42MHz ~ 1002MHz Decode MPEG2 (ATSC 1) Video (optional) HEVC 4Kp60 (ATSC 3) Output HDMI 2.0 10/100M RJ-45 Ethernet 2.4G 802.11n 802.11n Wi-Fi Antenna... -
Page 6: Features
2.3 Features Emergency alerting system ATSC 3.0 broadcast application compliant ATSC 3.0 / 1.0 receiving capability 4k UHD Video; Dolby AC4 Audio Streaming to client Devices 4G LTE Internet Connection Remote learning Application 2.4 Package Contents... -
Page 7: Panel Specification
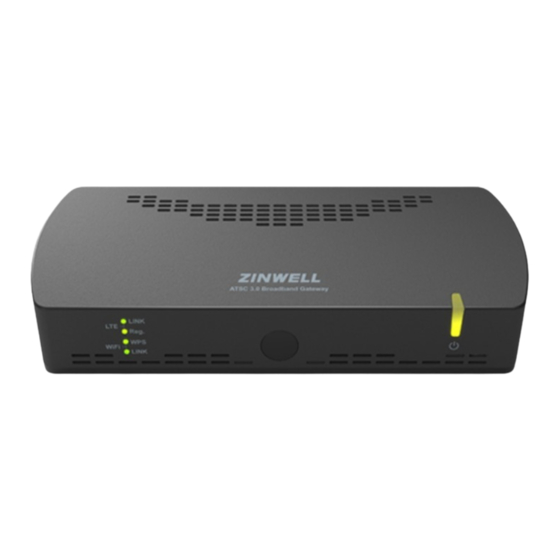
2.5 Panel Specification 2. HDMI OUT 3. LAN 5. RESET 1. ANTENNA 7. SIM SLOT 4. USB 8. DC IN (POWER: 12V/1.5A) 6. WPS (Wi-Fi Protected Setup) 1. Antenna port is to connect the cable from your aerial 2. HDMI out port is to connect the cable from your display is for Ethernet (RJ45) network or internet access ... -
Page 8: Finding Out The Ir Remote Control
3 Finding Out the IR Remote Control IR Key Function POWER Power Key AUDIO Audio Track Key CLOSE CAPTION Close Caption ALERT Alert Key E-LEARNING E-Learning Number keys 1 Number keys 2 Number keys 3 Number keys 4 Number keys 5 Number keys 6 Number keys 7 Number keys 8... -
Page 10: Installing Your Set-Top-Box
4 Installing Your Set-Top-Box 4.1 Installing Instruction in 3 Steps *Before Reading the Instructions Refer to the Section 2.5 Panel Specification for the location of each port or button mentioned below Step 1. Connect your Coaxial Cable to the Antenna Port Step 2. -
Page 11: Connecting Your Set-Top-Box For Internet Access
4.2 Connecting Your Set-Top-Box for Internet Access LTE Mode (ON) - AP / Router Mode 4.2.1 *Before Reading the Instructions SIM Card Size: Micro SIM Card Refer to the Section 2.5 Panel Specification for the location of each port or button mentioned below Turn ON the Power of Set-Top-Box and wait for about ONE minute (IF... - Page 12 Select Network & Internet -> Press OK on the remote control to confirm Ensure your SIM Card HAS NO PASSCODE before inserting your Micro SIM Card into the SIM Slot on the Set-Top-Box. IF your SIM Card requires PASSCODE, please refer to the Section 4.2.2 Setting Up ...
- Page 13 Use Cursor Keys (▲▼◄ ►) on the remote control to Enable LTE Mode and wait for about ONE minute. Check the status of the LED indicator on the Set-Top-Box (Refer to the image on the right side). When the GREEN LIGHT from LED2 is illuminated, it indicates that the SIM Card has been connected to your telephone service successfully.
- Page 14 Use Cursor Keys (▲▼◄ ►) on the remote control to MOVE to IP settings (Refer to the picture on the left side) -> Press OK on the remote control to confirm Use Cursor Keys (▲▼◄ ►) on the remote control to SELECT DHCP ->...
- Page 15 Ensure that IP 192.168.1.xxx (last 3 digits are randomly generated by the system) APPEARS on the setting screen for Internet Access Function. (Refer to the picture on the right side) The IP is Auto-Generated from Set-Top- Box when LTE Mode is ENABLED (ON) and able to connect with the internet.
-
Page 16: Setting Up Sim Card Apn And Pin Code
Setting Up SIM Card APN and PIN Code 4.2.2 Press the "HOME" button on the remote controller to enter the Menu Screen (Refer to the Image on the left side) -> Use Cursor Keys (▲▼◄ ►) on the remote control and MOVE to All Apps ->... - Page 17 Current Setting Information of your SIM Card will be shown (Refer to the picture on the right side) Use Cursor Keys (▲▼◄ ►) on the remote control to enter the APN (Access Point Name) and "PIN Code of your SIM Card (In most of use cases, only the PIN Code is required) ->...
-
Page 18: Hot Spot - Password And Name Setting
Hot Spot - Password and Name Setting 4.2.3 Press the "SETTING" button on the remote controller (Refer to the Image on the left side) Select Network & Internet -> Press OK on the remote control to confirm... - Page 19 Use Cursor Keys (▲▼◄ ►) on the remote control to MOVE to HotSpot (Refer to the picture on the Right side) Press OK on the -> remote control to confirm Default Hot Spot Name: AndroidAP_xxxx (NO Password) (In order to enhance the Security of your Internet Access, it is recommendable to SET UP a Password) If you wish to change your Hotspot Password, Use Cursor Keys (▲▼◄...
-
Page 20: Setting Up The Program System
5 Setting up the Program System Step 1. Turn ON the Power of Set- Top-Box and wait for about ONE minute. Step 2. Press the Menu button on the remote control. Step 3. Press OK for moving next to the SETTING page, then select Scan Channels... - Page 21 Step 4. Select “Auto Scan” in the scan channels. Press “Start Scanning” button, to start the process of scanning channels. Alternatively, select "Manual Scan" in the scan channel. Change the Channel Number to be scanned. Select the "Start Scanning" in order to starting the process of scanning the channel...
- Page 22 Step 5. In the completion of scanning, the scan bar will reach 100% and the services of channel are found. On the remote control, press OK and BACK in order to exit the setting page. Step 6. Select any channel in service to ensure program running smoothly...
-
Page 23: Exploring The Function In Setting System
6 Exploring the Function in Setting System 6.1 Function Overview Auto Scan Scan Channels Manual Scan Audio Language Setting Closed Caption Parental Rating Home Mini EPG Display Change PIN Electronic Program Guide Guide... -
Page 24: Guide To The Setting System
6.2 Guide to the Setting System Press the Menu button on the remote control. Select SETTINGS and Press OK on the remote control to confirm The image on the right side is the screen of SETTINGS... -
Page 25: Other Functions
6.3 Other Functions Searching for the Available Channels (Auto Scan) 6.3.1 Main Menu -> Settings -> Scan Channels -> Mode: Auto Scan -> Press Start Scanning Searching for the Available Channels (Manual Scan) 6.3.2 Main Menu -> Settings -> Scan Channels -> Mode: Manual Scan ->... -
Page 26: Selecting Your Preferred Language For Audio
Selecting Your Preferred Language for Audio 6.3.3 Main Menu -> Settings -> Audio Language -> Press OK to confirm Turning Off the Caption 6.3.4 Main Menu -> Settings -> Closed Captions-> Press OK to confirm. -
Page 27: Selecting The Parental Rating
Selecting the Parental Rating 6.3.5 Main Menu -> Settings -> Parental Rating (The Admin PIN MUST be ENTERED before entering the Parental Rating screen (The default password is: 0000) -> Select the Rating Restriction -> Press OK to confirm. Setting the Display Duration of Mini EPG 6.3.6 Main Menu ->... -
Page 28: Changing The Administrator Pin
Changing the Administrator PIN 6.3.7 (Before entering the Change PIN screen, the Admin PIN MUST be ENTERED (the default password is: 0000)) Main Menu -> Settings -> Change PIN -> Press OK and enter the NEW Administrator PIN -> Press OK to confirm. -
Page 29: Updating The New Live Tv In Apk
7 Updating the New Live TV in APK Step 1. Put the APK in a USB storage device Insert the USB storage device into the USB port of the Set-Top-Box Turn ON the Power of Set-Top-Box and wait for about one minute ... - Page 30 Step 3. Select the USB storage device (such as Kingston USB drive) and press OK to select. App Installer will list all APKs from the USB storage device Select "Next Gen LiveTV" and press OK to start the installation. Step 4.
-
Page 31: Trouble Shooting
File too large for Set-Top-Box Re-encode the file at data rate and/or lower resolution Faulty File Check the file to ensure there is no encoding issue 9 Contacting Us Please kindly reach out us via the Contact Us function in our website: https://www.zinwell.com.tw/us/...
Need help?
Do you have a question about the ATSC 3.0 and is the answer not in the manual?
Questions and answers