Table of Contents
Advertisement
Quick Links
Advertisement
Table of Contents

Summary of Contents for Mint InstantKon SF70
- Page 1 Instruction manual...
-
Page 2: Table Of Contents
CONTENTS Aperture control Introduction Exposure control Foreword Tips: How to set your light meter Designation of parts B mode Quick-start guide Double exposure Basic skills Tips: When to use an ND filter Inserting batteries Opening the front cover Extra adapters Closing the front cover Connecting external flash Loading film... -
Page 3: Foreword
FOREWORD Dear Customer, Congratulations and thank you for choosing the InstantKon SF70. We are very proud of this unique one-of-a-kind analogue camera, and hope you will get a great deal of pleasure from making use of its many features to create amazing images. -
Page 4: Designation Of Parts
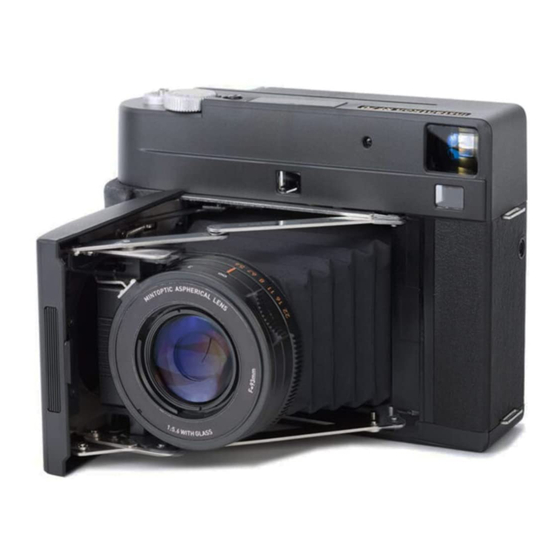
DESIGNATION OF PARTS Film release lever Lens lock button Viewfinder window Cable release socket Front cover lock Rangefinder window Shutter button Flash button 2.5mm audio jack Shutter speed selector dial Built-in flash Aperture ring Front cover Ambient light meter Focusing ring... - Page 5 DESIGNATION OF PARTS Viewfinder window Neck strap eyelets Exposure indicator light Battery compartment Rangefinder window Film door lock Film and battery indicator Tripod mount socket...
-
Page 6: Quick-Start Guide
QUICK-START GUIDE 1. Open front cover 2. Turn focusing ring 3. Press shutter release 4. Pull film release lever... -
Page 7: Inserting Batteries
INSERTING BATTERIES 1. Open battery chamber cover Note: 2. Insert batteries as indicated This camera uses two AA size Alkaline batteries 3. Close battery chamber cover 4. Check battery power in battery indicator... -
Page 8: Opening The Front Cover
OPENING THE FRONT COVER 5. 按下快門鍵 1. Open the front cover by pressing the front cover lock Note: and pulling as indicated by the arrow Opening the front cover powers on the 2. Once the front cover is open, straighten the cover camera braces to open it fully... -
Page 9: Closing The Front Cover
CLOSING THE FRONT COVER 1. Set the focusing ring to Infinity position Note: (Front cover cannot close if the focusing ring is not set to The front cover can close normally with a Infinity. Forcing it to close might cause damage.) filter attached to the lens 2. -
Page 10: Loading Film
LOADING FILM 1. Open the back cover Note: 2. Insert film pack (yellow line on top right) Film: W72mm x H86mm 3. Close the back cover. The LCD screen displays “C” Image: W62mm x H62mm which means cover before ejecting the dark slide 4. -
Page 11: Focusing
FOCUSING Rangefinder Window (round) Out of focus In focus 1. Focus using the round rangefinder window 2. Ensure that your subject is centered in the bright frame 3. Adjust the focusing ring until the double images converge into one Rangefinder Window Note: Focusing range is 0.75m to Infinity... -
Page 12: Composing
COMPOSING Viewfinder Window (rectangular) 1. Compose your picture using the Viewfinder 2. Frame your picture within the bright lines 3. The bright frame lines give you a 80% preview of the final image Viewfinder Note: Window Two different frame lines allow you to preview images at different focusing distances The larger frame lines (orange) preview the image at Infinity The smaller frame lines preview the image at the minimum focusing distance... -
Page 13: Ambient Light Indicator
AMBIENT LIGHT INDICATOR When you half-press the shutter release, the If you see “2”, “4” or “8” displayed in the Indicator, you can Ambient Light Indicator will light up to show reduce the exposure by: whether your exposure is correct “2”... -
Page 14: Flash Photography
FLASH PHOTOGRAPHY 1. Flash is located on the top plate, next to the button Note: 2. Flash pops out when you glide the Flash Button to the right When using the Flash, ensure that your subject is within 3. Brightness is automatically adjusted depending on the the flash range of 3 meters focus distance The 2.5mm audio jack allows you to add an external... -
Page 15: Shutter Release And Film Eject
SHUTTER RELEASE AND FILM EJECT 1. Press the shutter and release when you hear the shutter click 2. Pull the Film Release Lever and the exposed film ejects Note: Self-timer function: Double-click to initiate the 5 second timer Multiple exposure: If you wish to expose more than one image on the same film, press the shutter as many times as you like before pulling the Film Release Lever Dark slide: Remember to eject the dark slide each time you insert a new film pack. -
Page 16: Aperture Control
APERTURE CONTROL The largest aperture is f/5. , which is equivalent to about f/2. in the 135 mm format 1. Turn the Aperture Ring to select your desired F-Stop Note: 2. There are 6 F-Stops to choose from, with the largest F-Stops: f/5. -
Page 17: Exposure Control
EXPOSURE CONTROL InstantKon SF70 Shutter Speed Dial SF70 Shutter Speed: AUTO, A+1, A-1, B, R , 1/500, 1/250, 1/125, 1/60, 1/30, 1/15, 1/8, 1/4, 1/2, 1, OFF 1. Turn the Shutter Speed Dial to select your desired shutter speed 2. The shutter speed options offer greater creative control over the final image... -
Page 18: Tips: How To Set Your Light Meter
TIPS: HOW TO SET YOUR LIGHT METER Time Aperture 1. Download the light meter app of your choice 2. ISO: Set at ISO800 3. Aperture: Set your desired aperture 4. Time: Once you have set your ISO and aperture, the app should give you the appropriate shutter speed for correct exposure. -
Page 19: B Mode
B MODE B mode 1. Set shutter speed dial to “B” mode Note: 2. Press and hold down shutter. Film is exposed until you “B” mode can be used in low light situations or to create release the shutter light painting or light trails 3. - Page 20 (REAR SYNC FLASH) The difference between regular flash and rear sync flash mode Shutter Shutter Normal flash Rear flash opens closes *shutter speed varies according to ambient lighting 1. Set shutter speed dial to “R ” Note: 2. Glide Flash Button to the right to pop up the Flash Rear Sync Flash: Flash fires as the shutter is about to 3.
-
Page 21: Double Exposure
DOUBLE EXPOSURE Multiple Exposure: If you wish to create double- or multiple Note: exposure images, press the shutter release as many times It is important to reduce exposure for each layer (use ND as needed before pulling the Film Release Lever filter or faster shutter speed) to avoid over-exposure of the final image... -
Page 22: Tips: When To Use An Nd Filter
TIPS: WHEN TO USE AN ND FILTER 1/15 1/30 1/60 1/125 1/250 1/500 1/1000 1/15 1/30 1/60 1/125 1/250 1/500 1/15 1/30 1/60 1/125 1/250 1/15 1/30 1/60 1/125 1. Your light meter app will show you the correct shutter speed after you have set the ISO at 800 and your desired F-Stop 2. -
Page 23: Connecting External Flash
CONNECTING EXTERNAL FLASH (Optional accessory not included) 2.5mm audio jack allows you to attach an external flash for better Note: Use 1/125 or slower speeds with illumination, particularly useful for wedding and fashion photos. external flash for the best results. -
Page 24: Attaching Neck Strap
ATTACHING NECK STRAP (Optional accessory not included) Please refer to the illustration to attach neck straps. If you prefer a third-party neck strap, please ensure that it is strong enough the bear the weight of the camera. -
Page 25: Connecting Cable Release
CONNECTING CABLE RELEASE (Cable release not included) Use a cable release to fire the camera remotely for long exposures and self-portraits (For use with normal threaded cable release) -
Page 26: Attaching Tripod Mount
ATTACHING TRIPOD MOUNT (Tripod not included) The tripod mount socket allows you to secure the camera on a tripod for longer exposures without camera shake, opening up many creative imaging possibilities (For use with normal tripod and tripod head at 1/4”. Same as all modern digital cameras and DSLR.) -
Page 27: Specifications
SPECIFICATIONS Apertures: f/5. , f/6. , f/8, f/11, f/16, f/22 Lens: 3-element lens with glass, aspherical lenses, f=93 mm, EFL(Effective Focal Length) Coating: Multi-layer coated Focusing distance: 0.75m (29.5 inches) - ∞ (manual focus) Depth-of-field: (@ 0.75m and f/5.6): 4.9cm Largest aperture: (35mm equivalent): f/2.4 Shutter speed:... -
Page 28: Precautions
In case the camera breaks open as a result of fall or other accident, remove the battery and contact the MiNT warranty centre. Do not use the camera in the presence of flammable gas, as this could result in explosion or fire. -
Page 29: Contact Us
CONTACT US Reach out to us anytime! At MiNT we value our customers most. If you have any difficulties with our products, feel free to contact us for assistance. Email: info@mint-camera.com Website: http://mint-camera.com...
Need help?
Do you have a question about the InstantKon SF70 and is the answer not in the manual?
Questions and answers