Table of Contents
Advertisement
Quick Links
Advertisement
Table of Contents

Summary of Contents for Go Fermentor NET
- Page 1 GOFERMENTOR NET OPERATING MANUAL...
- Page 2 GOfermentor is a registered trademark. US patent 9,260,682, 9,611,452, France 3013726, Australia 2014268161, other foreign registrations pending. Operating Manual ©2016-2023 Revision 4.1 Hardware 3.00 019123 DRAFT www.GOfermentor.com...
-
Page 3: Table Of Contents
6.6 GOFERMENTOR APP ADDITIONAL FEATURES ....................42 APPENDICES ................................. 45 A1. SPECIFICATIONS ..............................46 A2. NET CONTROL PANEL ASSEMBLY INSTRUCTIONS ..................... 50 A3. TROUBLESHOOTING ALARMS AND ERRORS ...................... 51 A4. OPERATION WITHOUT INTERNET ACCESS ......................52 A5. NET CONTROLLER CONFIGURATION ......................... 53 A6. -
Page 4: What Is The Gofermentor
1. WHAT IS THE GOFERMENTOR? Introducing the first truly revolutionary device for winemaking. Traditional winemaking fermentors have changed little in the last 500 years - the only major change being the move from open wood vats to temperature controlled stainless-steel tanks. The GOfermentor brings 21 century technology, developed originally for the manufacture of pharmaceuticals, to modern winemaking. - Page 5 BENEFITS The GOfermentor provides many benefits to the winery: 1. A clean and closed environment for the fermentation. No open operations result in minimal oxidation. This also can reduce the need to add sulfites. No “reductive” aromas. 2. Minimal capital expenditures. 3.
-
Page 6: Components
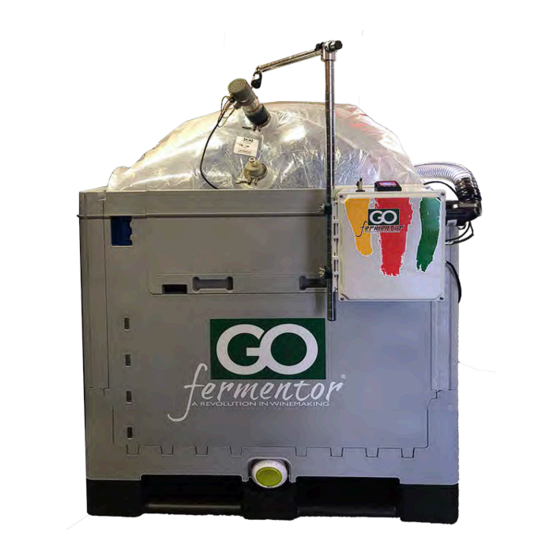
2. COMPONENTS The GOfermentor consists of two major components: 1. GOBASE - Reusable outer container with control panel – This rigid plastic container holds the fermentation liner in position. The container can be moved by pallet jack or forklift. It is also DOT certified for truck shipment. -
Page 7: Installation
Chilled water or glycol supply if using optional GOCOOLER heat exchanger plate. 3.2 WHAT DO YOU NEED TO ORDER FROM US? REQUIRED • GOFERMENTOR NET GOBASE outer container • GOLINER single-use dual chamber fermentation liners. Need one per batch. Sold in packs of 3. -
Page 8: Equipment Setup
3.3 EQUIPMENT SETUP Setting up the GOfermentor for winemaking is easy and should take less than 15 minutes. First set up the rigid GOBASE unit. Then install the single-use GOLINER. GOBASE 1. Set the rigid GOBASE in a suitable area. Open the folded sides and push them until they lock in place. 2. - Page 9 3. Reach inside the GOBASE bottom discharge opening and pull the BOTTOM DRAIN PORT towards you. Pull until the tabs on either side of the BOTTOM DRAIN PORT lock into the corresponding ribs on the GOBASE as shown below. Make sure tabs are locked into the grooves on both sides! DO NOT remove the tamperproof flange and green cap...
- Page 10 5. Connect the VENT VALVE on to the VENT port using the supplied TriClamp and gasket. The VENT port is the middle port (located between the sampling port and the blue inflation port). 6. Use the supplied suspension cord to hang the VENT VALVE from the support pole located on the left side of the GOFERMENTOR control panel.
- Page 11 8. Connect the INFLATION port to the fitting on the right side of the control panel using the supplied INFLATION HOSE. The TriClamp end connects to the liner and the quick-connect end connects to the control panel. 9. Power up the control panel. Once the MAIN CONTROL window is displayed press the PUNCH button and verify that the VENT valve opens.
-
Page 12: Red Wine Operations
RED WINE OPERATIONS Ensure the GOfermentor is setup as described earlier in Section 3.3. FILLING WITH MUST 1. Connect the destemmer outlet with a 2 inch TriClamp hose to the FILL port (closest to front). 2. Run the destemmer/crusher and use its internal pump or external must pump to transfer the required amount of crushed grapes into the GOLINER (max 1 ton). - Page 13 ALTERNATIVE FILLING METHOD 1. In the event a must pump is not available, or any other reason the 2 inch TriClamp opening can’t be used, an opening can be cut into the top of the GOLINER. Use of whole clusters not recommended. 2.
- Page 14 4. Once finished filling, the cut is easily closed with tape. Ensure surface is clean and dry before applying tape. First apply a few small strips perpendicularly along the cut to “stitch” it together and to align the 2 sides. Then apply a few more long strips parallel to the cut to seal it closed. You can use duct tape but special food-grade tape is available –...
- Page 15 TEMPERATURE PROBE/SAMPLING TUBE 1. Place a TriClamp gasket and slide the GOTEMP sampler/temperature probe down through the FILL port into the GOLINER. 2. Use the supplied TriClamp to secure the sampler/temperature probe. 3. Plug the temperature probe cable into the jack located on the front panel. 4.
- Page 16 SAMPLING USING HAND SAMPLER Sampling is performed by connecting the hand sampler. Connect the coupling tube to the sampler. Push the quick-connect coupler on the coupling tube onto the mating socket on the sampling tube. This will open the flow path to the collection bottle. Now pump the handle to draw the sample into the collection bottle. Disconnect the sampler by pressing the release button on the mating socket.
- Page 17 PUNCH OPERATION Punch of the cap may be initiated at any time in the fermentation. It can also be performed after initial must adjustment to mix nutrient additions if desired. The punch operation can be initiated manually or on a scheduled basis. For manual operation select the PUNCH operation using the OPER button.
- Page 18 NOTE: You may need to adjust the PUNCH pressure setpoint depending on the must volume (SETUP). For small volumes 15” H2O is good, while for a large volume (> 600Kg) you should use a higher pressure (20” H2O) to get an effective punch.
- Page 19 PRESSING OUT THE WINE The GOfermentor built-in press system can be used to gently press out the wine. Use of the feature eliminates the need for an external press and performs the pressing operation without any damaging exposure to air. It is recommended the punching be discontinued several days prior to the anticipated pressing.
- Page 20 process is automatic. You set the number of cycles (typically 3), hit the PRESS button, and walk away. Pressing takes about 90 minutes (3 cycles). 9. When pressing is complete, disconnect and remove the pressing tube. Remove all fittings in preparation for lifting out the liner.
-
Page 21: White Wine Operations
WHITE WINE OPERATIONS The GOfermentor must first be setup as described earlier in Section 3.3. For white wine production you will need two GOBASE units and two GOLINERS. FILLING WITH GRAPES 1. Connect the destemmer outlet with a 2 inch TriClamp hose to the FILL port (closest to front). 2. - Page 22 6. The configuration should look as follows: 7. Start the wine transfer pump to transfer the free-run juice. At first, the pump will simply remove the headspace gas and you should see the headspace collapsing. The juice will start to flow once all the gas is removed.
- Page 23 ALTERNATIVE METHOD OF FILLING 1. In the event a must pump is not available, or any other reason the 2in TriClamp opening can’t be used, an opening can be cut into the top of the GOLINER. Use of whole cluster not recommended. 2.
- Page 24 4. Once finished filling, the cut is easily closed with tape. Ensure surface is clean and dry before applying tape. First apply a few small strips perpendicularly along the cut to “stitch” it together and to align the 2 sides. Then apply a few more long strips parallel to the cut to seal it closed.
- Page 25 BATONAGE The GOfermentor makes it easy to stir up the lees during fermentation and aging. The punch operation used in red wine production is used to perform the bâtonage. Simply press the PUNCH button and the primary fermentation chamber will be compressed and pushed upwards, effectively dispersing the settled yeast. RACKING Connect a hose to either the VENT or FILL port and use a wine pump to suck the wine out of the GOLINER to a collection liner, tank, or barrel for post-fermentation operations.
-
Page 26: Operation Of Controls
ADDING DEVICES Power up the GOfermentor NET unit you want add and control to you Blynk app. After the startup screen you should see the following screen on the GOfermentor display: If it gets stuck in this startup screen: Cycle power OFF/ON. - Page 27 To add additional new devices, first click Next click “Add new Device”. the 3 lines in the top right corner Verify that the NET lcd display still shows In App, +Add New Device. Now click “Start” on the app. screen. Click “Continue”...
- Page 28 Next choose your Wi-Fi network from the list. These MUST be 2.4 gHz networks. GOfermentor does not connect to 5 gHz. Now type in your WiFi network password (not Blynk password), remember this is case sensitive. Click the option to remember these settings if you plan on using it for other devices.
- Page 29 CHANGING THE DEVICE NAME When you add a new device to your mobile app it will be given a default device name. You can change this name to something that is more meaningful and easier to remember. Login into your Blynk console by clicking on blynk.cloud in any web browser and enter your username and password (same as the mobile app).
- Page 30 CHANGING THE WIFI SSID (LAN) If you move the GOfermentor to a new location that is out of range of the original LAN (SSID) you assigned it the first time, you can easily change the WiFi SSID: Cycle power on the GOfermentor and click the center button within 30 seconds. This will force the controller enter the SETUP menu, from here select “Reset WiFi”, confirm OK and wait for the reboot.
- Page 31 DEVICE INFORMATION AND TIMELINE The Blynk app shows all the devices you are allowed to view on a tiled display. Click to bring up a particular NET display. Next click on ooo symbol Shows if device is currently offline Click to show ALL...
- Page 32 SHARING DEVICES A user can allow others access to their devices. This involves adding new users to your ORGANIZATION: Click on icon (left top) Click on Members +invite new member Select your ORGANIZATION (GOFERMENTOR is just example.) Provide a valid email and user name Select ROLE as USER (will NOT allow user to pick...
-
Page 33: Net Local Controller Operation
6.2 NET LOCAL CONTROLLER OPERATION FIRST TIME USE The unit is controlled by the 3 silver buttons with corresponding captions on screen. A WiFi internet connection is required. First set up the WiFi connection using the SmartPhone app as described in SECTION 6.1. On power you will see the startup screen. - Page 34 OPERATING THE BUTTONS Indicator row Button Captions Short click selects MODE Long click selects LOG The GOfermentor panel has just three buttons. If a button has only one function, then the caption is printed in the center of the button. If the button has two functions, then both are printed on the caption – the function on the left is printed in white and corresponds to a short click.
- Page 35 ELEMENTS OF THE DISPLAY Shows when connected to cloud Shows if internet connected Shows when App connected User assigned Local time label from App WiFi signal Measured VENT temperature status Control BLOWER setpoint status COOL or HEAT UNIT status Temperature controller status OFF or Current Mode...
- Page 36 VIEWING THE EVENT LOG The last 12 events are retained in a log file. You can view the log by holding down the button under the MODE LOG caption. The log file will look like this. Scroll down Short click – exit Long click - show settings screen...
-
Page 37: Punching
6.3 PUNCHING The GOfermentor is unique in its ability to perform automatic punch-down. The inflatable chamber is the key to this operation. The punch-down can be performed manually by pressing the START button on the App or controller. Punch can also be done automatically on a preset schedule. MANUAL PUNCH: 1. - Page 38 2. Once the VENTING is complete, the controller will turn on the blower to inflate the air chamber. This forces the liquid up in the liner. This wets and compresses the crust of skins and seed (the “cap”). Takes about 2 minutes (can change in Settings). Inflation pressure inches H2O 3.
- Page 39 Punches start at midnight and are then spaced at equal intervals over 24 hours. The following table tells you the time each punch occurs. For example, if you select 4 punches per day, they are at midnight, 6 am, noon, and 6 pm. Note that if you select say 2 punches and you set this before noon then, the first scheduled punch will happen at noon not midnight.
-
Page 40: Pressing
6.4 PRESSING One of the unique features of the GOfermentor is the ability to function as a press at the end of fermentation. The fermented must does not need to be transferred out of the fermentor for pressing. The waste skins and seeds are left behind in the fermentation liner and can be easily discarded without any mess, cleaning, or handling. - Page 41 Pressure in inflation bladder Current cycle Time left in step mm:ss Step in PRESS cycle Cancel any time 5. PRESS functions in cycles: Each cycle starts with PRESSING. Here the inflation chamber is pressurized. Then a HOLDING period when it is allowed to be de-pressurized. b.
-
Page 42: Temperature Control
6.5 TEMPERATURE CONTROL If temperature control is ENABLED and a temprature probe is connected the GOfermentor will monitor and control temperature. The main screen has a tab to access the temperature functionality. Temperature reading Control setpoint Control MODE OFF, COOL, HEAT Click to turn temperature control OFF/ON... -
Page 43: Gofermentor App Additional Features
6.6 GOFERMENTOR APP ADDITIONAL FEATURES MULTIPLE GOFERMENTOR PANEL DISPLAY All GOfermentors in the login account are shown when the App is opened: Exit App Click here to add a new device or change how devices are listed DEVICE name assigned when added to App Click on any panel tile to access the GOfermentor: User defined... - Page 44 TAG LABEL The GOfermentor can be assigned a tag from the App. This could be the batch number or some other information that helps you identify the unit. The tag is also shown the controller display. Enter tag using pop-up keypad.
- Page 45 SETTINGS Various settings (see Appendix A5 for details of each parameter) can be adjusted from the SETTINGS tab: PUNCH settings PRESS settings AUX SCREEN The optional ethanol concentration data derived from CO2 evolution from the GOfermentor can be accessed from the AUX screen.
-
Page 46: Appendices
APPENDICES A1. Specifications A2. Control Panel Assembly Instructions A3. Troubleshooting A4. NET operation without internet A5. NET Controller Configuration A6. GOCOOLER Assembly Instructions A7. Ethanol Estimator (OPTONAL) A8. Warranty and Returns A9. Terms and Conditions of Sale... -
Page 47: A1. Specifications
Bottom discharge with locking flange Certified for truck and rail shipping Includes locking shipping lid. PART # GOCONTROLLER NET Description GOfermentor control panel NET Dimensions (LxWxH) 12”x13”x7”. Attaches to GOBASE container Weight 10 lb (4.5Kg) LCD display Color TFT with pushbuttons... - Page 48 STANDARD ACCESSORIES INCLUDED WITH NET CONTROLLER PART# DESCRIPTION FUNCTION VENT Vent valve Pressure relief/vent valve assembly assembly with 2” TriClamp IFLTHOSE Inflation hose 6 ft 2”ID flexible duct with connectors PRESS Perforated Insert in 2” FILL port during pressing. TUBE...
- Page 49 GOLINER SPECIFICATIONS PART # GOLINER1000 Description Single-use wine fermentation liner with air inflation chamber Product contact film 2 ply metallocene linear low-density polyethylene FDA-approved resins Meets FDA 21 CFR 177.1520 for food contact. EU-approved resins EU 10/2011 & EU 1935/2004 Additives None.
- Page 50 GOCOOLER PART # GOCOOLER Description Flat heat exchanger for cooling and heating Heat exchange surface 14”x31.5” (360 x800 Material of construction Stainless steel 304 + PVC Weight 20lb (9Kg) Power 24 VDC ball valve 1 A. Supplied from GOfermentor control panel Process connections ½”...
-
Page 51: A2. Net Control Panel Assembly Instructions
A2. NET CONTROL PANEL ASSEMBLY INSTRUCTIONS The control panel is shipped with a 1) support rail and 2) a 3-piece vent support pole. Minimal assembly is required. 1. Unscrew the two large screws on the back of the control panel 2. -
Page 52: A3. Troubleshooting Alarms And Errors
A3. TROUBLESHOOTING ALARMS AND ERRORS Solutions to common problems and questions. Please look at the website – www.GOfermentor.com for an updated list of FAQs. Liners appear to inflate too much! For small volumes you may want to lower the trip pressure. -
Page 53: A4. Operation Without Internet Access
A4. OPERATION WITHOUT INTERNET ACCESS The GOfermentor NET is an IOT (internet-of-things) device. It is intended to be permanently connected to the internet. It is not recommended to operate the GOfermentorNET without continuous internet connection via WiFi. However, in the event that internet connection is not available, the equipment can be configured to operate without the internet. -
Page 54: A5. Net Controller Configuration
A5. NET CONTROLLER CONFIGURATION SETUP MENU On power up click the center button within 30 seconds to enter the setup menu. If you need to enter setup menu at any later time just cycle power. Connected SSID Firmware version Inserting a pin in this... - Page 55 SET PROCESS PARAMETERS Certain process parameters can be set by the user to customize the programming. Select SET PROCESS PARAMETERS to change. Changes are retained on power off. If you mess up simply select DEFAULT and the unit will reset to factory settings. Be aware that this will also erase any logged events. Only advanced users should change these parameters.
- Page 56 RESET WIFI If you cannot connect to a WiFi network because you moved the unit to another location, or the network no longer exists, then select the Reset WiFi option and press OK. This will make the controller “forget” the network it wants to connect to and will now behave as brand-new unconfigured device.
-
Page 57: A6. Gocooler Assembly Instructions
A6. GOCOOLER ASSEMBLY INSTRUCTIONS The GOCOOLER is shipped as two components – 1) stainless-steel heat exchanger plate and 2) plastic piping with electric control valve. 1. Place the stainless heat exchanger plate in the GOBASE. It should be positioned inside the GOBASE on either side of the drain port with the inlet and outlet tubing towards the back side. - Page 58 SINGLE COOLER OPERATION Coolant flow in The piping diagram for temperature control is shown: Connect cable to control panel flow out GOcooler Control valve GOcooler DUAL COOLER OPERATION In a hot environment, or if coolant available is not sufficiently cold it is possible to increase the cooling capacity by utilizing two GOCOOLERs in series.
-
Page 59: A7. Ethanol Estimator (Optional)
A7. ETHANOL ESTIMATOR (OPTIONAL) Instantly determine the ethanol concentration is your fermenting wine. GOFermentor NET option. Determining alcohol concentration in fermenting wine is the holy grail of the winemaker. In addition to determining when the sugar is depleted, knowing the rate of ethanol production can provide insight into whether the fermentation is “stuck”, complete, or progressing normally. - Page 60 Data Analysis – Accuracy of ethanol estimation solely from evolved CO2: Fermentations were run in GOfermentorNET and GOfermentorJR. In the NET, volumes ranged from 500 to 1100 liters of grape must. In the smaller JR device, the fermentation volumes ranged from 12 to 40 liters of grape must.
- Page 61 Ethanol production and concentration can be estimated from the CO2 evolution. Here is another dataset from a Merlot fermentation performed in GOfermentor NET. It was run at maximum capacity of 1 ton of grapes (approx. 1100 liters of must).
- Page 62 GOfermentor NET has a vent valve that is used to release gas from the liner. It is actuated automatically by the GOfermentor controller and will also release gas automatically in the event of overpressure. The GOvent NET replaces the original vent valve with a vent valve with internal gas flow sensing. Any gas (CO2) from the liner can only be released through the vent valve.
-
Page 63: A8. Warranty, Liability, And Returns Policy
A8. WARRANTY, LIABILITY, AND RETURNS POLICY The GOfermentor hardware is warranted to be free of defects in material or workmanship for 12 months after delivery to the first purchaser for use, providing that the units have not been misused. Since we have no control over the operation, we cannot guarantee against failure or loss of product in the unit. -
Page 64: A9. Terms And Conditions Of Sale
A9. TERMS AND CONDITIONS OF SALE When you purchased your GOfermentor you agreed to the following Terms & Conditions of Sale. If for some reason you feel that you are unable to abide by these conditions please return the equipment in as-new condition for a full refund (minus shipping charges). - Page 65 (iii) By purchasing any Product, PURCHASER acknowledges and agrees that COMPANY has made no representations or warranties, express or implied, to or for the benefit of PURCHASER which contradict any of the foregoing. PURCHASER’S SOLE AND EXCLUSIVE REMEDY AND LIMITATIONS ON LIABILITY. Sole and Exclusive Remedy.
- Page 66 legal theory upon which such matter is asserted and without regard to the State of New Jersey’s choice of law provisions. All Claims shall be submitted exclusively to the federal and state courts of competent jurisdiction located in Somerset County, New Jersey, and the Parties hereby unconditionally and irrevocably consent and submit to such exclusive jurisdiction and venue, and waive any objection they may now or hereafter have with respect thereto.
Need help?
Do you have a question about the NET and is the answer not in the manual?
Questions and answers