Table of Contents
Advertisement
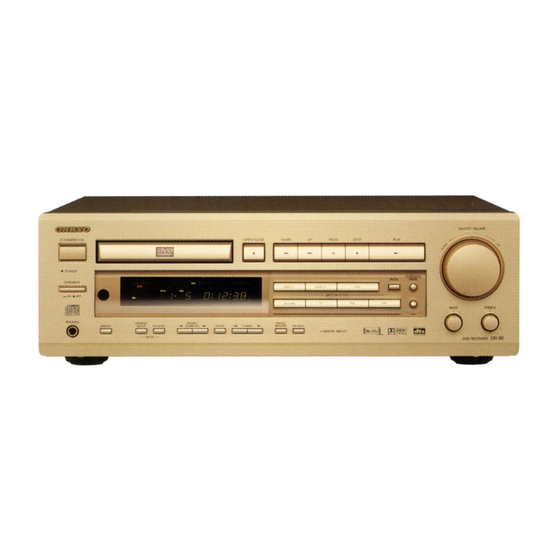
DVD Receiver
DR-90
Instruction Manual
THIS DVD PLAYER IS MANUFACTURED FOR PLAYBACK
O F R E G I O N 1 ( U S A , C A N A DA ) E N C O D E D DV D
SOFTWARE. USE OF SOFTWARE NOT INTENDED FOR
REGION 1 PLAYBACK MAY RESULT IN UNDESIRABLE
PLAYER PERFORMANCE.
Thank you for purchasing the ONKYO DVD Receiver.
Please read this manual thoroughly before making
connections and turning on the power.
Following the instructions in this manual will enable
you to obtain optimum performance and listening
enjoyment from your new DVD Receiver.
Please retain this manual for future reference.
Contents
Before Using Your DVD Receiver
Getting Started
Basic Operation
Advanced DVD/
VIDEO CD/
Audio CD
Operation
Additional Operation
Others
2
6
20
33
58
61
Advertisement
Table of Contents

Subscribe to Our Youtube Channel
Related Manuals for Onkyo DR-90


Summary of Contents for Onkyo DR-90
-
Page 1: Getting Started
SOFTWARE. USE OF SOFTWARE NOT INTENDED FOR REGION 1 PLAYBACK MAY RESULT IN UNDESIRABLE PLAYER PERFORMANCE. Thank you for purchasing the ONKYO DVD Receiver. Please read this manual thoroughly before making connections and turning on the power. Following the instructions in this manual will enable you to obtain optimum performance and listening enjoyment from your new DVD Receiver. -
Page 2: Important Safeguards/Precautions/Table Of Contents
19. Outdoor Antenna Grounding - If an outside antenna is connected to the receiver, be sure the antenna system is grounded so as to provide some protection against voltage surges and built up static S3125A charges. - Page 3 • Reorient or relocate the receiving antenna. • Increase the separation between the equipment and receiver. • Connect the equipment into an outlet on a circuit different from that to which the receiver is connected.
- Page 4 • When the DVD Receiver is not in use, be sure to remove the disc and turn off the power. • If you do not use the DVD Receiver for a long period, the unit may not function properly in the future. Turn on and use the DVD Receiver occasionally.
-
Page 5: Table Of Contents
Positioning Speakers ... 13 Making Antenna Connections ... 14 Connecting to AC OUTLET on the Rear Panel ... 16 Connecting the Power/Turning on the DVD Receiver ... 17 Speaker Setup ... 18 Basic Operation Playing DVD Videos/VIDEO CDs/Audio CDs ... 20 Listening to the Radio ... -
Page 6: Getting Started
Getting Started Features A/V Digital Receiver Features All channels 55 watts per channel min. RMS. into 6 ohms two channel driven, 1,000 Hz with no more than 0.2 % total harmonic distortion. (FTC) All channels 50 watts per channel min. RMS. into 6 ohms two channel driven, 1,000 Hz (DIN) DTS®*, Dolby®** Digital &... -
Page 7: Supplied Accessories
Supplied Accessories Make sure your box contains everything listed below. If any pieces are missing, contact your nearest ONKYO dealer. The number of accessories is indicated in brackets. Remote controller (RC-399M) [1] FM antenna [1] Audio/video connection cable [1] Batteries (size AA/UM-3) [2]... -
Page 8: Preparing The Remote Controller
Set the switch to TV when you wish to control your TV. Before you start using this function, you need to copy the signal patterns of the TV’s remote control buttons to the DVD Receiver’s remote controller. See page 60. SENDING/ LEARNED indicator... -
Page 9: Notes On Discs
The region number of this DVD Receiver is 1. If region numbers, which stand for their playable area, are printed on your DVD video and you do not find will not be allowed by the DVD Receiver. (In this case, the DVD Receiver displays a message.) Playable Discs This DVD Receiver can play back the following discs. -
Page 10: Connecting To A Tv
Before connecting • Refer also to the instruction manual of the TV. • When you connect the DVD Receiver to the TV, be sure to turn off the power and unplug both the units from the wall outlets before making any connections. -
Page 11: Connecting To Audio/Video Equipment
• Refer also to the instruction manual of each component to be connected. • When you connect the DVD Receiver to audio/video equipment, be sure to turn off the power and unplug all the units from the wall outlets before making any connections. -
Page 12: Connecting Speakers
Before connecting • Refer also to the instruction manuals of the speakers. • This DVD Receiver is designed to reproduce optimum sound quality when speakers with impedances within the ranges specified below are connected. Please check the following information and choose speakers with appropriate impedances for the connections. -
Page 13: Positioning Speakers
Positioning Speakers Speaker placement plays an important role in the reproduction of Surround sound. The placement of the speakers varies depending on the size of the room and the wall coverings used in the room. The illustration below shows an example of a layout for standard speaker placement. -
Page 14: Making Antenna Connections
Making Antenna Connections Connecting the Supplied FM and AM Indoor Antennas ANTENNA CENTER PRE OUT CENTER SURROUND FRONT SPEAKERS SPEAKER SPEAKERS FM indoor antenna ANTENNA Remove the insulation at the end of the cable (1), then fully insert the stripped end of the cable (2). S VIDEO COMPONENT VIDEO OUTPUT DIGITAL OUTPUT... - Page 15 Slit B Wire A Slit C 4 Insert the end of the cable. 5 Clamp it in place with pliers. 6 Reinstall the cover. Directional linkage type splitter To DVD Receiver To TV (or VCR) AM indoor antenna Outdoor antenna ANTENNA...
-
Page 16: Connecting To Ac Outlet On The Rear Panel
DVD Receiver. The power supply to AC OUTLET stops: • When the main power of the DVD Receiver is switched off (see next page) or • When the DVD Receiver is in standby mode (see next page). Using this function, you can turn on and turn off the audio/video component connected to AC OUTLET with this DVD Receiver if you leave the component’s power switch on. -
Page 17: Connecting The Power/Turning On The Dvd Receiver
• Make sure that all the connections from pages 10 to 16 are completed (the connection to the TV is required). • Turning on the DVD Receiver may cause a momentary power surge, which might interfere with other electrical equipment such as computers. If this happens, use a wall outlet on a different circuit. -
Page 18: Speaker Setup
Source in its Original Sound Quality – 96k Sound” on page 40. Press SPEAKER SETUP to display the subwoofer configuration. SPEAKER The subwoofer configuration appears in SETUP CH L the DVD Receiver's display. MODE Press MODE ADJ either “YES” (when a subwoofer is PRESET / MODE ADJ connected) or “NO”... - Page 19 When you have completed the TEST TONE adjustment, press TEST TONE. Note Set the DVD RECEIVER/LEVEL SETUP/TV LEVEL SETUP DVD RECEIVER switch to DVD RECEIVER for normal use of the remote controller. LEVEL SETUP SENDING/ DVD RECEIVER LEARNED POWER SLEEP...
-
Page 20: Basic Operation
Before playing • DVD Videos, VIDEO CDs, and audio CDs can be played with the DVD Receiver (see “Playable discs” on page 9). Do not play anything else. • When playing DVD videos or VIDEO CDs, turn on the TV and set the TV to the video input connected to MONITOR OUT or S VIDEO MONITOR OUT connector on the DVD Receiver. - Page 21 • Use OPEN/CLOSE on the remote controller or DVD Receiver to open and close the disc tray. Do not touch the disc tray while it is moving. Doing so may cause the DVD Receiver to malfunction.
- Page 22 Various Functions While Playing Discs To use the following functions, see page 29. • Adjusting the volume • Adjusting the tone • Dimming the DVD Receiver's display • Listening through headphones • Using the Sleep Timer • Muting the sound...
- Page 23 TV screen, follow those instructions. • If you display the title menu during playback and press TITLE again without selecting any title, the DVD Receiver resumes playback from the point where you first pressed TITLE (depending on the actual DVD video).
- Page 24 To select chapter or track 25 • • Press PLAY. PLAY The DVD Receiver starts playback from the selected chapter or track. To select a title and chapter number at the same time Press to highlight the space next to ENTER “Title,”...
- Page 25 TONE Hours T i m e Press PLAY. PLAY The DVD Receiver starts playback from the entered location. Notes • Some discs may not respond to this procedure. • Some scenes may not be located precisely. • This method for accessing specific locations is available only within the current title of the DVD video or within the current track of the VIDEO CD/audio CD.
-
Page 26: Listening To The Radio
LATE NIGHT BASS TREBLE FM MUTE Presetting Radio Stations • You can preset up to 30 stations. • You can preset radio stations only with the buttons on the DVD Receiver. to change the STANDBY/ ON OPEN/CLOSE DOWN PAUSE STOP... - Page 27 Press TUNER to switch the input TUNER source to the tuner. “FM” or “AM” appears in the DVD Receiver’s display. The band selected in this step will not affect the next step. Press TUNER PRESET CHANNEL repeatedly until the desired preset TUNER number appears.
-
Page 28: Playing The Connected Source
MEMORY FM MUTE MODE About digital sound If the equipment is digitally connected to the DVD Receiver, the sound from the digital input will automatically be selected and reproduced instead of the analog sound as explained below. • When the VIDEO 1 source is selected, the digital sound from the DIGITAL INPUT OPTICAL VIDEO 1 connector is reproduced. -
Page 29: Various Functions Common To All The Sources
Adjusting the Tone Adjusting low frequencies Turn BASS on the DVD Receiver to + to BASS increase the level of the low frequencies, or – to decrease it. There is no low frequency control at the center position. -
Page 30: Enjoying The Sound Effects
Enjoying the Sound Effects The surround sound of the DVD Receiver enables you to enjoy the presence of a movie theater or concert hall in your room. Before using any sound effect, make sure the Speaker Setup configurations have been set (see page 18). - Page 31 The DVD Receiver will automatically detect the sound system when DOLBY DIGITAL ( PCM DIGITAL (2 channel digital stereo) is played back. The sound system appears in the DVD Receiver's display. Lights up when PCM DIGITAL (2 channel digital stereo) sound is reproduced.
- Page 32 You can readjust each speaker's relative volume balance according to your preference while listening to the sound. The adjusted values will be canceled when the DVD Receiver enters standby mode, or the main power is switched off unless you save the values.
-
Page 33: Advanced Dvd/Video Cd/Audio Cd Operation
(point A) you want to play repeatedly. A – Press A-B again at the end of the segment (point B). A – B The DVD Receiver automatically returns to point A and starts repeat playback of the selected segment (A-B). Press CLEAR. CLEAR... -
Page 34: Operation
You can program up to 28 selections into the memory (Memory playback). Setting Titles, Chapters, or Tracks in a Favorite Order The DVD Receiver automatically plays titles, chapters, or tracks in the order you program. Insert a disc and press MEMORY MEMORY while the disc is stopped. -
Page 35: Operation
You can play titles, chapters within a title, or tracks in random order (Random playback). Playing Titles or Tracks in Random Order The DVD Receiver automatically selects the titles in a DVD video, or tracks in a VIDEO CD/audio CD, and plays them randomly. -
Page 36: Operation
TONE PAUSE DOWN PLAY RANDOM STOP REPEAT REMOTE CONTROLLER To resume normal playback ZOOM Press ZOOM repeatedly until "Zoom" disappears. LEVEL SETUP DVD RECEIVER SLEEP DIMMER DISPLAY MENU SURROUND MODE INPUT SELECTOR SETUP VIDEO 1 TAPE VIDEO 2 TUNER AUDIO... -
Page 37: Selecting The Camera Angle
• If you pause a picture immediately after changing the camera angle, the resumed playback picture may not use the new camera angle. , the LEVEL SETUP SENDING/ DVD RECEIVER LEARNED POWER SLEEP DIMMER DISPLAY STANDBY... -
Page 38: Selecting Subtitles Included On The Dvd
: Cycles backwards Notes • When you turn on the DVD Receiver or replace a disc, the DVD Receiver returns to the initial default setting. (See page 47.) When you select a subtitle language which is not included on the disc, the DVD Receiver plays the prior language programmed on the disc. -
Page 39: Selecting Audio Language/Sound Included On The Disc
“Audio Language” in the setting menu. Audio channel • When you turn on the DVD Receiver or replace a disc, the DVD Receiver returns to the automatic setting in the setting menu (see See next page. -
Page 40: Changing The Sound Signal Conversion Method
Therefore, the selection in this section will not change the setting of “Audio Out Select” in the setting menu. • When you turn on the DVD Receiver or replace a disc, the DVD Receiver returns to the automatic setting in the setting menu (See page 44.) - Page 41 Changing the DOLBY DIGITAL Sound Format to the Digitally Recordable Frequency (kHz)/Quantization (bit) Change the sound signal conversion method to “PCM” following the steps in “Changing the Sound Signal Conversion Method Temporarily” on the opposite page. Referring to c in the table below, the DOLBY DIGITAL Surround format will be converted into the 48 kHz/16 bit format which is recordable.
-
Page 42: Operation
You can view the current title number, track number, and total playing time of the disc. When the disc is inserted in the DVD Receiver The following information appears in the DVD Receiver’s display for about five seconds. DVD video* e.g. -
Page 43: Operation
VOLUME REPEAT MEMORY RC-399M REMOTE CONTROLLER Each time you press DISPLAY, the DVD Receiver’s display changes as follows. DVD video e.g. Remaining time of the current title Current title number Current chapter number Elapsed time of the current title Current title number Current chapter number... -
Page 44: Operation
Customizing the Function Settings When you insert a DVD Video, VIDEO CD, or audio CD, the various functions of the DVD Receiver will be set (reset) according to the setting menu. You can customize this setting menu according to your preference. -
Page 45: Operation
Setting On-Screen Language Disc menu Language Audio Language Subtitle Language TV Shape Black Level Audio Out Select Dynamic Range Control Karaoke Vocal Extended Audio Features On-Screen Displays OSD Background Color Extended Subtitle Features Screen Saver Pause/Still Parental Lock Title Stop Details To select a preferred language for on-screen displays. - Page 46 Others Subtitle Language Code • Some DVD videos may not include your preferred language. In this case, the DVD Receiver automatically displays disc menus consistent with the disc’s initial language setting. Select a preferred language by pressing ENTER , then press ENTER.
- Page 47 • Some DVD videos allow you to change subtitle selections only by using the disc menu. If this is the case, press MENU and choose the appropriate subtitle language from the selection on the disc menu. LEVEL SETUP SENDING/ DVD RECEIVER LEARNED POWER SLEEP DIMMER...
- Page 48 Customizing the Function Settings (continued) After you select PICTURE (see page 44), change the settings according to your preference. PICTURE Setting (Continued from page 45) Press ENTER TV Shape PICTURE ENTER TV Shape 4:3LB 4:3 LetterBox Black Level Nrml 4:3 Normal 16:9Widescreen (Continued on next page)
- Page 49 Set according to your preference and the TV’s capability. Enhanced: Expanded black level. ( 0 IRE ) Normal: Standard black level. ( 7.5 IRE ) ENTER ENTER LEVEL SETUP SENDING/ DVD RECEIVER LEARNED POWER SLEEP DIMMER DISPLAY STANDBY TITLE MENU...
- Page 50 Select to convert DOLBY DIGITAL sound into the sound format recordable by equipment such as an MD recorder connected to the DIGITAL OUTPUT OPTICAL connector on the DVD Receiver (see pages 11 and 41). ENTER Select the output sound type by...
- Page 51 On: Some DVD videos contain a narration track that describes the actions on-screen for visually impaired persons. The DVD Receiver automatically plays this special feature. Off: The DVD Receiver does not play this special feature. ENTER ENTER LEVEL SETUP...
-
Page 52: Operation
On: Some DVD videos contain special subtitles, an enhancement of closed captions for hearing impaired persons. The DVD Receiver automatically displays these special subtitles. Off: The DVD Receiver does not display these special subtitles. Gray ENTER Select "On" or "Off" by pressing ENTER then press ENTER. - Page 53 Screen Saver SETUP Press SETUP. The setting menu disappears. On: The screen saver is enabled. Off: The screen saver is disabled. ENTER ENTER LEVEL SETUP SENDING/ DVD RECEIVER LEARNED POWER SLEEP DIMMER STANDBY TITLE MENU SURROUND MODE INPUT SELECTOR ENTER...
-
Page 54: Operation
• DVD videos may or may not respond to the parental lock settings. This Is not a defect in the DVD Receiver. Make sure this function works with your DVD videos. - Page 55 STOP STOP STOP STOP The 4-digit security code is cleared. (2) Press the number buttons to create a new 4-digit security code. (3) Press ENTER. LEVEL SETUP SENDING/ DVD RECEIVER LEARNED POWER SLEEP DIMMER DISPLAY STANDBY TITLE MENU SURROUND MODE...
-
Page 56: Operation
If you press RETURN while a menu appears on the screen, you will return to the previously displayed menu screen. On: The DVD Receiver stops after playback of a title is complete. Off: The DVD Receiver continues after playback of a title is complete. Auto ENTER On: To view the menu screen when playing a PBC-featured VIDEO CD. -
Page 57: Table Of Languages
Table of Languages Table of Languages and Their Abbreviations Abbreviation Language Abbreviation Language of the of the Language Language ––– No alternate language CHI (ZH) Chinese DUT (NL) Dutch ENG (EN) English FRE (FR) French GER (DE) German ITA (IT) Italian JPN (JA) Japanese... -
Page 58: Additional Operation
Recording Using the Connected Equipment You can record according to the following using the connected recording equipment: • Sound/picture of discs played back by the DVD Receiver, • Sound of FM/AM programs, and • Sound/picture of the connected source. Simplified diagram of the connected equipment (See also pages 10 and 11 for the actual connections.) - Page 59 PCM signals may not be output from the digital output connector (DIGITAL OUTPUT OPTICAL) depending on frequency and quantization. See also “Note” in “Digital recording from a DVD video played by the DVD Receiver” below. Digital recording from a DVD video played by the DVD Receiver...
-
Page 60: Customizing The Remote Controller To Your Tv
• Turn off both the DVD Receiver and TV to prevent the units from undesired operation during programming. • The remote control buttons on some TVs may have more than one function;... -
Page 61: Others
• Switch off the main power, then switch it on again. If not recovered, disconnect the power cord, then connect it again. • Contact your nearest ONKYO service center. • Deactivate the muting function. • Check the connections to the DVD Receiver. - Page 62 • No batteries are inserted in the remote controller. • The batteries are worn out. • The remote controller is not pointed at the remote sensor of the DVD Receiver. • The remote controller is too far from the DVD Receiver. • The DVD RECEIVER/LEVEL SETUP/TV switch is set to the wrong position.
-
Page 63: Specifications
Specifications AMPLIFIER SECTION Power Output (FTC) All channels 55 watts per channel min. RMS. into 6 ohms two channel driven, 1,000 Hz with no more than 0.2 % total harmonic distorsion. Continuous power output (DIN) All channels 50 watts per channel min. RMS. -
Page 64: Index To Parts And Controls
* Press this button to select the DVD video/VIDEO CD/audio CD player of the DVD Receiver. Pressing OPEN/CLOSE or PLAY (when the disc is in the DVD Receiver) also switches the source to the DVD video/VIDEO CD/audio CD player. MASTER VOLUME... - Page 65 Display G H I 1 REPEAT indicator 2 Inserted disc indicator 3 SLEEP indicator 4 PCM DIGITAL indicator 5 TITLE/TRACK/CHP (chapter) indicator 6 DOLBY DIGITAL indicator 7 DOLBY PRO LOGIC indicator 8 DTS indicator 9 DSP indicator 0 STEREO indicator A TOTAL indicator B TUNED indicator C FM STEREO indicator...
- Page 66 Index to Parts and Controls (continued) Rear Panel CENTER SPEAKER 1 FM ANTENNA connector [14] 2 AM ANTENNA connectors [14] 3 TV IN jacks [10] 4 TAPE/MD IN (PLAY)/OUT (REC) jacks [11] 5 PRE OUT CENTER jack [10] 6 PRE OUT SUBWOOFER jack [12] 7 S-VIDEO MONITOR OUT jack [10] 8 COMPONENT VIDEO OUTPUT Y/C 9 DIGITAL OUTPUT OPTICAL jack [11]...
- Page 67 * Press this button to select the DVD video/VIDEO CD/audio CD player of the DVD Receiver. Pressing OPEN/CLOSE or PLAY (when the disc is in the DVD Receiver) also switches the source to the DVD video/VIDEO CD/audio CD player. buttons [32]...
- Page 68 Tel: 201-825-7950 Fax: 201-825-8150 E-mail: onkyo@onkyousa.com ONKYO EUROPE ELECTRONICS GmbH Industriestrasse 20, 82110 Germering, GERMANY Tel: 089 84 93 20 Fax: 089 84 93 226 E-mail: info@onkyo.de ONKYO CHINA LIMITED Units 2102-7, Metroplaza Tower I, 223 Hing Fong Road, Kwai Chung, N.T., HONG KONG Tel: 852 2429 3118 Fax: 852 2428 9039...
Need help?
Do you have a question about the DR-90 and is the answer not in the manual?
Questions and answers